Toshiba B-FV4D SERIES Owner's Manual
Hide thumbs
Also See for B-FV4D SERIES:
- Counter reading manual (29 pages) ,
- Quick installation manual (7 pages)
Table of Contents
Advertisement
Advertisement
Table of Contents

Related Manuals for Toshiba B-FV4D SERIES


Summary of Contents for Toshiba B-FV4D SERIES
- Page 1 TOSHIBA Barcode Printer B-FV4D SERIES Owner’s Manual...
- Page 2 CE marking is the responsibility of TOSHIBA TEC GERMANY IMAGING SYSTEMS GmbH, Carl-Schurz-Str. 7, 41460 Neuss, Germany. For a copy of the related CE Declaration of Conformity, please contact your dealer or TOSHIBA TEC. This is a Class A product. In a domestic environment this product may cause radio interference in which case the user may be required to take adequate measures.
- Page 3 Standards below are certified under the operation with the provided antenna. Do not use this product with other antennas. Europe - EU Declaration of Conformity Hereby, TOSHIBA TEC, declares that B-FV4D / B-FV4T series are in compliance with the essential requirements and other relevant provisions of Directive 2014/53/EU. USA-Federal Communications Commission (FCC) NOTE: This equipment has been tested and found to comply with the limits for a Class A digital device, pursuant to part 15 of the FCC Rules.
- Page 4 à des appareils mobiles (antennes sont supérieures à 20 cm à partir du corps d'une personne). Approved Countries/Regions for use for the devices This equipment is approved to the radio standard by the specific countries/regions. Please ask TOSHIBA TEC authorized dealer or service engineer. Precaution for Use This product communicates with other devices by radio.
-
Page 5: Safety Precautions
Do not attempt to effect repairs or modifications to this equipment. If a fault occurs that cannot be rectified using the procedures described in this manual, turn off the power, unplug the machine, and then contact your authorised TOSHIBA TEC CORPORATION representative for assistance. - Page 6 Utilize our maintenance services. After purchasing the machine, contact your authorised TOSHIBA TEC CORPORATION representative for assistance once a year to have the inside of the machine cleaned. Dust will build up inside the machine and may cause a fire or a malfunction. Cleaning is particularly effective before humid rainy seasons.
-
Page 7: Table Of Contents
ENGLISH VERSION EO1-33097 TABLE OF CONTENTS Page PRODUCT OVERVIEW ......................E1-1 Introduction ........................E1-1 Features ........................E1-1 Unpacking ........................E1-1 Accessories ........................E1-1 Appearance ........................E1-3 1.5.1 Dimensions ......................... E1-3 1.5.2 Front View ........................E1-3 1.5.3 Rear View ........................E1-4 1.5.4 Interior ........................ -
Page 8: English Version
ENGLISH VERSION EO1-33097 NOTES: • This manual may not be copied in whole or in part without prior written permission of TOSHIBA TEC CORPORATION. • The contents of this manual may be changed without notification. • Please refer to your local Authorized Service representative with regard to any queries you may have in this manual. -
Page 9: Product Overview
ENGLISH VERSION EO1-33097 1.1 Introduction 1. PRODUCT OVERVIEW Thank you for choosing the TOSHIBA B-FV4D series barcode printer. 1.1 Introduction This Owner’s Manual contains valuable information from general set-up to confirming the printer's operation using test prints. You should read it carefully to help you gain maximum performance and life from your printer. - Page 10 In some countries the power cord is not provided with this unit, if this is the case then please purchase an approved one that meets the following standards or contact your authorised TOSHIBA TEC CORPORATION representative. (As of Oct. 2014)
-
Page 11: Appearance
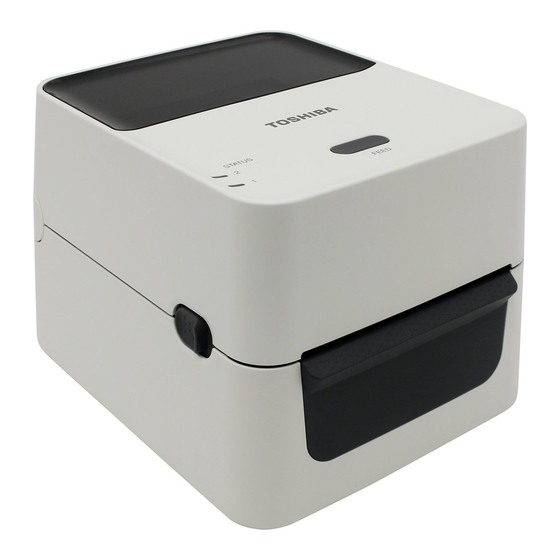
1. PRODUCT OVERVIEW ENGLISH VERSION EO1-33097 1.5 Appearance The parts and units shown and named in this section are used for 1.5 Appearance descriptions in the following chapters. 1.5.1 Dimensions W: 183.8 (7.2”) x D: 226.2 (8.9”) x H: 166.0 (6.5”) Dimensions in mm (inches) 1.5.2 Front View LED 2... -
Page 12: Rear View
1. PRODUCT OVERVIEW ENGLISH VERSION EO1-33097 1.5 Appearance 1.5.3 Rear View CAUTION! To avoid injury, be careful not to trap your fingers in the Paper Slot while opening or closing the Top Cover. Paper Slot For details of the rear view, refer to Section 2.4 Connecting the Cables to the Printer. -
Page 13: Button And Indicator Lamp
1. PRODUCT OVERVIEW ENGLISH VERSION EO1-33097 1.5 Appearance 1.5.5 Button and Indicator The [FEED] button has three functions. It can operate as a FEED, RESTART or PAUSE button depending on current the printer state. Lamp As a FEED Pressing this button when the printer is online will cause button the media to feed forwards. -
Page 14: Printer Setup
For best results, and longer printer life, use only TOSHIBA TEC CORPORATION recommended media. (Refer to the Supply Manual.) Store the media in accordance with the specifications. -
Page 15: Procedure Before Operation
Turn the Power ON. (Refer to Section 2.3.) commands. For details, please contact your TOSHIBA TEC CORPORATION representative. 2.3 Turning the Printer When the printer is connected to a host computer it is good practice to... -
Page 16: Turning Off The Printer
2. PRINTER SETUP ENGLISH VERSION EO1-33097 2.3 Turning the Printer ON/OFF 2.3.2 Turning OFF the 1. Before turning off the printer power switch, verify that: LED 1 is Printer illuminated in green (not flashing) and LED 2 is extinguished. CAUTION! 2. -
Page 17: Connecting Cables To The Printer
2. PRINTER SETUP ENGLISH VERSION EO1-33097 2.4 Connecting the Cables to the Printer This section details how to connect communication cables to the printer 2.4 Connecting Cables from your host computer or other devices. There are four different means to the Printer of connection that can be used on the printer. -
Page 18: Connecting The Power Adapter And The Power Cord
2. PRINTER SETUP ENGLISH VERSION EO1-33097 2.5 Connecting the Power Adapter and the Power Cord 1. Make sure that the printer power switch is in the OFF (O) position. 2.5 Connecting the Power Adapter and 2. Insert the Power Cord into the inlet of the Power Adapter. the Power Cord NOTES: 1. -
Page 19: Opening/Closing The Top Cover
2. PRINTER SETUP ENGLISH VERSION EO1-33097 2.6 Opening/Closing the Top Cover 2.6 Opening/Closing the When opening or closing the Top Cover, please be sure to follow the instructions below. Top Cover To open the Top Cover: WARNING! To avoid injury, be careful 1. -
Page 20: Loading The Media
2.7 Loading the Media This section describes how to load the media in the printer. This printer accepts label rolls, tag rolls, and fanfold paper stocks. Please use TOSHIBA TEC CORPORATION approved media. WARNING! 1. Do not touch any moving NOTES: parts. - Page 21 2. PRINTER SETUP ENGLISH VERSION EO1-33097 2.7 Loading the Media 1. Open the Top Cover while pulling the Lock Release Portions as 2.7 Loading the Media indicated by the arrows. (Cont.) Top Cover Lock Release Portion 2. Open the Media Roll Holders by pressing the Holder Lock Lever and NOTE: Media path slide them outward.
- Page 22 2. PRINTER SETUP ENGLISH VERSION EO1-33097 2.7 Loading the Media 3. Pass the media through the Media Guides. Pull the media until it reaches 2.7 Loading the Media the front of the printer. (Cont.) Media Guide Media Guide E2-9...
- Page 23 2. PRINTER SETUP ENGLISH VERSION EO1-33097 2.7 Loading the Media 2.7 Loading the Media 4. Check and adjust the media sensor position and select the sensor type (Cont.) to be used. (Refer to Section 2.8.1.) NOTES: This printer has a Black Mark Sensor which can detect black marks 1.
- Page 24 2. PRINTER SETUP ENGLISH VERSION EO1-33097 2.7 Loading the Media 2.7 Loading the Media 5. Close the Top Cover, then press the [FEED] button to check the media (Cont.) feeds correctly. FEED Button There are three issue modes available for this printer. CAUTION! Batch mode: To separate the printed...
- Page 25 2. PRINTER SETUP ENGLISH VERSION EO1-33097 2.7 Loading the Media Strip mode (Option): 2.7 Loading the Media (Cont.) When printing in strip mode, labels are automatically removed from the backing paper as each label is printed. How to set the media NOTES: When issuing labels in the strip mode, set the label in the following 1.
- Page 26 2. PRINTER SETUP ENGLISH VERSION EO1-33097 2.7 Loading the Media Cut mode (Option): 2.7 Loading the Media (Cont.) When a Cutter is fitted, the media can be automatically cut. When loading the media as described on the previous pages, insert the leading edge of the media through the Media Outlet of the Cutter Cover while WARNING! pulling the media through the printer.
- Page 27 2. PRINTER SETUP ENGLISH VERSION EO1-33097 2.7 Loading the Media When the media roll has an outside diameter exceeding 127 mm (5”) or 2.7 Loading the Media the inner core diameter is 76.2 mm (3”), the optional External Media (Cont.) Stand is needed.
-
Page 28: Media Sensor Calibration, Self Print Test, And Dump Mode Utilities
2. PRINTER SETUP ENGLISH VERSION EO1-33097 2.8 Media Sensor Calibration, Self Print Test, and Dump Mode Utilities These utilities are used to calibrate the sensitivity of the Feed Gap/Black 2.8 Media Sensor Mark Sensor, Print out a test with details of the printer settings and set Calibration, the printer into Dump mode. -
Page 29: Self Print Test And Dump Mode
2. PRINTER SETUP ENGLISH VERSION EO1-33097 2.8 Media Sensor Calibration, Self Print Test, and Dump Mode Utilities 1. Turn off the printer power and install a full width media roll 2.8.2 Self Print Test and (104mm/4inch) in the printer. Dump Mode 2. - Page 30 2. PRINTER SETUP ENGLISH VERSION EO1-33097 2.8 Media Sensor Calibration, Self Print Test, and Dump Mode Utilities 2.8.2 Self Print Test and [LAN] Dump Mode (Cont.) IP ADDRESS [192.168.010.020] SUBNET MASK [255.255.255.000] GATEWAY [000.000.000.000] MAC ADDRESS [ab-cd-ef-01-23-45] DHCP [OFF] DHCP CLIENT ID [FFFFFFFFFFFFFFFF] [FFFFFFFFFFFFFFFF] DHCP HOST NAME...
- Page 31 2. PRINTER SETUP ENGLISH VERSION EO1-33097 2.8 Media Sensor Calibration, Self Print Test, and Dump Mode Utilities BACKFEED ADJUST ------------------------- Back feed amount fine adjustment value X-COORD. ADJUST --------------------------- X-coordinate fine adjustment value CODEPAGE ------------------------------------- Character code selection ZERO SLASH ----------------------------------- Font “0” selection FEED KEY--------------------------------------- [FEED] key function setting EURO CODE ------------------------------------ Euro code setting CONTROL CODE ------------------------------ Control code type...
-
Page 32: Maintenance
3. Do not touch the print head element with bare hands, as static may damage the print head. NOTE: Print Head Cleaners can be purchased from your authorised TOSHIBA TEC CORPORATION service representative. E3- 1... -
Page 33: Sensors
3. MAINTENANCE ENGLISH VERSION EO1-33097 3.1 Cleaning 3.1.2 Sensors 1. Wipe the media sensors with a soft cloth or a cotton swab lightly moistened with absolute (pure) ethyl alcohol. 2. To remove dust or paper particles wipe the media sensors with a dry soft cloth. -
Page 34: Media Housing
3. MAINTENANCE ENGLISH VERSION EO1-33097 3.1 Cleaning 3.1.4 Media Housing Wipe the media housing with a dry soft cloth. Wipe off dirt with a soft cloth slightly moistened with mild detergent solution. E3- 3... -
Page 35: Care/Handling Of The Media
3. MAINTENANCE ENGLISH VERSION EO1-33097 3.2 Care/Handling of the Media and Ribbon 3.2 Care/Handling of the Media Do not store media for longer than the manufacturer’s recommended shelf life CAUTION! Store media rolls on the flat end. Do not store them on the curved Be sure to carefully review and sides as this might flatten that side causing erratic media advance and understand the Supply... -
Page 36: Troubleshooting
WARNING! If a problem cannot be solved by taking actions described in this chapter, do not attempt to repair the printer. Turn off and unplug the printer. Then contact an authorised TOSHIBA TEC CORPORATION service representative for assistance. 4.1 Troubleshooting Guide... -
Page 37: Status Lamp
Turn off the power and then back on. If this 232C is used.) problem frequently occurs, turn off the printer and contact the nearest TOSHIBA TEC CORPORATION representative. The media has ended. Load a new media roll, then press the [FEED] Orange Button. -
Page 38: Removing Jammed Media
4. TROUBLESHOOTING ENGLISH VERSION EO1-33097 4.3 Removing Jammed Media 4.3 Removing Jammed Media This section describes in detail how to remove jammed media from the printer. CAUTION! Do not use any tool that may damage the print head. 1. Turn the power off. 2. -
Page 39: Appendix 1 Specifications
APPENDIX 1 SPECIFICATIONS ENGLISH VERSION EO1-33097 A1.1 Printer APPENDIX 1 SPECIFICATIONS Appendix 1 describes the printer specifications and supplies for use on the B-FV4D printer. A1.1 Printer The following are the printer specifications. Item B-FV4D-GS Series Supply voltage AC100 to 240V, 50/60 Hz (External Power Adapter) Power consumption During a print job 100 to 120V: 1.0 A, 60 W maximum, 200 to 240V: 0.6 A, 59 W maximum... - Page 40 APPENDIX 1 SPECIFICATIONS ENGLISH VERSION EO1-33097 A1.2 Options Item B-FV4D-TS Series Supply voltage AC100 to 240V, 50/60 Hz (External Power Adapter) Power consumption During a print job 100 to 120V: 1.0 A, 60 W maximum, 200 to 240V: 0.6 A, 59 W maximum During standby 100 to 120V: 0.12A, 3.7 W maximum, 200 to 240V: 0.07 A, 3.8 W maximum Operating temperature range...
-
Page 41: A1.2 Options
CORPORATION Head Quarters. A1.3 Media Please make sure that the media to be used is approved by TOSHIBA TEC CORPORATION. The warranties do not apply to problems caused by using media that is not approved by TOSHIBA TEC CORPORATION. For information regarding TOSHIBA TEC CORPORATION-approved media, please contact a TOSHIBA TEC CORPORATION authorised representative. - Page 42 25.4, 38.1, or 76.2 (1.0, 1.5, or 3.0) NOTES: 1. To ensure print quality and print head life use only TOSHIBA TEC CORPORATION approved media. 2. When using a media roll of 76.2-mm (3”) inner core diameter, the 3”-Diameter Media Shaft included in the optional External Media Stand is required.
-
Page 43: A1.3.2 Detection Area Of The Feed Gap (Transmissive) Sensor
APPENDIX 1 SPECIFICATIONS ENGLISH VERSION EO1-33097 A1.3 Media A1.3.2 Detection Area of the Feed Gap (Transmissive) Sensor The Transmissive Sensor is fixed and positioned at 6.35 mm right of the centre of the media path. The Transmissive Sensor detects a gap between labels, as illustrated below. Sensor position Area to be detected. - Page 44 APPENDIX 1 SPECIFICATIONS ENGLISH VERSION EO1-33097 A1.3 Media The figure below shows the effective print area on the media. Start line 1.5mm from the left edge of media 1.5mm from the right edge of media Guaranteed print area Media feed direction Media width (Backing paper width is not included.) NOTES:...
-
Page 45: Appendix 2 Interface
APPENDIX 2 INTERFACE ENGLISH VERSION EO1-33097 APPENDIX 2 INTERFACE APPENDIX 2 INTERFACE Interface Cables To prevent radiation and reception of electrical noise, the interface cables must meet the following requirements: Fully shielded and fitted with metal or metallized connector housings. ... - Page 46 GLOSSARIES ENGLISH VERSION EO1-33097 GLOSSARIES GLOSSARIES Barcode A code which represents alphanumeric characters Distance from the bottom of one label to the top of by using a series of black and white stripes in the next label. different widths. Barcodes are used in various industrial fields: Manufacturing,...
- Page 47 GLOSSARIES ENGLISH VERSION EO1-33097 GLOSSARIES Supply Media and ribbon A type of media having no adhesive backing but black marks to indicate the print area. Usually tags are made of cardboard or other durable material. Thermal print head A print head using thermal transfer or thermal direct printing method.
- Page 48 EO1-33097D R141020P4804-TTEC Ver04 F 2016-03 © 2015, 2016 TOSHIBA TEC CORPORATION All Rights Reserved 1-11-1, Osaki, Shinagawa-ku, Tokyo 141-8562, JAPAN...