
Related Manuals for Nuvo Essentia Six-Source, Six-Zone Audio Distribution System NV-E6GMS


Summary of Contents for Nuvo Essentia Six-Source, Six-Zone Audio Distribution System NV-E6GMS
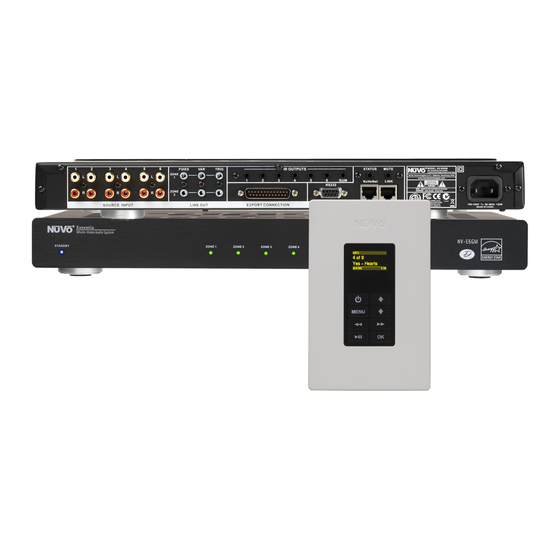
- Page 1 Essentia ® Six-Source, Six-Zone Audio Distribution System NV-E6GMS, NV-E6GXS Installation Guide...
-
Page 3: Important Safety Instructions
ENGLISH Danger Exposure to extremely high noise levels may cause a permanent hearing loss. Individuals vary considerably to noise induced hearing loss but nearly everyone will lose some hearing if exposed to sufficiently intense noise for a sufficient time. The U.S. Government's Occupational Safety and Health Administration (OSHA) has specified the following permissible noise level exposures: DURATION PER DAY (HOURS) 8 6 4 3 2 1... - Page 4 FRENCH Danger L‘exposition a des niveaux eleves de bruit peut provoquer une perte permanente de l’audition, Chaque organisme humain reagit differemment quant a la perte de l’audition, mais quasiment tout le monde subit une diminution de I’acuite auditive lors d’une exposition suffisamment longue au bruit intense.
- Page 5 Table of Contents Installing the Essentia System in Your Home...
- Page 6 Introduction ’ ’ ’ fi ’ ’...
- Page 7 RS232 ALLPORT CONNECTION ’ STATUS MUTE MODEL NV-E6GM SIX SOURCE SIX ZONE AUDIO DISTRIBUTION SYSTEM NuVo Technologies LLC • Hebron, Kentucky USA www.nuvotechnologies.com NuVoNet LINK RoHS CO NF OR MS TO UL ST D. 60 06 5 CE RT IF IE D TO CAN /C SA STD .
- Page 8 Essentia Control Pad . Source Indicator: T . Wall Plate: E . OLED Display: T . Now Playing/Menu Display: T . Volume Level Indicator: T . Power: T . Menu: M . Play/Pause: T . OK: T . Forward/Reverse: T .
- Page 9 NV-GRC1 Remote Control 1. Power: E . Volume: T . Function Buttons: T . Forward and Reverse: T . Favorites: A . DISP: T . Function LED: T . MUTE: T . SOURCE/OK: T . Play/Pause: T . MENU: T .
- Page 10 “homerun” from each zone to the location of the Essentia amplifier and Audio Source equipment. Complete CAT5 Crimping Instructions The NuVo audio systems require CAT5, unshielded, twisted pair (UTP) for communication between the Control Pads and the main amplifier unit. Each end of the wire is terminated with an RJ45 connector.
- Page 11 II. Terminating the Speaker Wire (Fig. 2) ’ III. Installing the Essentia Amplifier IV. Installing the NV-E6GMAP-DC Allport (Fig. 3) Fig. 2 Fig. 3 ’ LEFT LEFT RIGHT RIGHT...
-
Page 12: Fig. 4
V. Connecting the Allport to the Essentia Amplifier (Fig. 4) VI. Attaching Audio Source Equipment (Fig. 5) Using the Fixed and Variable Lineouts Setting up NuVo Sources for use with NuVoNet Fig. 4 Fig. 5 T2G AM/FM and XM Tuners... -
Page 13: Fig. 6
1 – 6 are used. VII. Connecting the IR Emitters for Third-Party Source Components (Fig. 6) Fig. 6 SOURCE 1, SOURCE , SOURCE 3, NuVo T2G Tuner Direct Numeric Access (Fig. 7) Fig. 7 IR OUTPUTS RS232 ALLPORT CONNECTION ALLPORT CONNECTION... - Page 14 These are readily available and are not supplied with the NuVoDock system, fig. 8c. ’ Fig. 8a NV-RCAY3 “Y” cable Fig. 8b E6GXAP-DC Expander Allport Hub AUDIO OUT USE ONLY NuVo NV-T2PAS TRIGGER POWERED ANTENNA SYSTEM ON=+12V AUDIO OUTPUT ANTENNA INPUT TUNER B...
- Page 15 IX. Using the Essentia Configurator Software 1. Main Startup (Fig. 9) Fig. 9 1.1 Open or Create Essentia Configurator File (fig. 10) 1.2 Retrieve Configuration from Essentia Fig. 10 2. IR Libraries (Fig. 11) ’...
- Page 16 Fig. 11 2.1 Adding a New Component to the IR Library (Fig. 12) Fig. 12 Using the IR Learning Station Interface (Fig. 13) 2.2 Recording IR codes (Fig. 14) ’...
- Page 17 Fig. 13 POWER CONNECT TO CONNECT TO 12VDC/0.4A CONCERTO D Concerto Learning Station Model NV-I8DLS PASSTHRU READY IR SENSOR Fig. 14 2.3 IR Library Default Key Assignment (Fig. 15) EMITTER BLASTER TEST ACTIVE POWER Fig. 15 ’...
- Page 18 2.4 IR Library Test (Fig. 16) ’ Although not required, testing each code is highly recommended. Fig. 16 2.5 Adding a Function Code (Fig. 17) Fig. 17 2.6 Cleaning Up an IR Library 3. Defining Sources...
- Page 19 3.1 Select or Edit Source (Fig. 18) Fig. 18 Adding a NuVoNet Source (Fig. 19) with NuvoNet, pg. 9 & 10. Fig. 19 4. Macros (Fig. 20) Definition s Setting NuVo Sources for use 4.1 Edit Macro...
- Page 20 Fig. 20 4.1 Edit Macro Definition (Fig. 21) Fig. 21 4.1 Creating a Macro Preset String (Fig. 22)
- Page 21 Fig. 22 4.2 Editing Codes in a Macro (Fig. 23) Fig. 23 Re-Ordering Macro Codes Macros (updated) 4.3 Control Macros Creating a Preset Macro String o 5. Zones (Fig. 24)
- Page 22 Fig. 24 5.1 Edit Zone Properties (Fig. 25) Max Volume: T ’ Party Volume: T Page Volume: I Balance: T Bass and Treble: B Volume Reset at Zone ON: A Loudness Compensation ON: T Exclusive Source Control: C IR Pass-through: E ’...
- Page 23 Source Grouping: T Lock Zone By Default: T Display Time While Zone Off: T Do-Not-Disturb: T No Mute: T No Page: T No Party: M Enabled Zone Sources: T Display Settings: T Dimmest, Dim, Not So Bright, Normal, Bright, Brighter, Brightest.
- Page 24 5.2 Zones (updated) (Fig. 26) Fig. 26 6. System Settings 6.1 External Mute: System Mute Trigger (Fig. 27) Fig. 27 6.2 External Mute: Paging Trigger (Fig. 28) Fig. 28...
- Page 25 6.3 24 Hour Time Display and Power Off Mode 24 Hour Time Display: T Power Off Mode: T Tap Mute/Hold for Zone-Off w/ All-Off Menu: T Tap Zone-Off/Hold for Group/All-Off Menu: I Tap Zone-Off/Hold for All-Off (no menu): T 6.4 Serial Delay (Fig. 29) Fig.
- Page 26 Fig. 31a Please note that if multiple Control Pads are plugged in during the update process they will update themselves one at a time in succession beginning with zone one. Wait for the entire process to complete until the last zone turns off. Firmware Upgrade..
- Page 27 X. Control Pad Setup Factory-new Installation , Essentia V. X.XX w Zone 1, Zone 2, e 3. T Reprogramming the Zone Address Setup. W Zone Number. A XI. Using the Control Pad's MENU Button MAIN MENU: T Advanced Zone Control a Fig.
-
Page 28: Table Of Contents
Fig. 35 Edit Favorites Rock Dinner Party --Add to Favorit Sources: T Fig. 36 Sources Satellite NuVo M3 A NuVo M3 B Advanced Zone Control: A Fig. 37 Adv. Zone Control Do-Not-Distrub Sleep Party Mode: T Do-Not-Disturb: T Sleep Mode: T Fig. -
Page 29: Rock
Lock Zone: T Lock Zone & Off: T Fig. 39 Lock Code? (5) 3485 Setup: T Fig. 40 Setup Favorites #1-12 Zone Settings *Souce Settings Favorites #1-12: T Fig. 41 Favorites #1-12 Rock Jazz (Empty) Zone Settings: T Fig. 42 Zone Settings Balance Bass... - Page 30 Balance: T Bass: T Treble: T Loudness Compensation: L Volume Settings: T . Volume Reset i Initial Volume. C . Maximum Volume i Volume c Party Volume s Fig. 43 Initial Volume Set (current volu Reset (-60 dB) Advanced Zone Settings: T Fig.
-
Page 31: System Settings
Remote Controls: T Remotes Enabled, t NuVo Remote Only. I Remotes Disabled. Slaved to Zone: A Fig. 46 Slaved To Zone None Kitchen Dining Room Zone Number: E Slaved Zone m Diagnostic Self Test: T Source Settings: T Gain: T , All ’... -
Page 32: Sources: T
Power Off Mode: T Mute/Off/ w/ Menu i Off/All-Off Menu: I Off/All-Off: T Fig. 49 Zone Power-Off M... Tap/Hold Action Mute/Off w/Menu Off/All-Off Menu Advanced: W Fig. 50 Advanced Ext. Mute/Page Serial Delay Sources External Mute/Page: T Low (Closed). Serial Delay: T Sources: T Reset System: T Paging Mode. - Page 33 XII. Essentia Accessories The NV-I8DLS IR Learning Station Interface 1. PASSTHRU: T 2. READY: W 3. IR SENSOR: T 4. TEST ACTIVE: W 5. POWER: T 1. AC Power: A 2. CONNECT TO PC: U 3. CONNECT TO GRAND CONCERTO D: U ’...
- Page 34 Capturing IR codes using the IR Learning Station Interface ’ remote control should be held 8 to 10 inches from the Interface when learning. The IR Learning Station is a universal device for Essentia, Concerto, and Grand Concerto use. ’ .
- Page 35 Line 1: Pins 3,4 Line 2: Pins 2,5 Model NV-MI1 Mute Interface Module STATUS MUTE MODEL NV-E6GM SIX SOURCE SIX ZONE AUDIO DISTRIBUTION SYSTEM NuVo Technologies LLC • Hebron, Kentucky USA www.nuvotechnologies.com NuVoNet LINK RoHS CO NF OR MS TO UL ST D.
- Page 36 NV-LSI24 Local Source Interrupt (Fig. 52) Fig. 52 FIXED TRIG IR OUTPUTS ZONE ZONE ALLPORT CONNECTION 18 07 STATUS MUTE MO DE L NV-E6 GM SI X SO UR CE S IX Z ON E AU DI O DI ST RI BU TI ON S YS TE M Nu Vo Tech no lo gi es L LC •...
- Page 37 TRIG IR OUTPUTS ZONE ZONE ALLPORT CONNECTION LSA40 Back MODEL:NV-LSA40 LOCAL SOURCE AMPLIFIER NuVo Technologies LLC Cincinnati, Ohio USA www.nuvotechnologies.com Designed In USA Made In China WIRE STRIP 5/16” (8MM) 18 07 STATUS MUTE MO DE L NV-E6 GM SI X SO UR CE S IX Z ON E...
- Page 38 2 OF 2-Follow th... drift-Edge of Tom 1:19 3:48 MENU MODEL:NV-LSA40 LOCAL SOURCE AMPLIFIER NuVo Technologies LLC Cincinnati, Ohio USA www.nuvotechnologies.com Designed In USA Made In China WIRE STRIP 5/16” (8MM) 2 OF 2-Follow th... drift-Edge of Tom 1:19 3:48...
- Page 39 NV-P2100 200-Watt Auxiliary Amplifier (Fig. 55) ’ l RS232 Interface Fig. 55 NV-P2100 Amplifier AUDIO CONTROL CONTROL SENSITIVITY POWER VOLTAGE OdBV = 1.0RMS MODE TRIGGER ON/OFF SWITCH 3-30 VOLTS INPUT LEFT RIGHT AUDIO AC/DC AC OR DC INPUT OUTPUT Essentia Amplifier FIXED TRIG ZONE...
- Page 40 Zones 1-6 Power Amplifier Outputs Zones 1 and 2 Preamplifier Outputs Source Inputs 1-6 IR Emitter Outputs System Serial Port Essentia Package Contents •N •6 •1 •6 •1 •1 •1 •1 •1 Essentia Specifications Zone Trigger Outputs Power Requirements – Physical Specifications •N •6...
- Page 41 Troubleshooting Symptom Probable Cause Remedy...
- Page 42 Troubleshooting Symptom Probable Cause Remedy IR Passthrough), o Controls), a Remote...
- Page 44 NuVo Technologies LLC Hebron, Kentucky USA www.nuvotechnologies.com E6G 0841...