Table of Contents
Advertisement
Available languages
Available languages
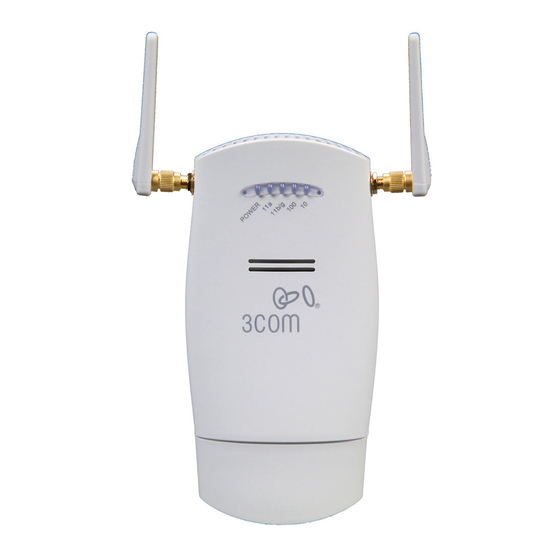
3Com Wireless 7760
11a/b/g PoE Access Point
3CRWE776075 / WL-561
Copyright © 2006 3Com Corporation. All rights reserved. 3Com and the 3Com logo are registered
trademarks of 3Com Corporation. All other company and product names may be trademarks of the
respective companies with which they are associated.
Part Number 10015002 Rev. AA
Published April 2006
Quick Start Guide
Guida introduttiva...23
Kurzanleitung...33
Snabbstartguide...63
Français
Italiano
Deutsch
Español
Portuguese
Svenska
Advertisement
Table of Contents

Related Manuals for 3Com AP7760


Summary of Contents for 3Com AP7760
-
Page 1: Table Of Contents
Portuguese Snabbstartguide…63 Svenska Copyright © 2006 3Com Corporation. All rights reserved. 3Com and the 3Com logo are registered trademarks of 3Com Corporation. All other company and product names may be trademarks of the respective companies with which they are associated. -
Page 3: About This Guide
(WLAN). The Wireless 7760 Access Point also includes robust standards-based security features, and supports wireless network standards including 802.11a and 802.11g. This Quick Start Guide describes the basic steps necessary to install and configure your 3Com Wireless 7760 11a/b/g PoE Access Point (3CRWE776075 / WL-561). Throughout this guide the Wireless 7760 Access Point is simply referred to as the Access Point. - Page 4 Description Ethernet Port The Ethernet port provides a 10/100BASE-TX Ethernet connection to a 3Com switch. Use a suitable Category 5 cable with straight-through signaling and standard RJ-45 connectors to connect your Access Point to the switch on the network. Power Port Not supported.
-
Page 5: Safety Information
To conform to FCC channel usage restrictions, only channels 1–11 are available by default. If channels 1–13 are permitted for use in your country, please visit the 3Com web site for the latest software version. - Page 6 Informacje na temat bezpieczeñstwa Urządzenie musi być zamontowane zgodnie z lokalnymi i krajowymi normami, ustawami i przepisami. W celu zagwarantowania bezpieczeństwa osób i urządzeń, instalację Punktu dostępowęgo może przeprowadzać wyłącznie wyszkolony fachowiec ds. sieci. OSTRZEŻENIE: Ostrzeżenia zawierają wskazówki, których należy przestrzegać w celu zagwarantowania bezpieczeństwa osobistego.
-
Page 7: Unpacking The Access Point
1. Unpacking the Access Point Make sure that you have the following items, which are included with the Access Point: • One 3Com Wireless 7760 11a/b/g PoE Access Point • Two external dual-band antennas (2.4 GHz and 5.3 GHz) •... -
Page 8: Attaching The Antennas
3. Attaching the Antennas Carefully unpack the standard detachable antennas that came with your Access Point. Thread each antenna on to an antenna connector on the Access Point and hand-tighten them. After network startup, you may need to adjust the antennas to fine-tune coverage in your area. For best results, adjust the antennas so they are perpendicular to the floor and ceiling. -
Page 9: Tabletop Mounting
Connect the Ethernet cable (for power and network connection) to the port on the front of the Access Point. Snap the Access Point onto the mounting bracket. To install the locking bar, push the locking bar through the opening in the side of the mounting bracket until the hole on the locking bar is exposed. - Page 10 Power Over Ethernet from a PoE Injector To power the Access Point using the 3Com PoE Injector (included with the unit), do the following: Connect the LAN cable from the switch or hub to the Hub/Switch port on the 3Com PoE Injector (included with Access Point).
-
Page 11: Checking The Led Indicators
Ethernet port. If the LED is flashing, the link is OK and data is being transmitted or received. No link 7. Installing Software The following applications and documents are included on the 3Com CD-ROM: • Wireless Infrastructure Device Manager • User manual •... -
Page 12: Connecting To The Access Point
Follow the instructions on the screens to complete the installation. Reboot the computer if prompted to do so. Launch the tool from the Windows Start menu: select Start > Programs > 3Com Wireless > Wireless Infrastructure Device Manager. 8. Connecting to the Access Point You can connect to the Access Point on networks that have a DHCP server, and on networks that do not have a DHCP server. -
Page 13: Configuring The Access Point
For complete details on using the Wireless Infrastructure Device Manager and configuring your Access Point, refer to the 3Com Wireless 7760 11a/b/g PoE Access Point User Guide included on the product CD. Updates to the user manual may be found on our website: http://www.3Com.com. -
Page 15: Guide De Mise En Route
11a/b/g PoE Access Point 3CRWE776075 / WL-561 Le point d’accès sans fil 3Com Wireless 7760 11a/b/g PoE Access Point associe hautes performances, interopérabilité et simplicité d’utilisation pour englober des réseaux câblés isolés dans un seul et même réseau local sans fil. Ce point d’accès propose également de puissantes fonctions de sécurité, et répond aux normes de réseau standard comme 802.11a et 802.11g. - Page 16 Fonction Description Port Ethernet Ce port permet d’établir une connexion Ethernet 10/100BASE-TX à un commutateur 3Com. Utilisez un câble droit de catégorie 5 et des connecteurs RJ45 standard pour relier le point d’accès au commutateur du réseau. Connecteur Sans objet. Le point d’accès utilise l’alimentation électrique par câble d’alimentation...
- Page 17 Conformément aux dispositions relatives à l’utilisation des canaux du règlement FCC, seuls les canaux de la plage 1-11 sont disponibles par défaut. Si l’utilisation des canaux de la plage 1-13 est autorisée dans votre pays, visitez le site Web de 3Com pour obtenir la dernière version du logiciel. www.3Com.com...
- Page 18 1. Contenu du coffret Vérifiez que vous disposez des éléments suivants, fournis avec le point d’accès : • Point d’accès 3Com Wireless 7760 11a/b/g PoE • 2 antennes externes à deux bandes de fréquences (2,4 GHz et 5,3 GHz) •...
- Page 19 3. Raccordement des antennes Déballez soigneusement les antennes amovibles standard fournies avec le point d’accès. Insérez les deux antennes dans les connecteurs du point d’accès et redressez-les. Après le démarrage du réseau, il vous faut régler les antennes pour optimiser la zone de couverture. Pour des résultats satisfaisants, orientez les antennes de façon qu’elles soient perpendiculaires au sol et au plafond.
- Page 20 Les schémas ci-dessous illustrent comment passer le câble dans la grosse encoche et comment fixer le support au mur. Mise en place du câble Fixation du support au mur Insérez le câble Ethernet (alimentation et connexion au réseau) dans le port placé à l’avant du point d’accès.
- Page 21 Alimentation électrique par câble Ethernet depuis un injecteur PoE Pour alimenter le point d’accès à l’aide de l’injecteur PoE 3Com (fourni), procédez comme suit : Insérez le câble réseau connecté au commutateur ou au concentrateur dans le port Concentrateur/Commutateur de l’injecteur PoE 3Com (fourni avec le point d’accès).
- Page 22 6. Vérification des voyants lumineux Lorsque le point d’accès est sous tension, différents voyants s’allument pour indiquer les activités en cours, répertoriées ci-dessous : Voyan Couleur Indication Marche Vert Sous tension Éteint Hors tension Vert La connexion au réseau sans fil est établie.
- Page 23 7. Installation du logiciel Le CD-ROM 3Com inclut les applications et documents suivants : • Wireless Infrastructure Device Manager (Gestionnaire de périphériques pour infrastructure sans fil) • Manuel de l’utilisateur • Guide de mise en route Vous devez installer le logiciel Wireless Infrastructure Device Manager (WIDMan) sur votre ordinateur pour détecter et configurer le point d’accès.
- Page 24 Utilisation de WIDMan Le logiciel 3Com WIDMan (Wireless Infrastructure Device Manager) vous permet de détecter et de configurer le point d’accès. Suivez la procédure ci-après pour déterminer l’adresse IP du point d’accès à l’aide de WIDMan. Connectez votre ordinateur au point d’accès, directement ou par le biais du réseau.
-
Page 25: Guida Introduttiva
802.11a e 802.11g. Questa Guida introduttiva descrive le operazioni di base necessarie per installare e configurare l'Access Point Wireless 7760 11a/b/g PoE 3Com (3CRWE776075 / WL-561). Nel corso di questa guida, l'Access Point Wireless 7760 verrà indicato semplicemente come "access point" per brevità. - Page 26 Caratteristica Descrizione Porta Ethernet La porta Ethernet fornisce un'interfaccia Ethernet 10/100BASE-TX a uno switch 3Com. Utilizzare un cavo Categoria 5 "straight-through" adatto e connettori RJ-45 standard per collegare l'access point allo switch della rete. Porta di alimentazione Non supportata. L'access point viene alimentato tramite Power over Ethernet (PoE).
- Page 27 Per rispettare i limiti stabiliti dall'FCC sull'uso dei canali, sono disponibili per impostazione predefinita i canali 1–11. Se l'uso dei canali 1–13 è consentito nel proprio paese, visitare il sito Web di 3Com per scaricare la versione più recente del software. www.3Com.com...
- Page 28 1. Apertura della confezione dell'access point Assicurarsi che la confezione dell'access point contenga i seguenti componenti: • Un access point Wireless 7760 11a/b/g PoE 3Com • Due antenne esterne dual-band (2,4 GHz e 5,3 GHz) • Un iniettore PoE (Power over Ethernet) •...
- Page 29 3. Collegamento delle antenne Disimballare attentamente le antenne staccabili standard fornite con l'access point. Avvitare ciascuna antenna a un connettore di antenna sull'access point e stringerle manualmente. Dopo l'avvio della rete, potrebbe essere necessario regolare le antenne per sintonizzare con precisione l'access point in base alla copertura nella propria area.
- Page 30 La figura sottostante mostra la disposizione di un cavo attraverso l'apertura grande sul supporto e la modalità di montaggio del supporto su una parete. Disposizione di un cavo Montaggio a parete del supporto Collegare il cavo Ethernet (per il collegamento all'alimentazione e alla rete) alla porta sul lato anteriore dell'access point.
- Page 31 Per alimentare l'access point mediante l'iniettore PoE 3Com (fornito con l'unità), eseguire le seguenti operazioni: Collegare il cavo LAN dallo switch o l'hub alla porta Hub/Switch dell'iniettore PoE 3Com (fornito con l'access point). Quindi, collegare un cavo LAN dalla porta Ethernet dell'access point all'altra porta dell'iniettore PoE.
- Page 32 LED lampeggia, il link è presente ed è in corso la trasmissione o la ricezione di dati. Spento Nessun link 7. Installazione del software Il CD-ROM 3Com contiene le seguenti applicazioni e documentazione: • Wireless Infrastructure Device Manager • Manuale per l'utente •...
- Page 33 IP dell'access point. Collegare il computer all'access point direttamente o tramite rete. Avviare WIDMan dal menu Start di Windows: Start > Programmi > 3Com Wireless > Wireless Infrastructure Device Manager. Non appena l'access point viene rilevato, verrà visualizzato nella schermata Wireless Network Tree.
- Page 34 Per dettagli completi sull'uso di Wireless Infrastructure Device Manager e sulla configurazione dell'access point, consultare la 3Com Wireless 7760 11a/b/g PoE Access Point User Guide inclusa nel CD del prodotto. Per eventuali aggiornamenti al manuale per l'utente, visitare il nostro sito Web: http://www.3Com.com.
-
Page 35: Kurzanleitung
802.11a und 802.11g. Diese Kurzanleitung beschreibt die grundlegenden Schritte zur Installation und Konfiguration Ihres 3Com Wireless 7760 11a/b/g PoE Access Point (3CRWE776075 / WL-561). In diesem Handbuch wird der Wireless 7760 Access Point kurz mit point d’accès bezeichnet. Bitte lesen Sie vor der Installation oder Umlegung des Access Points unbedingt die Sicherheitsinformationen in den “Sicherheitsinformationen”... - Page 36 Funktion Beschreibung Ethernet-Schnittstelle Die Ethernet-Schnittstelle bietet eine 10/100BASE-TX Ethernet- Verbindung zu einem 3Com-Schalter. Verwenden Sie ein passendes Kabel der Kategorie 5 (US) mit gerader Signalgebung und genormten RJ-45-Anschlüssen (US), um Ihren point d’accès an dem Schalter des Netzwerks anzuschließen. Stromanschluss Nicht unterstützt.
- Page 37 Wählen Sie Ihr Land aus der Länder-Auswahlliste, um die Installation korrekt auszuführen. Gemäß den Gebrauchsbeschränkungen der US-Behörde FCC (Federal Communications Commission) sind standardmäßig nur die Kanäle 1 – 11 verfügbar. Sofern die Nutzung der Kanäle 1 -13 in Ihrem Land zulässig ist, finden Sie die aktuellste Software-Version auf der 3Com-Website. www.3Com.com...
- Page 38 1. Auspacken des Access Point Stellen Sie sicher, dass Sie die folgenden Komponenten mit dem point d’accès mitgeliefert wurden: • Ein 3Com Wireless 7760 11a/b/g PoE (Stromanschluss über Ethernet) point d’accès • Zwei externe Dual-Band Antennen (2.4 GHz und 5.3 GHz) •...
- Page 39 3. Anbringen der Antennen Vorsichtig die mit dem point d’accès mitgelieferte abschraubbare Standardantenne auspacken. Die jeweilige Antenne am Antennenanschluss des point d’accès von Hand festschrauben. Nach der Netzwerkinbetriebnahme kann es sein, dass die Antenne ausgerichtet werden muss, um ihre gesamte Reichweite abzudecken. Um die besten Ergebnisse zu erreichen, die Antenne senkrecht zum Boden und zur Decke ausrichten.
- Page 40 Die Abbildungen unten stellen den Verlauf eines Kabels durch die große Öffnung der Basisstation und dann die Montage der Basisstation an der Wand dar. Kabelverlegung Wandmontage der Basisstation Schließen Sie das Ethernet-Kabel (für Strom- und Netzwerkanschluss) an dem Anschluss an der Vorderseite des point d’accès an.
- Page 41 Access Point PoE-Schalter/-Hub Strom über Ethernet mit einem PoE-Injektor Um den point d’accès mit dem (mit dem Gerät mitglelieferten) 3Com-PoE-Injektor mit Strom zu versorgen, führen Sie Folgendes aus: Schließen Sie das LAN-Kabel vom Schalter oder Hub an die Hub/Schalter-Schnittstelle des (mit dem point d’accès mitgelieferten) 3Com-PoE-Injektors an.
- Page 42 Schnittstelle entdeckt wurde. Eine blinkende Leuchtdiode bedeutet, dass die Verbindung besteht und Daten übertragen werden. Keine Verbindung 7. Installation der Software Die folgenden Anwendungen und Dokumente sind auf der 3Com CD-ROM enthalten: • Gerätemanager der drahtlosen Infrastruktur • Benutzerhandbuch •...
- Page 43 Computer installieren, um mit dem point d’accès kommunizieren zu können und ihn zu installieren. Schalten Sie Ihren Computer ein. Legen Sie die die 3Com-Installations-CD in das CD-ROM-Laufwerk Ihres PCs ein. Das CD-Menü wird angezeigt. Wenn es nicht angezeigt wird, können Sie das Installationsprogramm vom Windows-Menü Start starten. Beispiel: Start > Ausführen >...
- Page 44 Zurück durch die Bildschirme. Klicken Sie Beenden wenn Sie fertig sind. Alle Einzelheiten über den Gebrauch des Gerätemanagers für drahtlose Infrastruktur und die Konfiguration Ihres point d’accès, finden Sie auf der Produkt-CD im 3Com Wireless 7760 11a/b/g PoE Access Point-Benutzerhandbuch. Aktualisierungen des Benutzerhandbuchs finden Sie ggf. auf unserer Internetseite: http://www.3com.com.
-
Page 45: Guía De Inicio Rápido
Esta Guía de inicio rápido describe los pasos básicos necesarios para instalar y configurar su Punto de acceso inalámbrico PoE 11a/b/g 3Com 7760 (3CRWE776075 / WL-561). A lo largo de esta guía el Punto de acceso inalámbrico 7760 se denomina simplemente Punto de acceso. - Page 46 Puerto Ethernet El puerto Ethernet proporciona una conexión de 10/100BASE-TX Ethernet a un conmutador 3Com. Para hacer la conexión del Punto de acceso al conmutador en la red, utilice un cable Categoría 5 adecuado con señalización directa y conectores RJ-45 estándar.
- Page 47 Para acatar las restricciones de uso de canales de la FCC, en forma predeterminada sólo están disponibles los canales 1 al 11. Si en su país se permite el uso de los canales 1 al 13, visite el sitio Web de 3Com para obtener la última versión del software. www.3Com.com...
- Page 48 1. Desempaque del Punto de acceso Asegúrese de tener los siguientes elementos, que vienen con el Punto de acceso: • Un Punto de acceso inalámbrico PoE 11a/b/g 3Com 7760 • Dos antenas externas de doble banda (2,4 GHz y 5,3 GHz) •...
- Page 49 3. Conexión de las antenas Desempaque cuidadosamente las antenas desmontables estándar que vienen con el Punto de acceso. Atornille cada antena en un conector de antena del Punto de acceso y apriétela a mano. Después de iniciar la red, puede que deba ajustar las antenas para mejorar la cobertura en su área.
- Page 50 Las siguientes figuras ilustran el enrutamiento de un cable a través de la abertura grande en el soporte y luego el montaje del soporte en una pared. Enrutamiento del cable Montaje del soporte en la pared Conecte el cable Ethernet (para la alimentación y la conexión a la red) al puerto en la parte delantera del Punto de acceso.
- Page 51 Punto de acceso Conmutador/concentrador PoE Power Over Ethernet de un inyector PoE Para alimentar el Punto de acceso utilizando el inyector PoE 3Com (incluido con la unidad), haga lo siguiente: Conecte el cable LAN del conmutador o concentrador al puerto para conmutador/ concentrador en el inyector PoE 3Com (incluido con el Punto de acceso).
- Page 52 LED está destellando, el enlace es correcto y se están transmitiendo o recibiendo datos. Apagado No hay enlace 7. Instalación del software En el CD-ROM 3Com se incluyen las siguientes aplicaciones y documentos: • Wireless Infrastructure Device Manager • Manual de usuario •...
- Page 53 IP del Punto de acceso. Conecte su computadora al Punto de acceso ya sea directamente o a través de la red. Lance WIDMan desde el menú Inicio de Windows: Inicio > Programas > 3Com Wireless > Wireless Infrastructure Device Manager.
- Page 54 Punto de acceso, consulte la Guía del usuario del Punto de acceso inalámbrico PoE 11a/b/g 3Com 7760 que viene en el CD del producto. Las actualizaciones al manual del usuario pueden encontrarse en nuestro sitio Web: http://www.3Com.com.
-
Page 55: Guia De Início Rápido
11a/b/g PoE Access Point 3CRWE776075 / WL-561 O 3Com Wireless 7760 11a/b/g PoE Access Point combina alto desempenho, interoperabilidade e fácil utilização para integrar redes com fio isoladas com uma rede local sem fio (WLAN) coesa. O Wireless 7760 Access Point inclui também recursos de segurança robustos com base em padrões e suporta padrões de rede sem fio, inclusive 802.11a e 802.11g. - Page 56 Descrição Porta Ethernet A porta Ethernet oferece uma conexão 10/100BASE-TX Ethernet para um switch 3Com. Use um cabo Categoria 5 adequado com sinalização direta e conectores RJ-45 padrão para conectar o Access Point ao switch na rede. Porta de Alimentação Não suportada.
- Page 57 Para estar em conformidade com as restrições de uso de canal do FCC, apenas os canais 1–11 estão disponíveis, por padrão. Se os canais 1–13 puderem ser usados no seu país, visite o site da 3Com para obter a última versão do software. www.3Com.com...
- Page 58 1. Componentes do Pacote do Access Point Ao desembalar o Access Point, verifique se os seguintes componentes estão presentes: • One 3Com Wireless 7760 11a/b/g PoE Access Point • Duas antenas externas com banda dupla (2,4 GHz e 5,3 GHz) •...
- Page 59 3. Conexão das Antenas Desembale cuidadosamente as antenas destacáveis padrão fornecidas com o Access Point. Parafuse cada antena em um conector da antena do Access Point até que elas fiquem firmes. Após a rede ser inicializada, pode ser necessário fazer o ajuste fino das antenas para a cobertura da área.
- Page 60 As figuras abaixo mostram um cabo passando pela abertura grande na base e, em seguida, a base sendo montada em uma parede. Encaminhamento do cabo Montagem da base na parede: Conecte o cabo Ethernet (para conexão de alimentação e rede) à porta na frente do Access Point.
- Page 61 PoE Switch/Hub Power Over Ethernet de um Injetor PoE Para alimentar o Access Point usando o Injetor PoE da 3Com (fornecido com a unidade), faça o seguinte: Conecte o cabo da LAN do switch ou hub à porta Hub/Switch no Injetor PoE da 3Com (fornecido com o Access Point).
- Page 62 LED estiver piscando, a conexão está funcionando e dados estão sendo transmitidos ou recebidos. Apagado Sem conexão 7. Instalação do Software Os aplicativos e documentos a seguir estão incluídos no CD-ROM da 3Com: • Wireless Infrastructure Device Manager • Manual do usuário •...
- Page 63 Access Point. Conecte o computador ao Access Point diretamente ou pela rede. Inicie o WIDMan no menu Iniciar do Windows: Iniciar > Programas > 3Com Wireless > Wireless Infrastructure Device Manager. Quando o Access Point for detectado, ele será mostrado na tela Wireless Network Tree.
- Page 64 Para obter detalhes completos sobre como usar o Wireless Infrastructure Device Manager e configurar o Access Point, consulte o Guia do Usuário do 3Com Wireless 7760 11a/b/g PoE Access Point incluído no CD do produto. As atualizações do manual do usuário podem ser encontradas no site: http://www.3com.com.
-
Page 65: Snabbstartguide
802.11a och 802.11g. Denna snabbstartguide beskriver de grundläggande stegen för att installera och konfigurera din 3Com Trådlösa 7760 11a/b/g PoE Accesspunkt (3CRWE776075 / WL-561). I denna guide kommer vi helt enkelt att kalla den Trådlösa 7760 Accesspunkten för Accesspunkt . - Page 66 Funktion Beskrivning Ethernetport Ethernetporten ger en 10/100BASE-TX Ethernetanslutning till en 3Com-switch. Använd en lämplig rak kategori 5-kabel med standard RJ-45-kontakter för att ansluta dinAccesspunkt till nätverkets switch. Powerport Stöds ej. Accesspunkt får ström via Power Over Ethernet (PoE). Se “Strömanslutning” på sidan 68.
- Page 67 För korrekt installation, välj ditt land från listan med länder. För att överensstämma med FCC:s begränsningar gällande kanalanvändning är endast kanal 1-11 tillgängliga som standard. Om det är tillåtet att använda kanal 1–13 i ditt land, vänligen besök 3Com:s webbsajt för den senaste programvaruversionen. www.3Com.com...
- Page 68 1. Packa upp Accesspunkten Se till att följande finns i förpackningen med Accesspunkt : • En 3Com Trådlös 7760 11a/b/g PoE Accesspunkt • Två externa tvåbands antenner (2.4 GHz och 5.3 GHz) • En PoE (Power over Ethernet) injector •...
- Page 69 3. Ansluta antennerna Plocka försiktigt upp de lösa standardantennerna som medföljde din Accesspunkt . Gänga på varje antenn på en antennanslutning på din Accesspunkt och dra åt dem för hand. Efter att du har startat upp nätverket kan du behöva justera antennerna för att finjustera mottagningen för den plats där du befinner dig.
- Page 70 Anslut Ethernetkabeln (för ström- och nätverksanslutning) till porten på framsidan av Accesspunkt . Fäst Accesspunkt på monteringsfästet. För att installera låskolven, tryck på låskolven genom öppningen på sidan av monteringsfästet tills hålet på låskolven blir synligt. Sätt i ett lås (ej inkluderat) genom hålet på...
- Page 71 Power Over Ethernet från en PoE Injector För att få ström till Accesspunkt genom 3Com PoE Injector (inkluderad), gör följande: Koppla LAN-kabeln från switchen eller hubben till hubb/switch-porten på 3Com PoE Injector (medföljer Accesspunkt ). Koppla därefter en LAN-kabel från Ethernetporten på Accesspunkt till den andra porten på...
- Page 72 Indikerar att ett 10Base-T-nätverk har upptäckts vid Ethernetporten. Om LED-indikatorn blinkar är länken OK och data sänds eller mottas. Ingen länk 7. Installera programvara Följande program och dokument är inkluderade på 3Com-CD-ROM:en: • Enhetshanterare för trådlös infrastruktur • Användarhandbok •...
- Page 73 Installera för att installera denna. Följ instruktionerna på skärmen för att utföra installationen. Starta om datorn när du uppmanas att göra detta. Starta verktyget från Windows Startmeny: välj Start > Program > 3Com Trådlös > Enhetshanteraren för trådlös infrastruktur. 8. Ansluta till Accesspunkt Du kan ansluta till Accesspunkt både på...
- Page 74 Klicka på Avsluta när du är klar. För fullständiga detaljer om hur man använder Enhetshanteraren för trådlös infrastruktur och hur man konfigurerar din Accesspunkt hänvisas till handboken för 3Com Trådlös 7760 11a/b/g PoE Accesspunkt som finns på produkt-CD:n. Uppdateringar till handboken kan hittas på vår webbsajt: http://www.3Com.com.
- Page 75 3Com’s warranty and all applicable regulatory certifications and approvals. Only antennas specified for your region by 3Com can be used with this product. The use of external amplifiers or non-3Com antennas may invalidate regulatory certifications and approvals.
- Page 76 Interference Handbook. This booklet is available from the U.S. Government Printing Office, Washington, DC 20402. Stock No. 004-000-0034504. 3Com is not responsible for any radio or television interference caused by unauthorized modification of the devices included with this 3Com Wireless 7760 11a/b/g PoE Access Point, Model WL-561 (3CRWE776075), or the substitution or attachment of connecting cables and equipment other than specified by 3Com.
- Page 77 NOTE: To ensure product operation is in compliance with local regulations, select the country in which the product is installed. Česky [Czech] 3Com Coporation tímto prohlašuje, že tento RLAN device je ve shodě se základ- ními požadavky a dalšími příslušnými ustanoveními směrnice 1999/5/ES. Dansk [Danish] Undertegnede 3Com Corporation erklærer herved, at følgende udstyr RLAN...
- Page 78 övriga relevanta bestämmelser som framgår av direktiv 1999/5/EG. Íslenska [Icelandic] Hér með lýsir 3Com Corporation yfir því að RLAN device er í samræmi við grunnkröfur og aðrar kröfur, sem gerðar eru í tilskipun 1999/5/EC. Norsk [Norwegian] 3Com Corporation erklærer herved at utstyret RLAN device er i samsvar med de...
- Page 79 EU - R 2.4GH ESTRICTIONS FOR SE IN THE Z BAND This device may be operated indoors or outdoors in all countries of the European Community using the 2.4 GHz band: Channels 1–13, except where noted below. • In Italy the end-user must apply for a license from the national spectrum authority to operate this device outdoors.