Advertisement
Table of Contents
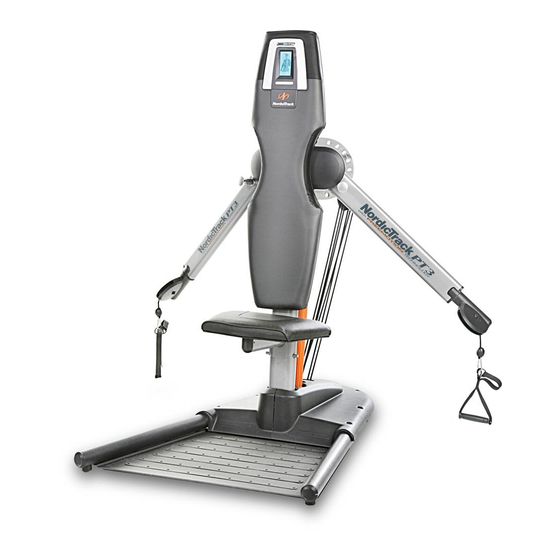
Model No. NTCCSY9897.0
Serial No.
Write the serial number in the
space above for future reference.
Serial Number Decal (under seat)
QUESTIONS?
As a manufacturer, we are com-
mitted to providing complete
customer satisfaction. If you
have questions, or if parts are
damaged or missing, PLEASE
CONTACT OUR CUSTOMER
SERVICE DEPARTMENT
DIRECTLY.
CALL TOLL-FREE:
1-888-936-4266
Mon.–Fri., 8:00 until 17:00 EST
(excluding holidays)
OR E-MAIL US:
customerservice@iconcanada.ca
CAUTION
Read all precautions and instruc-
tions in this manual before using
this equipment. Save this manual
for future reference.
USER'S MANUAL
Notre site internet
www.nordictrack.com
Advertisement
Table of Contents

Related Manuals for NordicTrack PT3 NTCCSY9897.0


Summary of Contents for NordicTrack PT3 NTCCSY9897.0
- Page 1 CALL TOLL-FREE: 1-888-936-4266 Mon.–Fri., 8:00 until 17:00 EST (excluding holidays) OR E-MAIL US: customerservice@iconcanada.ca CAUTION Read all precautions and instruc- tions in this manual before using this equipment. Save this manual for future reference. USER’S MANUAL Notre site internet www.nordictrack.com...
-
Page 2: Table Of Contents
Apply the decal in the location shown. Note: The decals may not be shown at actual size. NordicTrack is a registered trademark of ICON IP, Inc. -
Page 3: Important Precautions
IMPORTANT PRECAUTIONS WARNING: To reduce the risk of serious injury, read all important precautions and instructions in this manual and all warnings on your resistance system before using your resistance system. ICON assumes no responsibility for personal injury or property damage sustained by or through the use of this product. -
Page 4: Before You Begin
BEFORE YOU BEGIN Thank you for selecting the versatile NordicTrack WITH FREEMOTION TECHNOLOGY resistance sys- tem. The resistance system offers a selection of weight stations designed to develop every major muscle group of the body. Whether your goal is to tone your body,... -
Page 5: Part Identification Chart
PART IDENTIFICATION CHART See the drawings below to identify small parts used in assembly. The number in parentheses below each draw- ing is the key number of the part, from the PART LIST near the end of this manual. Note: Some small parts may have been preattached. -
Page 6: Assembly
ASSEMBLY Make Assembly Easier Everything in this manual is designed to ensure that the resistance system can be assembled successfully by almost anyone. By setting aside plenty of time, assembly will go smoothly. Before beginning assembly, carefully read the following information and instructions: •... - Page 7 2. Attach the Base Plate (3) to the Base Legs (2) with eight M6 x 20mm Screws (67) and eight M6 Large Washers (61). See step 1. Tighten the M10 x 20mm Button Screws (59). Carefully tip the resistance system back into the operating position.
-
Page 8: Adjustment
ADJUSTMENT This section explains how to adjust the resistance system. Properly tighten all parts each time you use the resist- ance system. Replace any worn parts immediately. To clean the resistance system, use a damp cloth and a mild, non-abrasive detergent; do not use solvents to clean the resistance system. ADJUSTING THE SEAT The Seat (24) can be attached at either of two heights. - Page 9 ADJUSTING THE RESISTANCE To increase the resistance, first squeeze the Adjustment Handle (12). Next, lift the end of the Adjustment Handle and move it away from the Backrest (23). When the Adjustment Handle is in the desired position, release it. Push the Adjustment Handle forward or backward slightly to make sure that it is fully engaged.
-
Page 10: Console Operation
CONSOLE OPERATION DISPLAY FEATURES OF THE CONSOLE The revolutionary console offers an array of features designed to make your workouts more effective. When you use the manual mode of the console, you can enter the numbers of sets and reps that you plan to complete and set a length of time to rest between sets. - Page 11 HOW TO USE THE MANUAL MODE Note: If there is a sheet of clear plastic on the face of the console, remove the plastic. 1. Touch the screen or press the ON/RESET button to turn on the console. When you turn on the console, the display will light.
- Page 12 HOW TO USE A DAILY WORKOUT 1. Touch the screen or press the ON/RESET button to turn on the console. See step 1 on page 11. 2. Select a male or female workout routine. Touch the MALE DAILY WORKOUT button to select a workout routine designed for men.
- Page 13 HOW TO USE A TARGET MUSCLE WORKOUT 1. Touch the screen or press the ON/RESET button to turn on the console. See step 1 on page 11. 2. Access the target muscle workout menu. Touch the TARGET MUSCLE button to access the target muscle workout menu.
- Page 14 HOW TO USE A BUILD AND TONE WORKOUT 1. Touch the screen or press the ON/RESET button to turn on the console. See step 1 on page 11. 2. Access the build and tone workout menu. Touch the BUILD & TONE button to access the build and tone workout menu.
- Page 15 HOW TO USE AN IFIT WORKOUT 1. Touch the screen or press the ON/RESET button to turn on the console. See step 1 on page 11. 2. Insert an iFIT Card and select a program. To use an iFIT workout, insert an iFIT Card into the iFIT slot;...
- Page 16 HOW TO ADJUST THE DISPLAY SETTINGS When you touch the DISPLAY button on a screen, you will access the display settings screen. The dis- play settings screen allows you to make the following display adjustments: LCD Contrast—To adjust the LCD contrast for the screen, touch the LCD CONTRAST UP/DOWN buttons.
-
Page 17: Strength Training Guidelines
STRENGTH TRAINING GUIDELINES When begining an exercise program, avoid overdoing it during the first few months. Progress at your own pace, and be sensitive to your body’s signals. If you experience pain or dizziness while exercising, stop immediately and begin cooling down. Find out what is wrong before continuing. -
Page 18: Part List
PART LIST—Model No. NTCCSY9897.0 Key No. Qty. Description Base Base Leg Base Plate 16mm Spacer Seat Frame Left Arm Right Arm Adjustment Arm Gas Shock Shock Cover Adjustment Plate Adjustment Handle Handle Bracket Left Handle Cover Right Handle Cover Left Adjustment Arm Cover Right Adjustment Arm Cover Left Rear Cover Left Front Cover... -
Page 19: Exploded Drawing
EXPLODED DRAWING—Model No. NTCCSY9897.0 R0707A 75 85... -
Page 20: Ordering Replacement Parts
ORDERING REPLACEMENT PARTS To order replacement parts, please see the front cover of this manual. To help us assist you, be prepared to pro- vide the following information when contacting us: • the model number and serial number of the product (see the front cover of the manual) •...