
Related Manuals for Samsung Gear VR SM-R322


Summary of Contents for Samsung Gear VR SM-R322
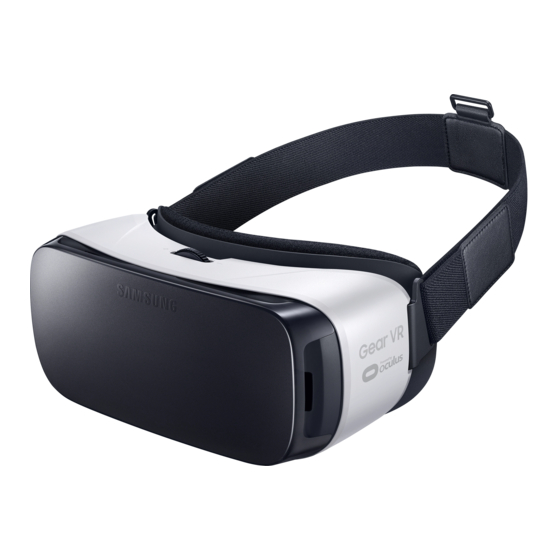
- Page 1 User Manual Please read this manual before operating your device and keep it for future reference.
-
Page 2: Table Of Contents
Table of Contents Intellectual Property ..........iii Beginning the Software Installation ....27 Disclaimer of Warranties; Exclusion of Wearing the Gear VR ..........28 Liability ..............iv Removing the Mobile Device ......29 Connecting a Headset ..........30 Support ................6 Using the Charger ..........31 Read me first ..............7 Installing Gear VR Software ........33 Completing the Set Up Process ......34 Wearing the Gear VR .......... - Page 3 Applications ..............51 Loading New Applications ........51 Uninstalling Existing Applications .......52 Updating Applications ..........52 Oculus Video ............53 VR Gallery ...............54 Oculus 360 Videos ..........55 Oculus 360 Photos ..........56...
-
Page 4: Intellectual Property
For more information, please call 1-800-SAMSUNG (726-7864). Intellectual Property All Intellectual Property, as defined below, owned by or which is otherwise the property of Samsung or its respective suppliers relating to the SAMSUNG mobile device, including but not limited to, accessories, parts, or software relating thereto (the “mobile device”), is proprietary to Samsung and protected under... -
Page 5: Disclaimer Of Warranties; Exclusion Of Liability
THE INSTRUCTION MANUAL SHALL BE CONSTRUED TO CREATE AN EXPRESS OR IMPLIED WARRANTY OF ANY KIND WHATSOEVER WITH RESPECT TO THE PRODUCT. IN ADDITION, SAMSUNG SHALL NOT BE LIABLE FOR ANY DAMAGES OF ANY KIND RESULTING FROM THE PURCHASE OR USE OF THE PRODUCT OR ARISING FROM THE BREACH OF THE EXPRESS WARRANTY, INCLUDING INCIDENTAL, SPECIAL OR CONSEQUENTIAL DAMAGES, OR LOSS OF ANTICIPATED PROFITS OR BENEFITS. - Page 6 ©2015 Samsung Electronics America, Inc. Samsung is a registered trademark of Samsung Electronics Co., Ltd. Do you have questions about your Samsung Mobile Device? For 24 hour information and assistance, we offer a new FAQ/ARS System (Automated Response System) at:...
-
Page 7: Support
Warning! This product contains chemicals known to the State of California to cause cancer, birth defects, or other reproductive harm. For more information, please call 1-800-SAMSUNG (726-7864). This guide provides you with the information you need to get started. For more information and additional support, please visit the main www.samsung.com... -
Page 8: Read Me First
Compatible devices include: – Samsung Galaxy Note 5, Samsung Galaxy S6 edge+, Samsung Galaxy S6, or Samsung Galaxy S6 edge. Important: Use the Gear VR for its intended purpose only. Using the Gear VR for other purposes may result in injury. -
Page 9: Wearing The Gear Vr
Ensure that you have read the warnings below carefully before using the Gear VR to reduce the risk of personal injury, discomfort, or property damage. These Health and Safety warnings are periodically updated for accuracy and completeness. Check both www.samsung.com oculus.com/warnings for the latest updated content. - Page 10 • When children, age 13 or older, use the Gear VR, adults should limit their usage time and ensure they take frequent breaks. Adults should monitor children closely after using the Gear VR if children feel discomfort. • The factory lens protectors are pre-installed on the Gear VR. •...
-
Page 11: Before Using The Gear Vr Headset
• When you are not wearing the Gear VR, do not place objects on the Gear VR’s proximity sensor. Doing so may cause the proximity sensor to stay on and drain the battery. • Refer to your mobile device online support material for more information. Before Using the Gear VR Headset •... -
Page 12: About The Gear Vr
About the Gear VR The Samsung Gear™ VR powered by Oculus™ (also referred to as Gear VR) is a headmounted, virtual reality device that provides an immersive experience for a wide range of users. -
Page 13: Additional Notifications
(to prevent the device from overheating) or if your carrier or Wi-Fi network is slow or out of range. • The availability of VR-enabled content and applications and language support may vary by region. Note: Use only Samsung-approved accessories. Using unapproved accessories may cause performance problems and malfunctions that are not covered by the warranty. - Page 14 Note: Factory lens protectors are pre-installed on the Gear VR. Remove the lens protectors before you use the Gear VR so you can see clearly. Note: When you are not wearing the Gear VR, do not place objects on the internal proximity sensor. Doing so may cause the proximity sensor to remain on and drain the connected mobile device’s battery.
-
Page 15: Device Functions
Device Functions USB Connector Focus Adjustment Wheel Strap Loop Device Holder (left) Device Holder Charging (right) Port Note: The connected Gear VR does not require charging because it obtains power from the connected mobile device. - Page 16 Proximity Foam Sensor Cushioning Lenses...
- Page 17 Back Key Securing Slot Strap Loop Touchpad Front Cover Volume Key...
- Page 18 Caution: Take care not to stand up or move around while the Gear VR is “plugged in”, as this may cause injury to the user or damage the device.” • You can connect the charger to the charging port on the Gear VR. Use only Samsung-approved USB cables and 2A power adapters. –...
-
Page 19: Function Overview
Function Overview Keys Function • Back Press to return to the previous screen. • Press and hold to access the Universal menu. You can view the status of the Gear VR and configure settings. • Volume Press to adjust the volume. •... -
Page 20: Setting Up The Device
Setting Up the Device Installing the straps 1. Insert each end of the strap through the main strap loop on the Gear VR (1). 2. Use the velcro to fasten each end (2). - Page 21 3. Carefully insert the hook (from the top head strap) into the front bar of the Gear VR (1), then pull it upward until it locks in place (2). The hook snaps when secured. Note: The head strap contains a longer velcro strip and is used to secure the front of the Gear VR frame.
- Page 22 4. Slide the top head strap through the loop (3) and use the velcro to fasten it (4). Note: The head strap contains a longer velcro strip and is used to secure the front of the Gear VR frame.
-
Page 23: Installing The Mobile Device
Installing the Mobile Device 1. Gently pull the front cover toward you to remove the protective front cover. - Page 24 ● Position A: is used for either a Samsung Galaxy Note5 or Samsung Galaxy S6 edge+. ● Position B: is used for a Samsung Galaxy S6 or Samsung Galaxy S6 edge.
- Page 25 3. Verify that your device volume is on and not set to silent. Caution: If you insert the mobile device tilted to one side, it may cause discomfort. 4. Carefully insert the mobile device (face down) at an angle into the center of the Gear VR and then insert the Gear VR connector (1) into the mobile device’s USB port.
- Page 26 Device Holder (left) Device Holder (right)
- Page 27 7. Verify the orientation of the mobile device. Caution: If you insert the mobile device tilted to one side, it may cause discomfort. In this case, the mobile device screen will not be aligned properly to the lenses. Device Holder (right) Alignment Tabs Correctly Mounted...
-
Page 28: Beginning The Software Installation
Note: Verify that your device volume is on and not set to silent. If the sound is not emitted when you insert the connector into the mobile device, the Gear VR did not recognize the connection. Carefully reconnect the mobile device until you hear the sound. Caution: Do not leave the Gear VR in direct sunlight. -
Page 29: Wearing The Gear Vr
Wearing the Gear VR 1. Align your face and the foam cushion and put on the Gear VR. Caution! Do not walk or drive while wearing the Gear VR. Always be aware of your surroundings while using the Gear VR to avoid injury to yourself or others. 2. -
Page 30: Removing The Mobile Device
Removing the Mobile Device Remove the mobile device from the Gear VR when not in use. 1. Remove the protective cover (that aids in securing the mobile device). 2. Carefully pull the device holder (right) outward (1), remove the connected mobile device (2) by carefully sliding it outwards at an angle, and then replace the front cover. -
Page 31: Connecting A Headset
Connecting a Headset You can connect a headset or a Bluetooth headset to the mobile device when using the Gear VR. Note: Some audio jacks on headphones/earbuds may not fit properly in your mobile device while mounted to the Gear VR. If this is the case, do not force the connector into the mobile device as this may cause damage. Note: Hold the mobile device tightly when connecting the headset. -
Page 32: Using The Charger
Using the Charger • You can connect the charger to the charging port on the bottom of the Gear VR. Note: Use only Samsung-approved USB cables and 2A power adapters. • If using the Gear VR while the charger is connected: –... - Page 33 • To save energy, unplug the charger when not in use. The charger does not have a power switch, so you must unplug the charger from the electric socket when not in use to avoid wasting power. • The charger should remain close to the electric socket and easily accessible while charging. •...
-
Page 34: Installing Gear Vr Software
Installing Gear VR Software You must install the Gear VR software in order to use the Gear VR. When you connect the mobile device to the Gear VR for the first time, the set up process automatically begins. Note: Connect your mobile device to an active network or Wi-Fi connection before performing the setup process. -
Page 35: Completing The Set Up Process
Completing the Set Up Process 1. Confirm the mobile device is securely mounted into the Gear VR. 2. Read the displayed Health & Safety Warning! information and then use your head to position the on- screen Pointer (crosshair) into the Oculus logo area to continue. 3. -
Page 36: Basic Navigation And Selection
Basic Navigation and Selection Using the Touchpad The Touchpad, located at the right side of the Gear VR, is used for both selection and navigation of displayed elements. Making Selections (Tapping) 1. Move your head to place the pointer on top of the desired item. 2. - Page 37 Moving Around the screen (Swiping) • Swipe forward across the touchpad to move to the next item. • Swipe backward across the touchpad to view the previous item. Swiping to next item or list item (Forward) Swiping to previous item or list item (Backward) •...
- Page 38 • Swipe upward across the touchpad to move to the previous item in a list. Swiping down to next item (Downward) Swiping up to next item (Upward) Note: Some apps may not support upward or downward swiping actions.
-
Page 39: Moving The Pointer
Moving the Pointer The Gear VR recognizes your head movements and then translates that information as a location within your current screen environment. Some screens may not display a pointer. • Moving your head around also changes the views and perspectives of the current screen. Pointer Pointer •... -
Page 40: Making A Selection
Making a Selection You can select items or apps by moving your head and then tapping the touchpad. 1. Move your head to place the displayed pointer onto a desired selection (1). 2. Tap the touchpad (on the right side of the unit) (2). -
Page 41: Navigation - Home Screen
Any time the Gear VR application restarts, you are prompted to read the displayed Health and Safety information and tap the touchpad to accept the terms before proceeding. Recent Apps Oculus Store Store Application Library Library Samsung Featured Content Access to Different Pages... -
Page 42: Navigation - App Screen
The Oculus Home screen is the starting point for accessing Apps, files, and features. From this Home screen you can navigate to any of the three main screens: • HOME screen: Provides access to the Oculus store, Samsung content, Recent apps, and Library (of apps) •... - Page 43 Accessing Additional Application Functions 1. From within the Library, scroll upward or downward to locate an installed application. 2. Place your pointer over the View Details key to display the Apps screen, where you can review more detailed information for the selected app. User Ranking Oculus Video...
- Page 44 3. This Apps screen provides both useful application information and additional related options such as: • User Ranking: View current user ranking for this application. • Comfort: View the current user comfort rating for this application. • Install/Launch/Play Now: Install an application that is not currently downloaded or Launch/Play the available app.
-
Page 45: Using The Universal Menu
Using the Universal Menu This menu can be accessed from any active VR application screen and provides access to some very useful features. Note: These features may not be available within some apps. Accessing the Universal Menu 1. From an active application screen, press and hold the Back key. - Page 46 Signal Strength Charge Notifications Status Do Not Passthrough Distrub Camera Oculus Brightness Home Reorient...
- Page 47 Going to Oculus Home Back key. 1. From an active VR screen or application, press and hold the 2. Place the pointer on top of Oculus Home, to begin exiting the current app and return to the main Home screen. Using Passthrough Camera This feature activates the mobile device’s rear camera and projects it onto your screen so that you can see your surroundings while wearing the Gear VR.
- Page 48 Reorienting the Gear VR There may be times when the viewing angle of the screen might change and not display centered in your line of sight. Reorienting the screen resets the viewing angle to match your current line of sight and orientation by resetting the forward location.
- Page 49 To deactivate the Do Not Disturb Mode: Back key. 1. From an active Gear VR screen, press and hold the Do Not Disturb and tap the touchpad to deactivate the feature. The 2. Place the pointer on top of screen displays Do Not Disturb: Off. Note: Once deactivated, you hear new notifications such as those for new incoming calls.
-
Page 50: Calls
Calls The icon displays on the screen if you receive a call while you are using the Gear VR. ► You can reject the call, by placing the pointer on top of your selection and tapping the touchpad. ► You cannot answer calls while using the Gear VR. To answer a call, separate the mobile device from the Gear VR and answer the call. -
Page 51: Viewing Notifications
Rejecting a call Incoming Call. 1. When a call comes in, move your head to place the pointer on top of 2. Move your head to place the pointer on top of Reject Call. 3. Once the button highlights, tap the touchpad to reject the incoming call. Viewing Notifications While using the Gear VR, you can view general notifications, such as events, messages, and alarms when they display as a pop-up notification on the screen. -
Page 52: Applications
Loading Using the Gear VR Store 1. Navigate to the HOME screen, place the pointer on the Store tab and tap the touchpad. 2. Select an application type (All or Samsung). 3. Swipe through the available pages and select an application entry. -
Page 53: Uninstalling Existing Applications
4. Once successfully installed, place the mobile device securely back into the Gear VR compartment (Installing the Mobile Device). 5. Navigate to the HOME screen, place the pointer on the Library tab and tap the touchpad. 6. Select the application and follow the prompts. Uninstalling Existing Applications You must uninstall applications from the OCULUS application (available on the mobile device’s Applications page). -
Page 54: Oculus Video
Oculus Video Enjoy videos on a screen in your own virtual movie theater. 1. Navigate to the HOME screen, place the pointer on the Library button and tap the touchpad. 2. Swipe across your touchpad until the Oculus Video app displays. 3. -
Page 55: Vr Gallery
VR Gallery View images and videos you created using the mobile device. 1. Navigate to the HOME screen, place the pointer on the Library button and tap the touchpad. 2. Swipe across your touchpad until the VR Gallery app displays. Playing videos ►... -
Page 56: Oculus 360 Videos
Viewing images Select an image folder and then select an image. • View previous image: Swipe backward across the touchpad. • View next image: Swipe foward across the touchpad. • Enlarge image size: Swipe upward on the touchpad. • Reduce image size: Swipe downward on the touchpad. •... -
Page 57: Oculus 360 Photos
Oculus 360 Photos This application provides 360 degree views of available panoramic images. 1. Navigate to the HOME screen, place the pointer on the Library button and tap the touchpad. 2. Swipe across your touchpad until the Oculus 360 Photos app displays, then select START. 3.