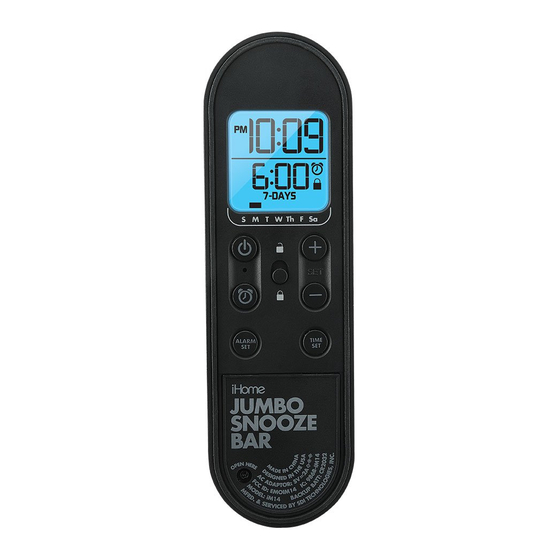
Summary of Contents for iHome IM14
-
Page 1: Usb Charging
Model: iM14 Jumbo Snooze Bar Alarm Clock with USB Charging instruction manual Questions? Contact Customer Service at 1-800-288-2792... -
Page 2: Table Of Contents
Important Safety Instructions...................................14 Troubleshooting.......................................15 Warranty Information ....................................16 What’s in the Box This product ships with the following items. Make sure all are present. 1. iM14 Alarm Clock 2. AC adaptor 3. Aux in cable 4. Instruction book Product Care • Place the unit on a level surface away from sources of direct sunlight or excessive heat. -
Page 3: Controls Overview
Controls Overview Top Panel Bottom Panel Display Snooze Power Button Button Power Plus/Minus Setting Indicator Buttons Alarm On/Off Button Button Lock Switch Alarm Set Time Set Button Button Power ON Alarm ON Indicator Indicator LED LED (blue) (green) Backup Battery Compartment (Use a Phillips screwdriver to loosen... -
Page 4: Display
Display Time display Note: This unit has motion detection that will turn on the display for 15 seconds when the unit is moved. When lit, indicates time displayed is PM (does not appear in 24 hour display mode) When lit, indicates alarm is active Alarm Time display When lit, indicates Button Lock is active When blinking, indicates backup batteries... -
Page 5: Setting The Clock
Setting the Clock Press and hold the Time Set Button until the 2 SECS hour flashes on the display and a beep sounds. Press and release the Plus or Minus Setting Button as needed to set the correct hour (hold for faster setting). NOTE: The PM indicator will light when the time is set for PM. - Page 6 Press and release the Time Set Button to confirm hour setting. The minutes will flash on the display. Press and release the Plus or Minus Setting Button as needed to set the correct minutes (hold for faster setting). Press and release the Time Set Button to confirm minute setting.
- Page 7 Press and release the Plus or Minus Setting Button as needed to set the correct day of the week by matching the day of the week indicator to the day of the week printed below the display. Press and release the Time Set Button to confirm clock setting.
-
Page 8: Setting And Using The Alarm
Setting and Using the Alarm Press and hold the Alarm Set Button until the hour and alarm icon flash on the 2 SECS lower half of the display and a beep sounds. Press and release the Plus or Minus Setting Button as needed to set the desired alarm hour (hold for faster setting). - Page 9 Press and release the Plus or Minus Setting Button as needed to set the desired alarm time minutes (hold for faster setting). Press and release the Alarm Set Button to confirm alarm minute setting. The alarm days schedule indicator will flash on the display. Press and release the Plus or Minus Setting Button as needed to set the desired alarm schedule:...
- Page 10 Press and release the Alarm Set Button to confirm alarm setting. 2 beeps will sound to confirm alarm setting is complete. The alarm icon, alarm time and alarm schedule will remain on the screen, indicating the alarm is armed. TURNING ALARM ON OR OFF Alarm is OFF Press and release the Alarm ON/OFF Button as needed to arm or disarm the...
- Page 11 RESETTING ALARM TO COME ON THE NEXT SET DAY Press and hold the ZZZ Snooze Button for 3 seconds while alarm is sounding to silence the alarm and reset it to come on again at the next 3 SECS scheduled day. For example, if set to WEEK DAYS, if pressed on Friday it will be reset to wake you again on Monday.
-
Page 12: Using The Aux-In Mode
Turn on your device and put it in play mode. The iM14 has auto detect and will turn on if audio is detected. If no audio is detected or unit does not turn on, press and release the Power Button to turn on the iM14. -
Page 13: Charging Devices Using The Usb Ports
Charging Devices Using the USB Port Connect a USB cable (not included) to the 1 Amp USB Charging Port located under the rubber seal on the right end of the unit and connect the other end to the device you wish to charge. Monitor charging status on the device. -
Page 14: Installing And Replacing Backup Battery
Installing and Replacing Backup Battery Your new alarm clock includes 1 CR2032 button cell battery (installed). Pull the battery pull tab before using the unit. This battery backup system will maintain the time and alarm settings during a tempo- rary power interruption. When the Battery Low Indicator on the lower right of the display is flashing, it’s time to replace the battery. -
Page 15: Important Safety Instructions
IMPORTANT SAFETY INSTRUCTIONS When used in the directed manner, this unit has been designed and manufactured to ensure your personal safety. However, improper use can result in potential electrical shock or fire hazards. Please read all safety and operating instructions carefully before installation and use, and keep these instructions handy for future reference. -
Page 16: Troubleshooting
Troubleshooting 1. The unit does not power ON. The unit is not connected to AC outlet, the AC outlet has no power, or is controlled by a wall switch that is “OFF”. Check AC outlet and wall switch. 2. Alarm does not come on? The alarm time AM or PM incorrectly set, Alarm was OFF, alarm is not scheduled to come on, etc. -
Page 17: Warranty Information
Limited 90 Day Warranty Information iHome Products, a division of SDI Technologies Inc. (hereafter referred to as SDI), warrants this product to be free from defects in workmanship and materials, under normal use and conditions, for a period of ninety (90) days from the date of original purchase.


