Nokia 9110 User Manual
Nokia cell phone user's manual
Hide thumbs
Also See for 9110:
- Quick manual (36 pages) ,
- Setting up dial-in service manual (16 pages) ,
- Connection manual (10 pages)

Related Manuals for Nokia 9110


Summary of Contents for Nokia 9110
- Page 1 User’s manual 9357168 ISSUE 3 EN Electronic user's guide released subject to "Nokia User's Guides Terms and Conditions, 7th June, 1998".
- Page 2 Nokia Mobile Phones is not responsible for any loss of data, income or any consequential damage howsoever caused. Geoworks ® application software and GEOS® operating system software copyright © 1990-1998 Geoworks. All rights reserved.
- Page 3 In this license agreement ("License Agreement"), you, the purchaser of the license rights granted by this Agreement, are referred to as "Licensee." In accordance with the terms and conditions of this License Agreement, Nokia Mobile Phones Ltd. ("Licensor") grants Licensee a non-exclusive sublicense to use SSL Software (“Software”), which contains the RSA Software licensed to Licensor by RSA Data Security, Inc.
- Page 4 1999 Nokia Mobile Phones. All Rights Reserved.
- Page 5 INFRARED PRECAUTIONS Do not point the IR beam at anyone’s eye or allow it to interfere with other IR devices. . To end a call press for several seconds, to clear the 1999 Nokia Mobile Phones. All Rights Reserved. . To . Give your...
-
Page 6: Table Of Contents
To transfer data from older communicator models Computer connectivity To use the PC Suite To use the Nokia Communicator Server Nokia Communicator Server for MacOs Contacts Contacts directory To make contact cards Contact groups Logs 1999 Nokia Mobile Phones. All Rights Reserved. - Page 7 Business cards SMS settings Internet Internet settings Mail Mail settings To send mail To fetch mail To read mail World Wide Web WWW settings Bookmarks To navigate in WWW Terminal Telnet Text Web 1999 Nokia Mobile Phones. All Rights Reserved.
- Page 8 System System settings Security User data Memory Infrared activation Digital camera connectivity Remote synchronisation Fax modem Data removal Install/Remove software Backup/Restore Memory card tool About this product Extras Calculator Clock Composer Voice recorder 1999 Nokia Mobile Phones. All Rights Reserved.
- Page 9 To use the menus Messages (Menu 1) Call register (Menu 2) Profiles (Menu 3) Settings (Menu 4) Call divert (Menu 5) Recorder (Menu 6) Troubleshooting Care and maintenance Important safety information Glossary Index 1999 Nokia Mobile Phones. All Rights Reserved.
- Page 10 1999 Nokia Mobile Phones. All Rights Reserved.
-
Page 11: Introduction
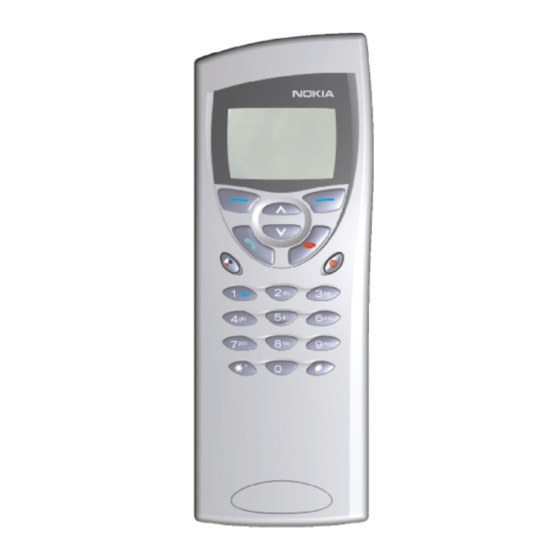
The Nokia 9110 Communicator consists of two parts: the phone and the communicator interface. The phone is on the device cover (figure 1) and the communicator interface is under the cover (figure 2). -
Page 12: About This Manual
There is a short glossary of Internet and cellular terms and abbreviations at the back of this manual. If you are switching from the Nokia 9000 Communicator or the Nokia 9000i Communicator to the Nokia 9110 Communicator, please, see ”To transfer data from older communicator models”... -
Page 13: Facts About Your Communicator
Services The GSM system provides a number of various wireless services, but they are not automatically enabled to the wireless phone user. Even though the Nokia 9110 Communicator represents the latest development in wireless phone technology, using its various communications applications requires that you have subscribed to these services and that your network operator has activated these services for you. -
Page 14: Facts About Cellular Data Transmission
Facts about cellular data transmission The Nokia 9110 Communicator employs the data transmission capabilities of the GSM network to send faxes, short messages and e-mail, and to establish connections with remote computers. - Page 15 If the cellular signals are not strong enough to support a voice call, data connection should not be attempted until you can find a location with better signal reception. Note: When the antenna is up, the signal is stronger. 1999 Nokia Mobile Phones. All Rights Reserved.
- Page 16 1999 Nokia Mobile Phones. All Rights Reserved.
-
Page 17: Getting Started
• Diskette package • CD-ROM with PC connectivity software • Stickers with the serial number and the lock code of the communicator For information about the Nokia 9110 Communicator accessories, see the Accessories guide. First start-up 1 Close the device cover and make sure that the phone is switched off. If it is... - Page 18 See figure 2. 4 When the SIM card is properly inserted into the SIM card slot, the bevelled corner will remain visible. See figure 3. 1999 Nokia Mobile Phones. All Rights Reserved. Figure 1 Figure 2 Figure 3...
- Page 19 9 Write the current date in the input field using the format dd.mm.yy, for example 22.03.98. Press OK. You can later change the date format in the System settings. Time and date can be changed in the settings of the Clock application. Figure 4 1999 Nokia Mobile Phones. All Rights Reserved.
-
Page 20: Communicator Display
Whenever the selection frame is shown, you can select items by moving the selection frame over the desired item with the up and down arrow keys. 1999 Nokia Mobile Phones. All Rights Reserved. Note: When taking the phone into use, observe the instructions... - Page 21 1 When a command is dimmed, it cannot be used, see figure 7. 2 When a cursor appears on a dotted line, enter a value with the keyboard, see figure 7. Figure 5 Figure 6 1999 Nokia Mobile Phones. All Rights Reserved.
- Page 22 Application icon Application name Call status Inbox/Outbox Field strength and battery level 1999 Nokia Mobile Phones. All Rights Reserved. Figure 7 Figure 8 next to it is selected, pressing Change toggles the next to it...
- Page 23 – The communicator is connected to a cellular network. When all the four bars are shown, the cellular signal reception is good. If the signal is weak, make sure the antenna is up. You can also try 1999 Nokia Mobile Phones. All Rights Reserved.
-
Page 24: Communicator Keyboard
Character (Chr) The character key is used to generate characters not on the communicator keyboard. A single press of the character key opens a table of special 1999 Nokia Mobile Phones. All Rights Reserved. Figure 9... -
Page 25: Communicator Applications
Contacts — Used for managing contact information, such as names, numbers and addresses. You can exchange contact information as business cards via the SMS application. Notes — Used for writing and storing documents. 1999 Nokia Mobile Phones. All Rights Reserved. -
Page 26: Connectors
Nokia 9110 Communicator saves all data. Connectors The Nokia 9110 can be connected to a variety of devices. The connectors are (figure 10): 1999 Nokia Mobile Phones. All Rights Reserved. Figure 10... -
Page 27: Battery
3 Connector for the RS-232 cable plug and the headset plug. Battery The Nokia 9110 Communicator is powered by a rechargeable Lithium-ion battery. The High Power Battery provides 3 to 6 hours of talk/fax/terminal time or 60 to 170 hours of standby time. Furthermore, up to 400 hours of standby time may be achieved when the phone is off. - Page 28 Always close the device cover before removing the battery. Closing the cover will save all data. 1999 Nokia Mobile Phones. All Rights Reserved.
- Page 29 The performance of Lithium-ion batteries is particularly limited in temperatures below 0°C (+32°F). Do not dispose of batteries in a fire! Batteries must be recycled or disposed of properly. Batteries must not be disposed of in municipal waste. 1999 Nokia Mobile Phones. All Rights Reserved.
- Page 30 1999 Nokia Mobile Phones. All Rights Reserved.
-
Page 31: Special Features
The backlight can be adjusted in the System settings. See ”System settings” on page 125. 1999 Nokia Mobile Phones. All Rights Reserved. - Page 32 2 Remove the battery: press the catch at the top of the battery and lift the battery away from the battery cavity. 1999 Nokia Mobile Phones. All Rights Reserved. Note: The memory card is not included in the sales package,...
- Page 33 To cancel the entire selection, press Chr-Q. If you want to select every item in a list, press Ctrl-A. If you want to cancel the selection, press Ctrl-A again. Figure 2 1999 Nokia Mobile Phones. All Rights Reserved.
-
Page 34: Document Features
Chr-up or down arrow Shift-Ctrl-left or right arrow Shift-right/left/up/ down arrow Shift-Chr-up or down arrow 1999 Nokia Mobile Phones. All Rights Reserved. Function Selects all Copies selected text Cuts selected text Pastes selected text Cancels the most recent operation Applies bold... - Page 35 Documentation section on the CD-ROM supplied in the communicator sales package, or see the Nokia Wireless Data Forum home page in the World Wide Web at http://www.forum.nokia.com. Please, refer to the user’s guide of the printer for detailed safety instructions on the device.
- Page 36 At [time] — The fax is waiting to be sent at the time you have specified. See ”Fax settings” on page 74. Sending [current page/total pages] — The number of the fax page that is being sent and the total number of the pages. 1999 Nokia Mobile Phones. All Rights Reserved. Figure 3...
-
Page 37: To Transfer Data From Older Communicator Models
You can make backups of the data in the Nokia 9000 Communicator or the Nokia 9000i Communicator with the Nokia Communicator Server program, and then restore the data to a same language version of the Nokia 9110 Communicator. You can transfer data in a similar way between the same language versions, e.g. - Page 38 2 Move your documents with the Nokia Communicator Server program onto a PC using the File transfer application. 3 Start the PC Suite for Nokia 9110 Communicator program on the PC and transfer the contacts, calendar data, and documents to the Nokia 9110 Communicator.
-
Page 39: Computer Connectivity
When using the PC Suite, you only need to connect your communicator to a PC; everything else is done on the PC. Note: Making or answering phone calls during a PC connection is not recommended as it might disrupt the operation. Figure 1 1999 Nokia Mobile Phones. All Rights Reserved. - Page 40 CD drive of your PC. If not, please, follow these steps: 1 Click the Windows “Start” button; then click “Run”. 2 If your PC has Windows 95, 98 or NT 4.0 (or later), type d:\9110.exe in the command line. If your PC has Windows 3.x, type d:\data\9110_31.exe.
- Page 41 Contacts The Contacts function of the PC Suite lets you create, edit and update contact cards on your Nokia 9110 Communicator, and transfer them between a PC and your communicator. To start the Contacts application, click on the Contacts icon in the main screen.
- Page 42 In the Advanced settings dialog, click on Field Mapping and match the fields of the PC application with those fields of the communicator that have been marked with asterisks, see figure 3. 1999 Nokia Mobile Phones. All Rights Reserved.
- Page 43 1000 contacts in each database. Refer to "Quick Start Tutorial" in Chapter 3 of the PC Suite for Nokia 9110 Communicator User Guide found on the CD-ROM for instructions on how to synchronise contacts on the memory card.
- Page 44 3 Select an item by clicking on it in the File Transfer screen with the mouse and drag and drop it to the appropriate PC directory or communicator folder. Backup / Restore 1999 Nokia Mobile Phones. All Rights Reserved. Figure 4...
- Page 45 Install / Remove The Install/Remove Software function lets you install and remove software from your communicator. Note: If you install to the Nokia 9110 Communicator software made for the older communicator models, be aware that the greyscales of the devices are different.
-
Page 46: To Use The Nokia Communicator Server
For Windows 3.11 and Apple Macintosh users the CD-ROM in the communicator sales package contains the Nokia Communicator Server program. With the Nokia Communicator Server you can install and use the communicator applications that require PC connectivity, see chapter 12 "System"... -
Page 47: Nokia Communicator Server For Macos
PC, and the other end to the connector at the bottom of the communicator. See ”Connectors” on page 26. 2 Start the Nokia Communicator Server software on the PC. Check that the COM port reported by the software is correct. - Page 48 1999 Nokia Mobile Phones. All Rights Reserved.
-
Page 49: Contacts
SMS messages. The Telephone, Fax, SMS, Calendar and Mail applications all use information found in the Contacts directory. Tip: You will find the Club Nokia Careline contact card in the Contacts directory. Club Nokia Careline answers questions and offers instructions over the phone. - Page 50 Zero / 10 days / 30 days / 1 year / User defined: days (0 – 365 days). To create a new contacts database on your memory card To create a new contacts database on your memory card, press the Menu button and select New contacts database. 1999 Nokia Mobile Phones. All Rights Reserved.
-
Page 51: To Make Contact Cards
To add new fields to a contact card 1 Press Fields in the currently opened contact card. See figure 2. 2 Press Add field. A pop-up box opens, listing the available fields. 1999 Nokia Mobile Phones. All Rights Reserved. - Page 52 Ringing tone — You can set a specific ringing tone for each contact in the Contacts directory. Select a tone from the list, and press Select. The appears at the top of the contact card. See figure 2. In order to use this 1999 Nokia Mobile Phones. All Rights Reserved. Figure 2 icon...
- Page 53 2 Select a field to which you want to assign a speed dial and press Change. 3 Select a number and press OK. The speed dial number will be shown in the contact card with the icon . See figure 2. 1999 Nokia Mobile Phones. All Rights Reserved.
- Page 54 To view the contact information on your SIM card 1 Press the Menu button in the Contacts directory, and select the SIM card memory option. 2 Select the contact with the selection frame and press Open. 1999 Nokia Mobile Phones. All Rights Reserved. Table 1...
-
Page 55: Contact Groups
To add new contacts to a group 1 Open the group contact card and press Add. A list of contacts opens. 2 Select the contact(s) you want and press Add. 1999 Nokia Mobile Phones. All Rights Reserved. -
Page 56: Logs
The clearing procedure reflects on the other log as well. To make a new contact card 1 Open the General log. 1999 Nokia Mobile Phones. All Rights Reserved. Figure 3 Note: Remote mailbox, Terminal and Internet connections are... - Page 57 2 Select a log event and press Create card. If the contact card already exists, the command is dimmed. To view only certain communication types 1 Open the General log and press Filter. 2 Select the communication type you want to view and press OK. 1999 Nokia Mobile Phones. All Rights Reserved.
- Page 58 1999 Nokia Mobile Phones. All Rights Reserved.
-
Page 59: Telephone
2 Press Call. If the contact has more than one phone number, a pop-up box opens, listing all the contact’s phone numbers. Choose a number from the list and press Call. 1999 Nokia Mobile Phones. All Rights Reserved. -
Page 60: To Answer A Call
Contacts directory, as in the figure 2, the caller’s name is shown on the note, if this feature is supported by the network. To answer the call, press Answer. Or, 1999 Nokia Mobile Phones. All Rights Reserved. Figure 1 Tip: When you open the Dialled,... -
Page 61: Handsfree Mode
After the audio has been set on, the command changes to Volume. Press Volume to adjust the speaker volume or to turn the audio off. The indicator shows the chosen volume level. . The caller will hear key on 1999 Nokia Mobile Phones. All Rights Reserved. -
Page 62: Multiple Calls
To end a call, select the call with the arrow keys and press End call. Note: The actual invoice for calls and services from your service provider may vary, depending upon network features, rounding-off for billing, taxes and so forth. 1999 Nokia Mobile Phones. All Rights Reserved. Figure 2... - Page 63 3 Once you have finished the private conversation, you can connect the person back into the conference call by pressing Conference call. Figure 3 1999 Nokia Mobile Phones. All Rights Reserved.
- Page 64 An alternating call is made as a voice call, but it changes into a fax call. An alternating call can be made to a fax box, for example: you initiate the call as 1999 Nokia Mobile Phones. All Rights Reserved. Note: Calls can be transferred only...
-
Page 65: Telephone Settings
Silent — You can set this profile on when you want all the alert tones to remain silent. Meeting — You can specify how the communicator operates when you are in a meeting. Outdoor — You can specify how the communicator operates when you are outdoors. Figure 4 1999 Nokia Mobile Phones. All Rights Reserved. - Page 66 Automatic answer — All calls are automatically answered. Available in the car profile only. Caller groups — Set one or several contact groups to Yes, and only those calls that come from people belonging to these groups, alert. All the other sounds 1999 Nokia Mobile Phones. All Rights Reserved.
- Page 67 While the communicator is making a request to the network, a query note is shown on the display. After a successful request, the new status now appears in the settings list. To cancel all call diverts or barrings, press Cancel call diverts or Cancel call barrings. 1999 Nokia Mobile Phones. All Rights Reserved.
- Page 68 (e.g. 112 or other official emergency number). 1999 Nokia Mobile Phones. All Rights Reserved. Note: If you have subscribed to the Alternate phone line service, this setting applies only to the selected...
-
Page 69: Flight Profile
2 While the FLIGHT PROFILE ACTIVE text is visible (for approximately five seconds) you can dial the emergency number, e.g. 112. 3 Press , and your short messages, faxes and mail will be 1999 Nokia Mobile Phones. All Rights Reserved. - Page 70 The flight profile will allow use of the communicator interface only and will prevent use of the phone. Be aware that all communications applications, Telephone, Fax, SMS, Mail, and Internet, require use of the phone. Figure 5 1999 Nokia Mobile Phones. All Rights Reserved.
-
Page 71: Fax
To forward a received fax 1 Select the Received faxes folder in the Fax main view and press Open. 2 Select a fax and press Open. 3 Press Forward to access the Fax directory. 1999 Nokia Mobile Phones. All Rights Reserved. - Page 72 Cover page, Send resolution, Logo file, Signature file, Begin sending, Resend, and ECM. For more information, see ”Fax settings” on page 74. To change an option, select it and press Change. 1999 Nokia Mobile Phones. All Rights Reserved. Figure 1...
-
Page 73: To Receive Faxes
To remove the viewed fax, press Delete. Tip: A list of shortcuts for viewing faxes and other operations can be found in ”Document features” on page Figure 2 . Select the fax and press 1999 Nokia Mobile Phones. All Rights Reserved. -
Page 74: Fax Settings
Cover page — Provides you with the following options: Header — The cover page contents will be attached to the beginning of the first fax page. 1999 Nokia Mobile Phones. All Rights Reserved. Figure 3 Tip: You can also use the Zoom button to magnify the fax on the display. - Page 75 Fax call diverting — This network service allows you to divert incoming faxes to another fax machine. For more information and instructions on how to change diverting and barring settings, see ”Telephone settings” on page 65. 1999 Nokia Mobile Phones. All Rights Reserved.
- Page 76 As voice/fax. This setting applies also to the Fax modem application. 1999 Nokia Mobile Phones. All Rights Reserved. Note: When you set Fax polling to On, Fax polling becomes one of the commands in the Fax main view.
-
Page 77: Short Messages
Business cards — All contact cards in the Contacts directory. Info messages — Informative messages sent by the network. Delivery reports — Information about the status of sent messages. Document outbox — See ”Document features” on page 34. Figure 1 1999 Nokia Mobile Phones. All Rights Reserved. -
Page 78: To Send Short Messages
3 Press Recent numbers to get a list of recent short message numbers, open one of the lists, select a contact, and press Select. 1999 Nokia Mobile Phones. All Rights Reserved. Note: You can only send short messages to wireless phone numbers stored in the Tel(GSM) field of contact cards. -
Page 79: To Receive Messages
1 When you receive a note informing you of a received short message, press View to read the message. Or, 2 Press Cancel to dismiss the note. You can then open the Received messages folder where unread received messages are marked with 1999 Nokia Mobile Phones. All Rights Reserved. -
Page 80: Standard Messages
Standard messages folder. To write a new standard message, open the Standard messages folder and press Write message. The commands in a new standard message are: 1999 Nokia Mobile Phones. All Rights Reserved. . Select the message and... -
Page 81: Business Cards
You can send your own business card or any contact card as a business card. Business cards sent from a device that supports the Nokia 9110 Communicator contact card format can be saved directly as new contact cards in the Contacts directory. -
Page 82: Sms Settings
SMS messages. If set to Yes, messages that are longer than 160 characters are sent as several messages, but if the recipient 1999 Nokia Mobile Phones. All Rights Reserved. Note: Sending a business card with an attached picture makes the message very long and may be expensive. - Page 83 Nokia 9110 Communicator or a Nokia 9000i Communicator, the messages are received as one long message. Receive info messages: Yes/No/View index — If your network supports this feature, it will send you information about various topics. If you choose View index, the network will send you a list of topics, and you can select those topics on which you wish to receive information.
- Page 84 1999 Nokia Mobile Phones. All Rights Reserved.
-
Page 85: Internet
Terminal — Allows your communicator to connect to computers, such as mainframe computers, that provide direct dial-in terminal services. Both Telnet and Terminal emulate the VT100 terminal. Text Web — Used for obtaining information from the Internet via SMS. 1999 Nokia Mobile Phones. All Rights Reserved. -
Page 86: Internet Settings
Before being able to use the Internet services, you need to configure an Internet connection. You can subscribe to the Internet services of selected providers in your country directly with your Nokia 9110 Communicator, provided that the data service is activated for your SIM card. See the instructions below. - Page 87 Press Delete to remove an access point. Provider name — The name of the Internet service provider. If you define the access point manually, the name can be edited freely. Figure 1 1999 Nokia Mobile Phones. All Rights Reserved.
- Page 88 Primary nameserver — The IP address of the primary nameserver. Secondary nameserver — The IP address of the secondary nameserver. 1999 Nokia Mobile Phones. All Rights Reserved. Tip: Some Internet service providers refer to these nameservers as DNS1 and DNS2.
-
Page 89: Mail
Mail The Nokia 9110 Communicator mail system is compliant with the Internet standards SMTP, IMAP4, POP3, MIME1 and MIME2. Mail is started in the Internet main view by selecting Mail and pressing the Select command button. The Mail main view shows the following folders: Own texts —... - Page 90 Signature file — Allows you to add your signature to the mail message. The signature file must first be stored as a text file in the Own texts folder, where it is then selected. 1999 Nokia Mobile Phones. All Rights Reserved. Note: E-mail addresses cannot contain accented...
- Page 91 System settings. Time limit: None/5/10/30/60 min — You can set the time limit for the fetching operation. This way your communicator will not fetch too large messages, which would take too much time. 1999 Nokia Mobile Phones. All Rights Reserved.
-
Page 92: To Send Mail
Remember that the mail address must contain the @ character, and that the address cannot contain accented characters. The Mail envelope opens whenever you are about to send mail, see figure 3. All the field entries are editable. 1999 Nokia Mobile Phones. All Rights Reserved. Figure 3... - Page 93 3 Select the document(s) from the Own texts and Downloaded files folders and press Select. 4 When all the desired attachments are in the list, press Close. 5 To send the message, press Send. 1999 Nokia Mobile Phones. All Rights Reserved.
-
Page 94: To Fetch Mail
To fetch a selected message 1 Select the mail message(s) you want to fetch and press Fetch selected. 2 After the mail has been fetched, the Remote mailbox view returns. 1999 Nokia Mobile Phones. All Rights Reserved. Figure 4 and deleted messages with icon is fetched to the Received mail folder. -
Page 95: To Read Mail
When you open a received mail, the following commands become available: Attachments — Lists all MIME attachments: text, image, audio, video or application. If the message does not contain any attachments, this command 1999 Nokia Mobile Phones. All Rights Reserved. - Page 96 URL, you can open a connection to the selected address by pressing Fetch. Hierarchical structure — Shows the hierarchical structure of the mail message. Print — Prints the message. Scroll to any of these and press Select. 1999 Nokia Mobile Phones. All Rights Reserved. Figure 5...
-
Page 97: World Wide Web
To exit the WWW, press Close or Hang up in the Bookmarks list, which is the main view of the application. This ends the data call and closes the WWW application. For information on how to create tailored WWW pages for the Nokia 9110 Communicator, see the documents on the CD-ROM. WWW settings To change the WWW settings: 1 Open the WWW application and press the Menu button. -
Page 98: Bookmarks
No proxy for — You may define domains for which the HTTP proxy is not needed. Domain names are separated with commas, for example nokia.com, edu.fi. You may specify the domains as accurately as you wish. Bookmarks The WWW main view shows the Bookmarks list. When you select a bookmark from the list, the name of the Internet access point used for connecting to the bookmark is shown on the top right corner. - Page 99 3 Enter the URL address of the bookmark, e.g. www.nokia.com, in the Address field. To set advanced bookmark properties Select Details and press Change. The advanced settings are: User name — If a user name is needed to fetch the bookmark, enter your user name here.
- Page 100 Pages fetched with the smart bookmarks function are stored in a folder cache. To empty the cache, press the Menu button in the smart bookmarks view and 1999 Nokia Mobile Phones. All Rights Reserved. Figure 7...
-
Page 101: To Navigate In Www
See figure 8. Tip: To select the next or previous hyperlink on the WWW page, press the Tab key or Shift + Tab, respectively. Figure 8 1999 Nokia Mobile Phones. All Rights Reserved. - Page 102 History — Contains a list of browsed documents. Find — You can search for various items, such as words in the WWW page. Open file — You can open files from the Own texts and Downloaded files folders. 1999 Nokia Mobile Phones. All Rights Reserved.
- Page 103 The commands in the external image viewer are the same as in the fax viewer. Tip: You can also reload a WWW page by pressing Ctrl-R. 1999 Nokia Mobile Phones. All Rights Reserved.
-
Page 104: Terminal
Local echo for incoming data call — If set to On, characters typed from the communicator keyboard are echoed locally to the communicator. If set to Off, they are echoed to the remote host computer. 1999 Nokia Mobile Phones. All Rights Reserved. Caution: Beware of viruses. Only install on the communicator... - Page 105 Line end — Defines which character is generated with the Enter key in the terminal session. The alternatives are: Carriage return (CR), Linefeed (LF), and Carriage return - Linefeed (CR/LF). 1999 Nokia Mobile Phones. All Rights Reserved.
- Page 106 2 Press Capture text. All interaction with the host will be recorded in a file in the Downloaded files folder. Control characters, except line changes, will not be stored. Press Stop capture to end the text capture process. 1999 Nokia Mobile Phones. All Rights Reserved.
-
Page 107: Telnet
To change the IAP, press Change and select a new IAP from the list. Backspace key: BS/DEL — Defines whether the keyboard backspace key is used as a backspace (BS) or delete (DEL) key. 1999 Nokia Mobile Phones. All Rights Reserved. - Page 108 Press Hang up to close the connection to the host, end the data call and return to the Telnet application main view. 1999 Nokia Mobile Phones. All Rights Reserved. Figure 10 Note: The text transfer function is also available in Telnet. See “To...
-
Page 109: Text Web
You can also access services provided by your network operator and Nokia. Nokia services The contents are maintained by Nokia, and they cannot be changed. Nokia updates the contents from time to time. Operator services The Operator services allows the network operator to provide various services to the subscribers. - Page 110 To open the selected form, press Open. The TTML browser opens up with the same commands as above. To rename a service, press Rename in the Saved forms main view. To remove the selected form, press Delete. 1999 Nokia Mobile Phones. All Rights Reserved.
-
Page 111: Notes
1 Press Write note. The note editor opens. 2 Write the document. To read a document 1 Select a folder and press Open. 2 Select a document from the list and press Open. Figure 1 1999 Nokia Mobile Phones. All Rights Reserved. - Page 112 Copy to sounds — You can add the selected tune to the list of ringing tones. Transfer via IR — You can copy files to another Nokia 9110 Communicator via the infrared link. The IR port of the receiving device must be activated before the operation.
-
Page 113: To Edit Documents
2 Move the selection frame over the desired character with the arrow keys. 3 Press Insert to close the character table and to insert the selected character to the left of the cursor. Figure 2 1999 Nokia Mobile Phones. All Rights Reserved. -
Page 114: Downloaded Files And Read-Only Documents
4 Edit the new note normally. The contents of a received fax cannot be converted into text or edited. Opening a fax activates the fax viewer and opening an image activates the image viewer. 1999 Nokia Mobile Phones. All Rights Reserved. -
Page 115: Notes Settings
Margins — Opens a new view where you can define values for the top, bottom, left or right margin. The unit of measurement used in this setting is either inches or centimetres, and it can be changed in the System settings. 1999 Nokia Mobile Phones. All Rights Reserved. - Page 116 1999 Nokia Mobile Phones. All Rights Reserved.
-
Page 117: Calendar
If the whole date has been reserved for an event, the event is shown in the daily events list in bold (as “Design conference” in figure 1). To write yourself reminders of important matters, press To-do list. Figure 1 1999 Nokia Mobile Phones. All Rights Reserved. -
Page 118: Weekly Schedule
The details will be shown on the bar across the bottom of the weekly schedule. To view the previous event, press Shift and Tab. 1999 Nokia Mobile Phones. All Rights Reserved. Tip: To add events to the monthly and weekly schedules, just start writing the event description. -
Page 119: Daily Schedule
To adjust the details of the selected event Press Details. A new view opens, allowing you to adjust the following details: Description — The description of the event. Figure 3 1999 Nokia Mobile Phones. All Rights Reserved. - Page 120 To-do list — Opens the To-do list. Available in the daily schedule only. Pending requests — Opens the list of pending calendar event requests. Today — Shows the current day. Next month/week/day (Ctrl-N) — Shows the next month, week or day. 1999 Nokia Mobile Phones. All Rights Reserved.
-
Page 121: Calendar Booking
2 Press Calendar booking in the Details view. 3 Select whether to send the event as a request or a reservation. 4 Press Transfer via IR to send the booking to another Nokia 9110 Communicator via the infrared link, or press Send as SMS to open the SMS directory where you can select the recipient for the booking. - Page 122 1 Remove the event from your own calendar. Your communicator will check the “Event sent to” list (see ”Daily schedule” on page 119) and send a 1999 Nokia Mobile Phones. All Rights Reserved. Figure 4 Note: Old events are not removed when new events are added, even if they have the same date and time.
-
Page 123: Alarms
Move to To-do list. To-do list The To-do list is a list of tasks which must be completed eventually, but are not connected to any specific time or day. The entries in the To-do list are 1999 Nokia Mobile Phones. All Rights Reserved. - Page 124 To write down a new to-do task, press New. An empty entry field is added at the end of the To-do list. To remove the currently selected task from the list, press Delete. 1999 Nokia Mobile Phones. All Rights Reserved. Figure 5...
-
Page 125: System
Grande valse will replace it. Alternate ringing tone — If your SIM card supports the alternate line service, you can select a different ringing tone for Line 2. See ”Telephone settings” on page 65. 1999 Nokia Mobile Phones. All Rights Reserved. - Page 126 Backlight period — You can set the time period for which the backlight is switched on. The available settings are 15/30/45 seconds /1/2/3/4/5 minutes. The backlight can also be turned off by pressing the 1999 Nokia Mobile Phones. All Rights Reserved. button. Figure 1...
-
Page 127: Security
2 If the Autolock period is in use, the device will lock immediately. If the Autolock period is off, you must enter your lock code before the device is locked. Note: Extensive use of the backlight may drain the battery. 1999 Nokia Mobile Phones. All Rights Reserved. - Page 128 PIN code request is set to Off, the PIN code cannot be changed. Pressing Close will close the security settings and return to the Security main view. 1999 Nokia Mobile Phones. All Rights Reserved. Tip: Most of the security features can also be changed in the Security options menu of the phone.
- Page 129 PUK2 code to unblock the PIN2 code. The length of the PIN2 code is 4 to 8 digits. Figure 2 Note: Some SIM cards do not allow you to turn the PIN code request off. 1999 Nokia Mobile Phones. All Rights Reserved.
-
Page 130: User Data
If the memory is getting low, you should remove some documents. Before removing, you can print, fax or mail them, or transfer them to a PC or a memory card. 1999 Nokia Mobile Phones. All Rights Reserved. Note: Avoid using codes that are similar to emergency numbers to prevent accidental dialling of the emergency number. -
Page 131: Infrared Activation
Infrared activation If you want to use the PC Suite for Nokia 9110 Communicator program (see ”To use the PC Suite” on page 39) with the infrared connection, or if you want to receive data from another device via the infrared, you need to use the Infrared activation application. -
Page 132: Remote Synchronisation
With this application, you connect to the PC via the Internet. Note that you need an Internet access point, see ”Internet settings” on page 86. The PC Suite for Nokia 9110 Communicator program must be running on the PC to which you are connecting. -
Page 133: Fax Modem
PC application that you are using. A list of common AT commands based on the ETSI 07.07 standard and supported by the Nokia 9110 Communicator are available in the atcomm.txt file on the diskette included in the sales package of your communicator. -
Page 134: Data Removal
To use this application, you need to start the Nokia Communicator Server on your PC and connect your communicator to the PC. See ”To use the Nokia Communicator Server” on page 46. Press Install and select the software you want to install, or press Remove and select the software you want to remove. -
Page 135: Backup/Restore
PC. To use this application, you need to start the Nokia Communicator Server on your PC and connect your communicator to the PC. See ”To use the Nokia Communicator Server” on page 46. - Page 136 1999 Nokia Mobile Phones. All Rights Reserved.
-
Page 137: Extras
The results of the calculations appear in bold. As long as you have not pressed Enter or “=”, you can move in the calculation string with the arrow keys and edit the string. Figure 1 1999 Nokia Mobile Phones. All Rights Reserved. -
Page 138: Clock
The Clock shows the time and date in your home city and country, as well as in several other cities and countries in the world. The Clock also includes an alarm clock. 1999 Nokia Mobile Phones. All Rights Reserved. Function decimal point... - Page 139 OK button. However, if the alarm interval is set to zero, the alarm will sound only once. Set the alarm interval in the clock settings. Figure 2 1999 Nokia Mobile Phones. All Rights Reserved.
- Page 140 Area code — The area code required when calling the city. The area code can be entered with or without a national prefix. Only numbers can be entered. 1999 Nokia Mobile Phones. All Rights Reserved. Figure 3...
-
Page 141: Composer
Composer The Composer application enables you to create your own, customised ringing tones. To start the composer for the selected tune, press Open. To compose a new tune press Compose. 1999 Nokia Mobile Phones. All Rights Reserved. - Page 142 To accept the tempo, press OK. To test the tempo, press Test. The tune will be played with the tempo 1999 Nokia Mobile Phones. All Rights Reserved. Note: To edit the preset tunes that were in the communicator at the time of purchase, press the Menu button and select Copy.
- Page 143 To send the composition(s), press Send. When you receive a composition via SMS, a note showing the name or number of the sender and the name of the sent composition will appear on the display. 1999 Nokia Mobile Phones. All Rights Reserved.
-
Page 144: Voice Recorder
1 Open the file into which you want the sound to be recorded, and press Record. If you are recording a telephone conversation, you will hear a tone when the recording starts. 1999 Nokia Mobile Phones. All Rights Reserved. Tip: With the Voice recorder you can record sounds and speech and set them as ringing tones. - Page 145 Copy from memory card — Copies the selected recording from the memory card to your communicator. Note: Sound files that the voice recorder can play have a .WAV extension and support the following audio format: 8, 11, 22 or 44khz, PCM/A-law, Stereo/Mono, 8bit. 1999 Nokia Mobile Phones. All Rights Reserved.
- Page 146 1999 Nokia Mobile Phones. All Rights Reserved.
-
Page 147: Phone
When a call is active, pressing the scroll keys adjusts the volume level. — Dials a phone number and answers a call. — Ends any active call, cancels a dialled call, or clears the display. Figure 1 1999 Nokia Mobile Phones. All Rights Reserved. -
Page 148: Display Indicators
The display indicators inform you about the current operation of the phone. The indicators described below are shown when the phone is ready for use, with no characters entered by the user on the display. 1999 Nokia Mobile Phones. All Rights Reserved. Figure 2... -
Page 149: To Make A Call
Note: The microphone and earpiece are on the rear of the device. 4 After the conversation, end the call by pressing twice quickly. The keys to lower or raise the 1999 Nokia Mobile Phones. All Rights Reserved. -
Page 150: To Answer A Call
During a conference call, One to one allows you to converse privately with a selected participant. Transfer — The voice call transfer enables you to connect two voice calls 1999 Nokia Mobile Phones. All Rights Reserved. . You can answer the call even while using . The caller will... -
Page 151: To Search For Phone Numbers
1 Key in the number of the speed dial location where you have stored the to swap between the . If the person has several phone numbers, until you reach the correct one. 1999 Nokia Mobile Phones. All Rights Reserved. -
Page 152: To Send Dtmf Tones
When the communicator is removed from the car kit, without having been switched off, the keypad will be locked automatically again. 1999 Nokia Mobile Phones. All Rights Reserved. Note: Number 1 is the speed dial location of your voice mailbox. To... -
Page 153: Help
3 Press Select to enter the menu. If the menu contains any submenus, reach the one you want with either 4 Press Select. The selection frame is on the current setting. key within 3 seconds. icon and the Unlock command are key within 3 seconds. 1999 Nokia Mobile Phones. All Rights Reserved. -
Page 154: Menu Structure
SETTINGS CALL MENU 5 DIVERT MENU 6 RECORDER 1999 Nokia Mobile Phones. All Rights Reserved. Submenus 1 Received short messages, 2 Info service, 3 Service command editor, 4 Voice messages 1 Missed calls , 2 Received calls 4 Erase recent call lists, 5 Show call duration... -
Page 155: Messages (Menu 1)
You may read messages on topics that you have pre-defined on the communicator interface, see ”SMS settings” on page 82. 1 Press Select to view the list of available choices. to select it and then press Read. while viewing 1999 Nokia Mobile Phones. All Rights Reserved. symbol in the... -
Page 156: Call Register (Menu 2)
(Menu 2-1), received (Menu 2-2) or dialled (Menu 2-3). Note that the Received calls and Missed calls functions are network services which work only in networks that allow you to view the caller’s phone number. 1999 Nokia Mobile Phones. All Rights Reserved. Note: The communicator only registers missed calls when the phone is switched on and within network coverage. - Page 157 PIN2 code. Contact your service provider for more information. Last call cost (Menu 2-6-1) Shows the cost of the last, or current, call. All calls’ cost (Menu 2-6-2) Shows the total cost of all calls made with the current SIM card. 1999 Nokia Mobile Phones. All Rights Reserved.
-
Page 158: Profiles (Menu 3)
One profile is always in use. To set on a profile 1 Press Menu. 2 Scroll with 1999 Nokia Mobile Phones. All Rights Reserved. to insert a decimal point. Next, enter the currency name. to Profiles and press Select. to insert a decimal point. -
Page 159: Settings (Menu 4)
Call waiting (Menu 4-1-4) Call waiting is a network service. Contact your operator for subscription. See ”Telephone settings” on page 65. key on the phone keypad. 1999 Nokia Mobile Phones. All Rights Reserved. - Page 160 Welcome note (Menu 4-2-5) You can write a message of up to 36 characters which appears on the display when you switch on the phone. 1999 Nokia Mobile Phones. All Rights Reserved. Note: The communicator consumes more power when the Cell info display...
- Page 161 Voice call barring (Menu 4-3-2) Call barring is a network service; contact your operator for subscription. See ”Telephone settings” on page 65. 1 Scroll to one of the following barring modes and press Select. All outgoing calls 1999 Nokia Mobile Phones. All Rights Reserved.
- Page 162 Off — Calls can be made and received in the normal way. You can use this option only if you are entitled to do so. 1999 Nokia Mobile Phones. All Rights Reserved. Note: The SIM card contents cannot be accessed if the...
-
Page 163: Call Divert (Menu 5)
2 Scroll to Activate. You will be asked for the phone number to which you wish to divert the incoming calls. The Cancel option sets the divert mode off. Status shows what kind of calls are being diverted. 1999 Nokia Mobile Phones. All Rights Reserved. -
Page 164: Recorder (Menu 6)
2 Scroll to Play last and press Select. Or, if you want to play an older record- ing, follow the steps above. The other party will also hear the recording. 1999 Nokia Mobile Phones. All Rights Reserved. Note: Local laws may apply to recording conversations. -
Page 165: Troubleshooting
In that case, check that the temperature of the battery is not above +45°C (+113°F). Wait for a while, disconnect the charger, connect it again and retry. If charging still fails, contact your local Nokia dealer. 2. Power comes on, but the phone does not work Reboot the communicator by removing the battery and replacing it again. - Page 166 Caution: All temporary files will be removed. The Document outbox will be cleared, the default application settings restored, but for example, the SMS message centre number, Internet access point and Remote mailbox settings will be lost. Stored documents will not be affected. 1999 Nokia Mobile Phones. All Rights Reserved.
- Page 167 If you cannot select a contact in the Telephone, Fax, SMS or Mail directory, the contact card does not have a telephone number, fax number, wireless phone number or an e-mail address. Add the missing information to the contact card in the Contacts application. 1999 Nokia Mobile Phones. All Rights Reserved.
- Page 168 If you receive service provider error messages when connecting to your Remote mailbox, contact your remote mailbox service provider. Your Remote mailbox may contain corrupted mail messages or the mail server settings may be incorrect. 1999 Nokia Mobile Phones. All Rights Reserved.
- Page 169 The communicator may be connected to a PC, laptop, printer, digital camera, wireless phone or another communicator via the infrared link. If you are using the PC Suite for Nokia 9110 Communicator program on your PC, or if you want to receive data from another communicator or a digital camera, you will have to start the Infrared activation application on your communicator before the connection is made.
- Page 170 If you have problems establishing a data connection with the remote modem, try fixing the data transmission rate by using an AT command. Common AT commands based on the ETSI 07.07 standard and supported by the Nokia 9110 Communicator are listed in the atcomm.txt file on the diskette supplied with the communicator.
-
Page 171: Care And Maintenance
16. Care and maintenance Your Nokia 9110 Communicator is a product of superior design and craftsmanship and should be treated with care. The suggestions below will help you to fulfil any warranty obligations and to enjoy this product for many years. - Page 172 1999 Nokia Mobile Phones. All Rights Reserved.
-
Page 173: Important Safety Information
Should always keep the communicator more than 20 cm (6 inches) from their pacemaker when the phone is switched on; Should not carry the communicator in a breast pocket; Should use the ear opposite the pacemaker to minimise the potential for in- 1999 Nokia Mobile Phones. All Rights Reserved. - Page 174 Faulty installation or service may be dangerous and may invalidate any warranty which may apply to the unit. Check regularly that all wireless phone equipment in your vehicle is mounted and operating properly. 1999 Nokia Mobile Phones. All Rights Reserved.
- Page 175 Emergency calls IMPORTANT! The Nokia 9110 Communicator, like any wireless phone, operates using radio signals, wireless and landline networks as well as user-programmed functions which cannot guarantee connection in all conditions. Therefore you should never rely solely upon any wireless phone for essential communications (e.g.
- Page 176 The manual activation commands for various services are not presented in this manual (e.g., using the characters for activating or deactivating services). The Nokia 9110 Communicator, nevertheless, is capable of handling commands given in that form. For these commands, please consult with your service providers.
-
Page 177: Glossary
These commands give the advanced user an opportunity to control all the features of the modem. A list of common AT commands based on the ETSI 07.07 standard and supported by the Nokia 9110 Communicator are available in the atcomm.txt file on the diskette included in the sales package of your communicator. - Page 178 A standard Internet format which permits including multiple mail objects in a single message. The mail objects can be, for example, formatted multifont text messages and non-textual elements, such as images and audio fragments. 1999 Nokia Mobile Phones. All Rights Reserved.
- Page 179 When the SIM is rejected, you will need a new SIM card. You cannot change the PUK code. If you lose the code, contact your network operator. 1999 Nokia Mobile Phones. All Rights Reserved.
- Page 180 Link information required by the WWW to connect to a given WWW host computer. The URL usually starts with http:// followed by www. For example, the Nokia Wireless Data Forum home page can be found at http://www.forum.nokia.com. URLs are often referred to with phrases like “Home page location,”...
-
Page 181: Index
Business cards 81 Cable connection 40 Cache 97 Emptying 103 Calendar Adding events 119 Alarms 123 Booking password 121 Cancelling and changing bookings 122 Memos 120 Receiving bookings 122 Sending bookings 121 Caller groups 66 1999 Nokia Mobile Phones. All Rights Reserved. - Page 182 Selecting destination city 140 Cleaning the communicator 171 Clock settings 141 Codes Lock code 130 PIN code 129 PIN2 code 129 PUK code 179 PUK2 code 180 Composing tunes 141 Conference call 63 1999 Nokia Mobile Phones. All Rights Reserved.
- Page 183 Printing 112 Reading 111 Read-only documents 114 Sending 114 Transferring via IR 112 Writing 111 Downloaded files Installing 104 Opening 114 DTMF tones Sending 64 Special characters 54 Storing 54 Emergency calls 175 1999 Nokia Mobile Phones. All Rights Reserved.
- Page 184 General log 56 Handsfree mode 61 Help Application help 32 General help 32 Phone 153 Images Contact images 53 Transferring 131 WWW images 103 Import/Export Calendar 46 Contacts 46 Indicators 22 Individual log 56 1999 Nokia Mobile Phones. All Rights Reserved.
- Page 185 Fetching attachments 91 Font 90 Forwarding 96 Opening attachments 95 Printing 96 Reading 95 Remote mailbox 94 Removing messages 95 Replying 96 Sending 92 Sending upon request 93 Timed fetching 92 Writing 92 Margins 113 1999 Nokia Mobile Phones. All Rights Reserved.
- Page 186 Booking password 121 Internet password 88 Mail password 91 WWW password 99 PC connectivity Cable connection 40 Infrared connection 40 PC Suite for Nokia 9110 Communicator Installing 40 PIN code 129 PIN2 code 129 1999 Nokia Mobile Phones. All Rights Reserved.
- Page 187 Playing a recording 144 Recording 144 Remote mailbox 89 Resetting the communicator 166 Ringing tones Alternate ringing tone 125 Composing 141 Recording 144 Selecting 125 Sending 143 Setting individual tones 52 Settings 66 1999 Nokia Mobile Phones. All Rights Reserved.
- Page 188 SIM card Installing 17 Viewing contents 54 Forwarding 80 Receiving 79 Replying 80 Sending 78 Setting message centre number 82 Writing 78 Special characters 113 Speed dialling Settings 53 Using 151 Standard messages 80 1999 Nokia Mobile Phones. All Rights Reserved.
- Page 189 Text (Telnet, Terminal) 106 Unit of measure 127 Unlocking Communicator 128 Keypad 153 Voice mailbox Calling 69 Setting number 69 Volume Adjusting loudspeaker 61 Communicator key click 66 Phone key click 66 Ringing tone 66 1999 Nokia Mobile Phones. All Rights Reserved.
- Page 190 Creating a bookmark folder 99 Downloading software 104 Fetching a page 98 Following a hyperlink 102 Navigation commands 102 Saving a page 103 Saving the HTML format 99 Timed fetching 100 Viewing images 103 Zoom button 31 1999 Nokia Mobile Phones. All Rights Reserved.