Table of Contents
Advertisement
> Before start
> Hookup
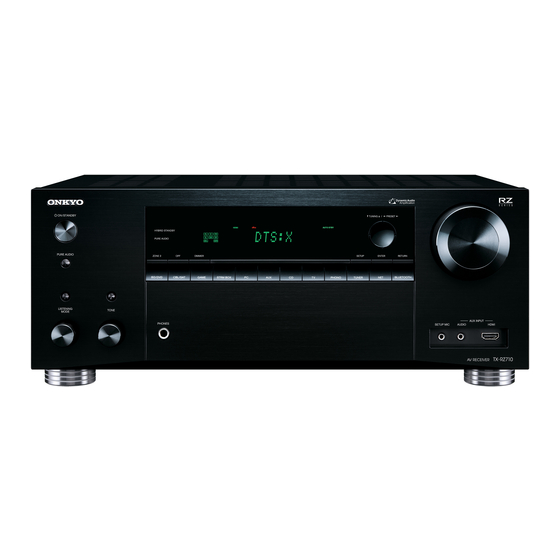
AV RECEIVER
TX-RZ710
> Setup
> Playback
Basic Manual
> Part Names
Hookup
Step1: Choose your Speaker Layout .......................................3
Step2: Connect the Speakers ..................................................9
Step3: Connect the TV ..........................................................11
Step4: Connect the AV Components .....................................13
Step5: Multi-zone Connection ...............................................16
Step6: Connect Other Cables ................................................19
Setup
Step7: Power On & Initial Setup ............................................20
HDMI Setup ...........................................................................21
Basic Playback ......................................................................22
Network Functions .................................................................23
Others ....................................................................................25
Front Panel ............................................................................27
Rear Panel ............................................................................28
Remote Controller .................................................................29
Display ...................................................................................29
This manual includes information needed when starting up and also
instructions for frequently used operations. The "Advanced Manual" is
available on the internet with details about the playback features/
listening modes/settings details, specifications, and troubleshooting.
The Advanced Manual is created in a format that makes it easy to read
on a PC or Smartphone.
http://www.onkyo.com/manual/txrz710/adv/en.html
Advanced Manual found here
Advertisement
Table of Contents

Related Manuals for Onkyo TX-RZ710


Summary of Contents for Onkyo TX-RZ710
-
Page 1: Table Of Contents
The Advanced Manual is created in a format that makes it easy to read AV RECEIVER on a PC or Smartphone. TX-RZ710 http://www.onkyo.com/manual/txrz710/adv/en.html Advanced Manual found here... -
Page 2: Main Features
> Before start > Hookup > Setup > Playback > Part Names What's in the box 1. Main unit 2. Remote controller (RC-911R) ×1, Batteries (AAA/R03) ×2 3. Indoor FM antenna ×1 4. AM loop antenna ×1 5. Speaker setup microphone ×1 6. -
Page 3: Step1: Choose Your Speaker Layout
> Before start > Hookup > Setup > Playback > Part Names Step1: Choose your Speaker Layout For 5.1-Channel System This is a 5.1-channel system that is the basic surround system. Front speakers output front stereo sound and a center speaker outputs center sound such as dialogs and vocals. - Page 4 > Before start > Hookup > Setup > Playback > Part Names For 7.1-Channel System (with Surround Back Speakers) This is a system with surround back speakers added to the basic 5.1-channel system. The connection of surround back speakers improves the sense of envelopment and connectivity of sound created by the back sound field and provides a more real sound field.
- Page 5 > Before start > Hookup > Setup > Playback > Part Names For 7.1-Channel System (with Height Speakers-A) Front High or Rear High speakers This is a basic 5.1-channel system with the addition of height speakers, either as front high speakers or rear high speakers.
- Page 6 > Before start > Hookup > Setup > Playback > Part Names For 7.1-Channel System (with Height Speakers-B) Ceiling speakers This is a basic 5.1-channel system using ceiling speakers, for example, with the addition of height speakers, either as top front speakers, top middle speakers, or top rear speakers.
- Page 7 > Before start > Hookup > Setup > Playback > Part Names For 7.1-Channel System (with Height Speakers-C) Dolby enabled speakers This is a basic 5.1-channel system using Dolby enabled speakers, with the addition of height speakers, either as Dolby enabled speakers (front) or Dolby enabled speakers (surround).
- Page 8 > Before start > Hookup > Setup > Playback > Part Names For Bi-Amping the Speakers It is possible to connect front speakers supporting Bi- Amping to improve quality of the bass and treble. The maximum number of channels available with this connection is 5.1 because Bi-Amping speakers require one amplifier for the tweeter jacks and one amplifier for the woofer jacks.
-
Page 9: Step2: Connect The Speakers
> Before start > Hookup > Setup > Playback > Part Names Step2: Connect the Speakers in case of: Pages 3 to 7 Connect 123456 for a 5.1-channel system. For a 7.1-channel system, select either surround back speakers or height speakers, and connect 78. Up to two powered subwoofers can be connected. - Page 10 > Before start > Hookup > Setup > Playback > Part Names in case of: Page 8 Connect front speakers compatible with Bi-Amping connection to the FRONT jacks and the SURROUND BACK or HEIGHT jacks. Make sure you remove the jumper bar fitted between the woofer jacks and tweeter jacks of the front speakers.
-
Page 11: Step3: Connect The Tv
> Before start > Hookup > Setup > Playback > Part Names Step3: Connect the TV if you have: ARC TV This unit is connected between your TV and AV components. If you connect two or more AV components, you can select the video displayed on the TV and the audio output from this unit by changing the input selector. - Page 12 > Before start > Hookup > Setup > Playback > Part Names if you have: Non-ARC TV This unit is connected between your TV and AV components. If you connect two or more AV components, you can select the video displayed on the TV and the audio output from this unit by changing the input selector.
-
Page 13: Step4: Connect The Av Components
> Before start > Hookup > Setup > Playback > Part Names Step4: Connect the AV Components if you have: HDMI AV Components This is an example of connection with an AV component that has an HDMI jack. With connection to an AV component that conforms with the CEC (Consumer Electronics Control) standard, you can use features such as the HDMI CEC feature that links with the input selector,... - Page 14 > Before start > Hookup > Setup > Playback > Part Names if you have: Non-HDMI AV Components This is an example of connection with an AV component that does not have an HDMI jack. Make the connections to the AV component to match the jacks it has. When video input connection is to the BD/DVD jack, the audio input connection should also be to the BD/DVD jacks, and so on, so that you connect the video input jacks to the...
-
Page 15: Audio Components
> Before start > Hookup > Setup > Playback > Part Names if you have: Audio Components Example of a connection with an audio component. Connect a CD player using a digital optical cable or analog audio cable. You can also connect a turntable that has an MM-type cartridge to the PHONO jack. -
Page 16: Step5: Multi-Zone Connection
> Before start > Hookup > Setup > Playback > Part Names Step5: Multi-zone Connection if you connect: ZONE 2 TV You can enjoy content from a Blu-ray Disc player on a TV equipped with an HDMI input jack in the separate room (ZONE 2) by playing a Blu-ray Disc player in the main room (where this unit is located), or play the content from another AV component. - Page 17 > Before start > Hookup > Setup > Playback > Part Names if you connect : ZONE 2 PRE/LINE OUT You can enjoy 2ch audio in the separate room through speakers connected to a pre-main amplifier or power amplifier by, for example, playing a Blu-ray Disc player in 7.1 ch in the main room (where this unit is located) and listening to internet radio in the separate room (ZONE 2).
- Page 18 > Before start > Hookup > Setup > Playback > Part Names if you connect: (ZONE 2A for North ZONE 2 SPEAKER American models) You can enjoy 2ch audio in the separate room by, for example, playing a Blu-ray Disc player in the main room (where this unit is located) and listening to internet radio through the speakers in the separate room (ZONE 2).
-
Page 19: Step6: Connect Other Cables
> Before start > Hookup > Setup > Playback > Part Names Step6: Connect Other Cables Antenna Hookup Network Hookup Move the antenna around while playing the radio to find Connect this unit to the network using wired LAN or Wi-Fi the position with the best reception. -
Page 20: Step7: Power On & Initial Setup
> Before start > Hookup > Setup > Playback > Part Names Step7: Power On & Initial Setup Initial Setup starts automatically 1. AccuEQ Room Calibration Once all connections are complete, change the TV's input to the input for this unit, inset batteries in the remote Place the supplied speaker setup microphone in the controller, and press Í... -
Page 21: Hdmi Setup
> Before start > Hookup > Setup > Playback > Part Names HDMI Setup 2. Source Connection To switch between upper and lower case, select "A/a" on HDMI CEC the screen and press ENTER. To select whether to mask Make this setting to enable the control feature for devices the password with "... -
Page 22: Basic Playback
> Before start > Hookup > Setup > Playback > Part Names Basic Playback AV Component Playback Digital and DTS-HD Master Audio is displayed (only with the MUSIC button) which is best for for DTS-HD Master Audio. The output is Stereo playback of classical and opera pieces. -
Page 23: Network Functions
> Before start > Hookup > Setup > Playback > Part Names Network Functions Network Services Player 11 or 12 network servers or NAS that are compatible with home network functionality. You may need to make some 1. Switch the input on the TV to that assigned to ®... -
Page 24: Airplay
8 paired devices. mode, press the button on the remote controller, Onkyo TX-XXX then in the Setup menu displayed set "5. Hardware" – 0 The coverage area is 48 feet (15 meters). Note that "Power Management"... -
Page 25: Multi-Zone
> Before start > Hookup > Setup > Playback > Part Names Others Listening To the Radio Multi-zone 1. Press TUNER (a) on the remote controller repeatedly to Play select either "AM" or "FM" on the display. 1. While holding down MODE (a) on the remote controller, 2. -
Page 26: When Unit Is Operating Erratically
> Before start > Hookup > Setup > Playback > Part Names or the ZONE 2 SPEAKER, adjust with VOL+/– on the remote Others When the unit is operating erratically controller. To control on the main unit, press ZONE 2 and adjust with the MASTER VOLUME control within 8 seconds. -
Page 27: Front Panel
> Before start > Hookup > Setup > Playback > Part Names Front Panel 1. Í ON/STANDBY button: Turns the unit on or into 7. DIMMER button: You can adjust the brightness of the "Movie/TV", "Music", "Game", then turn the dial to standby mode. -
Page 28: Rear Panel
> Before start > Hookup > Setup > Playback > Part Names Rear Panel 90° 180° 16 17 18 1. DIGITAL IN OPTICAL/COAXIAL jacks: Input TV or AV 7. HDMI OUT jacks: Transmit video signals and audio You can connect the multichannel speakers for the main room component digital audio signals with a digital optical signals with a HDMI cable connected to a monitor such and the speakers for a separate room (ZONE 2). -
Page 29: Remote Controller
> Before start > Hookup > Setup > Playback > Part Names Remote Controller Display 1. Í button: Turns the unit on or into standby mode. 2. Input selector buttons: Switches the input to be played. 3. Q (QUICK MENU) button: You can perform common settings on the TV screen. -
Page 30: License And Trademark Information
I238671 European Pat. 1,360,874 Bluetooth SIG, Inc. and any use of such marks by Onkyo Corporation is under license. Other trademarks and trade names are those of their respective PANDORA, the PANDORA logo, and the Pandora trade dress are trademarks THX Select2 Plus owners. - Page 31 DISCLAIMER “All other trademarks are the property of their respective owners.” “Toutes les autres marques commerciales sont la propriété de leurs détenteurs respectifs.” Through this device you are able to link to other services or websites which are not under the control of any company which has designed, manufactured or “El resto de marcas comerciales son propiedad de sus respectivos distributed/have distributed this device, and its affiliates (collectively, propietarios”.
- Page 32 The above-mentioned information is subject to change without prior notice. Visit the Onkyo web site for the latest update. F1602-0 (C) Copyright 2016 Onkyo & Pioneer Corporation Japan. All rights reserved. http://www.onkyo.com/privacy/ Printed in Malaysia / Imprimé en Malaisie / Напечатано в Малайзии...