
Related Manuals for Niles A4.6Ci


Summary of Contents for Niles A4.6Ci
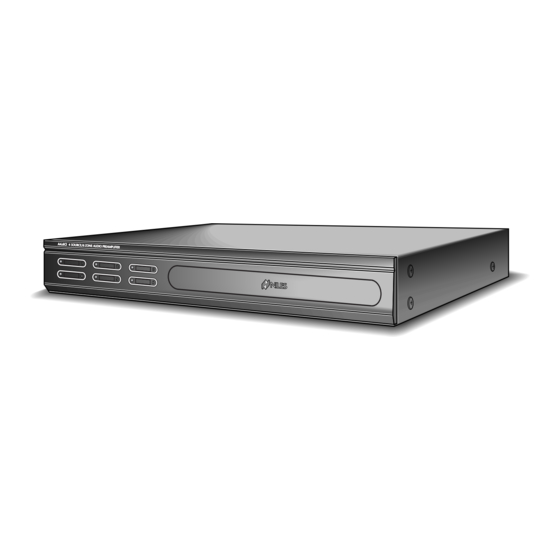
- Page 1 I N S T A L L A T I O N & O P E R A T I O N G U I D E A4.6Ci A4.6Ci MultiZone Audio Preamplifier Four-Source, Six-Zone Preamplifier L E N D I N G...
-
Page 2: Table Of Contents
Configuration 2-Adding Zones Using Multiple A4.6Ci’s ........ - Page 3 Operation from the Stereo Zones Provided by the A4.6Ci ....... .
- Page 4 Programming a Learning Remote for Zone Operation Using the Niles R-4 Remote Control ....62 Programming a Home Theater Remote to Operate Source Components Shared with an A4.6Ci ....62 INSTALLATION SETTINGS .
- Page 5 Transferring IR Configuration Programs Between A4.6Ci’s ........
-
Page 6: Introduction
The A4.6Ci MultiZone Preamplifier is the multi-zone solution you have been asking for. It allows you to combine Keypad Modules with Infrared Sensors and Hand-Held Remotes for total control of your Home Entertainment System, providing "one-touch"... -
Page 7: Features And Benefits
Central Intelligence The design approach of the A4.6Ci MultiZone Preamplifier is a radical departure from that of traditional pro- grammable keypad-controlled multi-zone systems. Instead of redundantly programming each of the individual keypads with IR commands, all IR commands are programmed and stored in the A4.6Ci. - Page 8 ON/OFF and volume adjustment. A Niles Ci Expander (FG00853) connects all keypads to a single zone of the A4.6Ci preamplifier. As many as 36 rooms can be connected to a single A4.6Ci preamplifier using six Ci expanders and 36 Ci silencer volume controls.
-
Page 9: Parts Guide
LED Zone ON/OFF Indicator Zone Label Slots Figure 2 A4.6Ci Front Panel with Programming Cover Figure 2 A4.6Ci Front Panel with Programming Cover Figure 3 A4.6Ci Front Panel with Programming Cover Removed Audio Inputs with Buffered Cascade Outputs Removable Programming Cover... -
Page 10: A4.6Ci
The HT Sync Input senses voltage, determining the on/off status of a Home Theater that shares source components with the A4.6Ci. 16V DC Power Input Power connection for use with included AC-to-DC... -
Page 11: Intellipad Ci Keypad Modules
PARTS GUIDE SOLD SEPARATELY IntelliPad Ci Keypad Modules Master Keys Function Keys Zone OFF Key Mute Key Zone Volume Key Solo™ Master Keypad Module Master Keys A quick tap of any of these keys turns on the zone and selects a source component. Pressing and holding these buttons for longer than three seconds turns on all enabled zones. -
Page 12: Remote Control
PARTS GUIDE SOLD SEPARATELY R-4 REMOTE Zone Volume Buttons Zone Mute Button Source Buttons A quick tap of any of these buttons turns on the zone and selects a source component. Pressing and holding these buttons for longer than three seconds turns on causes all enabled zones. -
Page 13: System Configurations
™ Source Components The A4.6Ci has RCA audio inputs for connecting four external source components for selection by each of the six zones. With this configuration, a user in one zone can listen to one source component while another user in a different zone listens to a different source component (i.e., the CD can be selected in Zone 1 while the tuner is selected... - Page 14 2. Latching Power - In Figure 4, AC power to the DVD and CD changer is turned on and off via the switched AC outlets of a Niles AC-3. The AC-3 is activated by the 12V control output of the A4.6Ci when any one of the six zones is ON (including the Home Theater Zone sharing sources).
-
Page 15: Configuration 2-Adding Zones Using Multiple A4.6Ci's
CONFIGURATION 2 – ADDING ZONES USING MULTIPLE A4.6Ci’s More than one A4.6Ci MultiZone Preamplifier can be used if the system requires more than six zones. A max- imum of four A4.6Ci’s (providing up to 24 zones) can be combined to create a larger multi-zone/multi-source system. -
Page 16: Configuration 3-Integrating An Ir-Controlled Home Theater
A4.6Ci. The Home Theater IR Remote Control is now able to control the shared source components. A 12V Sync signal is provided from the Home Theater to the Home Theater Sync Input to provide the A4.6Ci with the On/Off status of the Home Theater. This status enables the A4.6Ci to provide coordinated control of the source compo- nent's power On/Off. -
Page 17: Configuration 4-Integrating A Home Theater Using An Intellicontrol
R-4 Remote itself (see Programming Overview for more details on page 45). A 12V Sync signal is provided from the IntelliControl to the Home Theater Sync Input to provide the A4.6Ci with the On/Off status of the Home Theater. This status enables the A4.6Ci to provide coordinated control of the source component's power On/Off. -
Page 18: Configuration 5-Multiple Master Keypad Modules In A Zone
SYSTEM CONFIGURATIONS CONFIGURATION 5 – MULTIPLE MASTER KEYPAD MODULES IN A ZONE The single zone of a Niles A4.6Ci MultiZone Preamplifier can be expanded to contain multiple Solo Select ™ Master Keypad Modules, providing control from many locations within the zone. A Niles IntelliPad Expander ™... -
Page 19: Configuration 6-Multiple Listening Areas In A Zone
CONFIGURATION 6 – MULTIPLE LISTENING AREAS IN A ZONE A single zone of the A4.6Ci MultiZone Preamplifier can be set up to contain more than one listening area (i.e., an adja- cent living room and dining room). This configuration is chosen when the speakers in the zone are not required to play at separate volume levels or to be on/off separately. -
Page 20: Configuration 7-More Than One Room In A Zone
Connection of three rooms with Master Keypads and Silencers to a single zone of the A4.6Ci is accomplished with a single Niles Expander. Five rooms is accomplished using two Expanders (see the Expander manual for more details). -
Page 21: Configuration 8-System Paging With An External Telephone System
CONFIGURATION 8 – SYSTEM PAGING WITH AN EXTERNAL TELEPHONE SYSTEM A Paging Input connection is provided on the rear panel of the A4.6Ci. It provides a connection for the paging output signal of popular telephone systems for voice paging through the speakers located in the listening zones (see Figure 14). -
Page 22: Configuration 9-Ir Repeating For Control Of Local Components
CONFIGURATION 9 – IR REPEATING FOR CONTROL OF LOCAL COMPONENTS An IR Repeating System can be integrated into a room connected to the Niles A4.6Ci (see Figure 16). This enables a single IR Sensor (installed in that room) to control local components with a hand-held IR remote control. -
Page 23: Component Compatibility
COMPONENT COMPATIBILITY INFRARED COMMAND COMPATIBILITY IR control testing was conducted on many equipment brands to determine their compatibility with the A4.6Ci. Typical A/V source components (i.e., CD, DVD, DSS, Cable Boxes, etc.) from each brand were chosen for the test. All brands listed below passed the test. -
Page 24: Source-Power Synchronization
OFF, and to turn them OFF if they are ON. It is necessary to “synchronize” these source components with the A4.6Ci so it knows not to send an ON command if the source components are already ON (if it did, the source components would turn OFF, which is not the desired result). -
Page 25: Choosing A Synchronization Method
The A4.6Ci has three 12V Video Sync connections for synchronizing as many as three source components. In Figure 18, the video output of a DSS is connected to both a TV and the corresponding sync input for the DSS using an RCA Y-adapter. - Page 26 AC power plug is connected to the current sensing outlet on the APC-2. The APC-2’s 12V DC output is connect- ed to the A4.6Ci’s sync input dedicated to the CD changer, using a Niles 10’ bare wire to mini-plug accessory cable (FG00724, see Accessories for more details).
-
Page 27: Source And Home Theater Sync Status
The Niles LS-1 Light Sensor can synchronize a component by sensing changes in light. The 12V output of the LS-1 is then connected to the A4.6Ci’s sync input dedicated for that component. A mini- plug to RCA adapter is required for this connection (see Connections for more information). -
Page 28: Operational Overview
MASTER KEYS/SOURCE BUTTONS The Master Keys available on the Solo hand-held R-4 Remote accessory (Figure 21) provide "one-touch activation" of the A4.6Ci and its connected source components. The Master Keys on the Solo and Select Master Keypad Modules are equipped with back-lit LEDs for indicat- ing Zone ON/OFF, Zone Mute, and Zone Input Selection status. -
Page 29: Master Key/Source Button Events
It is typically used for issuing a stop command to latching source components that automatically play when powered. Note: Only the A4.6Ci set as the Master executes the System ON Sequence. Event 6 The Master Key Sequence is executed last and is programmed with IR commands and/or delays. -
Page 30: Master Key/Source Button Operation
OPERATIONAL OVERVIEW MASTER KEY/SOURCE BUTTON OPERATION The Master Key/Source Buttons have two methods for operating the system. Single-Zone Operation The first method, a quick tap of a Master Key/Source Button in a zone (holding the key/button for less than three seconds), causes only that zone to turn ON. -
Page 31: Off Key Events
OPERATIONAL OVERVIEW OFF KEY EVENTS When you press the OFF Key/Button, up to four events may occur. The first event is the Zone OFF sequence programmed by the installer for the zone that is turning OFF. The second event is factory programmed and turns the zone or all zones OFF every time the OFF Key/Button is pressed. -
Page 32: Volume Keys/Volume Buttons
OPERATIONAL OVERVIEW Multiple Rooms in a Zone Using an Expander and Silencers Individual-Room Operation - Multiple rooms within a zone using silencers require two short taps of the OFF Key to turn OFF that zone individually. A press of the OFF Key for less than three seconds in a room that is currently ON (selected Master Key illu- minated GREEN) causes that room to MUTE (selected Master Key now illuminates RED). -
Page 33: Mute Key/Mute Button
OPERATIONAL OVERVIEW MUTE KEY/MUTE BUTTON The Mute Key/Button provides a method of turning the sound ON\OFF for a brief moment in an individual zone without turning the zone OFF. (This also prevents the source components from being turned OFF.) Mute Button the R-4 Hand-Held Remote Accessory MUTE KEY/MUTE BUTTON OPERATION... -
Page 34: Function Keys/Buttons
Figure 25 FUNCTION KEY/BUTTON OPERATION After the Master Key/Source Button for a connected source component has been pressed, the A4.6Ci activates a zone and selects that source component. The individual Function Keys/Buttons in that zone will now issue the IR commands that have been programmed for the selected source component. A sequence of IR commands... -
Page 35: Identical Source Components
A source component in an A4.6Ci multi-zone system is considered “shared” when its audio signal is connect- ed to more than one A4.6Ci or if it is connected to an A4.6Ci and a Home Theater system (refer to System Configuration 2 and System Configuration 3 for more details). -
Page 36: Operation From The Stereo Zones Provided By The A4.6Ci
When the Home Theater turns ON, it provides a 12V status signal that is connected to the Home Theater sync input on the rear panel of the A4.6Ci. This provides the ON/OFF status of the Home Theater to the A4.6Ci. -
Page 37: System Busy Indication
The A4.6Ci has a built-in paging-indication mode that is displayed on a Master Key LED of the Solo Keypad Module. If the A4.6Ci sends a page to a zone, the user is alerted by the Master Key. That Master Key LED will blink slowly GREEN. -
Page 38: Installation
PLACEMENT Place the A4.6Ci on a flat, level surface such as a table or shelf, with its weight equally distributed on each of its four feet. Like any high-fidelity component, the A4.6Ci will last much longer if it receives adequate ventilation for proper cooling (see Figure 28). -
Page 39: Connections
CONNECTIONS TERMINATING FOUR-PAIR TWISTED CABLE The Solo and Select Master Keypad Modules, the expander, and the A4.6Ci’s system-expansion connections ™ ™ require a four-pair twisted cable with a one-to-one wiring configuration. To maintain consistency throughout all Intellipad ® Ci installations, we recommend the color-coding pattern described in Figure 31. However, you may follow the color-coding pattern of your choice, as long as it is consistent throughout the system. -
Page 40: Connecting Ir Sensors
CONNECTIONS CONNECTING IR SENSORS An IR sensor can be connected to a Solo Select ™ Master Keypad Module in one of two ways, directly with a four-pair twisted cable (see Figure 34 and 35), or with a three-wire to RJ-45 adapter available from Niles for IR sen- sors installed with two-conductor shielded cable. -
Page 41: Source Component Audio Signals
An RCA Y-adapter is used to split the video output of a source component for connection to one of the two source sync inputs of the A4.6Ci (1 or 2). One side of the RCA Y-adapter connects to the appropriate source sync input and the other side connects to the intended desti- nation for the video signal (i.e., the video input of a TV,... -
Page 42: Keypad Modules
IR transmission to all source components and adheres with its included Velcro mounting system. DC POWER 1. DC Power Adapter The 16V DC power adapter (included with the A4.6Ci) connects to the removable power-cord socket and to an AC power outlet. ™... -
Page 43: Connecting An Ir Sensor For Local-System Control
CONNECTING AN IR SENSOR FOR LOCAL SYSTEM CONTROL IR Sensors installed in zones for hand-held IR remote control of the A4.6Ci and its connected source compo- nents can also be used to control local components (i.e., a TV, DSS, DVD, and a surround-sound system locat- ed in the master bedroom zone as shown in Figure 38). -
Page 44: Connecting An A/B Amplifier Switch For Local-System Selection
As shown in Figure 39, the zoned speaker output of the A4.6Ci connects to the "A" side of the SPK-1. The main speaker output of the local system connects to the "B" side of the SPK-1. In addition, a 12V DC power adapter (Niles FG00665) is plugged into a switched AC outlet of the local system to activate the SPK-1. -
Page 45: R-4 Remote Control
(see Figure 41). A Niles hand-held R-4 Remote can be used instead of a connected Master Keypad Module (see Figure 42). For complete information on the A4.6Ci’s step- by-step programming procedure, refer to the Programming Steps section of this manual. -
Page 46: Installation And Programming Documentation
The system documentation was designed to minimize your time investment, while still providing all the neces- sary information that will be required to design, install, and troubleshoot an A4.6Ci preamplifier. As you com- plete the various forms, you will find that the information is simply the normal questions you are required to ask when designing a typical distributed audio system. - Page 47 Multi-Area Zone Schematic Each A4.6Ci has six zones to document. Fill out one Master Preamplifier Schematic for the Master A4.6Ci, and one Slave Preamplifier Schematic for each Slave A4.6Ci in the system. Doing so determines how many zones will be installed, the name of the room in a zone, and what keypads each room contains.
- Page 48 (CHOOSE ONE) ZONE ON SEQUENCE ZONE OFF SEQUENCE STEP DESCRIPTION PAGE STEP DESCRIPTION PAGE MASTER (THE SYSTEM ON/OFF SEQUENCE IS PROGRAMMABLE FOR THE MASTER A4.6CI ONLY) SYSTEM ON SEQUENCE SYSTEM OFF SEQUENCE STEP DESCRIPTION PAGE STEP DESCRIPTION PAGE Zone On/Off Sequence and System On/Off Sequence Figure 49 –...
-
Page 49: System-Installation Schematics
If your system has only six zones and each zone has one room, you can document the necessary information in just one Preamp Schematic sheet (Figure 43). If your system has more than one A4.6Ci, use the Slave Preamplifier Installation Schematic for the Slave(s). - Page 50 PROGRAMMING OVERVIEW A4.6Ci MASTER DIP switches on the front panel ALL ON / PAGE ZONE determine which zones will be enabled to the ALL-ON and PAGE features. Check those that have been enabled to the ALL-ON/PAGE feature. ZONE OUTPUT SOURCE...
- Page 51 Multi-Area Zone JOB TITLE Mr. Smith Document the customer’s name. The A4.6Ci to which the expander is connected (Master or Slaves 1, 2, or 3). The zone number to which the expander is connected. AREA SETUP OUTPUT Assign the first expander the same number...
- Page 52 JOB TITLE Mr. Smith Document the customer’s name. The A4.6Ci to which the expander is connected (Master or Slaves 1, 2, or 3). The zone number to which the expander is connected. ROOM SETUP OUTPUT Assign the first expander the same num-...
- Page 53 After filling out the Master Preamp Schematic and any necessary Expander Schematics for the Master, you are ready for the Slave Preamp Schematic sheet (Figure 43) if the system has more than six zones. Fill out one sheet per Slave A4.6Ci. JOB TITLE Mr.
- Page 54 PROGRAMMING OVERVIEW CASCADE OUTPUT SOURCE SOURCE DESTINATION This documents the audio output from the shared source components going to the next Slave or the Home Theater. • Does your system include other preamps or a Home Theater? (YES/NO) • If yes, specify where the cascade output is going (for example, a Home Theater or the next Slave preamp in the system).
-
Page 55: System-Programming Worksheets
MODEL: _____________________________ POWER PROGRAMMING Single “Power” IR Command Two Separate ON and OFF IR Commands Latching Power – ALL MASTER & SLAVE A4.6Ci’s MASTER KEY 2 ASSIGNED SOURCE INPUT: John Doe Document the system designer’s name. MASTER KEY LABEL: ________... - Page 56 Select accessory modules. You will need a worksheet for each A4.6Ci in your system. Although Worksheet #2 is for the Master, exclusive- ly, make as many copies of Worksheet #3 as needed, one for each Slave. Worksheet #2, Master A4.6Ci Function-Keys Planning Worksheet Worksheet #2 (Figure 46) documents the IR commands programmed into the Master A4.6Ci.
- Page 57 PROGRAMMING OVERVIEW Worksheet #3, Slave A4.6Ci Function-Keys Planning Worksheet Worksheet #3 (Figure 47) documents IR commands programmed into the Slave A4.6Ci’s. Because any IR com- mand programmed into a Slave is transparent to the system during normal operation, these commands cannot be used to operate the sources.
- Page 58 PROGRAMMING OVERVIEW Worksheet #4, Master-Key Sequence Programming Worksheet #4 documents the Master Key Sequences that will be performed whenever a Master Key is pressed. Indicate each step of the sequences, identifying where the IR commands were programmed by using their page and key address.
- Page 59 Identify where the IR commands were programmed by using their page and key address. Copy the worksheet as needed to document zone sequences for the Master A4.6Ci and all the Slaves in your system. It also documents the steps of the sequences that occur whenever the system turns on and when it turns off. The System On/Off Sequence is controlled by the Master A4.6Ci only.
- Page 60 Worksheet #6 documents the steps of the sequences that have been programmed into any of the available Function Keys for the Master A4.6Ci only. Identify where the IR commands were programmed by using their page and key address. Copy the worksheet as needed to document all Function Key sequences.
-
Page 61: Programming A Learning Remote For Zone Operation Using Keypad Modules
PROGRAMMING A LEARNING REMOTE FOR ZONE OPERATION USING KEYPAD MODULES Learning remote controls can be taught the IR commands to provide individual zone operation. These IR com- mands operate the A4.6Ci and its associated source components from any zone equipped with an IR sensor. Important Note: IR sensors can- not operate a zone when used alone. -
Page 62: Programming A Learning Remote For Zone Operation Using The Niles R-4 Remote Control
A4.6Ci (refer to System Configurations #2 and #3). The learning remote control may be programmed with the source component's factory IR commands using the A4.6Ci's IR repeating feature (see Method #1), or with the Niles commands (see Methods #2 & #3). - Page 63 An IR output of the IR repeat- ing or control system for the Home Theater is connect- ed to the IR input of the Master A4.6Ci. All the IR com- mands sent from the home theater are then passed through to all IR flashers connected to the A4.6Ci for...
- Page 64 A4.6Ci and it now “knows” that the Home Theater turned off. It will then check if there are any other zones on the A4.6Ci before it turns off the shared source components. Method #3 – Controlling Shared Source Components...
-
Page 65: Installation Settings
Maximum Turn ON and Source Change Volume. When greater, the zone will turn ON to the Maximum Turn ON and Source Change Volume level set by the factory in the A4.6Ci. When a zone selects a new source, the volume setting does not change unless the zone’s current volume set- ting is greater than the Maximum Turn ON and Source Change Volume setting. -
Page 66: Installer Setting Mode
Generally, four variables will cause system activation problems: the keypads, the IR sensor, the four-pair twist- ed wire, or the A4.6Ci itself. If you use the hidden controls to operate the A4.6Ci, you can select a zone and a source, and operate volume up/down. If you now have music in that zone, you've just narrowed the problem to the wire, the keypad, or the IR sensor. - Page 67 Step 2. Press the Program button to exit Manual Operation Mode. PREAMPLIFIER OUTPUT MODE SETTING The A4.6Ci is set by the factory to the variable-output mode for use with a single room in a zone. You change it to the fixed mode when using Silencers in a zone with multiple rooms.
- Page 68 INSTALLATION SETTINGS All ON/Fixed Volume Step 6. Master Key #1 lights up, indicating you are ready to adjust ALL ON Volume if the zone is set to variable mode. If the zone is set to fixed mode, you are adjusting the volume level to which the zone will always be set.
-
Page 69: Programming Steps
PROGRAMMING STEPS Important Note: Before you start programming the A4.6Ci: • Assign components with a single, toggle command for ON and OFF to Inputs 1 and 2. These inputs have sync. • Assign components with separate ON and OFF commands to Inputs 3 and 4. These inputs do not have sync. - Page 70 PROGRAMMING STEPS The PAGE LED turns off, and the ENTER IR LED turns on GREEN. Step 3 - Press the appropriate power or ON button on the original factory remote. Step 4 - Press the OFF button on the original factory remote if the component has discrete ON and OFF commands. Or press the PROGRAM button if the component has one power command for both ON and OFF.
- Page 71 PROGRAMMING STEPS Step 5 - To test the captured IR command(s), install a flasher for the source component. Tap the TEST button. The ENTER IR LED may flicker, blink, or be intermittently solid GREEN to reflect real-time IR. Step 6 - If the command turns on the source, tap the TEST button again to turn it off and continue your manual programming. If the command fails to operate the source component, press the same Master Key again to erase the IR command automatically.
-
Page 72: Input Assignment
PROGRAMMING STEPS INPUT ASSIGNMENT Step 1 - Press a Master Key to assign one of the four audio inputs corresponding to the source component that Master Key will activate. It doesn’t matter how the input assignment is ordered. For example, I can have input 3 assigned to Master Key 1, input 4 assigned to Master Key 2, and so on. -
Page 73: Function-Key Ir
PROGRAMMING STEPS Step 5 - When all the necessary inputs have been assigned, press the NEXT button to continue programming. The FUNCTION-KEY IR/(FUNT. KEY SEQ.) LED turns on RED, and the PAGE LED blinks RED. FUNCTION-KEY IR Step 1 - Press the appropriate Master Key to choose the page for programming the individual IR commands stored to the various Function Keys. - Page 74 PROGRAMMING STEPS Step 3 - Press the appropriate command on the original factory remote. Step 4 - To test the captured IR command, install a flasher for the source component and press the TEST IR button. The ENTER IR LED may flicker, blink, or be intermittently solid RED to reflect real-time IR activity during IR transmission and then turn OFF again.
-
Page 75: Master Key Sequence
PROGRAMMING STEPS Step 7 - Press the PROGRAM button to select a different Master Key Page. The KEY LED turns OFF, and the PAGE LED blinks RED. Step 8 - Repeat steps 1 through 7 until all the necessary IR commands have been stored, and all Function Keys have been programmed for all the Master Key Pages. - Page 76 PROGRAMMING STEPS Step 2 - Press the Master Key that identifies the Master Key Page where the IR command is stored for the first step in the Master Key Sequence you are programming. Tap the OFF Key if the IR command is in the Default Page. Press and hold the OFF key if the IR command is in the Library Page.
- Page 77 PROGRAMMING STEPS Step 4 - To insert delays, press the DELAY button instead of a Function Key, while the PAGE LED is blinking RED. The PAGE LED turns OFF, the KEY LED blinks RED, and the first four keys on the Master Key module illuminate. Step 5 - Choose the Master Key for the desired delay time.
- Page 78 PROGRAMMING STEPS Step 7 - Repeat steps 2 through 6 to continue identifying the Master Key Pages where the IR commands are stored for all the steps in the Master Key Sequence you are programming. Step 8 - Press the PROGRAM key to program the Master Key Sequence for a different Master Key. The TRIGGER LED turns on RED, and the PAGE LED continues to blink RED.
-
Page 79: Zone On/Off And System On/Off Sequence
PROGRAMMING STEPS ZONE ON/OFF AND SYSTEM ON/OFF SEQUENCE Step 1 - Press ZONE SELECT until the LED for the desired Zone blinks GREEN. All other LEDs turn off. Step 2 - Press the ZONE ON button to program the Zone ON Sequence for the desired zone or to program the System ON Sequence if you have selected all zones. - Page 80 PROGRAMMING STEPS Step 3 - Press the Master Key that identifies the Master Key page where the IR command is stored for the first step in the Zone On/Off or System On/Off sequence you are programming. Tap the OFF Key if the IR com- mand is stored in a Function Key within the Default Page.
- Page 81 PROGRAMMING STEPS Step 5 - Select the page where the next IR command is stored to continue the Zone On/Off or System On/Off sequence you are programming. (You can press a Master Key, tap the Off Key for the Default page, or press and hold the Off Key for the Library page).
- Page 82 PROGRAMMING STEPS After you choose a delay, all Master Keys turn off. The KEY LED turns OFF, and the PAGE LED blinks RED. Step 8 - To add another delay, press the DELAY button again, and repeat the previous step. (For example, you can have two consecutive one-second delays.) Step 9 - Repeat steps 3 through 8 (Zone ON/OFF and System ON/OFF sequence) to continue identifying the Master Key Pages where the IR commands are stored for all the steps in the Zone On/Off or System On/Off sequence you are programming.
-
Page 83: Function Key Sequence
PROGRAMMING STEPS Step 11 - Repeat steps 2 through 10 until all Zone On/Off or System On/Off sequences have been programmed. Note: If you missed IR commands in a sequence, re-do the programming for the whole sequence. Whatever was previously programmed is automatically replaced. - Page 84 PROGRAMMING STEPS Step 2 - Press the actual Function Key that triggers the sequence. The TRIGGER LED turns OFF, the PAGE LED blinks RED, and the KEY LED turns OFF. Step 3 - Press the Master Key that identifies the Master Key Page (or tap the OFF Key for the Default Page, or press and hold the OFF Key for the Library Page) where the IR command is stored for the first step in the Function-Key Sequence.
- Page 85 PROGRAMMING STEPS Step 4 - Press the Function Key where the IR command is stored. Select ™ Transport ™ Numeric ™ The KEY LED turns off, and the PAGE LED blinks RED. Step 5 - To insert delays, press the DELAY button instead of a Master Key while the PAGE LED is blinking RED.
- Page 86 PROGRAMMING STEPS Step 6 - Choose the Master Key for the desired delay time. Refer to the table below: DELAY TABLE DELAY TIME Master Key 1 .5 seconds Master Key 2 1 seconds Master Key 3 4 seconds Master Key 4 8 seconds After you choose a delay, all Master Keys turn off.
- Page 87 PROGRAMMING STEPS Step 10 - Repeat steps 2 through 9 until you have programmed all the Function-Key Sequences within the selected Master Key Page. Step 11 - Press the PROGRAM button twice to program sequences within other Master Key Pages. The TRIGGER LED turns on RED, the PAGE LED blinks RED.
-
Page 88: Program-Editing Steps
PROGRAM-EDITING STEPS EDIT SOURCE-COMPONENT POWER Steps to edit the IR commands to power IR activated source components. Step 1 Press and hold the PROGRAM button. The POWER/(MASTER KEY SEQ) LED turns on RED, and the PAGE LED blinks, RED. Step 2 Press a Master Key where you will edit source component power IR commands. -
Page 89: Function Key Ir Programming
PROGRAM-EDITING STEPS Step 5 Repeat steps 3 and 4 until all inputs have been edited. Step 6 Press NEXT to edit Function Key IR. The FUNCTION KEY IR/(FUNCT. KEY SEQ.) LED turns on RED, and the PAGE LED blinks RED. Step 7 Press PROGRAM again to save and exit programming. -
Page 90: Edit Master Key Sequence Programming
PROGRAM-EDITING STEPS EDIT MASTER KEY SEQUENCE PROGRAMMING Step 1 Press and hold the PROGRAM button. Step 2 Press the NEXT button three times. The (POWER)/MASTER KEY SEQ LED turns on GREEN, the TRIGGER LED turns on RED, and the PAGE LED blinks RED Step 3 Press the Master Key to edit. -
Page 91: Edit Zone And System On/Off Sequence Programming
PROGRAM-EDITING STEPS iii. Press the DELAY button again and repeat the previous step to add another delay. (For example, you can have two consecutive one-second delays.) Continue with your editing. Step 7 Repeat steps 4 – 6 until you have re-entered all the steps for the Master Key Sequence you are editing. Step 8 Press the PROGRAM key to edit the Master Key Sequence for a different Master Key. - Page 92 PROGRAM-EDITING STEPS Press the OFF Key if the IR command is stored in a Function Key within the Default Page. Master Keys 1 and 3 illuminate, indicating you are selected to the Default Page. Press and hold the OFF Key if the IR command is stored in a Function Key within the Library Page. Master Keys 1, 3, and 4 illuminate, simulating an "L."...
-
Page 93: Edit Function-Key Sequence Programming
PROGRAM-EDITING STEPS Step 9 Repeat steps 3 through 8 until all Zone/System Sequences have been edited. Note: If you missed IR commands in a sequence, re-do the whole sequence. Step 10 Press Next to edit Function-Key Sequences. The (FUNCTION KEY IR)/FUNCT. KEY SEQ LED turns on GREEN, the TRIGGER LED turns on RED, and the PAGE LED blinks RED. -
Page 94: Program Erasing
PROGRAM-EDITING STEPS ii. Choose the Master Key for the desired delay time. Refer to the table below: DELAY TABLE DELAY TIME Master Key 1 .5 seconds Master Key 2 1 seconds Master Key 3 4 seconds Master Key 4 8 seconds For example, if you press Master Key 2, a one-second delay is added to the sequence. - Page 95 PROGRAM-EDITING STEPS STEPS TO ERASE SOURCE-COMPONENT POWER To erase source-component power commands, follow the same steps as if you were going to store the power command up to when you would press the remote to enter the command. Press PROGRAM to exit. The power command is erased automatically.
- Page 96 PROGRAM-EDITING STEPS STEPS TO ERASE MASTER-KEY SEQUENCES To erase Master-Key Sequences, follow the same steps as if you were going to build the sequences, up to when you identify the page and key address where the individual commands are stored. Instead, press the PRO- GRAM key to erase the sequence and exit.
-
Page 97: Transferring Ir Configuration Programs Between A4.6Ci's
An A4.6Ci that is programmed with an IR configuration may have its program contents transferred to a second A4.6Ci. Step 1. Connect one end of a DB-9 null modem cable (pins 2 and 3 reversed and pin 5 to 5) to the A4.6Ci that contains the configuration you wish to transfer. -
Page 98: Accessories
A4.6Ci SYSTEM ACCESSORIES IntelliPad Ci Keypads and Remote Control ® Solo Master Keypad Module ™ STOCK # FG00807 • Backlit Master Keys enable monitoring and control of up to four audio sources or other remote controllable devices (see Niles MultiZone Control System for details). - Page 99 A4.6Ci SYSTEM ACCESSORIES IR Sensors and IR Flashers IntelliPad ® Ci Adapter Cable STOCK # FG00852 • Allows for easy connection of Niles IR Sensors (that have been installed with two-conductor shielded cable) to IntelliPad ® Ci Master Keypad Modules.
- Page 100 A4.6Ci SYSTEM ACCESSORIES Sync Accessories Many of the components in your system should have their power status “synced” to the A4.6Ci. The following accessories either sense that a component is on/off or actually turn the component(s) on/off. LS-1 Light Sensor...
-
Page 101: Convenience Outlets
A4.6Ci SYSTEM ACCESSORIES Convenience Outlets NET-2D Computer Network Convenience Outlets ColorStock# Almond FG00858 Bone FG00840 White FG00842 Two 8-wire (RJ-45) modular jacks for computer network or IntelliPad™ Ci Master Keypad connections. Decora faceplate. Audio/Video Distribution AVDA-3 Audio/Video Distribution Amplifier STOCK #... -
Page 102: Troubleshooting
A4.6Ci. Check the AC power outlet. Verify that the outlet is providing power (i.e., a switched AC outlet).You want to make sure that the A4.6Ci is always plugged into an un-switched AC outlet. If you've checked the cord and the outlet and you still have no lights, call Niles for service. -
Page 103: Specifications
SPECIFICATIONS A4.6Ci MultiZone Audio Preamplifier Frequency Response: 12 Hz - 230 KHz, 3 dB, at 1Vrms output Paging = -3dB > 200Hz - 4 KHz Distortion: <0.005% THD, 1 KHz Maximum Output: 6 Vrms before clipping Overall Voltage Gain: 27 db Maximum Input Level: 1 Vrms Signal-to-Noise Ratio: >90 db at 1Vrms output... - Page 104 NOTES...
- Page 105 NOTES...
- Page 106 Visit us on the web at www.nilesaudio.com ©2002 Niles Audio Corporation. All Rights reserved. Niles and the Niles logo are registered trademarks of Niles Audio Corporation. Blending Technology and Architecture, Expander, FloodFlasher, MicroFlasher, Numeric, Solo, and Transport are trademarks of Niles Audio Corporation. All other trademarks are property of their respective owners.
- Page 107 SPECIFICATIONS A4.6Ci MultiZone Audio Preamplifier Frequency Response: 12Hz - 150kHz, -3dB, at 1Vrms output Distortion: <0.005% THD, 1kHz Maximum Output: 6Vrms before clipping Overall Voltage Gain: 27dB Maximum Input Level: 1Vrms Signal-to-Noise Ratio: >90dB at 1Vrms output Crosstalk: >90dB at 1Vrms (between zones & channels)