Advertisement
Quick Links
Download this manual
See also:
User Manual
15-060120061
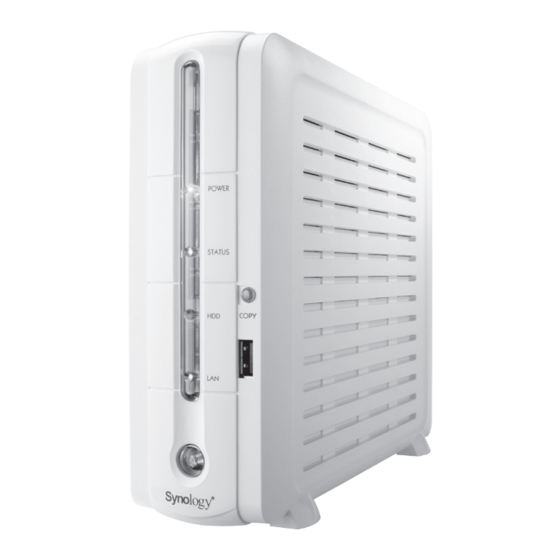
Synology Disk Station
DS-106j
Quick Installation Guide
Schnell-Installationsanleitung
Guide d'installation rapide
Guida di installazione rapida
Guía de instalación rápida
Advertisement

Related Manuals for Synology DS-106j


Summary of Contents for Synology DS-106j
- Page 1 15-060120061 Synology Disk Station DS-106j Quick Installation Guide Schnell-Installationsanleitung Guide d’installation rapide Guida di installazione rapida Guía de instalación rápida...
- Page 2 éléments suivants : Prima di cominciare, predisporre gli hard disk IDE da 3 1/2 (visitare http://www.synology.com per la scelta degli HDD consigliati) e controllare il contenuto della confezione per verificare di aver ricevuto gli elementi riportati di seguito.
- Page 3 Das DS-106j mit der Taste “USB COPY” nach oben seitlich anbringen und die Seitenabdeckung in der angezeigten Richtung aufschieben. Placez la DS-106j sur le côté, bouton « USB Copy » vers le haut et faites glisser le capot latéral dans la direction indiquée.
- Page 4 When opening the side cover, please be careful to keep the USB cable connected to the mainboard. Beim Öffnen der seitlichen Abdeckung vorsichtig vorgehen, damit das USB-Kabel am Hauptboard angeschlossen bleibt. Lorsque vous ouvrez le capot latéral, veillez à laisser le câble USB connecté à la carte mère. Nell’aprire il coperchio laterale, prestare attenzione a che il cavo USB resti collegato alla scheda madre.
- Page 5 Posizionare l’HDD IDE assemblato alla Staffa nel DS-106j e collegarlo con il cavo IDE e di alimen- tazione. Coloque el disco duro IDE montado con el soporte en DS-106j y conéctelo a IDE y al cable de alimentación. Use the 10mm screws to assemble the Bracket to the mainboard.
- Page 6 Stick one aluminum foil sticker on the hard disk and the LAN port. Then use the other one to stick on the hard disk and the USB port. This helps eliminate the Electromagnetic Interference. Einen Aluminium-Aufkleber auf der Festplatte und einen auf dem LAN-Anschluss anbringen. Den anderen Aluminium-Aufkleber auf der Festplatte und einen auf dem USB-Anschluss anbringen.
- Page 7 Die schwarzen Schrauben an der Rückseite des DS-106j verwenden, um die Seitenabdeckung anzubringen und das Installationsverfahren abzuschließen. Fixez le capot latéral à l’arrière de la DS-106j à l’aide des vis noires pour terminer le processus. Usare le viti nere dietro al DS-106j per assemblare il coperchio laterale per completare la procedura di installazione.
- Page 8 Das RJ-45 LAN-Kabel an den DS-106j und das andere Ende an Ihren Schalter/Hub/Router oder Notebook- bzw. Desktop-PC anschließen. Connectez le câble RJ-45 LAN à la DS-106j et l’autre extrémité à un routeur ou à un ordinateur. Collegare il Cavo LAN RJ-45 al ds-106j e collegare l’altra estremità al vostro switch/hub/router o al notebook/desktop.
- Page 9 In the Autorun Menu, choose “Set up the Synology Server”. Im Autorun-Menü, “Synology-Server einrichten” wählen. Dans le menu automatique, sélectionnez « Configuration du Synology Server ». Nel menu Esecuzione automatica, scegliere “Installazione Synology Server”. En el menú de ejecución automática, elija “Instalar el servidor Synology”.
- Page 10 [Mac User/ Mac OSX-Anwender/ Utilisateur Mac OSX/ Utente Mac OSX/ Usuarios de Mac OSX] Insert the Installation CD into CD/DVD-Rom Drive. Bitte legen Sie die Installations-CD in Ihr CD-/DVD-ROM Laufwerk. Insérez le CD d’installation dans le lecteur de CD/DVD. Inserire il CD di Installazione nel drive CD/DVD-Rom. Inserte el CD de instalación en la unidad de CD/DVD-Rom.
- Page 11 Doppelklicken Sie auf der automatisch generierten Miniaturansicht “Synology Assistent- SYNOLOGY” auf dem Desktop. Cliquez deux fois sur l’onglet généré automatiquement sur le bureau « Synology Assistant- SYNOLOGY ». Fare doppio click sulla miniatura generata automaticamente sul desktop “Synology Assistant- SYNOLOGY”.
- Page 12 Fare doppio click sulla miniatura “Synology Assistant” per avviare la procedura guidata di installazione. Haga doble clic en la miniatura “Synology Assistant” para ejecutar el asistente de instalación. Follow the on-screen instructions to complete the setup process. Befolgen Sie die Anweisungen auf dem Bildschirm, um den Einrichtungsvorgang abzuschließen.
- Page 13 Congratulations!/ Herzlichen Glückwunsch!/ Félicitations !/ Congratulazioni!/ Enhorabuena DS-106j has been set up. Refer to the user’s guide in the Installation CD for advance settings and management. For more information or online resources, please visit http://www.synology.com. DS-106j ist jetzt eingerichtet. Erweiterte Einstellungen und deren Handhabung finden Sie im Be- nutzerhandbuch auf der Installations-CD.
- Page 14 Copyright © 2004-2006 Synology Inc. Tutti i diritti riservati. Synology e altri nomi dei prodotti Synology sono marchi o marchi registrati della Synology Inc. Altri prodotti e nomi di aziende qui menzionati possono essere marchi appartenenti ai rispettivi titolari.