Table of Contents
Troubleshooting

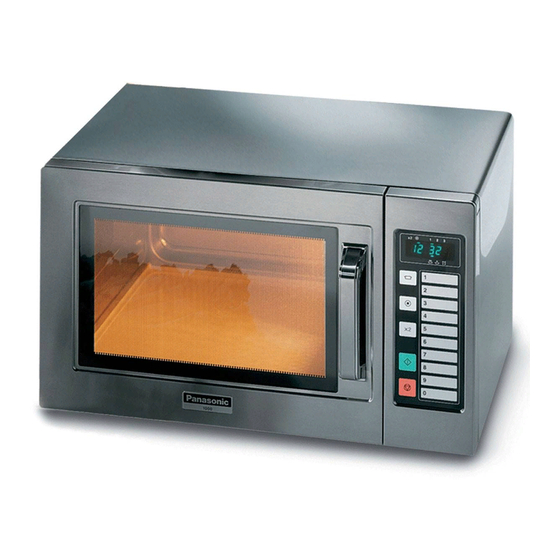
Related Manuals for Panasonic ne-1037 BTQ


Summary of Contents for Panasonic ne-1037 BTQ
-
Page 1: Microwave Oven
ORDER NO.PHAMOS0705021C2 Microwave Oven NE-1027 NE-1037 BTQ (U.K.) ETG (Continental Europe) © 2007 Panasonic Home Appliances Microwave Oven (Shanghai) Co., Ltd. All rights reserved. Unauthorized copying and distribution is a violation of law. - Page 2 NE-1027 / NE-1037...
-
Page 3: Table Of Contents
NE-1027 / NE-1037 CONTENTS Page Page 1 CONTROL PANEL 6.3. Low voltage transformer and/or power relays (RY1, RY2, 1.1. NE-1027 RY3, RY4) (NE-1037) 1.2. NE-1037 6.4. Fan motor 2 OPERATION PROCEDURE 6.5. Stirrer motor 2.1. Manual Heating for Single Stage 6.6. -
Page 4: Control Panel
NE-1027 / NE-1037 1 CONTROL PANEL 1.1. NE-1027... - Page 5 NE-1027 / NE-1037 1.2. NE-1037...
-
Page 6: Operation Procedure
NE-1027 / NE-1037 2 OPERATION PROCEDURE 2.1. Manual Heating for Single OPERATION DISPLAY 3. Press 1 , 0 , 0 pads. Stage (Sets to 1 minute) OPERATION DISPLAY 1. Plug the power supply cord into wall receptacle. 4. Press Start pad. -
Page 7: Memory Setting For 2Nd Stage
NE-1027 / NE-1037 OPERATION DISPLAY OPERATION DISPLAY 4. The pad number and Stage 5. 2 seconds later, the display Heating Indicator will appear in shows your setting program. the display again. 5. Press Power Level pad 2 times. (Sets to MED power) 6. -
Page 8: To Read Cycle Counter
NE-1027 / NE-1037 OPERATION DISPLAY 2.8. To Lock Program of Memory 7. Close the door, display will return blank after 1 minute. OPERATION DISPLAY 1. Plug the power supply cord into wall receptacle. - Display must be blank - 2.6. To Read Cycle Counter 2. -
Page 9: Description Of Operating Sequence
NE-1027 / NE-1037 4 DESCRIPTION OF OPERATING SEQUENCE 4.1. Variable power cooking 4.2. Variable power cooking control (NE-1027) control (NE-1037) The vari-power controller controls the ON-OFF time of the vari- The coil of power relay B (RY1) is energized intermittently by power switch to vary the output power of the microwave oven the digital programmer circuit, when the oven is set at any from "100"... -
Page 10: Cautions To Be Observed When Troubleshooting
NE-1027 / NE-1037 5 CAUTIONS TO BE OBSERVED WHEN TROUBLESHOOTING Unlike many other appliances, the microwave oven is high- 5.3. Warning about the electric voltage, high-current equipment. Though it is free from danger charge in the high voltage in ordinary use, extreme care should be taken during repair. capacitor CAUTION Servicemen should remove their watches whenever working close to... -
Page 11: When Parts Must Be Replaced, Remove The Power Plug From The Outlet
NE-1027 / NE-1037 5.4. When parts must be replaced, remove the power plug from the outlet. 5.5. When the 10 Amp/2.5 Amp fuse is blown due to the operation of short switch: WARNING When the 10 Amp/2.5 Amp fuse is blown due to operation of the interlock monitor switch, you must replace all of the components (Primary latch switch, Door switch, Short switch and Power relay B (RY1)). -
Page 12: Disassembly And Parts Replacement Procedure
NE-1027 / NE-1037 6 DISASSEMBLY AND PARTS REPLACEMENT PROCEDURE 6.1. Magnetron 6.2. Digital Programmer Circuit (D.P.C.) and membrane 1. Discharge the high voltage capacitor. keyboard. (NE-1037) 2. Remove 2 screws holding magnetron thermal cutout. 3. Remove 1 screw holding air guide A. NOTE: 4. -
Page 13: Low Voltage Transformer And/Or Power Relays
NE-1027 / NE-1037 6.4. Fan motor 6.3. Low voltage transformer and/or power relays (RY1, 1. Disconnect 2 lead wires from fan motor terminals. RY2, RY3, RY4) (NE-1037) 2. Disconnect 3 lead wires from noise filter P.C.B. terminals. 3. Disconnect 4 high voltage lead wires from high voltage NOTE: capacitor terminals. -
Page 14: Door Assembly
NE-1027 / NE-1037 6.6. Door assembly 6.7. Temp sensor (thermal protector) (NE-1037) 1. Open the door and remove door C from door E by carefully pulling outward starting from upper right hand corner. 1. Cut a lead wire at the top of sensor terminals. 2. -
Page 15: Component Test Procedure
NE-1027 / NE-1037 7 COMPONENT TEST PROCEDURE CAUTION 7.4. High voltage capacitor 1. High voltage is present at the high voltage terminal of the high voltage transformer during any cook cycle. 1. Check continuity of capacitor with meter on highest OHM 2. -
Page 16: Variable Power Controller (Ne-1027)
NE-1027 / NE-1037 7.6. Variable power controller 7.8. Protector diode (NE-1027) 1. Isolate the protector diode assembly from the circuit by disconnecting its leads. 1. Isolate variable power switch from circuit 2. With the ohmmeter set on the highest resistance scale, disconnecting 2 leads. -
Page 17: Measurements And Adjustments
NE-1027 / NE-1037 8 MEASUREMENTS AND ADJUSTMENTS 8.1. Adjustment of Safety switch A, 8.2. Measurement of microwave Safety switch B and short output switch The output power of the magnetron can be determined by performing IEC standard test procedures. However, due to the 1. -
Page 18: Troubleshooting Guide
NE-1027 / NE-1037 9 TROUBLESHOOTING GUIDE 9.1. NE-1027 CAUTION 1. Check grounding before checking for trouble. 2. Be cafeful of the high voltage circuit. 3. Discharge high voltage capacitor. 4. When checking the continuity of the switches or the high voltage transformer, disconnect one lead wire from these parts and then check continuity with the AC plug removed. - Page 19 NE-1027 / NE-1037 9.1.2. [TROUBLE 2] Fuse is blown SYMPTOM CAUSE CORRECTIONS 1. 10A fuse is blown. 1. Shorted lead wire harness 2. Shorted H.V. Capacitor 3. Shorted H.V. Diode Replace H.V. Diode and protector diode (*NOTE) 4. Defective magnetron Replace magnetron and protector diode (*NOTE) 5.
-
Page 20: Ne-1037
NE-1027 / NE-1037 9.2. NE-1037 CAUTION 1. Check grounding before checking for trouble. 2. Be careful of the high voltage circuit. 3. Discharge high voltage capacitor. 4. When checking the continuity of the switches or the high voltage transformer, disconnect one lead wire from these parts and then check continuity with the AC plug removed. - Page 21 NE-1027 / NE-1037 9.2.2. [TROUBLE 2] Fuse is blown SYMPTOM CAUSE CORRECTIONS 1. 10A fuse is blown. 1. Shorted lead wire harness 2. Defective short switch Check adjustment of latch switches and door 3. Defective primary latch switch 4. Shorted H.V. Capacitor 5.
-
Page 22: Trouble Related To Digital Programmer Circuit
NE-1027 / NE-1037 9.2.4. Trouble related to Digital Programmer Circuit SYMPTOM STEP CHECK RESULT CAUSE/CORRECTIONS No display when oven is first plugged Printed fuse pattern of D.P.C. Normal STEP 2 Open (NOTE) Shorted circuit of ZNR, L. V. T., Oven Lamp etc. Replace D.P.C.