Table of Contents
Advertisement
Available languages
Available languages
Quick Links
Istruzioni per l'uso
CUCINA E FORNO
IT
Sommario
IT
GB
T R
Installazione, 2-5
English, 14
Turco, 26
Italiano, 1
Tabella caratteristiche
Avvio e utilizzo, 7-10
KN6T76SA/ I
Assistenza, 13
Advertisement
Chapters
Table of Contents

Related Manuals for Indesit KN6T76SA/I


Summary of Contents for Indesit KN6T76SA/I
-
Page 1: Table Of Contents
Istruzioni per l’uso CUCINA E FORNO Sommario Installazione, 2-5 English, 14 Turco, 26 Italiano, 1 Posizionamento e livellamento Collegamento elettrico Collegamento gas Adattamento a diversi tipi di gas Tabella caratteristiche bruciatori e ugelli Tabella caratteristiche Descrizione dell’apparecchio, 6 Vista d’insieme Pannello di controllo Avvio e utilizzo, 7-10 KN6T76SA/ I... -
Page 2: Installazione
Installazione ! E importante conservare questo libretto per poterlo Scarico dei fumi della combustione consultare in ogni momento. In caso di vendita, di cessione o di trasloco, assicurarsi che resti insieme Lo scarico dei fumi della combustione deve essere all’apparecchio. assicurato tramite una cappa collegata a un camino a tiraggio naturale di sicura efficienza, oppure mediante ! Leggere attentamente le istruzioni: ci sono importanti... -
Page 3: Collegamento Elettrico
targhetta caratteristiche; • se la cucina viene • la tensione di alimentazione sia compresa nei installata sotto un HOOD valori nella targhetta caratteristiche; pensile, esso dovrà • la presa sia compatibile con la spina Min. mantenere una dell’apparecchio. In caso contrario sostituire la distanza minima dal presa o la spina;... -
Page 4: Adattamento A Diversi Tipi Di Gas
torsione e non presenti pieghe o strozzature; quelli adatti al nuovo tipo di gas ( vedi tabella • non venga a contatto con corpi taglienti, spigoli Caratteristiche bruciatori e ugelli ); vivi, parti mobili e non sia schiacciato; 3. rimettere in posizione tutti i componenti seguendo •... -
Page 5: Tabella Caratteristiche Bruciatori E Ugelli
Tabella caratteristiche bruciatori e ugelli Tabella 1 Gas liquido Gas naturale Bruciatore Diametro Potenza termica By-pass Ugello Portata * Ugello Portata * (mm) kW (p.c.s.*) 1/100 1/100 1/100 Nomin. Ridot. (mm) (mm) (mm) Rapido 3,00 (Grande) (R) Semi Rapido 1,90 (Medio) (S) Ausiliario 1,00... -
Page 6: Descrizione Dell'apparecchio
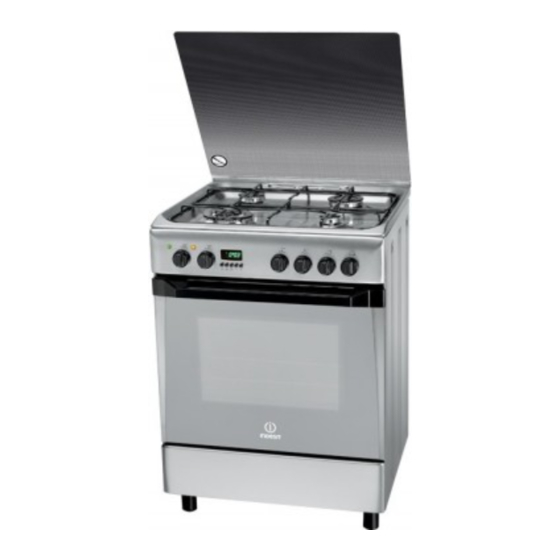
Descrizione dell’apparecchio Vista d’insieme Coperchio in vetro Bruciatore a gas Piano di contenimento per eventuali trabocchi Griglia del piano di lavoro GUIDE Pannello di controllo di scorrimento dei ripiani posizione 5 Ripiano GRIGLIA posizione 4 posizione 3 Ripiano LECCARDA posizione 2 posizione 1 Piedino di regolazione Piedino di regolazione... -
Page 7: Avvio E Utilizzo
Avvio e utilizzo Uso del piano cottura porta del forno e aerare il locale. L’odore che si avverte è dovuto all’evaporazione delle sostanze usate per proteggere il forno. Accensione dei bruciatori ! Non appoggiare mai oggetti sul fondo del forno In corrispondenza di ogni manopola BRUCIATORE è... -
Page 8: Programmi Di Cottura
Programmi di cottura cibo al centro della griglia, poiché negli angoli non viene cotto. ! Per tutti i programmi è impostabile una temperatura Forno “Fast cooking” Forno “Fast cooking” Forno “Fast cooking” Forno “Fast cooking” Forno “Fast cooking” tra 50°C e MAX, tranne: Posizione manopola termostato “M M M M M ”: Tra 60°C 60°C 60°C... -
Page 9: Pianificare La Cottura Con Il Programmatore Elettronico
Pianificare la durata di una cottura con inizio ritardato cottura GRATIN mettere la griglia in posizione 2 o 3 e la Innanzitutto occorre decidere il programma di cottura e la leccarda in posizione 1 per raccogliere i residui di temperatura desiderati, agendo sulle manopole cottura. -
Page 10: Tabella Cottura In Forno
Correggere o cancellare i dati impostati I dati impostati possono essere cambiati in qualsiasi momento premendo il tasto corrispondente (CONTAMINUTI, DURATA COTTURA o FINE COTTURA) e premendo il tasto oppure Cancellando la durata cottura si ha la cancellazione automatica anche della fine cottura e viceversa. -
Page 11: Precauzioni E Consigli
Precauzioni e consigli ! L’apparecchio è stato progettato e costruito in • Non è previsto che l'apparecchio venga utilizzato conformitè alle norme internazionali di sicurezza. da persone (bambini compresi) con ridotte Queste avvertenze sono fornite per ragioni di capacitè fisiche, sensoriali o mentali, da persone sicurezza e devono essere lette attentamente. -
Page 12: Manutenzione E Cura
Manutenzione e cura Escludere la corrente elettrica Sostituire la lampadina di illuminazione Prima di ogni operazione isolare l’apparecchio dalla del forno rete di alimentazione elettrica. 1. Dopo aver disinserito il forno dalla rete elettrica, Pulire l’apparecchio togliere il coperchio in vetro del portalampada ( vedi figura ). -
Page 13: Assistenza
Assistenza ! Non ricorrere mai a tecnici non autorizzati. Comunicare: • Il tipo di anomalia; • Il modello della macchina (Mod.) • Il numero di serie (S/N) Queste ultime informazioni si trovano sulla targhetta caratteristiche posta sull’apparecchio Assistenza attiva 7 giorni su 7 In caso di necessità... -
Page 14: Operating Instructions
Description of the appliance, 19 Overall view Control panel Start-up and use, 20-23 Using the hob Using the oven KN6T76SA/I Cooking modes Practical cooking advice Planning cooking with the programmer Oven cooking advice table Precautions and tips, 24 General safety... -
Page 15: Installation
Installation ! Before operating your new appliance please read Disposing of combustion fumes this instruction booklet carefully. It contains important information concerning the safe installation and Disposing of combustion fumes should be guaranteed operation of the appliance. using a hood connected to a safe and efficient natural suction chimney, or using an electric fan that begins ! Please keep these operating instructions for future to operate automatically every time the appliance is... -
Page 16: Electrical Connection
• The voltage is in the range between the values • If the cooker is indicated on the data plate. installed underneath a HOOD • The socket is compatible with the plug of the wall cabinet, there must appliance. If the socket is incompatible with the Min. -
Page 17: Adapting To Different Types Of Gas
Adapting to different types of gas • Its whole length is easy to inspect so that the condition of the hose may be checked. • Is shorter than 1500 mm. It is possible to adapt the appliance to a type of gas •... -
Page 18: Table Of Burner And Nozzle Specifications
Burners located inside the flap or, after the oven compartment has been opened, on the left-hand wall inside the oven. KN6T76SA/I Voltage and see data plate frequency Directive 2002/40/EC on the label of electric ovens. -
Page 19: Description Of The Appliance
Description of the appliance Overall view Glass cover Gas burner Containment surface for spills Hob grid GUIDE RAILS Control panel for the sliding racks position 5 GRILL rack position 4 position 3 DRIPPING PAN rack position 2 position 1 Adjustable foot Adjustable foot Control panel THERMOSTAT... -
Page 20: Start-Up And Use
Start-up and use Using the hob the oven door. The appliance may emit a slightly unpleasant odour caused by protective substances Lighting the burners used during the manufacturing process burning away. For each BURNER knob there is a full ring showing the strength of the flame for the relevant burner. -
Page 21: Cooking Modes
Cooking modes Fast cooking” Mode“ Fast cooking” Mode“ Fast cooking” Mode“ Fast cooking” Mode“ Fast cooking” Mode“ Position of thermostat knob “M M M M M ”: between 60°C 60°C 60°C 60°C 60°C and... -
Page 22: Planning Cooking With The Programmer
the rack in position 2 or 3 and the dripping pan in suitable temperature using the SELECTOR and position 1 to collect cooking residues. THERMOSTAT knobs on the oven. • We recommend that the power level is set to maximum. At this point it is possible to set the cooking time: ... - Page 23 pressing the corresponding button (TIMER, COOKING TIME or COOKING END TIME) and the button. When the cooking time data is cancelled, the cooking end time data is also cancelled automatically, and vice versa. If the oven has already been programmed, it will not accept cooking end times which are before the start of the programmed cooking process.
-
Page 24: Precautions And Tips
Precautions and tips ! This appliance has been designed and manufactured • The appliance should not be operated by people in compliance with international safety standards. (including children) with reduced physical, The following warnings are provided for safety sensory or mental capacities, by inexperienced reasons and must be read carefully. -
Page 25: Care And Maintenance
Care and maintenance Replacing the oven light bulb Switching the appliance off 1. After disconnecting the oven from the electricity Disconnect your appliance from the electricity supply mains, remove the glass lid covering the lamp before carrying out any work on it. socket ( see figure ). - Page 26 Kullaným talimatlarý OCAKLI FIRIN Içindekiler Montaj, 27-30 Yerlestirme ve seviye ayarlama Elektrik baglantýsý Türkçe, 26 Italiano, 1 English, 14 Gaz baglantýsý Farklý gaz tiplerine uyum saglama Agýzlýk ve ocaklarýn özellik çizelgesi Teknik veriler Cihazýn tanýtýmý, Genel görünüm Kontrol paneli Çalýstýrma ve kullanma, 32-36 Set üstü...
- Page 27 Montaj ! Bu kitapçýgý gerektigi her an danýsabilmeniz için Yanan dumanlarýn tahliyesi özenle saklayýnýz. Satýs, devir yada tasýnma halinde, bu kitapçýgýn cihazla birlikte kalmasýný saglayýnýz. Yanan dumanlarýn dýsarýya atýlmasý etkili dogal çekme sistemli sömineye baglý bir davlumbaz yada cihaz açýldýgýnda otomatik devreye giren elektrikli bir ! Talimatlarý...
- Page 28 • güç kaynagý geriliminin teknik veriler etiketi • Set üstü ocagýn bir raf üzerinde belirlenen degerler arasýnda olmasý (bkz. altýna gelecek sekilde HOOD asagý); monte edilmesi durumunda, • cihazýn fisinin prizle uyumlu olmasý. Aksi takdirde Min. bu rafýn tezgâh yüzeyine ya prizi, yada fisi degistiriniz;...
- Page 29 Farklý gaz tiplerine uyum saglama • boru; onun durumu her yerden kontrol edilebilecek sekilde yerlestirilmis olmalýdýr Cihazýn tasarlanmýs olan gazdan (kapaktaki • 1500 mm uzunlugundan kýsa olmalýdýr kalibrasyon etiketine bakýnýz) baska gaz tipine uyum • yürürlükteki ulusal normlara uygun tipte kablo saglanmasý...
- Page 30 Agýzlýk ve ocaklarýn özellik çizelgesi Ç ize lge 1 Sıv ı g az D oğa l ga z Be k Ç ap Te rm ik güç kW By-Pass Me me deb i* M e m e De bi* (m m ) (p.c.s.*) 1/10 0 1/10 0...
- Page 31 Cihazýn tanýmý Genel görünüm Kontrol paneli...
- Page 32 Çalýstýrma ve kullaným Set üstü ocagýn kullanýlmasý Piţ irme kabý çapý ř (cm) Hýzlý (R) 24 - 26 Ocaklarýn ayarlanmasý Büyük Bek (TR) 24 - 26 Her OCAK dügmesi için dolu bir yuvarlak sembolü ile Yarý hýzlý (S) 16 - 20 ilgili ocak konumu belirtilir.
- Page 33 ! Elektronik programlayýcýna sahip olan cihazlarda GELENEKSEL FIRIN programý elektrik fýrýný kullanmak üzere istenen pisirme fonksiyonunu seçmeden önce tuslarýna Alt ve üst ýsýtma elemanlarý devreye girer. Bu geleneksel pisirme konumu ile sadece tek pisirme ayný anda basýnýz (ekranda sembolü rafýnýn kullanýlmasý daha uygundur: birden fazla görüntülenir).
- Page 34 Yemegi tel ýzgaranýn ortasýna yerlestiriniz. Köselerde pismez. IZGARA • IZGARA türü pisirme yaparken pisirme kalýntýlarýný GRATIN programý (akan yag ve/veya soslar gibi) toplamak için yag toplama tepsisini 1 pozisyona, ýzgara ise 5 Üst ýsýtma elemaný devreye girer, fan ile çevirme (sis) kýsmý pozisyona alýnýz.
- Page 35 Fýrýnda pisirme tablosu Programlar Gıda Ağırlık Rafların Ön ısıtma Önerilen Pişirme (Kg) konumu (dakika) sıcaklık süresi (dakika) Ördek 65-75 Dana yada sığır kızartması 70-75 Domuz kızartması Geleneksel Fırın 70-80 Bisküvi türü (çırpılmış) 15-20 Reçelli tartlar 30-35 Reçelli tartlar 20-30 Meyveli tartlar 40-45 2 veya 3 Plum-cake...
- Page 36 Elektronik programlayýcýyla pisirme Bundan sonra pisirme bitirme saatinin planýný yapýnýz programlanmasý gerekir 4. PISIRME SONU tusuna basýnýz; Saat nasýl ayarlanýr 5. 4 saniye içinde tuslarýyla günün dogru Elektrik sebekesine baglandýktan sonra yada elektrik saatini ayarlayýnýz.
- Page 37 Önlemler ve öneriler ! Cihaz uluslararasý güvenlik normlarýna uygun sekilde • Fisi prizden çekerken kablosundan degil fisin tasarlanmýs ve imal edilmistir. kendisinden tutarak çekiniz. Bu uyarýlar güvenlik amaçlý olup dikkatlice • Fisi prizden çekmeden önce temizlik ve bakým okunmalýdýr. islemlerini yapmayýnýz. Genel güvenlik uyarýlarý...
- Page 38 Bakým ve özen Elektrik akýmýnýn kesilmesi Fýrýn contalarýnýn kontrol edilmesi Her türlü islem yapmadan önce cihazýn elektrik Fýrýn kapagýný çevreleyen contanýn durumunu sebekesine baglantýsýný kesiniz. periyodik olarak kontrol ediniz. Hasarlý olmasý halinde en yakýn Yetkili Teknik Servise basvurunuz. Bu durumda onarým yapýlýncaya kadar fýrýnýn kullanýlmamasý...
- Page 40 03/2011 - 195087047.00...