Table of Contents
Advertisement
Available languages
Available languages
Quick Links
Download this manual
See also:
Installation Manual
Advertisement
Table of Contents

Related Manuals for Axis P7224


Summary of Contents for Axis P7224
- Page 1 INSTALLATION GUIDE AXIS P7224 Video Encoder Blade...
-
Page 2: Electromagnetic Compatibility (Emc)
• find answers to resolved problems in the FAQ Australia - This electronic device meets the database. Search by product, category, or phrases requirements of the Radio communications • report problems to Axis support by logging in to your (Electromagnetic Compatibility) Standard AS/NZS private support area CISPR22:2002. -
Page 3: Battery Replacement
This Axis product must be used in compliance with local laws and regulations. Battery replacement This Axis product uses a 3.0V CR2032 Lithium battery as the power supply for its internal real-time clock (RTC). Under normal conditions this battery will last for a minimum of 5 years. Low battery power affects the operation of the RTC, causing it to reset at every power-up. -
Page 5: Installation Steps
CD included in this package, or from www.axis.com/techsup Important! • To mount the hardware in either the AXIS 291 1U Video Server Rack or the AXIS Q7900 Rack, please see the Installation Guide for the respective encoder rack • This product must be used in compliance with local laws and regulations. -
Page 6: Hardware Overview
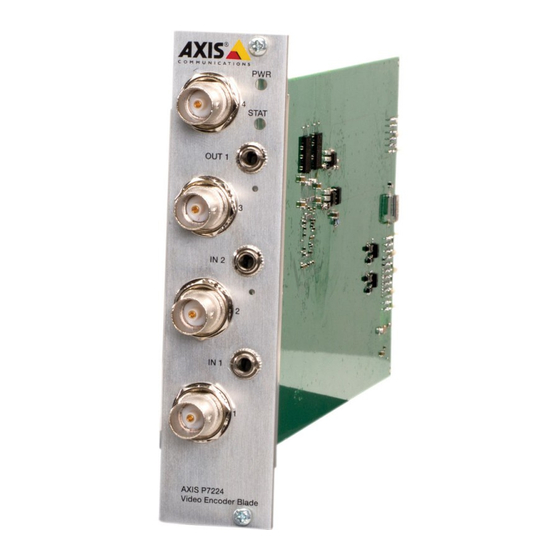
Page 6 AXIS P7224 Installation Guide Hardware overview Bus connectors Audio mounting nut Part number (P/N) & Serial number (S/N). The serial number may be required during the installation. 4 video inputs Power LED Audio input 1 Control button Status LED... -
Page 7: Install The Hardware
Follow the instructions in the Installation Guide included with the racks for installing the AXIS P7224. The installation guides for AXIS 291 1U and AXIS Q7900 are available on the AXIS Network Video Product CD included with the AXIS P7224, and at www.axis.com... -
Page 8: Assign An Ip Address
AXIS P7224 will use 192.168.0.90 as the default IP address. If you would like to assign a static IP address, the recommended method in Windows is either AXIS IP Utility or AXIS Camera Management. Depending on the number of products you wish to install, use the method that best suits your purpose. -
Page 9: Axis Ip Utility
1. Check that the AXIS P7224 is connected to the network and that power has been applied. 2. Start AXIS IP Utility. 3. When the AXIS P7224 appears in the window, double-click an entry to open the home page for that video input. -
Page 10: Axis Camera Management - Multiple Products/Large Installations
IP addresses. Automatic discovery 1. Check that the AXIS P7224 is connected to the network and that power has been applied. 2. Start AXIS Camera Management. 3. When the AXIS P7224 appears in the window, right-click the link and select Live View Home Page. -
Page 11: Set The Password
4. To log in, enter the user name “root” in the dialog as requested. Note: The default administrator user name root cannot be deleted. 5. Enter the password as set above, and click OK. If the password is lost, the AXIS P7224 must be reset to the factory default settings. See page 18. - Page 12 The Live View page of the video encoder is displayed. The Setup link leads to menus that allow you to customize the encoder. If required, click Yes to install AMC (AXIS Media Control), which allows viewing of the video stream in Internet Explorer. You will need administrator rights on the computer to do this.
-
Page 13: Other Methods Of Setting The Ip Address
(e.g. Safari) and click on the link to access the product’s web pages. A free service from Axis that allows you to quickly and simply install AXIS Dynamic your product. Requires an Internet connection with no HTTP proxy. See DNS Service www.axiscam.net for more information... -
Page 14: Set The Ip Address With Arp/Ping
-s 408 <IP Address> ping -s 408 192.168.0.125 4. Check that the network cable is connected to AXIS P7224 and then start/restart the product, by disconnecting and reconnecting power. 5. Close the command prompt when you see ‘Reply from 192.168.0.125:...’ or similar. -
Page 15: Unit Connectors
2 Ring 3 Sleeve GND Video Inputs - - The AXIS P7224 supports 4 video sources, each connected via coaxial / BNC connectors. Physical connections made using 75 Ohm coaxial video cable have a recommended maximum length of 250 meters (800 feet). -
Page 16: Pin Assignments For The I/O Connector Of The Axis 291 1U Video Server Rack
Page 16 AXIS P7224 Installation Guide Pin assignments Pin assignments for the I/O Connector of the AXIS 291 1U Video Server Rack Function Description +12V out, 100mA Configurable I/O 1 Digital input - Connect to GND to Min input = 0V DC... -
Page 17: Led Indicators
AXIS P7224 Installation Guide Page 17 Pin assignments for the RS-485 Connector of the AXIS Q7900 Rack AXIS P7224 Description RS485A A half-duplex RS-485 interface for controlling auxiliary equipment e.g. PTZ devices. RS485B 3-12 Not used LED Indicators Green Steady - normal operation. -
Page 18: Resetting To The Factory Default Settings
Accessing the AXIS P7224 from the Internet Once installed, your AXIS P7224 is accessible on your local network (LAN). To access the video encoder from the Internet, network routers must be configured to allow incoming traffic, which is usually done on a specific port. -
Page 20: Mesures De Sécurité
• Évitez d’exposer le produit Axis à des vibrations, des chocs ou une trop forte pression et ne l’installez pas sur des supports instables, ou encore sur des surfaces ou des murs instables ou vibrants; cela risquerait de l’endommager. -
Page 21: Procédure D'installation
CD joint ou sur le site www.axis.com/techsup. Important! • Si vous souhaitez monter le matériel soit sur le Rack de serveur vidéo AXIS 291 1U soit sur le Rack AXIS Q7900, reportez-vous au Guide d’installation correspondant. -
Page 22: Vue D'ensemble Du Matériel
Page 22 AXIS P7224 Guide d’installation Vue d’ensemble du matériel Connecteurs de bus Écrou de montage audio Référence et numéro de série. Le numéro de série peut vous être demandé pendant l’installation. 4 entrées vidéo Voyant d’alimentation Entrée audio 1 Entrée audio 2 Sortie audio 1 Voyant d’état... -
Page 23: Installation Du Matériel
Suivez les instructions du Guide d’installation fourni avec les racks pour installer l’AXIS P7224. Les guides d’installation pour l’AXIS 291 1U et l’AXIS Q7900 sont disponibles sur le CD du produit de vidéo sur IP AXIS fourni avec l’AXIS P7224, ainsi que sur www.axis.com. -
Page 24: Attribution D'une Adresse Ip
Choisissez la méthode qui vous convient le mieux en fonction du nombre de produits à installer. Ces deux applications gratuites sont disponibles sur le CD du produit de vidéo sur IP AXIS fourni avec ce produit. Vous pouvez également les télécharger à partir du site www.axis.com. -
Page 25: Axis Ip Utility
(sous-réseau physique) que l’AXIS P7224. Détection automatique 1. Vérifiez que l’AXIS P7224 soit bien connecté au réseau et se trouve sous tension. 2. Lancez AXIS IP Utility. 3. Lorsque l’AXIS P7224 apparaît dans la fenêtre, double-cliquez sur une entrée pour ouvrir la page d’accueil correspondant à... - Page 26 1. Vérifiez que l’AXIS P7224 soit bien connecté au réseau et se trouve sous tension. 2. Lancez AXIS Camera Management. 3. Lorsque l’AXIS P7224 apparaît dans la fenêtre, cliquez sur le lien avec le bouton droit de la souris et sélectionnez Live View Home Page (Page d’accueil – Vidéo en direct).
-
Page 27: Configuration Du Mot De Passe
5. Saisissez le mot de passe de la manière indiquée ci-dessus et cliquez sur OK. Si vous avez oublié votre mot de passe, vous devrez rétablir les paramètres d’usine par défaut de votre AXIS P7224. Reportez-vous à la page 34. - Page 28 La page Live View (Vidéo en direct) de l’encodeur vidéo s’affiche. Cliquez sur le lien Setup (Configuration) pour afficherles menus de personnalisation de l’encodeur. Si nécessaire, cliquez sur Yes (Oui) pour installer AMC (AXIS Media Control) afin de pouvoir visualiser le flux de données vidéo dans Internet Explorer. Vous devez pour cela avoir des droits d’administrateur sur cet ordinateur.
-
Page 29: Autres Méthodes De Configuration De L'adresse Ip
Bonjour dans votre navigateur (par exemple, Safari), puis cliquez sur le ultérieure) lien pour accéder aux pages Web du produit. Tous Service Axis gratuit vous permettant d’installer rapidement et AXIS Dynamic facilement votre produit. Nécessite une connexion Internet sans proxy DNS Service HTTP. -
Page 30: Configuration De L'adresse Ip À L'aide D'arp/Ping
-s 408 <Adresse IP> ping -s 408 192.168.0.125 4. Vérifiez que le câble réseau est connecté à AXIS P7224, puis démarrez/redémarrez le produit en débranchant puis en rebranchant l’alimentation. 5. Fermez l’invite de commande lorsque vous voyez apparaître « Reply from 192.168.0.125:... »... -
Page 31: Connecteurs De L'appareil
3 Manchon GND (Terre) GND (Terre) Entrées vidéo - – L’AXIS P7224 prend en charge 4 sources vidéo, chacune étant connectée par des connecteurs coaxiaux/BNC. Si un câble vidéo coaxial de 75 ohms est utilisé pour les raccordements physiques, il est conseillé de ne pas avoir plus de 250 mètres de longueur de câble. -
Page 32: Affectation Des Broches
Page 32 AXIS P7224 Guide d’installation Affectation des broches Affectation des broches du connecteur d’E/S du Rack de serveur vidéo AXIS 291 1U Broche Fonction Description + 12 V en sortie, 100 mA GND (Terre) Entrée/sortie configurable 1 Entrée numérique : connectez-la Entrée minimum = 0 V CC... -
Page 33: Voyants Lumineux
AXIS P7224 Guide d’installation Page 33 Affectation des broches du connecteur RS-485 du Rack AXIS Q7900 Broche AXIS P7224 Description RS485A Une interface RS-485 semi-duplex pour le contrôle des appareils auxiliaires (périphériques PTZ, par exemple). RS485B 3-12 Non utilisé Voyants lumineux Vert Continu : fonctionnement normal. -
Page 34: Rétablissement Des Paramètres D'usine Par Défaut
Web du produit. Pour en savoir plus, consultez l’aide en ligne. Accès à l’AXIS P7224 sur Internet Une fois installé, votre AXIS P7224 est accessible sur votre réseau local (LAN). Pour accéder à l’encodeur vidéo sur Internet, des routeurs réseau doivent être configurés de manière à autoriser le trafic entrant, ce qui est généralement réalisé... - Page 36 Axis oder Drittanbietern erhältlich. • Verwenden Sie nur Ersatzteile, die von Axis empfohlen bzw. bereitgestellt wurden. • Versuchen Sie nicht, das Produkt selbst zu reparieren. Wenden Sie sich bei Service-Angelegenheiten an Axis oder an Ihren Axis-Händler. WICHTIG! • Verwenden Sie dieses Axis-Produkt unter Beachtung der geltenden rechtlichen Bestimmungen.
- Page 37 AXIS P7224 Video-Encoder-Blade Installationsanleitung In dieser Anleitung wird die Installation des AXIS P7224 Video-Encoder-Blades in einem Netzwerk beschrieben. Alle weiteren Hinweise zur Verwendung des Produkts finden Sie im Benutzerhandbuch, das auf der mitgelieferten CD sowie auf unserer Website unter „www.axis.com/techsup“ zur Verfügung steht.
- Page 38 Seite 38 AXIS P7224 Installationsanleitung Hardwareübersicht Busanschlüsse Audioanschluss-Mutter Bestellnummer (P/N) und Seriennummer (S/N). Die Seriennummer wird für die Installation benötigt. 4 Videoeingänge Netz-LED Audio-Eingang 2 Audio-Eingang 1 Status-LED Steuertaste Audio-Ausgang 1 Reset-Taste Abmessungen 30 x 129 x 255 mm (einschließlich Anschlüsse)
-
Page 39: Installieren Der Hardware
AXIS Q7900 Rack Montieren Sie das AXIS P7224 gemäß den Anweisungen in der Installationsanleitung zum jeweiligen Rack. Die Installationsanleitungen für die Racks AXIS 291 1U und AXIS Q7900 stehen auf der im Lieferpaket des AXIS P7224 enthaltenen CD für Axis-Netzwerkvideoprodukte zur Verfügung... -
Page 40: Zuweisen Einer Ip-Adresse
In die meisten Netzwerke ist heutzutage ein DHCP-Server eingebunden, der angeschlossenen Geräten automatisch IP-Adressen zuweist. Wenn Ihr Netzwerk über keinen DHCP-Server verfügt, müssen die Blades nacheinander installiert werden und für das AXIS P7224 wird als Standard-IP- Adresse 192.168.0.90 verwendet. Zum manuellen Zuweisen einer statischen IP-Adresse stehen unter Windows die Programme AXIS IP Utility und AXIS Camera Management zur Verfügung. -
Page 41: Axis Ip Utility
AXIS IP Utility erkennt automatisch im Netzwerk vorhandene Axis-Geräte und zeigt diese an. Die Anwendung kann außerdem zur manuellen Zuweisung einer statischen IP-Adresse verwendet werden. Beachten Sie, dass sich das AXIS P7224 und der Computer, auf dem AXIS IP Utility ausgeführt wird, im gleichen Netzwerksegment (d.h. physischen Subnetz) befinden müssen. Automatische Erkennung 1. - Page 42 2. Starten Sie AXIS Camera Management. 3. Wenn das AXIS P7224 im Fenster angezeigt wird, klicken Sie mit der rechten Maustaste auf den Link und wählen Sie Live View Home Page (Homepage der Live-Ansicht). Anweisungen zum Festlegen des Kennworts finden Sie auf Seite 43.
-
Page 43: Festlegen Des Kennworts
Für den Zugriff auf das Produkt muss das Kennwort für den standardmäßigen Administrator- Benutzer root festgelegt werden. Dies erfolgt über das Dialogfeld Configure Root Password (Root- Kennwort konfigurieren), das beim erstmaligen Zugriff auf das AXIS P7224 angezeigt wird. Um ein Abhören der Netzwerkkommunikation während der Festlegung des Root-Kennworts zu vermeiden, können Sie diesen Vorgang über eine verschlüsselte HTTPS-Verbindung durchführen, die... - Page 44 Sie auf Menüs zugreifen, die die individuelle Einstellung des Encoders ermöglichen. Klicken Sie bei Bedarf auf Yes (Ja), um AMC (AXIS Media Control) zu installieren. Nach Abschluss der Installation können Sie Videoströme in Internet Explorer anzeigen. Hierzu müssen Sie über Administratorrechte für den Computer verfügen.
-
Page 45: Andere Methoden Zum Festlegen Der Ip-Adresse
Sie auf den Link, um auf die Webseiten des Produkts zu gelangen. Alle Ein kostenloser Service von Axis, mit dem Sie Ihr Produkt schnell und AXIS Dynamic einfach installieren können. Eine Internetverbindung ohne HTTP- DNS Service Proxyserver ist Voraussetzung. Weitere Informationen hierzu finden Sie auf „www.axiscam.net“. -
Page 46: Zuweisen Der Ip-Adresse Per Arp/Ping
-s 408 <IP-Adresse> ping -s 408 192.168.0.125 4. Stellen Sie sicher, dass das Netzwerkkabel mit dem AXIS P7224 verbunden ist, und starten Sie das Produkt neu, indem Sie die Stromversorgung unterbrechen und wiederherstellen. 5. Schließen Sie die Befehlszeile, sobald „Reply from 192.168.0.125:...“ (Antwort von 192.168.0.125:...) oder eine ähnliche Meldung angezeigt wird. - Page 47 2 Ring 3 Schaft Masse (GND) Masse (GND) Videoeingänge - - Das AXIS P7224 unterstützt vier Videoeingänge, die jeweils über Koaxial-/BNC- Anschlüsse angeschlossen sind. Für physische Verbindungen über ein 75-Ohm-Koaxial-Videokabel wird eine Länge bis maximal 250 Meter empfohlen. Hinweis: Für jeden Videoeingang kann der 75-Ohm-Videoanschluss auf der Produkt-Webseite unter Video &...
- Page 48 Seite 48 AXIS P7224 Installationsanleitung Kontaktbelegungen Kontaktbelegungen für den E/A-Anschluss des AXIS 291 Videoserver-Rack (1 HE) Funktion Bedeutung +12 V Ausgang, 100 mA Masse (GND) E/A 1 konfigurierbar Digitaleingang: Zum Aktivieren mit Min. Eingang = 0 V DC dem Massekontakt verbinden; zum Max.
-
Page 49: Led-Anzeigen
AXIS P7224 Installationsanleitung Seite 49 Kontaktbelegungen für den RS-485-Anschluss des AXIS Q7900 Rack AXIS P7224 Bedeutung RS485A Halbduplex-RS-485-Schnittstelle zur Steuerung von Zusatzgeräten, wie z.B. PTZ-Geräten RS485B 3-12 Nicht verwendet LED-Anzeigen Grün Leuchtet bei Normalbetrieb konstant Status Gelb Leuchtet konstant beim Einschalten und beim Wiederherstellen der Werkseinstellungen bzw. -
Page 50: Wiederherstellen Der Werkseitigen Standardeinstellungen
Weitere Informationen finden Sie in der Online-Hilfe. Über das Internet auf das AXIS P7224 zugreifen Nach der Installation können Sie über Ihr lokales Netzwerk (LAN) auf das AXIS P7224 zugreifen. Um auch über das Internet auf den Video-Encoder zugreifen zu können, müssen Sie die Netzwerk- Router so konfigurieren, dass diese den entsprechenden eingehenden Datenverkehr zulassen, was üblicherweise durch Zuweisung eines bestimmten Ports geschieht. -
Page 52: Sostituzione Della Batteria
• Evitare di esporre il prodotto Axis a vibrazioni, urti o pressioni eccessive e non installare la telecamera su staffe instabili, superfici o pareti instabili o vibranti, poiché in tal modo si potrebbe danneggiare il prodotto. •... -
Page 53: Procedure Di Installazione
Importante! • Per informazioni sull'installazione dell'hardware nel AXIS 291 1U Video Server Rack o AXIS Q7900 Rack, consultare la Guida all'installazione del rack del codificatore corrispondente • Il prodotto deve essere utilizzato in conformità alle leggi e alle disposizioni locali. -
Page 54: Panoramica Dell'hardware
Pagina 54 AXIS P7224 Guida all'installazione Panoramica dell'hardware Connettori bus Dado di montaggio audio Codice prodotto (P/N) e numero di serie (S/N). Il numero di serie potrebbe essere richiesto durante l'installazione. 4 ingressi video LED di alimentazione Ingresso audio 2 Uscita audio 1... -
Page 55: Installazione Dell'hardware
• AXIS Q7900 Rack Seguire le istruzioni nella Guida all'installazione inclusa con i rack di installazione di AXIS P7224. Le guide all'installazione per AXIS 291 1U e AXIS Q7900 sono disponibili sul CD AXIS Network Video Product incluso con AXIS P7224 e all'indirizzo www.axis.com... -
Page 56: Assegnazione Di Un Indirizzo Ip
AXIS P7224 utilizzerà l'indirizzo IP di default 192.168.0.90. Per assegnare un indirizzo IP statico, utilizzare AXIS IP Utility o AXIS Camera Management in ambiente Windows. In base al numero di prodotti da installare, utilizzare il metodo che meglio si adatta alle proprie esigenze. -
Page 57: Axis Ip Utility
1. Verificare che AXIS P7224 sia collegato alla rete e alimentato correttamente. 2. Avviare AXIS IP Utility. 3. Quando AXIS P7224 appare nella finestra, fare doppio clic su una voce per aprire la pagina iniziale per l'input video. 4. Vedere pagina 59 per indicazioni su come assegnare la password. - Page 58 1. Verificare che AXIS P7224 sia collegato alla rete e alimentato correttamente. 2. Avviare AXIS Camera Management. 3. Quando viene visualizzata AXIS P7224 nella finestra, fare clic con il pulsante destro sul collegamento e selezionare Live View Home Page (Pagina iniziale Immagini dal vivo).
-
Page 59: Impostazione Della Password
1. Fare clic sul pulsante Create self-signed certificate (Crea certificato autofirmato). 2. Fornire le informazioni richieste e fare clic su OK. Il certificato viene creato e la password può essere ora impostata in modo sicuro. Da questo momento in poi tutto il traffico verso e dal AXIS P7224 viene cifrato. - Page 60 Setup (Impostazione) conduce ai menu che permettono di personalizzare il codificatore. Se necessario, fare clic su Yes (Sì) per installare AMC (AXIS Media Control) che consente di visualizzare il flusso video in Internet Explorer. A questo scopo è necessario disporre dei diritti di amministratore.
-
Page 61: Altri Metodi Di Assegnazione Dell'indirizzo Ip
Bonjour nel browser (ad esempio Safari) e fare clic sul collegamento successive) per accedere alle pagine Web del prodotto. Tutte Servizio gratuito fornito da Axis che consente di installare il prodotto AXIS Dynamic in modo facile e veloce. È necessaria una connessione a Internet senza DNS Service proxy HTTP. - Page 62 -s 408 192.168.0.125 ping -s 408 <Indirizzo IP> 4. Verificare che il cavo di rete sia collegato a AXIS P7224, quindi avviare/riavviare il prodotto scollegandolo e ricollegandolo dalla/all'alimentazione. 5. Chiudere il prompt dei comandi quando viene visualizzato il messaggio 'Reply from 192.168.0.125:…' (Risposta da 192.168.0.125) o altro messaggio simile.
- Page 63 2 Anello 3 Guaina GND Ingressi video - - AXIS P7224 supporta 4 sorgenti video, ciascuna connessa tramite connettori coassiali/BNC. Se si utilizzano cavi coassiali da 75 Ohm, è consigliabile non superare la lunghezza di 250 metri per i collegamenti fisici.
-
Page 64: Assegnazioni Dei Pin
Pagina 64 AXIS P7224 Guida all'installazione Assegnazioni dei pin Assegnazioni dei pin della morsettiera di alimentazione di AXIS 291 1U Video Server Rack Funzione Descrizione Uscita +12 V, 100 mA Connettore configurabile 1 Ingresso digitale: per Ingresso min. = 0 V CC l'attivazione, collegarlo con Ingresso max. -
Page 65: Indicatori Led
AXIS P7224 Guida all'installazione Pagina 65 Assegnazioni dei pin del connettore RS-485 di AXIS Q7900 Rack AXIS P7224 Descrizione RS485A Interfaccia RS-485 half-duplex per il controllo di apparecchiature ausiliarie come i dispositivi PTZ (dispositivi di rotazione, inclinazione e zoom). RS485B... -
Page 66: Ulteriori Informazioni
Per ulteriori indicazioni, consultare la documentazione del router. Per ulteriori informazioni su questo e altri argomenti, visitare il sito Web per il supporto Axis all’indirizzo www.axis.com/techsup Ulteriori informazioni La Guida per l’utente è disponibile sul sito Web di Axis all’indirizzo www.axis.com oppure sul CD fornito con il prodotto. Suggerimento Visitare il sito di Axis all'indirizzo www.axis.com/techsup per verificare se sono disponibili... -
Page 68: Medidas Preventivas
Sustitución de la batería Este producto Axis utiliza una batería de litio CR2032 de 3,0 V como fuente de alimentación para su reloj de tiempo real interno (RTC). En condiciones normales esta batería durará un mínimo de 5 años. Cuando la batería tiene poca carga el funcionamiento del RTC se puede ver afectado, ya que esto puede hacer que se reinicie cada vez que se encienda la cámara. -
Page 69: Pasos Para La Instalación
¡Importante! • Para instalar el hardware en el servidor de vídeo en rack AXIS 291 1U o en el AXIS Q7900, consulte la Guía de instalación del bastidor de codificadores de vídeo correspondiente. • Este producto debe utilizarse de acuerdo a la legislación y normativas locales. -
Page 70: Presentación Del Hardware
Página 70 Guía de instalación de AXIS P7224 Presentación del hardware Conectores de bus Tuerca de montaje de audio Referencia (P/N) y número de serie (S/N). Es posible que necesite el número de serie durante la instalación. 4 entradas de vídeo LED de alimentación... -
Page 71: Instalación Del Hardware
AXIS P7224. Las guías de instalación para los modelos AXIS 291 1U y AXIS Q7900 están disponibles en el CD de productos de vídeo en red de AXIS que se incluye con el codificador AXIS P7224 y en www.axis.com. -
Page 72: Asignación De La Dirección Ip
AXIS Camera Management. En función del número de productos que desee instalar, deberá utilizar el método que se adapte mejor a sus necesidades. Ambas aplicaciones son gratuitas y están disponibles en el CD de productos de vídeo en red de AXIS suministrado con este producto o pueden descargarse de www.axis.com. - Page 73 1. Compruebe que la tarjeta AXIS P7224 está conectada a la red y que recibe alimentación. 2. Inicie AXIS IP Utility. 3. Cuando la tarjeta AXIS P7224 aparezca en la ventana, haga doble clic en una entrada para abrir la página de inicio de esa entrada de vídeo.
- Page 74 1. Compruebe que la tarjeta AXIS P7224 está conectada a la red y que recibe alimentación. 2. Inicie AXIS Camera Management. 3. Cuando la tarjeta AXIS P7224 aparezca en la ventana, haga clic con el botón derecho en el vínculo y seleccione Página inicial de Live View.
-
Page 75: Configuración De La Contraseña
Configuración de la contraseña Para poder acceder al producto, hay que asignar una contraseña para el administrador root. Al acceder por primera vez al codificador AXIS P7224, aparecerá el cuadro de diálogo "Configure Root Password" (Configurar contraseña de root). Para evitar la intercepción de la contraseña de root mientras se configura, este proceso se puede realizar a través de una conexión HTTPS cifrada, que precisa un certificado HTTPS. - Page 76 (Configuración) proporciona acceso a menús que permiten personalizar el codificador. En caso necesario, haga clic en Yes (Sí) para instalar el AMC (AXIS Media Control) y así permitir la visualización de la secuencia de vídeo en Internet Explorer. Para ello, debe tener derechos de administrador en el equipo.
-
Page 77: Otros Métodos Para Configurar La Dirección Ip
Bonjour del navegador (p. ej., Safari) y haga clic en el posterior) vínculo para acceder a las páginas Web del producto. Todos Servicio gratuito suministrado por Axis que permite instalar el Servicio de DNS producto de forma rápida y sencilla. Es necesario disponer de conexión dinámico de a Internet sin proxy HTTP. -
Page 78: Configuración De La Dirección Ip Con Arp/Ping
-s 408 192.168.0.125 ping -s 408 <Dirección IP> 4. Compruebe que el cable de red está conectado al codificador AXIS P7224 y desconecte y vuelva a conectar la corriente para iniciar o reiniciar el producto. 5. Cierre la línea de comando cuando vea “Reply from 192.168.0.125:…” (Respuesta de 192.168.0.125:…) o un mensaje similar. - Page 79 Masa Masa Entradas de vídeo - - La tarjeta AXIS P7224 admite 4 fuentes de vídeo, cada una conectada a través de conectores coaxiales / BNC. Las conexiones físicas realizadas con cable de vídeo coaxial de 75 ohmios tienen una longitud máxima recomendada de 250 metros.
- Page 80 Página 80 Guía de instalación de AXIS P7224 Asignación de los pines Asignación de pines del conector de E/S del servidor de vídeo en rack AXIS 291 1U Función Descripción Salida de +12 V, 100 mA Masa E/S configurable 1 Entrada digital: conecte a GND (masa) Entrada mín.
-
Page 81: Indicadores Led
Guía de instalación de AXIS P7224 Página 81 Asignación de pines del conector RS-485 del Bastidor AXIS Q7900 AXIS P7224 Descripción RS485A Una interfaz RS-485 semidúplex para controlar equipos auxiliares, como los dispositivos PTZ. RS485B 3-12 No se utiliza Indicadores LED Verde Fijo: funcionamiento normal. -
Page 82: Más Información
Consulte la ayuda en línea para obtener más información. Acceso al codificador AXIS P7224 desde Internet Una vez instalada, la tarjeta AXIS P7224 es accesible desde la red local (LAN). Para acceder al codificador codificador de vídeo desde Internet, los routers de red deben configurarse para permitir tráfico entrante, que normalmente se realiza en un puerto específico. - Page 84 Installation Guide Ver.1.1 AXIS P7224 Video Encoder Blade Printed: November 2011 ©2011 Axis Communications AB Part No. 45003...