Advertisement
Available languages
Available languages
Quick Links
Download this manual
See also:
User Manual
LevelOne
WAB-5120
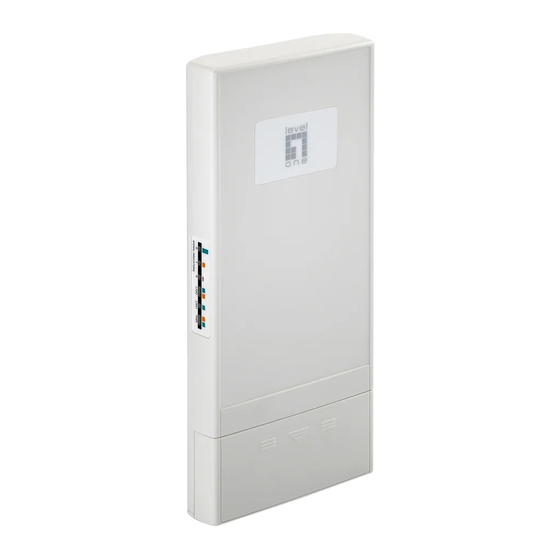
300Mbps Wireless Outdoor PoE Access Point/Bridge
Quick Installation Guide
English
Deutsch
- 1 -
Advertisement

Summary of Contents for LevelOne WAB-5120
- Page 1 LevelOne WAB-5120 300Mbps Wireless Outdoor PoE Access Point/Bridge Quick Installation Guide English Deutsch - 1 -...
- Page 2 Table of Content English ..............................- 3 - Deutsch ..............................- 9 - This guide covers only the most common situations. All detailed information is described in the user manual. - 2 -...
- Page 3 English Hardware Installation 1. Loosen the screw with a screwdriver. Grab the cover and pull it back harder to take it out 2. Plug Cat.5/5e/6 cable into the RJ-45 LAN1 port. Do not use the RJ45 LAN2 port. 3. Power on the CPE by press the black PWR button beside the LAN 1 Ethernet port. 4.
- Page 4 5. Plug the power cord into the DC port of the PoE injector 6. Plug the other side of the Cat.5/5e/6 cable into the PoE port of the PoE injector. The installation is finished and looks like the following picture. - 4 -...
- Page 5 Configuration Check Your Network Settings to login web UI You need to assign your PC a Static IP address so the WAB-5120 can communicate with your PC during configuration. Select “Control Panel” > “Network Connections”. Right click the “Local Area Connection” and choose “Properties”.
- Page 6 AP Mode 1. Choose Wireless > Basic Settings for the wireless basic settings. Click Apply. If security is required, open Wireless > Profile Setting and enter “VAP Profile 1 Settings” as below. Choose Network Authentication to change the security settings. Click Apply. - 6 -...
-
Page 7: Cpe Mode
CPE Mode 1. Choose Wireless > Basic Settings for the wireless basic settings. In Wireless mode, choose “Wireless Client” to operate in Client mode. Click Apply. 2. Click the “Site Survey” button beside Wireless Mode. It will scan all the available access points within coverage. - Page 8 3. If the AP you connect to needs authentication or password, click Profile Settings in the left column, fill out the corresponding items, and click Apply for data encryption. Congratulations! The AP – CPE connection is now successfully configured. - 8 -...
- Page 9 Deutsch Installation der Hardware 1. Lösen Sie die Schrauben mit einen Schraubendreher. Entfernen Sie das Gehäuse mit einem kräftigen Ruck. 2. Stecken Sie ein Cat.5/5e/6 Kabel in den RJ45 LAN1-Port. Verwenden Sie NICHT den RJ45 LAN2-Port. 3. Stellen Sie die Stromversorgung an, indem Sie die schwarze PWR-Taste neben dem LAN1-Ethernet-Port drücken.
- Page 10 4. Befestigen Sie das Gehäuse mit der mitgelieferten Schraube auf der Halterung. 5. Stecken Sie das Stromkabel in den DC-Port des PoE-Injektors. 6. Verbinden Sie das andere Ende des Cat.5/5e/6 Kabel mit dem PoE-Port des PoE-Injektors. Die Installation ist nun beendet und sollte dem folgenden Bild entsprechen. - 10 -...
- Page 11 Prüfen Sie Ihre Netzwerk-Einstellungen zum Login Web UI. Bitte stellen Sie sicher, dass Ihr PC eine statische IP-Adresse automatisch empfangen kann, so dass der WAB-5120 mit Ihrem PC während der Konfiguration kommunizieren kann. Wählen Sie “Control Panel” > “Network Connections”.
- Page 12 AP Modus 1. Wählen Sie “Wireless > Basic Settings” zur Grund-Einstellung der Wireless Verbindung. Klicken Sie auf “Apply”. Sofern Sicherheitseinstellungen erforderlich sind, öffnen Sie bitte “Wireless > Profile Setting” und geben “VAP Profile 1 Settings” wie folgt ein. Wählen Sie “Network Authentication” um die Sicherheitseinstellungen zu ändern.
- Page 13 CPE Modus 1. Wählen Sie “Wireless > Basic Settings” zur Grund-Einstellung der Wireless Verbindung. Im Wireless Modus, wählen Sie “Wireless Client” um im Client-Modus zu arbeiten. Klicken Sie auf “Apply”. 2. Klicken Sie auf den “Site Survey” Button neben “Wireless Mode”. Es wird nach allen verfügbaren Access Points innerhalb der Reichweite gesucht.
- Page 14 3. Sollte der verbundene AP eine Authentifizierung oder Passwort benötigen, klicken Sie auf “Profile Settings” in der rechten Spalte, geben die notwendigen Daten ein und klicken auf “Apply” zur Datenverschlüselung. Glückwunsch! Die AP – CPE Verbindung wurde erfolgreich konfiguriert. - 14 -...


