Table of Contents
Advertisement
Available languages
Available languages
Quick Links
Download this manual
See also:
Owner's Manual
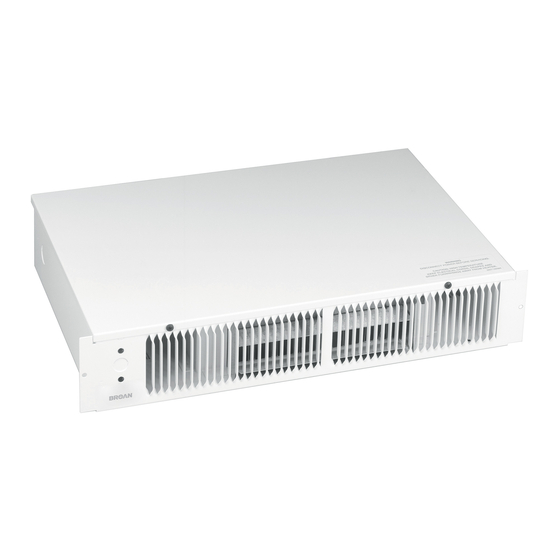
KICKSPACE HEATER
Factory Wired 240/208 V.A.C.
READ AND SAVE THESE INSTRUCTIONS
IMPORTANT INSTRUCTIONS
READ ALL INSTRUCTIONS BEFORE
INSTALLING OR USING THIS HEATER.
To reduce the risk of fire, electric shock, or injury to persons,
observe the following:
1. Use this unit only in the manner intended by the manufacturer.
If you have questions, contact the manufacturer at the address
or telephone number listed in the warranty.
2. Before servicing or cleaning unit, switch power off at service
panel and lock the service disconnecting means to prevent
power from being switched on accidentally. When the service
disconnecting means cannot be locked, securely fasten a
prominent warning device, such as a tag, to the service panel.
3. Installation work and electrical wiring must be done by a
qualified person(s) in accordance with all applicable codes
and standards, including fire‑rated construction codes and
standards.
4. When cutting or drilling into wall or ceiling, do not damage
electrical wiring and other hidden utilities.
5. This heater is hot when in use. To avoid burns, do not let bare
skin touch hot surfaces. Keep combustible materials, such as
furniture, pillows, bedding, papers, clothes, etc. and curtains at
least 3 feet (0.9 m) from the front of the heater.
6. Extreme caution is necessary when any heater is used by
or near children or invalids and whenever the heater is left
operating and unattended.
7. Do not operate any heater after it malfunctions. Disconnect
power at service panel and have heater inspected by a
reputable electrician before reusing.
8. Do not use outdoors.
9. To disconnect heater, turn controls to off, and turn off power
to heater circuit at main disconnect panel (or operate internal
disconnect switch, if provided).
10. Do not insert or allow foreign objects to enter any ventilation or
exhaust opening, as this may cause an electric shock or fire, or
damage the heater.
11. To prevent a possible fire, do not block air intakes or exhaust in
any manner.
12. A heater has hot and arcing or sparking parts inside. Do not
use it in areas where gasoline, paint, or flammable vapors or
liquids are used or stored.
13. Use this heater only as described in this manual. Any other use
not recommended by the manufacturer may cause fire, electric
shock, or injury to persons.
14. To avoid electrical shock: Do not install unit in a tub or shower
enclosure or any location where it may come in contact with
water. Never place a switch where it can be reached from a tub
or shower.
15. Do not connect heater to dimmer switch or speed control.
16. Do not install heater upside down or sideways. Heater must be
located in the horizontal position.
17. Do not recess louvered face of the heater more than three inches
from the vertical face of any overhang (cabinet).
18. Provide this heater with a separate electrical circuit following
directions under "Wiring" section.
19. This product is equipped with a thermostat which may start it
automatically. Turn off power at service entrance before cleaning
or servicing.
20. This heater includes a visual alarm to warn that parts are getting
excessively hot. If the alarm lights are activated, immediately
turn the heater off and inspect for any objects on or adjacent
to the heater that may cause high temperatures.
21. This product must be grounded.
SAVE THESE INSTRUCTIONS
PLANNING
This heater is designed for installation in an enclosed space such
as under a counter or kickspace to provide warm, gentle heat at
the floor level. Reread Safety Notes 3 through 8 for guidelines in
planning the installation.
The Model 114 is factory wired for 240/208 V.A.C. operation. It offers
a choice of heat outputs and can be internally connected for multiple
wattages at different voltages shown in the table below.
VOLTS
WATTS
240
1500
208
1125
120*
1500
120*
750
All ratings are 1‑Phase, 60 Hertz.
*See "FIELD CONVERSION TO 120 V.A.C." section.
MODEL 114
Page 1
AMPS
BTU/HR
6.3
5120
5.4
3840
12.5
5120
6.3
2560
Advertisement
Table of Contents

Related Manuals for Broan 114


Summary of Contents for Broan 114
-
Page 1: Important Instructions
5. This heater is hot when in use. To avoid burns, do not let bare The Model 114 is factory wired for 240/208 V.A.C. operation. It offers skin touch hot surfaces. Keep combustible materials, such as a choice of heat outputs and can be internally connected for multiple furniture, pillows, bedding, papers, clothes, etc. -
Page 2: Thermostat Installation
MODEL 114 Page 2 INSTALLATION THERMOSTAT INSTALLATION WARNING: To reduce the risk of fire, do not store or use gaso- line or other flammable vapors and liquids in the vicinity of NOTE: The thermostat control circuit must be wired prior to the the heater. - Page 3 MODEL 114 Page 3 3. Install thermostat from back side of front panel and fasten in 3. Remove one place, from front, with two screws and washers provided (see of the two illustrations). knockouts and connect power 4. Attach temperature control knob by gently pushing it on to the cable to heater thermostat shaft.
-
Page 4: Operation
MODEL 114 Page 4 OPERATION Before using heater, make sure heater has been properly installed according to installation steps beginning with the “PLANNING” section on page 1. Turn thermostat counterclockwise to its lowest setting. 2. Turn on power to circuit at service entrance. -
Page 5: Maintenance
MODEL 114 Page 5 MAINTENANCE The following maintenance and cleaning tasks can be performed by the user. All other servicing must be performed by an authorized technician If you have any questions, please consult with our cus‑ tomer service department at: 800‑558‑1711. -
Page 6: Service Parts
BROAN-NUTONE ONE YEAR LIMITED WARRANTY Broan‑NuTone warrants to the original consumer purchaser of its products that such products will be free from defects in materials or workmanship for a period of one year from the date of original purchase. THERE ARE NO OTHER WARRANTIES, EXPRESS OR IMPLIED, INCLUDING, BUT NOT LIMITED TO, IMPLIED WARRANTIES OF MERCHANTABILITY OR FITNESS FOR A PARTICULAR PURPOSE. -
Page 7: Instrucciones Importantes
El modelo 114 está cableado de fábrica para funcionamiento con 8. No lo use en exteriores. 240/208 VCA. Ofrece una selección de salidas de calor y puede 9. -
Page 8: Instalación Del Termostato
MODELO 114 Página 8 INSTALACIÓN INSTALACIÓN DEL TERMOSTATO Marque el sitio de montaje previsto en la placa de base o debajo NOTA: Es necesario hacer el cableado del circuito de control del del mostrador o gabinete, y retire los materiales necesarios para facilitar la inserción y el desmontaje del gabinete del calefactor. - Page 9 MODELO 114 Página 9 Instale el termostato desde el lado posterior del panel frontal y asegúrelo en su sitio, desde el frente, con los dos tornillos y Quite uno de los arandelas incluidos (vea las figuras). dos agujeros ciegos CABLES NEGRO Y y conecte el cable Conecte la perilla de control de temperatura empujándola...
- Page 10 MODELO 114 Página 10 FUNCIONAMIENTO Antes de usar el calentador, asegúrese de que esté instalado ad‑ ecuadamente, de acuerdo con los pasos de instalación indicados en “PLANIFICACIÓN” en la página 7. Gire el termostato en el sentido contrario de las agujas del reloj hasta su ajuste más bajo.
-
Page 11: Mantenimiento
MODELO 114 Página 11 MANTENIMIENTO El usuario puede realizar las siguientes tareas de mantenimiento y limpieza. Todos los demás servicios los debe realizar un técnico autorizado. Si tiene preguntas, consulte a nuestro departamento de servicio al cliente llamando al: 800‑558‑ 1711. -
Page 12: Piezas De Repuesto
Esta garantía le proporciona derechos legales específicos, y usted puede también tener otros derechos, los cuales varían de estado a estado. Esta garantía reemplaza todas las garantías anteriores. Para calificar en la garantía de servicio, usted debe (a) notificar a Broan‑NuTone al domicilio o al número de teléfono que se menciona abajo, (b) dar el número del modelo y la identificación de la pieza, y (c) describir la naturaleza de cualquier defecto en el producto o pieza.