
Related Manuals for NAD L 76


Summary of Contents for NAD L 76
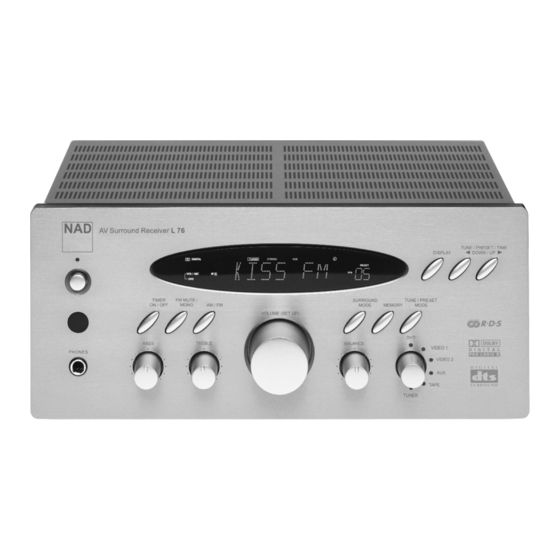
- Page 1 L 76 ® AV Surround Sound Receiver Owner’s Manual Manuel d’Installation Bedienungsanleitung Gebruikershandleiding Manual del Usuario Manuale delle Istruzioni Manual do Proprietário Bruksanvisning...
-
Page 2: Important Safety Instruction
IMPORTANT SAFETY INSTRUCTIONS IMPORTANT SAFETY INSTRUCTIONS • Save these instructions for later use. • Follow all warnings and instructions marked on the audio equipment. 1 Read instructions - All the safety and operating instructions should be read before the product is operated. - Page 3 NOTE TO CATV SYSTEM INSTALLER This reminder is provided to call the CATV system installer’s attention to Section 820-40 of the NEC which provides guidelines for proper grounding and, in particular, specifies that the cable ground shall be connected to the grounding system of the building, as close to the point of cable entry as practical. Example of Antenna Grounding as per National Electrical Code, ANSI/NFPA 70 GROUND CLAMP ELECTRIC SERVICE...
- Page 4 The equipment draws its nominal non-operational power from the AC outlet with its POWER switch in the STANDBY position. CAUTION Changes or modifications to this equipment not expressly approved by NAD Electronics for compliance could void the user’s authority to operate this equipment. CAUTION REGARDING PLACEMENT To maintain proper ventilation, be sure to leave a space around the unit (from the largest outer dimensions including projections) equal to, or greater than, shown below.
-
Page 5: Table Of Contents
READ THIS BEFORE OPERATION • Choose the installation location of your unit carefully. Avoid placing it in direct sunlight or close to a source of heat. Also avoid locations subject to vibrations and excessive dust, heat, cold or moisture. • The ventilation holes should not be covered. Make sure there is at least 50 cm of space above and at least 10 cm of space beside the amplifier/receiver. -
Page 6: Connecting Antennas
CONNECTING ANTENNAS FM INDOOR ANTENNA Lead-type FM Antenna In an area with strong FM signals, the “T”-type FM antenna provided is sufficient. (75Ω) provided Extend this into a “T” shape and connect the two wires at the base of the “T” to the provided matching transformer, as shown. -
Page 7: Connecting Speaker Systems
ASSEMBLING THE AM LOOP ANTENNA 1 Rotate the outer frame of the antenna 2 Insert the bottom edge of the outer frame into the groove on the stand. 3 Extend the antenna cord CAUTION To avoid damage the speakers by inputting a sudden high-level signal, be sure to switch the power off before connecting the speakers. -
Page 8: Connecting Audio Equipment
CONNECTING AUDIO EQUIPMENT CAUTION • Do not plug the power cord of any component into AC outlets and do not turn their POWER switches on until all connections have been performed. • The cable connectors should be fully inserted into the jacks. Loose connections may cause hum and noise. -
Page 9: Connecting Video Equipment
AUDIO SIGNAL JACKS • Connect the video deck (VCR) LINE output (AUDIO OUT) jacks to the IN (VIDEO 1) jacks, and the video deck (VCR) LINE input (AUDIO IN) jacks to the OUT (VIDEO 1) jacks. • Connect the cable / satellite receiver AUDIO OUTPUT jacks to the VIDEO 2 jacks. •... -
Page 10: Audio Operation
AUDIO OPERATIONS PHONES NOTES The following points apply throughout the “Audio Operations” sections unless otherwise noted. To simplify explanations, instructions refer to names of buttons and controls on the front panel, making no mention of the use of remote control unit. PRIVATE LISTENING For private listening, insert the headphones (1/4-inch plug) into the PHONES jack. -
Page 11: Audio Adjustments
BASIC OPERATIONS 1 Press the POWER button to ON. 2 Select the desired source with the Source Selector. An indicator for the selected source lights up. 3 Select the desired surround mode with the SURROUND MODE buttons. (The SURROUND indicator lights in the display.) •... -
Page 12: Auto Tuning
RADIO RECEPTION AUTO TUNING 1 Select the Tuner by turning the Source selector. 2 Select the AM or FM by pressing the AM/FM selector button. 3 Press the Tune/Preset MODE button to change to TUNING mode. (The PRESET CH. indicator disappears from the display.) This button is used to select Tuning or Preset scan mode. -
Page 13: Radio Reception
MANUAL MEMORY PRESETTING 1 Select the Tuner by turning the Source selector. 2 Select the AM or FM by pressing the AM/FM selector button. 3 Press the Tune/Preset MODE button to change to TUNING mode. (The PRESET CH. indicator disappears from the display). -
Page 14: Rds (Radio Data System)
RDS (RADIO DATA SYSTEM) RDS is a broadcasting service which allows stations to send additional information along with the regular radio program signal. RDS services can be received only in FM band. RDS DISPLAY 1 Select the tuner with the Source selector. 2 Press the AM/FM button to select FM. -
Page 15: Available Surround Modes
When you use the surround function, the sound creates a “live” atmosphere such as that experienced in movie theaters, discos, stadiums and concert halls. This unit is provided with the following surround modes, which can be selected using the SURROUND MODE switches. Select the appropriate surround mode according to the program source. -
Page 16: Available Surround Modes
AVAILABLE SURROUND MODES DOLBY 3 STEREO Front speakers receive rear (surround) speaker signals in addition to front speakers signals. Center speaker works similarly as that of Dolby Pro Logic mode. In this way, you can enjoy playback sound having superior sound positioning. HALL SURROUND When playing recordings of live music, this mode provides a feeling similar to actually being in a concert hall. -
Page 17: Speaker Positioning
The installation positions of speakers differ according to the size, and acoustics of the listening room. While actually listening to a program source, try various speaker positions to determine which layout provides the best surround effect. • Front speakers Place to the front left and right of the listening position. Front speakers are required for all surround modes. -
Page 18: Surround Effects
SURROUND EFFECTS DELAY TIME • Refer to OSD surround mode. (page 22) When you adjust the delay time in the DOLBY DIGITAL mode, an additional 15 ms is automatically added to the surround channels in the DOLBY PRO LOGIC mode. The current setting is shown on the display. DELAY TIME SETTING Adjustable Range DOLBY DIGITAL Mode:... -
Page 19: Osd (On Screen Display)
When your NAD Surround sound Receiver is connected to a television, you can operate the unit with the remote control by making selections from on-screen menus. If a menu remains on the screen for a period of time without a selection being made, the display will disappear. Most menus disappear after 12 seconds. -
Page 20: Osd On Position
OSD (ON SCREEN DISPLAY) SYSTEM STATUS When operating the system in DOLBY DIGITAL, DOLBY PRO LOGIC II, OR DOLBY 3 STEREO you can display the current status of your delay times and volume settings by pressing any buttons on the remote controller related to SURROUND, including SURROUND ON/OFF. - Page 21 4 Entering DIGITAL INPUT(see page 9) from the MAIN MENU brings up a menu that allows you to select the audio input you would like to monitor. An asterisk (*) appears opposite the input currently selected. To change this selection, move the arrow with the up/down keys to the input you want and press ENTER.
- Page 22 OSD (ON SCREEN DISPLAY) When you have selected DOLBY DIGITAL as your SURROUND MODE, the menu will include options for adjusting the DELAY TIME (see page 18) for each speaker channel. Using the right/left buttons, the delay for the CENTER speaker can be set from 0 to 5ms and the REAR speakers can be set from 0 to 15 ms.
-
Page 23: Remote Control Unit
• Contains pre-programmed library of NAD remote codes for the L76 The NAD HTR L76 is ready to operate the L76 receiver right out of the box, but it is really eight remotes in one. Each of the 8 Device Selector keys at the top of the handset can call up a new "page" of remote control codes to be transmitted by the remaining 44 keys. -
Page 24: Controlling The L76
"AMP," "TUNER," and "DVD" Device Selector "page" perform L76 functions. (The HTR L76 can also command many other NAD components, from its "CD" and "TAPE" pages.) It is important to note that certain HTR L76 keys perform different functions depending on the selected Device Selector "page."... -
Page 25: Punch-Through
PUNCH-THROUGH The HTR L76's "punch-through" function allows you to retain a function key from one Device Select "page" on another, so that, for example, the AMP "SURR MODE" function might still control the L76 when the DVD Device Selector page is active NOTE The HTR L76's "VOL"... -
Page 26: Key-Illumination Timeout
REMOTE CONTROL UNIT RECORDING MACROS To record a macro, simultaneously press-and-hold for 3 seconds both the "MACRO" key and the HTR L76 function key to which you wish to assign the macro, until the status LED turns green. The macro button will also light up. -
Page 27: Factory Reset
The HTR L76 can store learned, copied, and "default library" commands on any single key. (The default library commands are the pre-programmed NAD codes, such as the native L76 commands on the "AMP" "page.") You can delete commands by layers back "down" to the default library command on any key, removing learned commands, punched-through functions, and copied keys. -
Page 28: Loading Code-Libraries
REMOTE CONTROL UNIT LOADING CODE-LIBRARIES The HTR L76 can store a different library of default NAD codes for each of its Device Selector "pages." If the original default library does not control your NAD CD player, tape deck, DVD player, or other component, follow the procedure below to change the code-library. - Page 29 CHECKING CODE-LIBRARY NUMBER You can check the current code-library on any Device Selector key as follows. Enter Library Mode by simultaneously pressing-and-holding for 3 seconds both the desired component's Device Selector key and the "PROGRAM" key, until the Learn LED turns green. Press the "DISP" key; the HTR L76 indicates the current code-library by flashing its "TAPE,"...
-
Page 30: Troubleshooting
TROUBLESHOOTING To determine any problem with your receiver, always check the most obvious possible causes first. If any problem still remains after your have checked the items below, consult your nearest NAD dealer. Problem Amplifier When listening to the music in stereo, left/right speakers sounds reversed. -
Page 31: Specifications
AMPLIFIER SECTION Output Power (Front) Surround Output Power (0.5% THD, 1 kHz, 8Ω) Total Harmonic Distortion (Front) Delay Time DOLBY DIGITAL & DTS DOLBY PRO LOGIC II MOVIE & EMULATION DOLBY PRO LOGIC II MUSIC Audio Input Sensitivity/Impedance (LINE*) Output Level / Impedance (TAPE REC) Frequency Response (LINE*) Signal-to-Noise Ratio : 1 Watt (LINE*) Tone Control... - Page 32 ©2003 NAD ELECTRONICS INTERNATIONAL A DIVISION OF LENBROOK INDUSTRIES LIMITED All rights reserved. No part of this publication may be reproduced, stored or transmitted in any form without the written permission of NAD Electronics International L76 Manual 05/03 Korea...