Table of Contents
Advertisement
Advertisement
Table of Contents

Related Manuals for Teac DAB800


Summary of Contents for Teac DAB800
- Page 2 The warranty does not cover freight or insurance. In all cases of transit damage or lost, a claim must be filed against the carrier by the purchaser, even if shipment is arranged by TEAC. TEAC in- home service may also be available at a fee upon request.
- Page 3 10. No one is authorised to assume any liability on behalf of TEAC or impose any obligation on it, in connection with the sale of any equipment other than as stated in this warranty and outlined above.
- Page 4 Dealer’s Address Postcode Please ensure that your product is packed appropriately upon return to the service centre. If you have any other queries regarding service or warranty please contact the TEAC Customer Care Centre below: service@teac.com.au www.teac.com.au 1800 656 700...
-
Page 5: Safety Precautions
Safety Precautions To achieve the utmost in enjoyment and performance, and in order to become familiar with its features, please read this manual carefully before attempting to operate the unit, this will assure you years of faithful, trouble free performance and listening pleasure. Important Notes •... -
Page 6: Safety Information
ESD Remark: In case of malfunction due to electrostatic discharge just reset the product (reconnection of power source may be required) to resume normal operation. NOTE: In the unlikely event of a problem with your product please contact our TEAC Customer Care at 1800 656 700. -
Page 7: Table Of Contents
Table of Contents Package Content______________________________________________________ 8 Controls Overview (a) _____________________________________________________ 9 Controls Overview (b) ____________________________________________________ 10 DAB MODE _________________________________________________________ 11 Turning on the DAB radio _________________________________________________ 11 Finding and adding new Stations ___________________________________________ 12 DAB Menu Options ______________________________________________________ 13 Manual Tune ___________________________________________________________ 14 To Show the Signal Strength in DAB mode ____________________________________ 18 How to change the Station Information ______________________________________ 18 FM MODE __________________________________________________________ 19... -
Page 8: Package Content
Package Content Main Unit Instruction Menu... -
Page 9: Controls Overview (A)
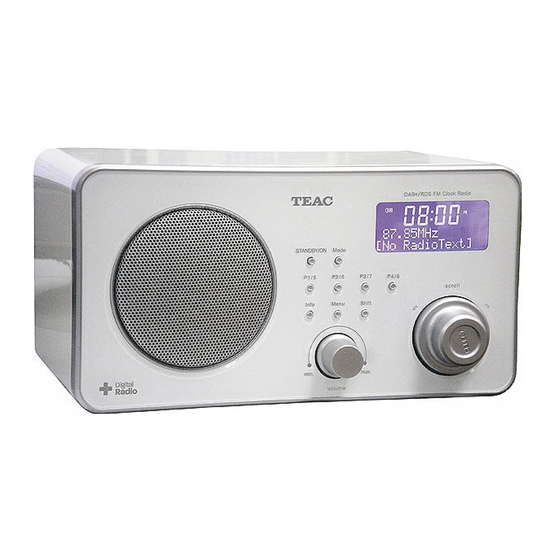
Controls Overview (a) Unit front view Control DAB+ and DAB mode FM mode STANDBY/ON Press to turn on/off radio Mode Press to convert among DAB, FM and AUX IN mode P1/5 P2/6 Press and hold to store preset station, and press to load preset station. P3/7 (Note: for detail please refer page 17) P4/8... -
Page 10: Controls Overview (B)
Controls Overview (b) Unit Back View Socket Remark a. A 3.5mm Headphone Socket located on the rear of your radio is provided for use with either headphones or an earpiece. Headphone Socket: b. Inserting a plug automatically mutes the internal loudspeaker. a. -
Page 11: Dab Mode
DAB MODE Turning on the DAB radio 1. Extend the antenna found on the top of radio, press STANDBY/ON to switch it on. 2. For initial use, radio will make a full scan, and store the stations in its memory. This will take a while, please be patient. -
Page 12: Finding And Adding New Stations
3. Turn the Scroll knob to cycle through stations list. When the desired station is display, press the knob to select it. 4. To find and add new stations, please refer to the following instructions. Finding and adding new Stations Note: To obtain maximum performance, it is highly recommended to place unit at a place with low interference. -
Page 13: Dab Menu Options
DAB Menu Options... -
Page 14: Manual Tune
Manual Tune 1. Press MENU at first. 2. Turn the Scroll knob to < Manual tune >. 3. Press the Scroll knob to confirm, the display will be show the channel number and frequency list. 4. Turn the Scroll knob to step between the channels and press it to select the current channel. - Page 15 DRC (Dynamic Range Control) value You can set the level of the compression of stations to eliminate the differences in dynamic range or sound level between radio stations. Note: Set DRC to off indicates no compression, set DRC to low indicates little compression, set DRC to high shows maximum compression.
-
Page 16: To Change Station Order
To change station order 1. Press MENU at first. 2. Turn the Scroll knob to < Station order >. 3. Press the Scroll knob to confirm. Note: There are two options available: Alphanumeric and Ensemble. shows the corresponding option is currently applied. 4. - Page 17 Prune order Note: This operation will remove inactive stations from the station list. 1. Press MENU at first. 2. Turn the Scroll knob to < Prune >. 3. Press the Scroll knob to confirm. 4. Turn the Scroll knob to ‘Yes’, press it to confirm.
-
Page 18: To Show The Signal Strength In Dab Mode
To Show the Signal Strength in DAB mode 1. While operating in DAB mode, press INFO to display the signal strength of the current station on the LCD. The indicator on the signal bar shows the minimum acceptable signal level. Note: Stations with signal strength below the minimum signal level will not provide a steady stream of audio. -
Page 19: Fm Mode
FM MODE FM Mode General Operation 1. Power up radio, and then press Mode repeatedly until < FM Mode > appeared. 2. For initial use, it will start at the beginning of the FM frequency range (87.50MHz). Otherwise, the last FM station you were listening will be selected. 3. -
Page 20: Setting Station Presets
Setting Station Presets Your radio can store up to 8 DAB and 8 FM preset stations. To store the current station to P1-P4: 1. Press and hold one of the preset buttons until it say ‘preset # stored’. To store the current station to P5-P8: 1. -
Page 21: Fm Menu Options
FM Menu Options... -
Page 22: Scan Setting
Scan setting 1. Press MENU, and unit will display such as below. 2. When cursor points at ‘Scan setting’, press the Scroll knob to select. Note: There are only two options available ('Strong stations only' and 'All stations'). 3. Turn the Scroll knob to your required option, and then press it to confirm. Audio setting 1. -
Page 23: Aux In Mode
AUX IN MODE 1. Switch radio on and press Mode repeatedly until < Auxiliary Input Mode > is appeared. 2. By connecting your external music player via 3.5mm jack, your radio is transformed into a high quality audio speaker system. 3. -
Page 24: System Setup
System setup How to enter system setup 1. Press MENU at first, and then turn the Scroll knob to < System >. 2. Press the Scroll knob to confirm. 3. Turn the Scroll knob to cycle through options, by which you can find ‘Sleep’, ‘Alarm’, ‘Time’, ‘Backlight’, ‘Factory Reset’... -
Page 25: How To Set Sleep
How to set sleep 1. It can be activated from < System > à < Sleep >, press the Scroll knob to confirm. 2. Turn the Scroll knob to change the sleep period which is between 0 – 90 minutes. 3. -
Page 26: How To Set Clock
How to set Clock 1. It can be activated from < System > à < Time >, press the Scroll knob to confirm. Note: below item C and item D will explain how to set the time. A. Set 12/24 hour format a. - Page 27 C. Set Time / Date (Manually) a.) It can be activated from < System > à < Time >à < Set Time/Date >. b.) Press the Scroll knob to confirm. c.) Turn the Scroll knob to change the hour, and then press it to confirm. d.) Turn the Scroll knob to change the minutes, and then press it to confirm.
- Page 28 D. Auto update a.) It can be activated from < System > à < Time >à < Auto update >. b.) Press the Scroll knob to confirm. Note: There are two options available (‘Auto update from DAB’ and ‘No update’). c.) Turn the Scroll knob to ‘Auto update from DAB’, press it to confirm.
-
Page 29: How To Set Alarm
How to set Alarm Note: to do this setting, ensure successful set clock at first. 1. It can be activated from < System > à < Alarm >. 2. Press the Scroll knob to confirm, meanwhile, the alarm icon is blinking. 3. - Page 30 5. Press the Scroll knob to confirm, refer ‘setting the clock’ to set Alarm time. 6. Press the Scroll knob to confirm, then turn the Scroll Knob to adjust the alarm duration. Each step will increase duration by 15 minutes. You can adjust alarm duration between 15-90 minutes.
- Page 31 9. Press SELECT to confirm. To cancel Alarm temporarily: When alarm is ringing, press the Scroll knob or STANDBY/ON to Snooze alarm, the Snooze icon will be display on the LCD. Note: a. Press the Scroll knob repeatedly to adjust Snooze time 5, 10, 15, 30 mins in turn. b.
-
Page 32: How To Set Backlight
How to set Backlight A. At ‘power on’ condition 1. It can be activated from < System > à < Backlight >. 2. Press the Scroll knob to confirm. 3. Select ‘Power On’, press the Scroll knob to enter, and then turn it to cycle through options and select your required setting. -
Page 33: How To Factory Reset
How to Factory reset Note: Factory reset means delete all of the preset stations and return its factory settings. 1. It can be activated from < System > à < Factory reset >. 2. Press the Scroll knob to confirm. 3. -
Page 34: How To Get Sw Version
How to get SW Version 1. It can be activated from < System > à < SW version >. 2. Press the Scroll knob and SW version will be display on LCD screen. -
Page 35: Specification
Specification ITEMS DESCRIPTION Specifications: DAB, DAB + and FM digital radio Audio Output: 5Wrms Speaker: 8 ohm Headphone socket: 32 ohm FM: 87.5-108MHz Frequency Ranges: DAB, DAB+ : 174 –240MHz LCD Display: High resolution display AC Power Input: 230-240VAC, 50-60Hz Power Supply: Dimension: 250mm x 130mm x 130mm... - Page 36 TEAC CUSTOMER CARE CENTRE (TCCC) Free call: 1800 656 700 Between Monday to Friday – EST 9AM to 5PM...