HP ep9010 Series User Manual
Hide thumbs
Also See for ep9010 Series:
- Installation (4 pages) ,
- Quick setup manual (2 pages) ,
- Datasheet (2 pages)
Table of Contents
Advertisement
Quick Links
Advertisement
Table of Contents

Related Manuals for HP ep9010 Series


Summary of Contents for HP ep9010 Series
- Page 1 HP ep9010 Series Instant Cinema Digital Projector User’s Guide...
- Page 2 © Copyright 2004 Hewlett-Packard Development Company, L.P. The information contained herein is subject to change without notice. The only warranties for HP products and services are set forth in the express warranty statements accompanying such products and services. Nothing herein should be construed as constituting an additional warranty.
-
Page 3: Table Of Contents
Contents 1 Setting up Safety precautions....... . . 7 What’s in the box? ....... . 8 Identifying common features . - Page 4 Contents Adjusting a slanted picture ....35 Adjusting the volume ......35 2 Playing DVDs and CDs Using the built-in DVD player .
- Page 5 Contacting HP support ......63 Obtaining HP repair ......65 Limited warranty .
- Page 6 Contents User’s Guide...
-
Page 7: Setting Up
51. Use a soft, dry cloth to clean the projector case. ■ Do not open the projector except as instructed by this manual, and only after allowing the projector to cool down. ■ If the projector is damaged in any way, contact HP for assistance. User’s Guide... -
Page 8: What's In The Box
Before setting up your projector, be sure your shipping box includes the following items. If the shipping box does not contain any of the following items, contact HP. ✎ After you open the box and remove the contents, save the box in case you must ship the projector. -
Page 9: Identifying Common Features
Setting up Identifying the contents of the box (Continued) Item Function DVI-to-VGA adapter Connects a VGA cable to the DVI port on the projector. User Guide package Contains documentation for the setup and use of the projector. Quick Setup Guide Provides instructions to help get started. -
Page 10: Projector Buttons And Lights
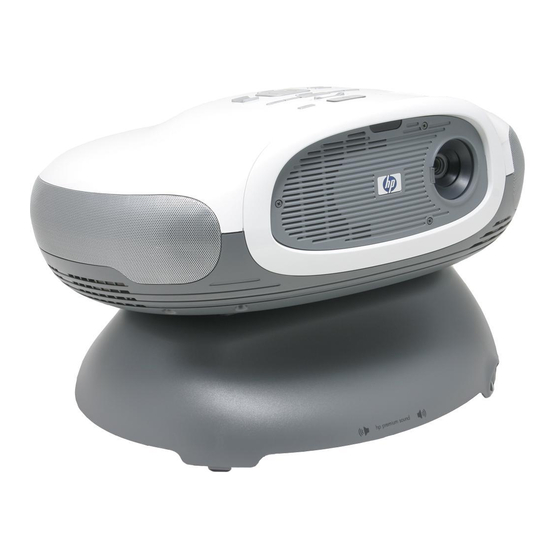
Setting up Identifying major components Item Function Infrared port Receives signals from the remote control. Button panel Contains control buttons and indicator lights. Lens cover Protects the lens. Lens Projects the image. Speakers (4) Produce stereo sound. DVD tray Plays a DVD or CD. Base with subwoofer Produces low-frequency sound effects. - Page 11 Setting up Identifying the projector buttons and lights Item Function Focus ring Focuses at distance of 1 to 10 m (3 to 33 ft). Zoom ring Enlarges picture size from 100% to 116%. Source button Displays picture from the next input port.
-
Page 12: Back Panel
Setting up Back panel Identifying back panel components Item Function DVI input port Connects DVI video source. Also supports computer video source. S-video input port Connects S-video source. Digital audio-out port Connects to a 5.1 digital sound system. Composite-video input port Connects composite-video source. -
Page 13: Remote Control
Setting up Remote control ✎ Before using the remote control, install two AAA batteries. See “Replacing the battery in the remote control” on page 53. Identifying features of the remote control Item Function Power button Turns the projector on or off. Keystone adjustment Adjusts the picture to eliminate slanted sides. -
Page 14: Accessories
Enjoy more from your home theater with HP projector accessories. You can purchase accessories at http://www.hp.com or through your projector dealer. ■ HP mobile screens with built-in handles—designed to be easy to carry and set up anywhere you need them. - Page 15 Setting up ■ For the best picture, consider purchasing a quality projection screen. Some screens are designed for wide-angle viewing, while others are designed to concentrate brightness in the center. A flat surface colored white or light gray will also give acceptable results. ■...
- Page 16 Setting up ✎ For best picture quality, place the projector 1.5 to 5 m (5 to 16 ft) from the screen. User’s Guide...
- Page 17 Setting up Image size relative to distance from the screen Image size (diagonal) Image size (width) Distance (lens to screen) (inches) (meters) (inches) (meters) (inches) (meters) 41 to 48 1.1 to 1.2 55 to 64 1.4 to 1.6 83 to 96 2.1 to 2.4 110 to 128 2.8 to 3.3...
-
Page 18: Connecting Power
Setting up Connecting power 1. Place the projector on a stable platform located 1 to 10 m (3 to 33 ft) in front of the screen. Ideally, the platform should be lower than the bottom of the screen. ✎ Do not place the projector on a soft surface, such as carpet or loose cloth. This will severely limit the sound from the subwoofer. -
Page 19: Connecting A Video Source
Setting up Connecting a video source The internal DVD player provides optimal picture quality and the convenience of a single remote control. If you connect an external video source, you should consider picture quality. Many video devices have more than one type of output port. When you connect the device to the projector, choose the connection that provides the best picture quality. - Page 20 Setting up Connecting a component-video source Examples: Cable box, DVD player, satellite receiver, and audio-video receiver Requires: ■ Component-video cable ✎ ■ Many DVD players and other high-quality video devices provide component video output. The three RCA connectors might be labeled YPbPr or YCbCr.
- Page 21 Setting up Connecting an S-video source Examples: DVD players, VCRs, cable boxes, camcorders, and video gaming devices Requires: ■ S-video cable User’s Guide...
- Page 22 Setting up Connecting a composite-video source Examples: VCRs, DVD players, audio-video receivers, and video gaming devices Requires: ■ Composite-video cable User’s Guide...
- Page 23 Setting up Connecting a DVI source Examples: Cable boxes, satellite receivers, and some computers Requires: ■ DVI cable User’s Guide...
- Page 24 Setting up Connecting a SCART source Examples: VCRs and DVD players Requires: ■ S-video cable (or composite-video cable if source does not provide S-video output) ■ S-video-to-SCART adapter (included with certain models) User’s Guide...
-
Page 25: Connecting A Sound System
Setting up Connecting a sound system A high-quality 2.1 sound system is built into the projector. No connections are required when using the internal DVD player. If you connect an external video source to the projector, you can also connect its audio output to the projector’s audio input. - Page 26 Setting up If you have a home theater system or external sound system, you can connect the audio output from the internal DVD player to that system. You can connect a 5.1 surround sound system with five speakers and a subwoofer for full surround sound (connection in the following illustration).
-
Page 27: Connecting Several Video Sources
Setting up Connecting several video sources If you have several video sources, connect them to an audio/video receiver or switch box, then connect the video output from the receiver or switch box to the projector using the highest quality connection available. Also connect the audio outputs from all sources to the receiver, switch box, or sound system. -
Page 28: Connecting A Computer
Setting up Connecting a computer You can connect a computer to the projector and show the computer display on the screen. This requires a DVI-to-VGA adapter (included with the projector) and a VGA cable (not provided). Requires: ■ DVI-to-VGA adapter ■... -
Page 29: Turning The Projector On And Off
Setting up Turning the projector on and off Turning the projector on 1. Be sure the power cord is connected. 2. Open the lens by sliding the lens cover to the left. 3. Press the power button on the projector or on the remote control. The projector takes a minute or so to warm up. -
Page 30: Turning The Projector Off
Setting up Turning the projector off 1. Press the power button on the projector or remote control to turn off the projector. Do not hold the button down. The power button blinks during the cool-down period, then the projector turns off. Even though the projector is off, it uses a small amount of power internally. -
Page 31: Making Basic Adjustments
Setting up Making basic adjustments This section provides instructions for making basic adjustments to the projector. Selecting a source If the picture from your video source does not appear on the screen, you can quickly select the correct source. ■ Press the source button one or more times—until you see the picture or you see the name of the video port where the source is connected. -
Page 32: Adjusting The Focus And Zoom
Setting up Adjusting the focus and zoom 1. Rotate the focus ring until the image becomes clear. The projector can be focused at distances of 1 to 10 m (3 to 33 ft). 2. Rotate the zoom ring to adjust the picture size from 100 to 116%. If the picture does not fit the screen, you might have to move the projector closer to or farther away from the screen. -
Page 33: Changing The Picture Mode
Setting up Changing the picture mode When you are showing video from a video source, you can quickly choose a different picture mode to make adjustments to the picture. Picture modes can control properties such as color and size. They let you easily choose the best settings for ambient lighting and the type of video content (see “Adjusting the picture”... -
Page 34: Adjusting The Shape Of The Picture
Setting up Adjusting the shape of the picture Depending on the type of video source you are viewing, the picture might or might not always look correct or fit on the screen: ■ If the active video device sends widescreen output to the projector, press menu, go to Picture >... -
Page 35: Adjusting A Slanted Picture
Setting up Adjusting a slanted picture If the projector is tilted up or down, the sides of the picture on the screen might slant in or out, even though the top and bottom are level. Keystone adjustment corrects this problem: ■... - Page 36 Setting up User’s Guide...
-
Page 37: Playing Dvds And Cds
Playing DVDs and CDs Using the built-in DVD player The internal DVD player is capable of playing several types of video, graphics, and audio discs, as listed in the following table. Discs not listed in the table are not supported. Type of disc Comments DVD video... -
Page 38: Playing A Dvd
Playing DVDs and CDs The following types of media are supported: DVD-ROM, DVD-R, DVD+R, DVD-RW, DVD+RW, CD-R, and CD-RW. Recording conditions might affect whether individual discs are playable. Playing a DVD 1. Press the DVD eject button on the projector or remote control to open the tray. -
Page 39: Using Special Play Options
Playing DVDs and CDs Using special play options The internal DVD player provides several features for controlling DVD playback. To do this... Press this... Pause play Play/pause button. Resume play Play/pause button. Jump to the next scene (chapter) Next button. Jump to start of current scene Previous button. -
Page 40: Showing Pictures
Playing DVDs and CDs Showing pictures If you insert a compatible picture disc in the DVD player, you can show the pictures as a slide show. 1. Press the DVD eject button on the projector or remote control to open the tray. - Page 41 Playing DVDs and CDs 2. Press the DVD eject button on the projector or remote control to open the tray. 3. Place the CD on the tray. 4. Press the DVD eject button again to close the tray. The projector selects the internal DVD player as the active source and begins playing the first track.
- Page 42 Playing DVDs and CDs User’s Guide...
-
Page 43: Showing Video
Showing video This chapter describes how to show video from external sources connected to the projector. See the previous chapter for information about using the internal DVD player. Showing the video source 1. Be sure the video device is connected to the projector and turned on. See “Connecting a video source”... - Page 44 Showing video 3. Press the source button on the projector or remote control one or more times to select the DVI port. 4. If the computer display is not shown on the projector, you might have to turn on the computer’s video output port. For example, some computers require you to press a key combination, such as Fn+F4 or Fn+F5.
-
Page 45: Adjusting The Projector
Adjusting the projector Adjusting the picture and sound Adjusting the picture The on-screen menu provides many settings that allow you to fine-tune the picture. 1. Press menu, and go to Picture. 2. Change the picture adjustments as needed. From the Picture menu, you can change many picture options, such as brightness, contrast, and picture shape, as well as customize the picture modes. -
Page 46: Adjusting The Projector Setup
Adjusting the projector Adjusting the projector setup 1. Press menu, and go to Setup. 2. Set the setup adjustments as needed. From the Setup menu, you can select settings, such as menu language, projector position, and menu timeout. To get descriptions for all available setup adjustments, see “Setup menu” on page 49. -
Page 47: Input Menu
Adjusting the projector Input menu For a visual aid, see “Back panel” on page 12. Input menu Internal DVD Shows the video from the internal DVD player. Component Shows the source connected to the component-video port (YPbPr). S-Video Shows the source connected to the S-video port. Composite Shows the source connected to the composite-video port. - Page 48 Adjusting the projector Picture menu (Continued) Widescreen input Sets whether a widescreen (16:9) input device is in use. Adjusts the height of the picture accordingly. VGA settings... Adjusts settings for a computer input. Auto-sync Resynchronizes the projector to the input signal. This can compensate for any change in the signal.
-
Page 49: Sound Menu
Adjusting the projector Sound menu Sound menu Mute Turns off sound output. Volume Adjusts the loudness of the speakers. Subwoofer Adjusts the loudness of only the subwoofer. Internal speakers Sets whether the internal speakers are turned on. Reset sound settings Restores sound settings to their default settings. - Page 50 Adjusting the projector User’s Guide...
-
Page 51: Maintaining The Projector
Maintaining the projector Getting the projector status To get the projector status, press the menu button on the projector or remote control and go to Help. This screen shows information and status for the projector. Cleaning the projector lens You can clean the front lens of the projector using the following recommendations. -
Page 52: Replacing The Lamp Module
Replacing the lamp module requires special consideration: ■ To reduce the risk of injury, be careful when removing the lamp module as broken glass might be present. If the lamp is broken, contact HP about repairs that might be required due to glass fragments. ■... -
Page 53: Replacing The Battery In The Remote Control
Maintaining the projector 5. Insert the new lamp module into the projector and tighten the two screws. 6. Insert the tab on the front cover into the slot in the projector and close the cover. 7. Tighten the screws that hold the cover. 8. - Page 54 Maintaining the projector User’s Guide...
-
Page 55: Fixing Problems
■ “Remote control problems” on page 62 ✎ If these suggestions do not solve your problem, go to http://www.hp.com/support for additional information. To contact HP, see Chapter 7, “Support and warranty.” Warning light problems If both red warning lights are blinking: ❏... -
Page 56: Start-Up Problems
If this occurs after you install a new lamp module, remove and reinstall the lamp module. If a new lamp does not fix the problem, contact HP for assistance. - Page 57 Fixing problems If the image is out of focus: ❏ Be sure the lens cover is open. ❏ While displaying the on-screen menu, adjust the focus ring. (The image size should not change; if it does, you are adjusting the zoom, not the focus.) ❏...
- Page 58 Fixing problems If the image is stretched: ❏ On the projector or remote control, press the picture mode button one or more times to see if one of the picture modes makes the image the correct size. ❏ Press menu, go to Picture > Customize picture mode > Stretch. Try the different settings.
-
Page 59: Dvd Player Problems
Fixing problems If several picture settings seem completely wrong and you cannot fix them: ❏ Press menu, go to Picture > Color settings > Reset color settings, and press ok. ❏ Press menu, go to Setup > Reset all settings, and press ok. If a scrolling or cut-off image is displayed for a computer connection: ❏... -
Page 60: Sound Problems
Fixing problems ❏ The type of disc you inserted might not be supported by the internal DVD player. If so, you cannot play this type of disc. ❏ For a DVD, check its region code. Most DVDs have a region code marked near the center hole. -
Page 61: Interruption Problems
Fixing problems ❏ If the internal DVD player is playing a DVD with DTS sound, press DVD menu and turn off the DTS sound and turn on stereo or Dolby sound. DTS sound plays only on a DTS-compatible sound system connected to the projector’s digital audio output. -
Page 62: Remote Control Problems
❏ If the lamp burns out and makes a popping sound, the projector will not turn back on until the lamp module has been replaced. ❏ If the lamp breaks, contact HP about repairs that might be required due to glass fragments. -
Page 63: Support And Warranty
Step 3: HP phone support HP provides telephone support free of charge for as long as you own your projector. (Standard phone company charges may apply.) Telephone support is available in any country or region where the product is distributed by HP. HP e-support is always available at no cost—see “Step 2: HP e-support”. - Page 64 Slovakia: + 421 2 6820 8080 Canada (other): 1-800-474-6836 Spain: 902 010 059 Chile: 800-360-999 Sweden: + 46 (0)77 120 4765 Colombia: 01-800-51-HP-INVENT Switzerland: 0848 672 672 Costa Rica: 0-800-011-4114 + Ukraine: + 7 (380 44) 490-3520 1-800-711-2884 United Kingdom: +44 (0)870 010 4320...
-
Page 65: Obtaining Hp Repair
Limited warranty HP is committed to providing the best service to ensure that you get the most out of your HP Digital Projector. This Limited Warranty Statement describes the standard Digital Projector warranty. - Page 66 HP ❏ Operation outside the product’s specifications 4. If HP receives notice of a defect in any hardware product covered by HP’s warranty during the applicable warranty period, HP shall either repair or replace the defective product at HP’s option.
- Page 67 ZEALAND, THE TERMS IN THIS WARRANTY STATEMENT, EXCEPT TO THE EXTENT LAWFULLY PERMITTED, DO NOT EXCLUDE, RESTRICT, OR MODIFY, AND ARE IN ADDITION TO, THE MANDATORY STATUTORY RIGHTS APPLICABLE TO THE SALE OF HP PRODUCTS TO SUCH CUSTOMERS. User’s Guide...
- Page 68 Support and warranty User’s Guide...
-
Page 69: Reference
This chapter lists the specifications, safety information, and regulatory information for the projector. Specifications Because HP continually improves its products, the following specifications are subject to change. For the latest specifications, visit the HP website at http://www.hp.com. Projector specifications Size 524 ×... - Page 70 Reference Projector specifications (Continued) Video compatibility NTSC 3.58 MHz and 4.43 MHz PAL B, D, G, H, I, M, N SECAM B, D, G, K, K1, L HDTV (480i/p, 575i/p, 720p, 1080i) DVI with HDCP PC video up to SXGA (by DVI-I connector) IR receiver Front and back of projector Lamp...
- Page 71 Reference Video mode compatibility Compatibility Resolution Refresh rates (Hz) Analog 640 x 350 70, 85 640 x 400 640 x 480 60, 66.66, 66.68, 72, 75, 85, 117, 120 720 x 400 70, 85 SVGA 800 x 600 56, 60, 72, 75, 85, 95 832 x 624 74.55 1024 x 768...
-
Page 72: Safety Information
(EN60825-1). This device is not considered harmful, but the following precautions are recommended: ■ If the unit requires service, contact an authorized HP service center. ■ Do not attempt to make any adjustment to the unit. ■ Avoid direct eye exposure to the infrared LED beam. Be aware that the beam is invisible light and cannot be seen. -
Page 73: Mercury Safety
This section presents information that shows how your digital projector complies with regulations in certain regions. Any modifications to your digital projector not expressly approved by HP could void the authority to operate the digital projector in these regions. U.S.A. -
Page 74: Canada
Reference Canada This Class B digital apparatus complies with Canadian ICES-003. Japan Korea International For regulatory identification purposes, your product is assigned a regulatory model number. The regulatory model number for your product is listed in the declaration of conformity. This regulatory number is different from the marketing name and product number. - Page 75 1000 NE Circle Blvd. Corvallis, OR 97330-4239 Declares, that the product(s): Product name: Instant Cinema Model number: ep9010 series Regulatory model: CRVSB-04ZO Conforms to the following product specifications: Safety: IEC 60950:1999/ EN 60950:2000 IEC 60825-1:1993 +A1 / EN 60825-1:1994 +A11 Class 1 LED...
- Page 76 Reference User’s Guide...
-
Page 77: Index
Index cleaning 7 component-video accessories 14 connecting source 20 adjusting port 12 picture 33 composite-video setup 46 connecting source 22 sound 35 port 12 subwoofer 35 computer, connecting 28 aiming projector 31 connecting analog video mode compatibility audio source 25 component-video source 20 audio composite-video source 22... - Page 78 12 language 49 listing 46 using 46 focus 9 PC, connecting 28 home theater 15 picture HP support 63 fixing slanted 35 focus 32 image. See picture picture modes 33 internal DVD player quality of 14 troubleshooting 59 shape 34...
- Page 79 Index safety information 7 VGA, connecting 28 SCART 24 video mode compatibility 71 screen video sources locating 17 selecting 31 selecting 15 showing 43 service 65 volume, adjusting setting up 14 sound. See audio warning lights specifications 69 location 10 subwoofer meanings 55 adjusting 35...
- Page 80 Index...
- Page 84 © 2004 Hewlett-Packard Development Company, L.P. Printed in China www.hp.com 5990-3664...
- Page 85 Wash your hands after cleaning the area or handling a broken lamp. Disposal of this lamp may be regulated due to environmental considerations. For disposal or recycling information, please contact your local authorities or the Electronic Industries Alliance (www.eiae.org). You can find safety information about the lamp at www.hp.com/hpinfo/globalcitizenship/environment/productdata.