
Related Manuals for Vitamix Blending Station Advance


Summary of Contents for Vitamix Blending Station Advance
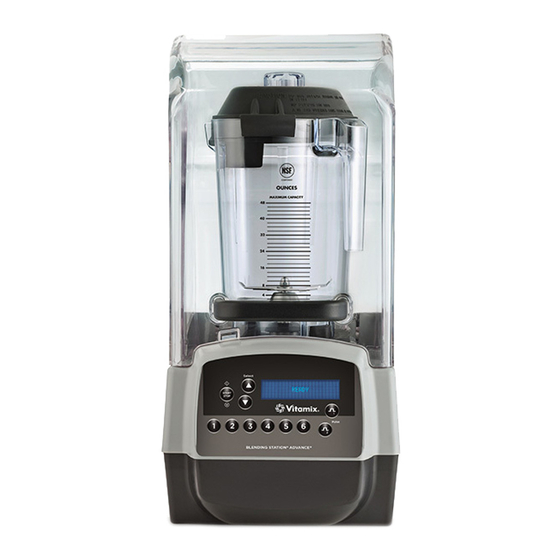
- Page 1 Blending Station Advance ® ® ALL MODELS Use and Care Manual Read and save these instructions ON-COUNTER IN-COUNTER E N G L I S H E S PA Ñ O L F R A N Ç A I S...
-
Page 2: Table Of Contents
CO N T E N TS English ..........................Español ........................Français ........................Important Safeguards ..................General Instructions ..................Control Panel ......................Programming ......................Programming Pre-Set Buttons Programming Custom Chip Resetting Pre-Set Buttons Recipe Options Machine Assembly .................... Compact Cover Blade Assembly Installation ........................ -
Page 3: Important Safeguards
This cord will vary for countries outside the United States of America. 4. Unplug the power cord from the wall outlet when the Vitamix® machine is not in use, • Adapters (Figure B) are available for two-prong outlets. Do not cut or remove the before disassembling, when putting on or taking off parts, and before cleaning, other third (ground) prong from the plug or power cord. -
Page 4: General Instructions
The machine will immediately begin to cycle through the selected program and turn off when the program is complete. (NOTE: Each button has a different pre-selected Vitamix® Customer Service or your local Vitamix Distributor for further assistance. combination of speed and length for blending). -
Page 5: Control Panel
A “Ready” message appears when there is power to the machine. Owner Controls: The owner control panel is accessible by pressing the Vitamix logo on the control panel. • P ress once to reveal the mode message. Press button 1 then button 6 within five seconds to continue. -
Page 6: Programming
Press the Owner Control button (Vitamix® logo). “MODE” will appear in the display Resetting the Pre-Set Buttons window. Press the Pre-Set buttons 1 and then 6. Then press the Vitamix logo three more times. The display window will say “BUTTON SETUP.”... -
Page 7: Recipe Options
P R O G R A M M I N G Recipe Options Arranged by recipe number (#) and drink type: Ramps up to LOW (25%), gradually ramps up to MED (50%), Multiple Coffees 2 then up to HIGH (100%) DRINK TYPE DESCRIPTION TIME... -
Page 8: Machine Assembly
• The Blending Station® Advance® machines are optimized for use with the Vitamix® 48 oz. / 1,4 L Advance® container (3 sided container). The 64 oz. / 2,0 L standard container will not fit in the compact cover used on the Blending Station®... -
Page 9: Blade Assembly
M AC H I N E ASS E M B LY Two-Piece Lid Blade Assembly (Figure A) 48 oz. / 1,4 L Advance® Container Blade Agitator Assembly: The blade assembly includes a precision-hardened stainless steel blade The two-piece lid is easy to clean and easy to put on, take off and seal. with enclosed double sealed steel ball bearings for • To remove a fully latched lid, lift the two tabs and pull upward and off. -
Page 10: Installation
I N STA L L AT I O N In-Counter Machine Gasket Installation Instructions Follow the instructions on page 18 for preparing the counter Preparing the counter Area: area for the installation of your In-Counter Blending Station® Back • Before cutting holes, make sure that there is adequate clearance under the counter for the Advance®. -
Page 11: Caring For Your Machine
Doing so will cause damage. ** To prolong polycarbonate container life, Vitamix recommends using soaps with a Container: Do not let mixtures, liquids or food products dry in the container. Rinse after low PH balance, such as a liquid dishwashing detergent (Ivory Liquid®). -
Page 12: Troubleshooting
If you cannot fix your machine with these suggestions, technical help is available • Button pressed starts wrong program by calling Vitamix® technical support at (800) 886.5235. If you purchased your • Machine starts by itself equipment outside the U.S.A., contact your local Vitamix Distributor or telephone the • A specific program... -
Page 13: Warranty
Sound Enclosure Warranty (if included): Vitamix warrants to the original In order to maximize the life of and keep your Vitamix® product in good working order, end-user that if a sound enclosure, container, lid, blade assembly, or drive socket fails... - Page 14 Any Equipment that is sent to Vitamix without prior authorization or approval will be returned to the shipper’s address “as is” without repair. B. Properly Package The Returned Item. Any item sent to Vitamix must be sent in original or sufficient packaging.
-
Page 15: Parts List
#18008 IMPORTANT NOTES! • Outside the U.S.A. and Canada, your machine may come with a different container configuration. Contact your local Vitamix Distributor for item numbers #18005 • Other than the drive socket, blade assembly and retainer nut, this unit is not user serviceable. - Page 16 • 22.5 in. / 57,2 cm high with lid open • Depth: 10.5 in. / 26,7 cm with handle • Width: 9.0 in. / 23,5 cm • Depth below counter: 5.7 in. / 14,4 cm When applicable: To see the complete line of Vitamix products, ® visit vitamix.com Vita-Mix ®...
- Page 17 CONTENIDO English ..........................Español ........................Français ........................Precauciones Importantes ............... Instrucciones Generales ................Panel de Control ....................Programación ...................... Programación de los botones preestablecidos Programación con un chip personalizado Restablecimiento de los botones preestablecidos Opciones de recetas Montaje de la Máquina .................
-
Page 18: Precauciones Importantes
Lea todas las instrucciones. 2. Para protegerse contra las descargas eléctricas, no coloque la base • El cable eléctrico para EE. UU. de la licuadora Vitamix viene con un enchufe de de motor en agua ni en ningún otro líquido. -
Page 19: Instrucciones Generales
Intente agregar más líquido y consulte al Servicio de Atención al Cliente de Vitamix® o numerados del 1 al 6. La máquina comenzará inmediatamente el ciclo siguiendo el solicite asistencia a su distribuidor local de Vitamix. -
Page 20: Panel De Control
Controles del propietario: Se puede acceder a este panel de control oprimiendo el logotipo de Vitamix que se encuentra en el panel de control. • Oprima una vez para ver el mensaje de modo. Oprima el botón 1 y luego el botón 6 dentro de los cinco segundos para continuar. -
Page 21: Programación
Advance®. El programa se puede personalizar usando el panel de control o un chip de programación o el kit de software programador ofrecido por Vitamix®. 5. Retire el chip de programación, colóquelo nuevamente en su envase original Llame a su distribuidor o al Servicio de Atención al Cliente para obtener más información. -
Page 22: Opciones De Recetas
PROGRAMACIÓN Opciones de recetas Dispuestas por número de receta (núm.) y tipo de bebida: Aumenta a velocidad BAJA (25%), luego sube gradualmente a Multiple Coffees 2 (Múltiples cafés 2) MEDIA (50%) y finalmente a ALTA (100%). TIEMPO DE Núm. TIPO DE BEBIDA DESCRIPCIÓN Small Coffee EJECUCIÓN... -
Page 23: Montaje De La Máquina
• Las máquinas Blending Station® Advance® están diseñadas para optimizar su uso con el vaso de 48 oz. / 1,4 L Advance® (vaso de 3 lados) de Vitamix®. El vaso estándar de 64 oz. / 2,0 L no cabe en la cubierta compacta de la máquina Blending Station® Advance®. -
Page 24: Conjunto De Cuchillas
MONTAJE DE LA MÁQUINA Tapa de dos piezas Conjunto de cuchillas (Figura A) Vaso de 48 oz. / 1,4 L Advance® Conjunto del agitador de cuchillas: El conjunto de cuchillas incluye cuchillas de precisión de acero La tapa de dos piezas se puede limpiar, colocar, retirar y sellar fácilmente. inoxidable templado con cojinetes esféricos de • Para retirar una tapa completamente cerrada con pestillo, acero doblemente sellados y encapsulados para... -
Page 25: Instalación
INSTALACIÓN Máquina empotrada Instrucciones de instalación de las juntas Preparación del área del mostrador: Siga las instrucciones de la página 48 para preparar el área del mostrador para la instalación de su licuadora Empotrada • Antes de hacer los orificios, asegúrese de que haya un espacio adecuado debajo del Posterior Blending Station®... -
Page 26: Cuidado De La Máquina
No se recomienda desmontar el mango durante la limpieza. Sin embargo, si decide retirarlo ** Para prolongar la vida útil del vaso de policarbonato, Vitamix recomienda usar de la cubierta, cerciórese de no apretarlo excesivamente al volver a colocarlo en la cubierta, detergentes con un equilibrio de pH bajo, como el detergente líquido para vajilla (Ivory... -
Page 27: Solución De Problemas
Si no puede reparar la máquina con estas sugerencias, obtenga ayuda experta tomacorriente. • El botón oprimido inicia el programa llamando al Servicio Técnico de Vitamix® al (800) 886.5235. Si la adquirió fuera de equivocado EE. UU., comuníquese con el distribuidor local de Vitamix o con la División Internacional • La máquina arranca sola... -
Page 28: Garantía
(1) año a partir de la fecha de compra, debido a defectos final original y son intransferibles. Para interponer un reclamo de garantía, se debe de material o de mano de obra, Vitamix asumirá el costo de todas las piezas y de la presentar el comprobante de compra. - Page 29 • Cualquier componente de Vitamix cubierto se usa con un componente no autorizado expresamente por escrito por Vitamix (es decir, se usa un vaso Vitamix con una base de motor que no es Vitamix o se usa una base de motor Vitamix con un vaso que no es Vitamix).
-
Page 30: Lista De Piezas
Núm. 18008 ¡NOTAS IMPORTANTES! • Fuera de EE. UU. y Canadá, es posible que la máquina venga con una configuración de vaso diferente. Póngase en contacto con su distribuidor local de Vitamix para obtener los números de los artículos. Núm. 18005 • Aparte del acople, el conjunto de cuchillas y la tuerca de sujeción, esta unidad no puede ser reparada por el usuario. - Page 31 • 22,5 pulg. / 57,2 cm de alto con tapa abierta • Profundidad: 10,5 pulg. / 26,7 cm con mango • Ancho: 9,0 pulg. / 23,5 cm • Profundidad bajo el mostrador: 5,7 pulg. / 14,4 cm Según corresponda: Para ver la línea completa de productos Vitamix ® visite el sitio web vitamix.com Vita-Mix ®...
- Page 32 TABLE DES MATIÈRES English ..........................Español ........................Français ........................Précautions importantes ................Instructions générales .................. Panneau de contrôle ..................Programmation ....................Programmation des boutons préréglés Programmation de la puce personnalisée Réinitialisation des boutons préréglés Choix de préparations Montage de l’appareil ...................
-
Page 33: Précautions Importantes
FIGURE A FIGURE B p. ex. 48 oz. / 1,4 L, et elle est substantiellement réduite pour les mélanges épais. 14. Ne faites jamais fonctionner le mélangeur Vitamix sans que le couvercle soit en place et soit correctement installé. REMARQUES IMPORTANTES! 15. La surface de la fenêtre d’affichage sera égratignée si elle entre en contact avec un tampon à... -
Page 34: Instructions Générales
Pensez à ajouter plus de liquide et consultez le Service à la clientèle immédiatement à exécuter le cycle du programme sélectionné et s’éteindra lorsque Vitamix® ou votre distributeur Vitamix local pour obtenir davantage d’aide. le programme sera terminé. (REMARQUE : Chaque bouton possède une différente... -
Page 35: Panneau De Contrôle
Le message « Ready » apparaît lorsque l’appareil est sous tension. Contrôles du propriétaire : Le panneau de contrôle du propriétaire est accessible en appuyant sur le logo de Vitamix situé sur le panneau de contrôle. • A ppuyez une fois pour révéler le message de mode. -
Page 36: Programmation
Appuyez sur le bouton de contrôle du propriétaire (logo de Vitamix®). Le mot « MODE » apparaitra dans la fenêtre d’affichage. Appuyez sur le bouton préréglé 1, Réinitialisation des boutons préréglés puis sur le 6. Ensuite, appuyez sur le logo de Vitamix trois fois de plus. La fenêtre d’affichage indiquera « BUTTON SETUP ». à leurs réglages d’origine 2. -
Page 37: Choix De Préparations
PROGRAMMATION Choix de préparations Classées par numéro de préparation (N ) et par type de boisson. Augmente à FAIBLE (25 %), accélère progressivement à Multiple Coffees 2 : 30 (Cafés multiples 2) MÉDIUM (50 %) et ensuite à ÉLEVÉ (100 %) TEMPS TYPE DE BOISSON DESCRIPTION Small Coffee D’EXÉCUTION... -
Page 38: Montage De L'appareil
Vitamix® Advance® de 48 oz. / 1,4 L (bol à trois cotés). Le bol standard de 64 oz. / 2,0 L ne rentre pas dans le couvercle compact utilisé sur la Blending Station® Advance®. Contactez le Service à la clientèle Vitamix au (800) 886.5235 ou votre distributeur pour obtenir de plus amples informations. -
Page 39: Assemblage De Lames
MONTAGE DE L’APPAREIL Assemblage de lames Couvercle deux pièces (Figure A) Assemblage d’agitateur de lames : L’assemblage de Bol Advance® de 48 oz. / 1,4 L lames est constitué de lames de précision en acier trempé Le couvercle deux pièces est facile à nettoyer, à installer, à enlever et à fermer. inoxydable ainsi que d’un roulement à... -
Page 40: Installation
INSTALLATION Appareil dans le comptoir Instructions d’installation du joint d’étanchéité Préparation de la surface du comptoir : Suivez les instructions à la page 78 pour préparer la surface de comptoir en vue de l’installation de votre Blending Station® • Avant de couper les trous, assurez-vous qu’il y a suffisamment d’espace sous le comptoir Arrière Advance®... -
Page 41: Entretien De Votre Appareil
Bol : Ne laissez pas les préparations, les liquides ou les aliments sécher à l’intérieur du bol. Rincez ** Afin de prolonger la durée de vie du bol en polycarbonate, Vitamix recommande d’utiliser après usage. Les aliments secs peuvent se coincer autour des lames et affaiblir/endommager des savons avec un équilibre pH bas, comme un détergent à... -
Page 42: Dépannage
É.-U., contactez votre distributeur Vitamix local, • Le bouton enfoncé démarre le ou prenez contact avec la Division internationale Vitamix au +1 (440) 782.2450 ou par mauvais programme courriel international@vitamix.com pour trouver un distributeur dans votre pays. Pour • L’appareil démarre par lui-même... -
Page 43: Garantie
Afin de maximiser la durée de vie et le bon fonctionnement de votre produit Vitamix®, antibruit (si inclus) : Vitamix garantit à l’utilisateur final original que si le boîtier antibruit, il est important de suivre quelques conseils simples d’entretien :... - Page 44 Tous les produits retournés doivent avoir leur Numéro d’autorisation de retour (« RA ») inscrit clairement sur l’extérieur de leur boîte. Tout Matériel envoyé à Vitamix sans autorisation ou accord préalable sera renvoyé à l’adresse de l’expéditeur « tel quel », sans réparation.
-
Page 45: Liste De Pièces
Joint d’étanchéité dans le comptoir REMARQUES IMPORTANTES! • À l’extérieur des É.-U. et du Canada, il est possible que votre appareil soit livré avec une configuration de bol différente. Contactez votre distributeur Vitamix local pour connaître les numéros des articles. 18005 • Mis à... - Page 47 ©2012 Vitamix Corporation. Cette publication ne peut être reproduite ou transmise, même en partie, dans n’importe quelle forme ou par n’importe quel moyen ou stockée dans une banque de données ou un système d’extraction sans la permission écrite de Vitamix Corporation.