D-Link DSL-2640U User Manual
Hide thumbs
Also See for DSL-2640U:
- User manual (174 pages) ,
- Quick installation manual (40 pages) ,
- User manual (86 pages)
Table of Contents
Advertisement
Advertisement
Table of Contents

Related Manuals for D-Link DSL-2640U


Summary of Contents for D-Link DSL-2640U
-
Page 2: Federal Communication Commission Interference Statement
Federal Communication Commission Interference Statement This equipment has been tested and found to comply with the limits for a Class B digital device, pursuant to Part 15 of the FCC Rules. These limits are designed to provide reasonable protection against harmful interference in a residential installation. This equipment generates, uses and can radiate radio frequency energy and, if not installed and used in accordance with the instructions, may cause harmful interference to radio communications. -
Page 3: Table Of Contents
INSTALLATION NOTES ....................5 DNS..........................51 INFORMATION YOU WILL NEED FROM YOUR ADSL SERVICE PROVIDER....7 DSL ..........................54 INFORMATION YOU WILL NEED ABOUT DSL-2640U............8 PORT MAPPING......................54 INFORMATION YOU WILL NEED ABOUT YOUR LAN OR COMPUTER: .......8 IPSEC ..........................57 DEVICE INSTALLATION ....................9 CERTIFICATE ........................ -
Page 4: Before You Begin
Computer with: • 200 MHz Processor • 64MB Memory • CD-ROM Drive • Ethernet Adapter with TCP/IP Protocol Installed • Internet Explorer v6 or later, FireFox v1.5 • Computer with Windows 2000, Windows XP, or Windows Vista D-Link DSL-2640U User Manual... -
Page 5: Features
TCP/IP (Transfer Control Protocol/Internet Protocol) – The DSL-2640U supports TCP/IP protocol, the language used for the Internet. It is compatible with access servers manufactured by major vendors. • RIP-1/RIP-2 – The DSL-2640U supports both RIP-1 and RIP-2 exchanges with other routers. Using both versions lets the Router to communicate with all RIP enabled devices. •... -
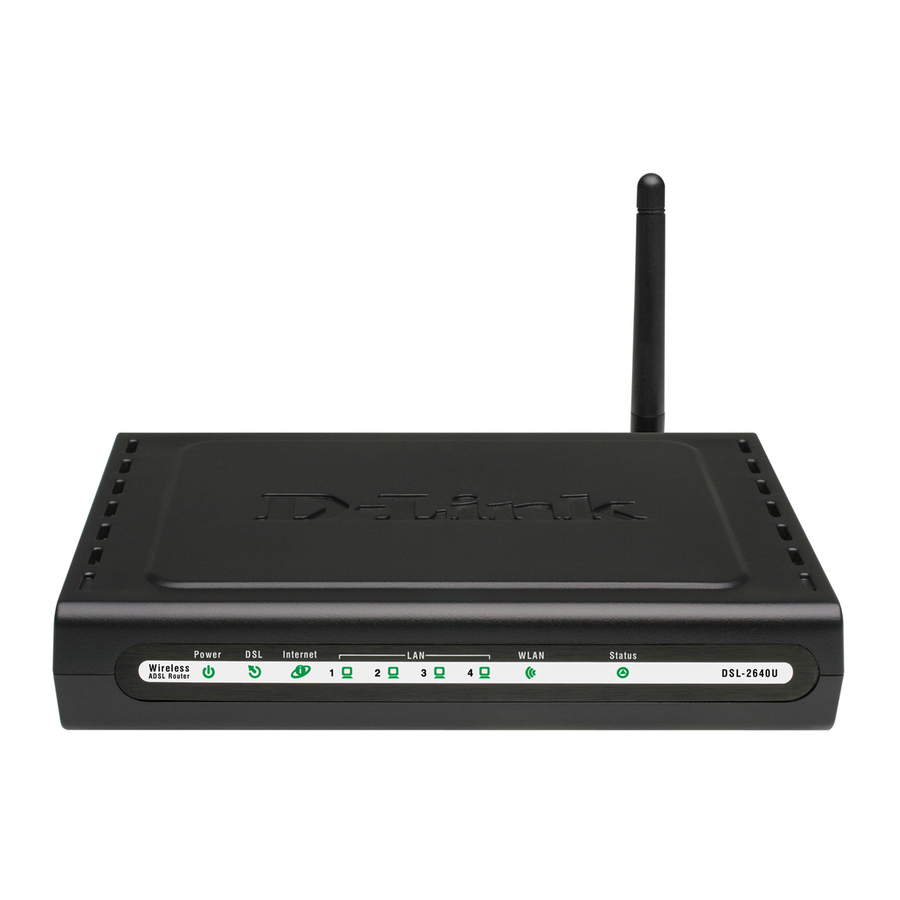
Page 6: Hardware Overview
Product Overview Hardware Overview Connections D-Link DSL-2640U User Manual... -
Page 7: Led Indicators
Device is ready for new WPS to setup. WPS (on the side panel) Blue Blink WPS is successfully triggered Connection is successfully established between the router and the client, the LED would remain in solid light for 5s. D-Link DSL-2640U User Manual... -
Page 8: Installation
Operating Systems The DSL-2640U uses an HTML-based web interface for setup and management. The web configuration manager may be accessed using any operating system capable of running web browser software, including Windows 98 SE, Windows ME, Windows 2000, Windows XP, and Windows Vista. - Page 9 802.1b wireless network card installed to use the Wireless ADSL Router. In addition the workstations must be configured to operate on the same channel and SSID as the Wireless ADSL Router. If wireless security is used, the wireless workstations must be properly configured for the security settings used. D-Link DSL-2640U User Manual...
-
Page 10: Information You Will Need From Your Adsl Service Provider
If you are setting up the Router for multiple virtual connections, you will need to configure the VPI and VCI as instructed by your ADSL service provider for the additional connections. This setting can be changed in the WAN Settings window of the web management interface. D-Link DSL-2640U User Manual... -
Page 11: Information You Will Need About Dsl-2640U
Ethernet NIC If your computer has an Ethernet NIC, you can connect the DSL-2640U to this Ethernet port using an Ethernet cable. You can also use the Ethernet ports on the DSL-2640U to connect to other computer or Ethernet devices. -
Page 12: Device Installation
Note: A factory reset will erase the current configuration settings and reset them to the default settings. After it has restarted, log in to the router’s web-based management interface and use the Setup Wizard to configure the basic settings. D-Link DSL-2640U User Manual... -
Page 13: Network Connections
Router’s wireless access point must have the same SSID and channel. If wireless security is used, the wireless clients must be configured with the correct security information to use the Router. More information on configuring the wireless settings is found later in this manual. D-Link DSL-2640U User Manual... -
Page 14: Introduction To Web Configuration
IP address of the Modem, that means the communication of the PC and the Modem is normal. Note: When you manage the Modem through Web, you must keep the Modem power on. Otherwise, the Modem may be damaged. D-Link DSL-2640U User Manual... -
Page 15: Logging In To The Modem
You need to reboot the DSL router to enable your modification or configuration effective in some cases, for example, after you modify the PVC configuration. Some modification, such as adding a static route, takes effect at once, and does not require modem reboot. D-Link DSL-2640U User Manual... -
Page 16: Quick Setup
After logging in to the DSL router, if no PVC is configured previously and no default settings exist, the Quick Setup webpage appears, which contains some basic configuration that is needed by ATM PVC. The following introduction guides you through the necessary steps to configure your DSL Router. D-Link DSL-2640U User Manual... - Page 17 IPoA Encapsulation Mode: LLC/SNAP-ROUTING, VC/MUX Bridging Bridging Encapsulation Mode: LLC/SNAP-BRIDGING, VC/MUX For example, change the connection type of PVC 0/35 to Bridging. Select Bridging, and set Encapsulation Mode to LLC/SNAP-BRIDGING (depending on the uplink equipment). D-Link DSL-2640U User Manual...
- Page 18 In the PVC and its QoS configuration page, configure a PVC and its QoS. Step 6 In the Internet connection type and encapsulation type page, set the Connection Type to PPP over ATM (PPPoA) and select the encapsulation mode. D-Link DSL-2640U User Manual...
- Page 19 Retry PPP password on authentication error Enable PPP debug mode Step 8 Click Next and the PPPoA IGMP and WAN function configuration page appears. To use IGMP service on pppoa pvc, select the Enable IGMP Multicast check box. D-Link DSL-2640U User Manual...
- Page 20 In the PVC and its QoS configuration page, configure a PVC and its QoS. Step 2 In the Internet connection type and encapsulation type page, set the Connection Type to PPP over Ethernet (PPPoE) and select the encapsulation mode. D-Link DSL-2640U User Manual...
- Page 21 Retry PPP password on authentication error Enable PPP Debug Mode Step 4 Click Next and the PPPoE IGMP and WAN function configuration page appears. To use IGMP service on pppoe pvc, select the Enable IGMP Multicast check box. D-Link DSL-2640U User Manual...
- Page 22 Use the following default gateway (use static gateway ip) Obtain DNS server addresses automatically (use dhcp to obtain DNS server IP) Use the following DNS server addresses (use static DNS server IP) D-Link DSL-2640U User Manual...
- Page 23 In the PVC and its QoS configuration page, configure a PVC and its QoS. Step 2 In the Internet connection type and encapsulation type page, set the Connection Type to IP over ATM (IPoA) and select the encapsulation mode. D-Link DSL-2640U User Manual...
- Page 24 Click Next and the IPoA IGMP and WAN function configuration page appears. To use IGMP service on ipoa pvc, select the Enable IGMP Multicast check box. In the MER mode, you can configure the following functions: Enable NAT. Enable Fullcone NAT. Enable Firewall. D-Link DSL-2640U User Manual...
- Page 25 In the PVC and its QoS configuration page, configure a PVC and its QoS. Step 2 In the Internet connection type and encapsulation type page, set the Connection Type to Bridging and select the encapsulation mode. Step 3 Click Next and the Bridging service configuration page appears. D-Link DSL-2640U User Manual...
-
Page 26: Lan Interface Setup
SSID: It is the network name shared among all points in a wireless network. The SSID must be identical for all points in the wireless network. It is case-sensitive and must not exceed 32 characters (use any character on the keyboard). D-Link DSL-2640U User Manual... -
Page 27: Wan Setup Summary
If your gateway is equipped with multiple LAN ports, you can connect additional devices directly to the gateway. Otherwise, connect a hub or switch to the LAN port, to which you can connect additional devices. In both cases, configure newly connected devices to automatically obtain IP address as previously described. D-Link DSL-2640U User Manual... -
Page 28: Dsl Router Device Information
DNS Server address and you can manually enter the information. WAN Interface Information Click WAN and the following page appears. The WAN Info page displays the status and the connect or disconnect button, depending on the selected connection mode. D-Link DSL-2640U User Manual... -
Page 29: Statistics Of Lan
Statistics of ATM Click Statistics > ATM and the following page appears. You can query information of packets recevied at the ATM interfaces. Click Reset to restore the values to zero and recount them. D-Link DSL-2640U User Manual... -
Page 30: Statistics Of Adsl
Web Configuration Statistics of ADSL Click Statistics > ADSL. If the DSL line is activated, the window shows on the left appears. Click Reset Statistics at the bottom to restore the values to zero and recount them. D-Link DSL-2640U User Manual... -
Page 31: Route Table Information
Note: If the BER reaches e-5, you cannot access the Internet. Route Table Information Click Route, and if the system is in the default configuration, the following page appears. If the configuration of modem is as PPPoE/PPPoA dial-up, the page shows different. D-Link DSL-2640U User Manual... -
Page 32: Advanced Setup
Note: After a PVC is deleted or modified, the system must be rebooted. Otherwise, the modification does not take effect. Click Add, Edit, or Remove to configure WAN interface. Click Save/Reboot to save the modification, and reboot the modem to make the modification effective. D-Link DSL-2640U User Manual... - Page 33 Encapsulation Mode. Click the Next button to continue. For further information about each of the five connection types available on the Router, please go to the Quick Setup section earlier in this manual as all of the windows are identical. D-Link DSL-2640U User Manual...
-
Page 34: Lan Configuration
A port in this context is an internal PC address, via which the data is exchanged between the Internet and a client on a PC in the local network. Communicating via a port is subject to the rules of a particular protocol (TCP or UDP). D-Link DSL-2640U User Manual... - Page 35 When an Internet user points his/her browser to DSL router external IP address, the gateway forwards the incoming HTTP request to your Web server. With one external IP address (DSL router main IP address), different applications can be assigned to your LAN computers, however each type of application is limited to use one computer. D-Link DSL-2640U User Manual...
- Page 36 The ALG is automatically assigned based on the destination port. Virtual servers are configured for this purpose. Adding Port Forwarding Step 1 To set up virtual servers for a service, select Advanced Setup > NAT > Virtual Servers, and click Add. D-Link DSL-2640U User Manual...
- Page 37 If you configure port triggering for a certain application, you need to determine a so-called trigger port and the protocol (TCP or UDP) that this port uses. You then assign the public ports that are to be opened for the application to this trigger port. You can select known Internet services or manually assign ports or port blocks. Adding Port Triggering D-Link DSL-2640U User Manual...
- Page 38 Note: A DMZ host is not protected by the firewall and may be vulnerable to attack. This may also put other computers in the home network at risk. Hence, when designating a DMZ host, you must consider the security implications and protect it if necessary. D-Link DSL-2640U User Manual...
-
Page 39: Security
Note: If the modem is configured to bridge mode only, IP filtering is disabled and the IP filtering interface does not appear. If the modem does not configure a PVC of Bridge mode, MAC filtering is disabled and the MAC Filtering interface does not appear. D-Link DSL-2640U User Manual... - Page 40 Click Security > IP Filtering > Incoming and the following page appears. By default, all incoming IP traffic from the WAN is blocked when the firewall is enabled. However, some IP traffic can be accepted by setting up filters. D-Link DSL-2640U User Manual...
- Page 41 MAC layer frames are forwarded except those matching with any of the specified rules in the following table. Blocked means that all MAC layer frames are blocked except those matching with any of the specified rules in the following table. D-Link DSL-2640U User Manual...
- Page 42 Forwarded to Blocked. Click No to cancel. For example, to forbid the PC whose MAC address is 00:13:20:9E:0F:10 through PPPoE dial-up, begin with the following page. Click Add to configure the interface as follows. Click Save/Apply and the following page appears. D-Link DSL-2640U User Manual...
-
Page 43: Parental Control
In this page, there are two URL list types – Exclude and Include. If select Exclude, LAN devices could not access Url addresses in the list. And so if select Include, LAN devices just could access Url addresses in the list. Otherwides, one of list types should be selected. D-Link DSL-2640U User Manual... -
Page 44: Quality Of Service
The QoS concept of quality is one in which the requirements of some applications and users are more critical than others, which means that some traffic needs preferential treatment. D-Link DSL-2640U User Manual... - Page 45 Note: Lower integer values for precedence imply higher priority for this queue relative to others. For example, add a QoS queue entry and allocate it to a specific network interface (PVC 0/0/35). Set integer values for queue precedence to 1. D-Link DSL-2640U User Manual...
- Page 46 Lower integer values for precedence imply higher priority for this queue relative to others. Step 2 Add a QoS queue entry and assign it to a specific network interface (PVC 0/0/35), and set integer values for queue precedence to 1. See the following figure: D-Link DSL-2640U User Manual...
- Page 47 QoS method can exist at the same time. Select WRR in QoS Queue Configuration page. The following interface appears. For example, add a QoS queue entry and allocate it to a specific network interface (PVC 0/2/35). Set queue precedence to 2 and weight value to 30%. D-Link DSL-2640U User Manual...
- Page 48 IP header DSCP byte. After QoS classification, QoS divides capacity between different applications and provides undelayed, continuous data transfer where data packet with higher priority is given preference. The follow figure shows QoS classification. D-Link DSL-2640U User Manual...
- Page 49 UPD/TCP destination port or a range of ports Source Mac Address Source Mac Mask Destination Mac Address Destination Mac Mask Set-2 Rules contain the following: 802.1p Priority: the 802.1p header includes a 3-bit prioritization field, which allows D-Link DSL-2640U User Manual...
- Page 50 Layer 3 IPV4 packet Vers proto ion/l S (1 engt TOS filed-IP priority (TOS front 3 bit) or DSCP (front 6 bit) IP priority Undefined DSCP Flow control D-Link DSL-2640U User Manual...
- Page 51 (0-7), where level 7 is the highest one. In addition, DSL maps these eight levels to priority queues, where queue 1 has the highest priority. Layer 2 802.Q frame Preamble mark Len/Etype DATA (2 word) word) Mark TPID(0x8100) Priority(3bit) CFI (1bit) VLAN (12bit) D-Link DSL-2640U User Manual...
- Page 52 Web Configuration For example: mark the frame of 802.1p that queued to Queue 9 on value 2. After proper modifications, click Save/Apply to show the following interface. D-Link DSL-2640U User Manual...
-
Page 53: Routing
WAN interface. Then, click Save/Apply. Note: If the Automatic Assigned Default Gateway check box is changed from deselected to selected, you need to reboot the router to obtain the automatic assigned default gateway. D-Link DSL-2640U User Manual... -
Page 54: Dns
Click Add and the following page appears. Enter the destination network address, subnet mask, gateway AND/OR available WAN interface, then click Save/Apply to add the entry to the routing table. DNS Server In this interface, you can modify the DNS server settings. D-Link DSL-2640U User Manual... - Page 55 The Dynamic DNS service allows you to alias a dynamic IP address to a static hostname in any of the many domains, allowing your DSL router to be more easily accessed from various locations on the Internet. D-Link DSL-2640U User Manual...
- Page 56 Web Configuration Click Add to add dynamic DDNS. D-Link DSL-2640U User Manual...
-
Page 57: Dsl
If you deselect the Enable virtual ports check box, the modem fails to recognize individual Ethernet ports within the Ethernet switch. The page displays two Ethernet ports, ENET(1-3) and ENET4. The ENET(1-3) represents the Ethernet MAC MII port. The ENET4 represents the BCM634x Ethernet MAC/PHY MDI port. D-Link DSL-2640U User Manual... - Page 58 Web Configuration Creating a Mapping Group Choose Advanced Setup > Port Mapping, and the following page appears. D-Link DSL-2640U User Manual...
- Page 59 ID (DHCP option 60) refuse IP addresses from the local DHCP server. Note: These clients may obtain public IP addresses. Click Save/Apply to apply the changes immediately. Note: The selected interfaces are removed from their existing groups and added to the new group. D-Link DSL-2640U User Manual...
-
Page 60: Ipsec
You can click Show Advance Settings to view some advance parameters and modify them to match the other side of this connection. Click Save/Apply to save this connection, then you can check the checkbox of enable column to enable this IPSec connection. And the communication is established. D-Link DSL-2640U User Manual... -
Page 61: Certificate
Local certificates are used by peers to verify your identity. It can store maximum 4 certificates. Click Create Certificate Request and the following page appears. To generate a certificate signing request, you need to include Common Name, Organization Name, State/Province Name, and the 2-letter Country Code for the certificate. D-Link DSL-2640U User Manual... - Page 62 Trusted CA Certificates Click Certificate > Trusted CA and the following page appears. CA certificates are used by you to verify certificates of peers. It can store maximum 4 certificates. D-Link DSL-2640U User Manual...
-
Page 63: Wireless
Wireless LAN or WLAN devices use electromagnetic waves within a broad, unlicensed range of the radio spectrum to transmit and receive radio signals. When a wireless access point is present, it becomes a base station for the WLAN nodes in its broadcast range. WLAN nodes transmit digital data using FM (frequency D-Link DSL-2640U User Manual... - Page 64 Regulatory Domain Allowed Radio Channels China 1 to 13 Europe 1 to 13 Israel 5 to 8 Japan 1 to 14 Jordan 10 to 13 Thailand 1 to 14 USA / Canada 1 to 11 D-Link DSL-2640U User Manual...
-
Page 65: Wireless - Basic
This page allows you to configure basic features of the wireless LAN interface. You can enable or disable the wireless LAN interface, hide the network from active scans, set the wireless network name (also known as SSID) and restrict the channel set based on country requirements. D-Link DSL-2640U User Manual... -
Page 66: Wireless - Security
This device is equipped with 802.1X and WPA/WPA2 (Wi-Fi Protected Access), the latest security standard. It also supports the legacy security standard, WEP (Wired Equivalent Privacy). By default, wireless security is disabled and authentication is open. Before enabling the security, consider your network size, complexity, and existing authentication infrastructure and then determine which solution applies to it. D-Link DSL-2640U User Manual... - Page 67 Network Key 1 to 4: Enter 5 ASCII characters or 10 hexadecimal digits for 64-bit encryption keys to fill out WEP keys box. The system allows you to type in 4 kinds of the WEP key. Click Save/Apply to save the wireless security options and make the modification effect. D-Link DSL-2640U User Manual...
- Page 68 13 ASCII characters or 26 hexadecimal digits for 128-bit encryption keys to fill out WEP keys box. The system allows you to type in 4 kinds of the WEP key. Click Save/Apply to save the wireless security options and make the modification effect. D-Link DSL-2640U User Manual...
- Page 69 WPA Encryption: Select TKIP, AES or TKIP + AES. The AES is default. The TKIP + AES encryption mode means AP auto adjust to use TKIP or AES according to wireless clients. Click Save/Apply to save the wireless security options and make the modification effect. D-Link DSL-2640U User Manual...
- Page 70 WPA Encryption: Select TKIP, AES or TKIP + AES. The TKIP is default. The TKIP + AES encryption mode means AP auto adjust to use TKIP or AES according to wireless clients. D-Link DSL-2640U User Manual...
- Page 71 Format Minimum Maximum characters Characters ASCII Hexadecimal WPA Group Rekey Interval: Specifies the timer the WPA key must change. If the value set 0, no need to change. The change is done automatically between the D-Link DSL-2640U User Manual...
-
Page 72: Wireless - Mac Filter
This page allows you to configure wireless bridge features of the wireless LAN interface. The Wireless Distribution System (WDS) allows you to extend the range of your wireless network by introducing one or more WDS-enabled devices into your wireless network. You can only establish WDS links with WDS-enabled devices. D-Link DSL-2640U User Manual... - Page 73 You must configure all Bridges Access Point with: The same encryption and authentication mode as Open, Shared, WEP, WPA-PSK or WPA2-PSK. The same fixed channel. Click Save/Apply to configure the wireless bridge options and make the modification effect. D-Link DSL-2640U User Manual...
-
Page 74: Wireless - Advanced
Should you encounter inconsistent data flow, only minor reduction of the default value, 2347, is recommended. If a network packet is smaller than the preset RTS threshold size, the RTS/CTS mechanism will not be enabled. The Router sends Request to Send (RTS) frames to a particular receiving station and negotiates the D-Link DSL-2640U User Manual... -
Page 75: Wireless -- Authenticated Stations
Transmit Power: Adjust the transmission range here. This tool can be helpful for security purposes if you wish to limit the transmission range. Click Save/Apply to configure the advanced wireless options and make the changes take effect. Wireless -- Authenticated Stations This page shows authenticated wireless stations and their status about Association and authentication. D-Link DSL-2640U User Manual... -
Page 76: Diagnostics
If the test continues to fail, click Help and follow the troubleshooting procedures. Management Settings Settings Backup Click Settings > Backup to back up the DSL router configuration. D-Link DSL-2640U User Manual... - Page 77 Settings Update Click Browse and select the correct update configure settings file. Then, click Update Settings to update the modem settings. Settings Restore Default Click Restore Default Settings to restore DSL router settings to the factory defaults. D-Link DSL-2640U User Manual...
-
Page 78: System Log
Click Configure System Log to show the following interface. You can enable or disable the system log and then select the log level, display level and mode, and click Apply to end your configurations. D-Link DSL-2640U User Manual... - Page 79 Note: The log and display of the system events are above the set level. If you intend to record all information, you need to set the levels as Debugging. Click Refresh to refresh the system event logs or click Close to exit from this interface. D-Link DSL-2640U User Manual...
-
Page 80: Tr-069 Client
Internet Time Note: When the PVC is PPPoE connection, the Internet Time appears in the Management directory. Click Internet Time to show the following page. In this page, the modem can synchronize with Internet time servers. D-Link DSL-2640U User Manual... -
Page 81: Access Control
HTTP, ICMP, SSH, TELNET and TFTP services. And the LAN side and WAN side can have different configurations. Note: If the connection is PPPoE PVC, you can view the information of WAN side. D-Link DSL-2640U User Manual... - Page 82 The services are the system applications listed in the Service Control List. Click Add to show the following interface. In the interface input the IP address of the management station permitted to access the local management services, and click Save/Apply. D-Link DSL-2640U User Manual...
-
Page 83: Update Software
You must guarantee the update software is right and accurate. It is strictly forbidden to use other software for updates. After update software, it is suggested to restore the modem to the factory defaults and configure it again. D-Link DSL-2640U User Manual... -
Page 84: Save/Reboot
Web Configuration Save/Reboot Click Save/Reboot to show the following interface. Click Save/Reboot to save and reboot the router. D-Link DSL-2640U User Manual... -
Page 85: Troubleshooting
Troubleshooting This chapter provides solutions to problems that might occur during the installation and operation of the DSL-2640U. Read the following descriptions if you are having problems. (The examples below are illustrated in Windows® XP. If you have a different operating system, the screenshots on your computer will look similar to the following examples.) -
Page 86: Networking Basics
Check Your IP Address After you install your new D-Link adapter, by default, the TCP/IP settings should be set to obtain an IP address from a DHCP server (i.e. wireless router) automatically. To verify your IP address, please follow the steps below. -
Page 87: Statically Assign An Ip Address
Windows® XP - Click Start > Control Panel > Network Connections. Windows® 2000 - From the desktop, right-click My Network Places > Properties. Step 2 Right-click the Local Area Connection that represents your D-Link network adapter and select Properties. Step 3 Highlight Internet Protocol (TCP/IP) and click Properties. -
Page 88: Technical Specifications
RFC1334 PAP • RFC2364 PPP over ATM • RFC1389 RIP v2 IP Settings: IP Address: 192.168.1.1, Netmask: 255.255.255.0, User Name: • RFC2516 PPP over Ethernet admin, Password: admin • RFC1577 Classical IP over DHCP Server: Enabled D-Link DSL-2640U User Manual...