
Related Manuals for Jensen JBD-100


Summary of Contents for Jensen JBD-100
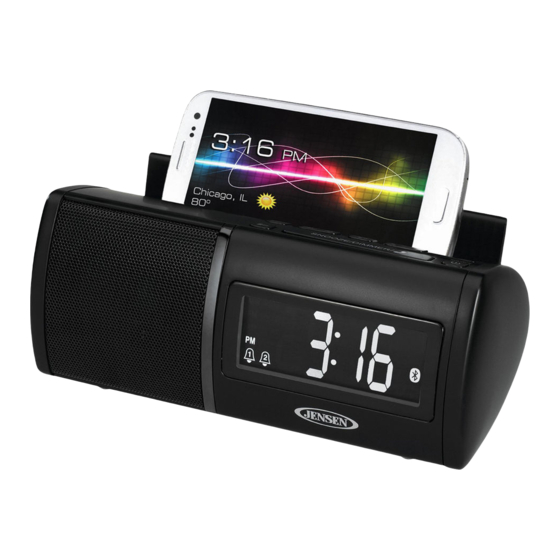
- Page 1 Universal Bluetooth Clock Radio With Charging for All Smartphones USER MANUAL JBD-100 PLEASE READ THIS USER MANUAL COMPLETELY BEFORE OPERATING THIS UNIT AND RETAIN THIS BOOKLET FOR FUTURE REFERENCE.
-
Page 2: Dear Jensen® Customer
The serial number of this product is found on its bottom cover. You should note the serial number of this unit in the space provided as a permanent record of your purchase to aid in identification in the event of theft of loss. Model Number: JBD-100 Serial Number: IMPORTANT SAFETY INSTRUCTIONS When used in the directed manner, this unit has been designed and manufactured to ensure your personal safety. -
Page 3: Compliance With Fcc Regulations
11. Refer all servicing to qualified service personnel. Servicing is required when the apparatus has been damaged in any way, such as ac adaptor is damaged, liquid has been spilled or objects have fallen into the apparatus, the apparatus has been exposed to rain or moisture, does not operate normally or has been dropped. -
Page 4: Location Of Controls
LOCATION OF CONTROLS TOP SIDE FRONT SIDE 1. Alarm 1 Button Alarm 2 Button 2. Access Opening for Top Compartment 3. Time Set/ Memory/ Display Button 4. Sleep Button 5. Snooze/ Dimmer/ Phone Button 6. Play/ Pause / Memory / Pairing Button 7. -
Page 5: Getting Started
REAR SIDE 12. USB Charging Port 13. DC IN Jack 14. AUX IN Jack 15. Reset Button 16. Battery Compartment (bottom of unit) 17. FM Wire Antenna GETTING STARTED Clock Back-up Battery Installation 1. Remove the battery compartment cover. 2. Install 2 “AAA” (UM-4) batteries (not included) in the battery compartment following the polarity markings shown on it. -
Page 6: Ac-Dc Adaptor Connection
- Do not mix alkaline, standard (carbon-zinc) or rechargeable (nickel- cadmium) batteries. - Only batteries of the same or equivalent type as recommend are to be used. - If the unit is not to be used for an extended period of time, remove the batteries. Any old or leaking battery can cause damage to the unit and may void the warranty. -
Page 7: Alarm Setting
ALARM SETTING 1. Tap the Alarm 1 or Alarm 2 Button once to check the alarm time and , Beeping Alarm, Bluetooth wake up option (Radio 2. In standby mode, press and hold the button for 3 seconds when the alarm time is showing. -
Page 8: Listening To Radio
4. To stop the Bluetooth-enabled device immediately, tap the respective alarm button. Note: Make sure the JBD-100 has been linked to your Bluetooth Enabled device • and is shown on Bluetooth list on the device. This feature is phone dependent. -
Page 9: Listening To Bluetooth Enabled Device
LISTENING TO A BLUETOOTH ENABLED DEVICE 1. If the JBD-100 has never been paired with a Bluetooth device before, you need to follow the pairing instructions below to link the JBD-100 with your Bluetooth device. - Page 10 3 seconds, a short beep tone will be heard and the call will be rejected. Hang up with the JBD-100 A quick press on the Phone Button will end the call in progress. A short beep tone will be heard from the speaker confirming the call has ended.
- Page 11 CHARGING YOUR SMART PHONE OR PORTABLE DEVICE This unit features a USB port for charging your portable device (iPod, iPhone, Android phone, etc.) when used with the USB charging cord that came with your device. 1. Plug one end of the USB cable (not included) into the USB Charging Port located on the back of the unit.
-
Page 12: Auxiliary Input
SLEEP TIMER OPERATIONS 1. In Radio, Bluetooth or AUX mode, when you press the Sleep Button once, the “SLEEP” indicator will appear on the LCD display. 2. Tap the Sleep Button repeatedly to select the desired sleep time. The sleep timer can be chosen from 10 - 120 minutes in 10 minute step. After sleep timer has been selected, wait for 5 seconds to confirm. -
Page 13: Resetting The Unit
RESETTING THE UNIT If the unit experiences a power surge or electric shock, it is possible that the internal micro-controller may lock up and the unit will not respond to any commands from the panel controls. In this event, use a straightened paper clip, toothpick or similar objects to press the RESET button located at rear of the unit (see the below figure). -
Page 14: Troubleshooting Guide
TROUBLESHOOTING GUIDE Symptom Possible Problem Solution The unit is disconnected from Reconnect to the AC outlet. The unit does not the AC outlet. respond (no power) The AC outlet has not power. Try the unit on another outlet. through “LISTENING The unit is not linked with BLUETOOTH ENABLED DEVICE”... -
Page 15: Specifications
SPECIFICATIONS Power requirement: AC-DC adaptor: Input: AC 120V ~ 60Hz Main Unit: DC input: DC 5V 1500mA Backup Battery for Clock: 2 x AAA (UM-4) Batteries (not included) Frequency Range Radio Band: FM 87.5 ~ 108 MHz At Spectra, environmental and social responsibility is a core value of our business. - Page 16 90 DAY LIMITED WARRANTY AND SERVICE VALID IN THE U.S.A. ONLY SPECTRA MERCHANDISING INTERNATIONAL, INC. warrants this unit to be free from defective materials or factory workmanship for a period of 90 days from the date of original customer purchase and provided the product is utilized within the U.S.A. This warranty is not assignable or transferable.