Carrier 42QTD024DS Series Installation Manual
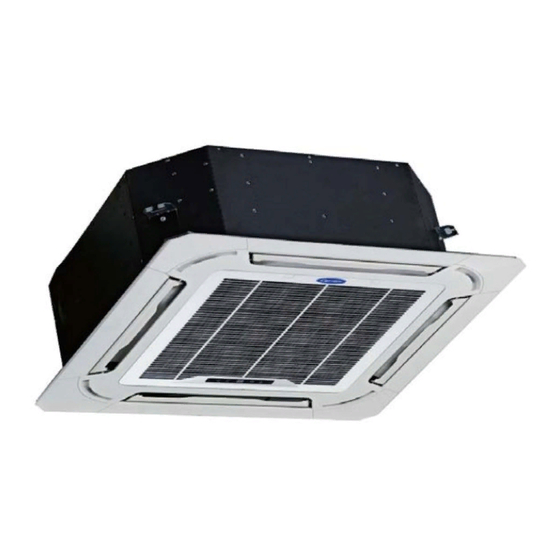
Cassette type air conditioner
Hide thumbs
Also See for 42QTD024DS Series:
- Installation manual (394 pages) ,
- Owner's manual (128 pages) ,
- Service manual (95 pages)
Table of Contents
Advertisement
Advertisement
Table of Contents

Related Manuals for Carrier 42QTD024DS Series


Summary of Contents for Carrier 42QTD024DS Series
-
Page 1: Installation Manual
CASSETTE TYPE AIR CONDITIONER INSTALLATION MANUAL INSTALLATION MANUAL INSTALLATIONSHANDBUCH DEUTSCH ENGLISH INSTALLATIEHANDLEIDING MANUEL D'INSTALLATION FRANÇAIS NEDERLANDS MANUAL DE INSTALACIÓN MANUALE DI INSTALLAZIONE ESPAÑOL ITALIANO INSTRUKCJA MONTAŻU POLSKI... - Page 2 This product has been det ermined t o be in compliance wit h t he Low Volt age Direct ive ( 2006/95/EC), and t he Elect romagnet ic Compat ibilit y Direct ive ( 2004/108/EC) of t he European Union. Correct Disposal of This Product (Waste Electrical &...
-
Page 3: Table Of Contents
CONTENTS 1. PREPARING FOR INSTALLATION ······································································ 1.1 Safety Percautions ························································································· 1.2 Accessories ·································································································· 2. INDOOR UNIT INSTALLATION ··········································································· 2.1 Installation Site Choosing ················································································ 2.2 Install The Suspension Bolts ············································································ 2.3 Handing The Indoor Unit ·················································································· 2.4 Install The Drain Pipe ····················································································· 2.5 Install The Panel ····························································································... -
Page 4: Preparing For Installation
1. PREPARING FOR INSTALLATION 1.1 SAFETY PRECAUTIONS nstalling, starting up, and servicing air-conditioning equipment can be hazardous due to system ressures, electrical components, and equipment location (roofs, elevated structures, etc.). nly trained, qualified installers and service mechanics should install, start-up, and serve this equipment. hen working on the equipment, observe precautions in the literature and on tags, stickers, and labels attached to the equipment. -
Page 5: Accessories
1. PREPARING FOR INSTALLATION WARNING ever modify this unit by removing any of the safety guards or bypassing any of the safety interlock switches. n order to avoid a hazard due to inadvertent resetting of the thermal cut-out, this appliance must not be supplied through an external switching device, such as a timer, or connected to a circuit that is regularly switched on and off by the utility. -
Page 6: Indoor Unit Installation
1. PREPARING FOR INSTALLATION The following accessories are related to remote controller. Name of Accessories Q‘ty(pc) Shape Remote Controller To remote control the air conditioner Remote controller holder To hold the remote controller on the wall Tapped screw To fix the remote controller holder For remote controller Battery Note: The accessories related to remote controller will be unavailable for the models with wired... - Page 7 2. INDOOR UNIT INSTALLATION SPACE REQUIREMENT FOR INDOOR UNIT Clearance from the wall or other obstacles Unit: mm The size of Outline dimension Connecting port Connecting port Connecting port of drain pipe of refrigerant pipe of drain pipe Connecting port of refrigerant pipe Fresh air intake ( Φ75mm) MODEL (QTD024-060)
-
Page 8: Install The Suspension Bolts
2. INDOOR UNIT INSTALLATION CAUTION t is recommended to install the Y joint before installing the indoor unit hen moving the unit during or after unpacking, make sure to lift by holding its hooks. o not exert any pressure on other parts, especially the refrigerant piping and drain piping. 2.2 INSTALL THE SUSPENSION BOLTS 2.2.1 Mark the spots on the ceiling where you want to install the indoor unit. -
Page 9: Install The Drain Pipe
2. INDOOR UNIT INSTALLATION 2.4 INSTALL THE DRAIN PIPE Remove the cover of the drain hose connection port Insert the flexible hose to the drain hose port. Fix the flexible hose to the indoor unit with pipe clamp securely. Install the flexible hose to the PVC water pipe (field supply, O.D.: Φ25) securely with PVC adhesive. Wrap the drain hose with the insulation materials. -
Page 10: Install The Panel
2. INDOOR UNIT INSTALLATION 2.5 INSTALL THE PANEL CAUTION Before installation of the panel, be sure to remove the cushion for transportation between the fan and orifice. Install the panel according to below instructure after piping and wiring work has completed. Joint the connecting sections of panel, ceiling surface and indoor unit closely. -
Page 11: Outdoor Unit Installation
3. OUTDOOR UNIT INSTALLATION 3.1 INSTALLATION SITE CHOOSING OUTDOOR UNIT ■ Where it is out of rain or direct sunlight. ■ Where it is well-ventilated and free from obstacles near the air inlet and air outlet. ■ Where does not increase the operating noise or vibration of the outdoor unit. ■... -
Page 12: Space Requirement For Outdoor Unit
3. OUTDOOR UNIT INSTALLATION 3.3 SPACE REQUIREMENT FOR OUTDOOR UNIT Single Unit Installation (Wall or obstacle) Air inlet >30cm Maintain channel Air inlet Fix with bolt >60cm Air outlet unit:cm unit:cm Parallel connect the front with rear sides. Parallel connect the two units or above >200 >50 >300... -
Page 13: Refrigerant Piping Work
4. REFRIGERANT PIPING WORK CAUTION heck if the height difference between indoor unit & outdoor unit and the total length of refrigerant pipe meet system requirement. efrigerant piping work follows the indoor unit and outdoor unit installation, connect the pipe at the indoor side first, then the outdoor side. -
Page 14: Refrigerant Pipe
4. REFRIGERANT PIPING WORK 4.3 REFRIGERANT PIPE Allowable Max. Height Charge less Additional charge Gas Side Liquid Side Model pipe length (m) difference (m) length (m) per meter (R410A) 38QUS024 Φ9.52mm Φ15.88mm 30 g/m Φ9.52mm Φ15.88mm 30 g/m 38QUS036/48 Φ9.52mm Φ15.88mm 30 g/m 38QUS060... -
Page 15: Wiring
5. WIRING CAUTION All the electrical connections must be carried out by qualified installers and all the wirings must be connected according to the wiring diagram. Make ground connection prior to any other electrical connections. All power sources must be turned off before wiring work and do not turn on the power until you have made sure all the wirings have been safety checked. -
Page 16: Independence Power Supply
5. WIRING Connection Diagram Power input cord Indoor Unit (QTD024) Outdoor Unit (QUS024) 60mm 1(L) 2(N) 1(L) 2(N) 10mm 40mm Connective Cable 60mm 10mm 40mm To Indoor Power Input To Outdoor 5.2 INDEPENDENCE POWER SUPPLY (For QUS036~060) Wiring figure Power supply Power supply Switch/Fuse Switch/Fuse... - Page 17 5. WIRING Connection Diagram Indoor Unit (QTD036~060) Outdoor Unit (QUS036) Power input cord (Single phase) 60mm 10mm 40mm Power input cord (Three phase) 60mm Power Input To Outdoor Power Input To Indoor 10mm 40mm Outdoor Unit (QUS048~060) Power Input To Indoor CAUTION Separate the low voltage wiring (signal wire) and high voltage wiring (power supply wiring) at least 0.5m so that they do not pass through the same place together.
-
Page 18: Final Check And Trail Operation
6. FINAL CHECK AND TRAIL OPERATION 6.1 FINAL CHECK LIST To complete the installation, perform the following checks before the trial operation. Strength of the installation site for both indoor and outdoor sides, confirm no obstruction of the unit air outlet or return. Tightness of Refrigerant piping connection and confirm no leakage Electric wiring connections are correctly completed and unit has been grounding connected Check the total length of the piping and record the volume of the additional charged refrigerant... - Page 19 BEIJER RET AB Stortorget 8 Malmö Sweden...