Table of Contents
Advertisement
Thank you very much for purchasing the ZOOM
Please read this manual carefully to learn about all the functions of the
you will be able to use it fully.
Keep this manual in a convenient place for reference when necessary.
Usage and safety precautions............... 2
Introduction ....................................... 3
Terms used in this manual .................. 3
Part names ....................................... 4
Turning the power on ........................ 6
Display information ........................... 7
Adjusting effects ................................. 9
Using the output booster ..................... 17
Adjusting the master level .................. 17
Using patches .................................... 18
Changing USB audio settings ............... 24
Changing various settings .................. 27
Copying or reproduction of this Operation Manual in part or in whole without permission is prohibited.
OPERATION MANUAL
Contents
© 2015 ZOOM CORPORATION
.
Using the tuner ................................. 33
Using rhythms .................................... 39
Using the looper ................................. 41
Using the pedal ................................. 45
Setting the tempo .............................. 46
Using as an audio interface .................. 47
Adjusting the pedal ........................... 48
Updating the firmware ........................ 50
Troubleshooting ................................. 53
Rhythm List ....................................... 54
Specifications .................................... 55
so that
Advertisement
Table of Contents

Related Manuals for Zoom G5n


Summary of Contents for Zoom G5n
-
Page 1: Table Of Contents
OPERATION MANUAL Thank you very much for purchasing the ZOOM Please read this manual carefully to learn about all the functions of the so that you will be able to use it fully. Keep this manual in a convenient place for reference when necessary. -
Page 2: Usage And Safety Precautions
Operation using an AC adapter If the unit becomes broken or malfunctions, immediately Use only a ZOOM AD-16 AC adapter with this unit. disconnect the AC adapter, turn the power OFF and disconnect Do not do anything that could exceed the ratings of outlets and other other cables. -
Page 3: Introduction
Download new effects and patches Our free Effects/Patch Manager software for Windows and MacOS allows you to regularly download new effects and patches created by ZOOM. For detailed information, see the ZOOM website (http://www.zoom.co.jp/downloads/). Terms used in this manual Patch can store up to 200 patches with effect parameter settings and ON/OFF states. -
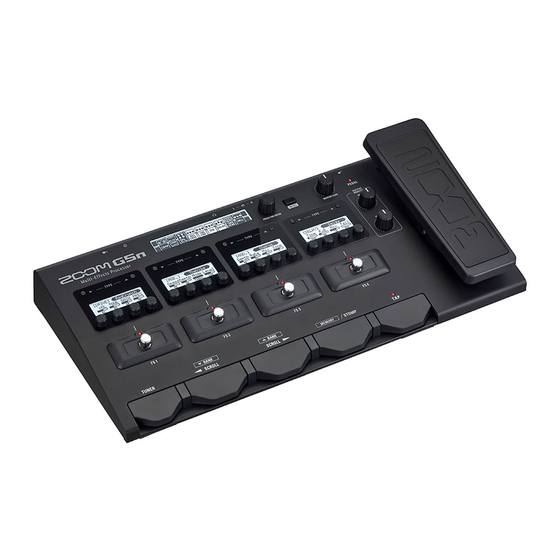
Page 4: Part Names
Part names Front panel Overview Display TYPE keys Unit Display Parameter knobs (In explanations, these will be shown like this: Footswitches FS1–FS4 TUNER switch BANK/SCROLL switches Mode switch TAP switch Rear panel INPUT jack AUX IN jack OUTPUT jacks Pedal switch Portable music player, etc. - Page 5 Part names Control knob/enter key MENU key MASTER LEVEL knob Expression pedal BOOST knob TONE knob CONTROL IN jack PHONES jack USB port POWER switch DC 9V AC adapter connector Dedicated AC adapter (AD-16) FP01/FP02 Headphones Computer...
-
Page 6: Turning The Power On
Turning the power on To turn the power on HINT Using the eco setting When eco mode is ON, the will automatically turn off if it is not used for 10 hours. -
Page 7: Display Information
Display information Display in STOMP mode Overview Display HINT The effects currently shown on the 4 Unit Displays have white backgrounds. Unit Display Standard effect Parameter names Parameter values Large effect Parameter names Parameter values Switching unit display contents Press to switch between showing parameters and effect names. - Page 8 Display information Display in MEMORY mode Overview Display Unit Display Patch name Patch number...
-
Page 9: Adjusting Effects
Adjusting effects Press to change to STOMP mode. Turning effects ON/OFF [OFF] [ON] NOTE has special functions for some effect types. The parameter function assigned to shown on the Unit Display with white letters on a dark background. Ordinary Selecting effect types... - Page 10 Adjusting effects NOTE allows you to combine up to 9 effects in whatever order you like. If limits on the processing effects will be bypassed. To end bypassing, delete some effects or change their types. Overview Display Unit Display Selecting effect categories , press effect type in the category.
-
Page 11: Adjusting Parameters
Adjusting effects Adjusting parameters HINT NOTE Scrolling effect displays ê Note about effect displays You can check the effects the is using at a glance on the Overview Display. The effects currently shown on the Unit Displays have white backgrounds. -
Page 12: Adding Effects
Adjusting effects Adding effects to select ADD. NOTE If 9 effects are already in use, ADD will not be shown. to open the ADD screen. to select where the effect will be added. - Page 13 Adjusting effects to select the effect type. Unit Display Overview Display Completing the addition of effects...
-
Page 14: Deleting Effects
Adjusting effects Deleting effects to select the effect to delete. to delete the effect. - Page 15 Adjusting effects HINT Turn to cancel deletion. Changing the effect order to select CHAIN. to open the CHAIN screen.
- Page 16 Adjusting effects to select the effect to swap. to swap with the next effect in the chain. to end selection of the effect.
-
Page 17: Using The Output Booster
Using the output booster The output booster function affects the signal just before output, emulating a tube booster. Setting the boost level NOTE Adjusting the audio quality Knob centered Frequencies are not adjusted. Knob turned left Low frequencies are emphasized. Knob turned right High frequencies are emphasized. -
Page 18: Using Patches
Using patches Selecting patches Switching patches Overview Display Unit Display NOTE The selected patch has a white background. Switching banks ê NOTE to change banks continuously. numbers. - Page 19 Using patches Setting independent patch parameters Entering patch setting mode Adjusting patch levels to set the patch level.
- Page 20 Using patches NOTE The setting range is 0–120. Changing patch names to select the character to change. to change the character.
-
Page 21: Saving Patches
Using patches NOTE to change the character type. Ending patch setting mode to end patch setting mode. Saving patches... - Page 22 Using patches to select where the patch will be saved. HINT Select NO to cancel saving the patch. to save the patch. Swapping patches...
- Page 23 Using patches to select the patch to be swapped. HINT Select NO to cancel swapping. to swap the patches.
-
Page 24: Changing Usb Audio Settings
Changing USB audio settings Opening the USB AUDIO screen to select USB. to open the USB AUDIO screen. - Page 25 Changing USB audio settings Adjusting the USB audio monitoring balance to adjust the monitoring balance. NOTE software (computer) when set to 100.
- Page 26 Changing USB audio settings Adjusting the recording level to adjust the recording level. NOTE...
-
Page 27: Changing Various Settings
Changing various settings Opening the SETUP screen Setting the auto save function... - Page 28 Changing various settings NOTE When set to OFF , no patch or effect parameters will be saved automatically. Note about switching patches When AUTO SAVE is set to OFF , if you try to switch patches after changing any parameters, a message will appear asking to save the parameter changes.
- Page 29 Changing various settings Setting up an external pedal This setting makes 2 pedal effects usable, with the pedal effect selected second assigned to the external pedal.
- Page 30 Changing various settings Setting the preselect function With this setting, pressing to change the bank only changes what is shown on the display until you press to confirm the patch change.
- Page 31 Changing various settings Setting the eco mode When eco mode is on, the will automatically turn off if not used for 10 hours. to select eco.
- Page 32 Changing various settings Adjusting the display contrast to select a display to adjust its contrast. to adjust the contrast. NOTE...
-
Page 33: Using The Tuner
Using the tuner Using the tuner Activating the tuner NOTE Whenever the Overview Display shows any other screen, press to reopen the Home Screen. Tuning a guitar Chromatic tuner The name of the nearest note and the pitch accuracy are shown. ←Flat Correct pitch Sharp→... -
Page 34: Changing The Tuner Settings
Using the tuner Closing the tuner Changing the tuner settings Opening the TUNER MENU screen Screen. - Page 35 Using the tuner Changing the tuner mode BYPASS When the tuner is operating, the sound is output without any effects. MUTE When the tuner is operating, no sound is output. EFFECT When the tuner is operating, the sound processed by the selected patch is output.
- Page 36 Using the tuner Changing the standard pitch of the tuner to change the standard pitch. NOTE...
- Page 37 Using the tuner Changing the tuner type to select the tuner type. CHROMATIC The chromatic tuner shows the nearest pitch name (semitone) and how far the input sound is from that pitch. Other tuner types Depending on the selected type, the nearest string name and how far the sound input is from that pitch are shown.
- Page 38 Using the tuner Using flat tuning to change the flat tuning. NOTE x 1), two ( x 2) or three (...
-
Page 39: Using Rhythms
Using rhythms Selecting a rhythm to select a rhythm. Playing a rhythm for the unit using the rhythm effect. HINT Stopping a rhythm for the unit using the rhythm. - Page 40 Using rhythms Setting rhythms Selecting rhythm patterns for the unit using the rhythm. NOTE Adjusting the rhythm tempo for the unit using the rhythm. NOTE Adjusting the rhythm volume for the unit using the rhythm effect. NOTE The setting range is 0–100.
-
Page 41: Selecting The Looper
Using the looper Selecting the looper to select the looper. Mono looper Stereo looper NOTE The looper has two types: mono and stereo. Recording and playing phrases Recording phrases for the unit using the looper effect. If the recording time is set to "MANUAL" Loop playback will start when you press again or when the maximum recording time is reached. - Page 42 Using the looper If the recording time is set to a musical note Loop playback will start when the set recording time is reached. HINT NOTE data. loop will automatically be adjusted so that loop playback stays in time. Overdubbing a recorded phrase for the unit using the looper effect.
- Page 43 Using the looper Deleting phrases for the unit using the looper effect. Setting the looper Setting the looper recording time for the unit using the looper effect. NOTE...
- Page 44 Using the looper Setting the UNDO function NOTE When UNDO is ON, the recording time will become as follows. HINT When UNDO is enabled, you can press for 1 second during playback to undo the last overdub. By pressing Setting how loop playback stops for the unit using the looper effect.
-
Page 45: Using The Pedal
Using the pedal Selecting the pedal effect to select the pedal effect. NOTE To select the pedal category, press while pressing and holding , or press while pressing and holding Turning the pedal effect ON/OFF down. HINT NOTE... -
Page 46: Setting The Tempo
Setting the tempo The tempo is used for the looper, rhythm, and delay. In addition, some modulation effects can be synchronized. To synchronize the tempo, select an effect that can be synchronized in advance and set a synchronizable parameter, such as "Time" or "Rate" to a musical note ("... -
Page 47: Using As An Audio Interface
Using as an audio interface The system requirements are as follows. Compatible OS Windows ® Windows 7 (32-bit, 64-bit) ® Windows 8.1 (32-bit, 64-bit) ® Windows 10 (32-bit, 64-bit) ® ® 32-bit: Intel Pentium 4 1.8GHz or faster, RAM 1GB or more ®... -
Page 48: Adjusting The Pedal
Adjusting the pedal Calibrating the sensitivity when required. NOTE Calibrate in the following cases. – Stepping on the pedal has little effect. – The volume and tone changes greatly even when the pedal is only pressed lightly. Adjusting the torque the pedal. -
Page 49: Restoring Default Settings And Patches
Restoring default settings and patches HINT Select NO to cancel initialization. to initialize. HINT , including its patches, to factory defaults. Do not use this function unless you are certain that you want to do this. -
Page 50: Updating The Firmware
Updating the firmware Checking the firmware version... - Page 51 Updating the firmware and check the version.
-
Page 52: Updating The Firmware
USB cable. update. NOTE HINT Do not disconnect the USB cable during the See the ZOOM website for instructions about update. how to use the application. HINT Updating the firmware version will not erase saved patches. -
Page 53: Troubleshooting
Troubleshooting No sound or very low volume An effect is not working “ON”. the number of units or the amount of resources used are exceeded, effects will → be bypassed and the following message → will appear (→ → to adjust the volume, adjust the pedal Expression pedal does not work well position until the volume level is suitable. -
Page 54: Rhythm List
Rhythm List PatternName TimSig PatternName TimSig PatternName TimSig Jazz2 8Beats1 Fusion 8Beats2 70s Soul Swing1 90s Soul Swing2 16Beats1 Motown Bossa1 16Beats2 HipHop Bossa2 Disco Samba1 Samba2 Breaks1 Breaks2 NewWave OneDrop Waltz HeavyMtl Steppers JzWaltz1 MtlCore JzWaltz2 CtWaltz1 CtWaltz2 Country TomTomBt Shuffle1 Funk1... -
Page 55: Specifications
Maximum output level: 20 mW + 20 mW (into 32 Ω load) Equivalent input noise -119dBu Noise floor (residual noise) -101dBu Control input For FP01/FP02 Power AC adapter DC9V (center minus plug), 500 mA (ZOOM AD-16) Dimensions 225mm(D) X 454mm(W) X 75mm(H) USB Audio Weight 3.4kg FP01/FP02 expression pedal Options... -
Page 56: Declaration Of Conformity
Connect the equipment to an outlet on a circuit different from that to which the receiver is connected. For EU Countries Declaration of Conformity ZOOM CORPORATION Z2I-2449-01...