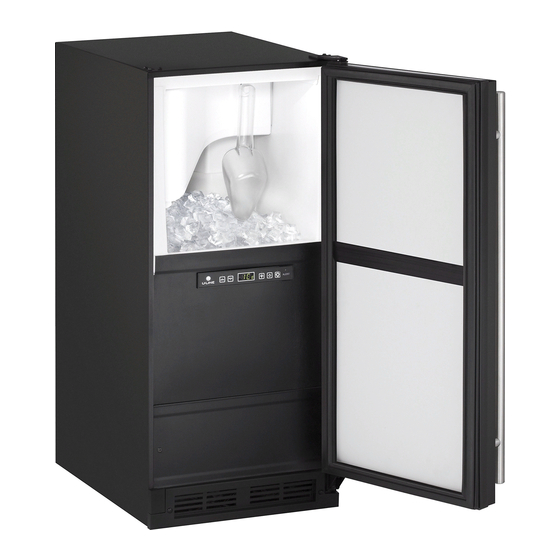
U-Line CLR1215 Quick Start Manual
1000 series
Hide thumbs
Also See for CLR1215:
- User manual (62 pages) ,
- User manual & service manual (53 pages) ,
- Quick start manual (16 pages)
Table of Contents
Advertisement
Advertisement
Table of Contents

Summary of Contents for U-Line CLR1215
- Page 1 QUICK START GUIDE 1000 Series CLR1215 115 V / 60 Hz • •...
- Page 2 1. U-Line Customer Care must be contacted immediately at +1.800.779.2547. 2. Service or repairs performed on the unit without prior written approval from U-Line is not permitted. If the unit has been altered or repaired in the field without prior written approval from U-Line, claims will not be eligible.
-
Page 3: Table Of Contents
QUICK START GUIDE u-line.com Contents Model List Safety and Warning Environmental Requirements Electrical Water Hookup Drain Door Swing General Installation Integrated Panel Installation Control Operation First Use Sabbath Mode Warranty... -
Page 4: Model List
QUICK START GUIDE u-line.com Model List This guide provides the basics to get you started. Looking for more information? Visit u-line.com to view detailed User Guides for all U-Line products. Clear Ice U-CLR1215S-00A U-CLR1215S-40A U-CLR1215INT-00A U-CLR1215INT-40A U-CLR1215B-00A U-CLR1215B-40A U-CLR1215W-00A U-CLR1215W-40A... -
Page 5: Safety And Warning
QUICK START GUIDE u-line.com Safety and Warning This unit is designed to operate between 50°F (10°C) and 100°F (38°C). Higher ambient temperatures may reduce NOTICE the unit’s ability to reach low temperatures and/or reduce ice production on applicable models. Please read all instructions before installing, operating, or servicing the appliance. -
Page 6: Electrical
QUICK START GUIDE u-line.com Electrical Water Hookup INDOOR MODELS WARNING PREPARE PLUMBING Please use the braided stainless steel water supply line SHOCK HAZARD — Electrical Grounding which comes attached. The water line is fitted with a Required. Never attempt to repair or perform standard 1/4"... - Page 7 The water valve uses a standard 1/4" (6.35 mm) 1. Turn off water supply and disconnect electrical supply compression fitting. U-Line recommends using accessory to product prior to attempting installation. water hook up kit – part # WATERHOOKUP. The kit includes a 10' (3 m) braided flexible water supply line and a brass hose fitting.
- Page 8 QUICK START GUIDE u-line.com provides an adequate seal – other materials WARNING could cause blockage of the valve. Prior to installation, determine if this product Failure to follow recommendations and contains a gravity style drain or factory installed instructions may result in damage and/or harm, drain pump.
-
Page 9: Drain
5. Thread water line through back panel hole CAUTION (with bushing). If your U-Line unit did not come with a factory installed drain pump you must use a gravity style drain connection. For assistance in determining if your unit has a pump please contact U-Line. - Page 10 Normal Proper Drain pre-installed U-Line P60 drain pump. If you need to install a P60 drain pump into your unit, see With Trap Poor Drainage, Water Will Back Up DRAIN PUMP section in the User Manual.
-
Page 11: Door Swing
QUICK START GUIDE u-line.com General Installation Y-Branch Tailpiece P60 Pump Required Air Gap LEVELING INFORMATION (Optional Hook-Up) 1. Use a level to confirm the unit is level. Level should Waste be placed along top edge and side edge Valve as shown. -
Page 12: Integrated Panel Installation
Clamp using clamps. A 5. Remove interior packing material and wipe out the robust tape may also inside of the unit with a clean, water-dampened cloth. be used. U-Line recommends the use of bar clamps to Door/Drawer Integrated Panel Installation secure the panel to the door/drawer. - Page 13 QUICK START GUIDE u-line.com 9. Using a Phillips screwdriver, place one screw into each of the 6 pilot holes and screw down. Do not overtighten screws. 10.Be sure the screws force their way past the opening on the gasket channel and sit flush against the bottom of the channel.
-
Page 14: Control Operation
”. 3 hours) Clean Mode Hold for five seconds First Use All U-Line controls are preset at the factory. Initial startup ICE CUBE THICKNESS ADJUSTMENT requires no adjustments. Interval - As Required NOTICE NOTICE Ice thickness adjustment should only be made U-Line recommends discarding the ice produced one increment at a time. - Page 15 QUICK START GUIDE u-line.com depth. A fuller cube with less of a dimple results in a Ice thickness adjustments are made using the control thicker ice bridge. As the ice bridge becomes thicker, the panel as follows: tendency for the cubes to stay together as a slab increases.
-
Page 16: Sabbath Mode
U-Line further warrants the sealed system (consisting of the compressor, condenser, evaporator, hot gas bypass valve, dryer, and connecting tube) in each U-Line product to be free from defects in materials and workmanship for a period of five years from the date of Select purchase. - Page 17 U-Line. This 30 day warranty does not apply to cosmetic damages. A proof of purchase may 7. If a product defect is discovered during the applicable be required.


