Viessmann Vitocrossal 200 CM2 186 Service Instruction
Hide thumbs
Also See for Vitocrossal 200 CM2 186:
- Installation instructions manual (52 pages) ,
- Technical data manual (17 pages) ,
- Operating instructions manual (12 pages)
Table of Contents
Advertisement
Service Instructions
for use by heating contractor
Vitocrossal 200
CM2 Series 186 to 311
Gas condensing boiler with Pre-mix cylinder burner
Heating input:
663 to 1112 MBH
194 to 326 kW
VITOCROSSAL 200
H
5584 109 - 10
12/2015
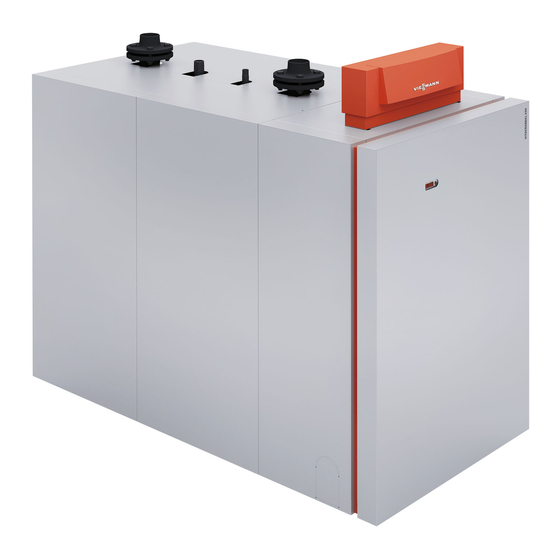
Product may not be exactly as shown
IMPORTANT
Read and save these instructions
for future reference.
Please file in Service Binder
Advertisement
Table of Contents

Related Manuals for Viessmann Vitocrossal 200 CM2 186


Summary of Contents for Viessmann Vitocrossal 200 CM2 186
- Page 1 Service Instructions for use by heating contractor Vitocrossal 200 CM2 Series 186 to 311 Gas condensing boiler with Pre-mix cylinder burner Heating input: 663 to 1112 MBH 194 to 326 kW VITOCROSSAL 200 Product may not be exactly as shown IMPORTANT Read and save these instructions for future reference.
-
Page 2: Safety, Installation And Warranty Requirements
Safety Vitocrossal 200 CM2 186 to 311 Service Safety, Installation and Warranty Requirements Please ensure that these instructions are read and understood before commencing installation. Failure to comply with the instructions listed below and details printed in this manual can cause product/property damage, severe personal injury, and/or loss of life. -
Page 3: Equipment
Safety Vitocrossal 200 CM2 186 to 311 Service Equipment Tools Technical information Assortment of flathead and Phillips screwdrivers The following is a list of literature applicable to the Vitocrossal 200, CM2 boiler: Pipe wrenches Installation Instructions Open-ended wrenches ... -
Page 4: Table Of Contents
Table of Contents Vitocrossal 200 CM2 186 to 311 Service Page Safety Safety, Installation and Warranty Requirements....2 Equipment..............3 Tools..............3 Cleaning supplies.............3 Testing/analysis equipment........3 Technical information..........3 Replacement parts...........3 Product Information.............3 General Information About these Instructions..........5 Important Regulatory and Installation Requirements..5 Safety Instructions............8 Target group............8... - Page 5 Table of Contents Vitocrossal 200 CM2 186 to 311 Service Page Burner Service Diaphragm Expansion Vessel and System Pressure..25 Check proper expansion tank and system pressures..25 Water Quality............25 Further Details Regarding the Individual Steps....25 Fan pressure monitoring function (air pressure switch 1)..25 Combustion chamber pressure monitoring (air pressure switch 2)..........26...
-
Page 6: General Information
General Information Vitocrossal 200 CM2 186 to 311 Service About these Instructions Take note of all symbols and notations intended to draw attention to potential hazards or important product information. These include “WARNING”, “CAUTION”, and “IMPORTANT”. See below. Warnings draw your attention to the presence of WARNING potential hazards or important product information. - Page 7 General Information Vitocrossal 200 CM2 186 to 311 Service Important Regulatory and Installation Requirements (continued) Instructing the system user The installer of the system is responsible to ensure the T he following topics must be covered: system operator/ultimate owner is made familiar with Proper system operation sequence.
-
Page 8: Safety Instructions
General Information Vitocrossal 200 CM2 186 to 311 Service Safety Instructions Target group If you smell flue gas These instructions are intended exclusively for qualified contractors. WARNING ■ Work on gas installations must only be carried out Flue gas can lead to life threatening poisoning. -
Page 9: Checking The High Limit Safety Cut-Out Setting
General Information Vitocrossal 200 CM2 186 to 311 Service Safety Instructions (continued) Checking the high limit safety cut-out setting CSD-1 Field Testing of High Limit Switches for Vitocrossal 200 CM2 boilers – where required by law. Never set the high limit safety cut-out higher than 210°F (99°C). -
Page 10: Commissioning, Inspection And Maintenance
Commissioning, Inspection and Maintenance Vitocrossal 200 CM2 186 to 311 Service Steps – Commissioning, Inspection and Maintenance Commissioning the system 6. Match the coding card at the burner control unit WARNING according to the chart on this page. Also refer to page 31. -
Page 11: Conversion To Liquid Propane Gas (Lpg)
Commissioning, Inspection and Maintenance Vitocrossal 200 CM2 186 to 311 Service Steps – Commissioning, Inspection and Maintenance (continued) Conversion to liquid propane gas (LPG) (The LPG conversion kit is supplied with the burner) 7. Remove four 8 mm hex nuts. Detach the gas valve 1. -
Page 12: Conversion To Natural Gas (Ng)
Commissioning, Inspection and Maintenance Vitocrossal 200 CM2 186 to 311 Service Steps – Commissioning, Inspection and Maintenance (continued) Conversion to natural gas (NG) 7. Remove four 8 mm hex nuts. Detach the gas valve 1. Close the gas shut-off valve. -
Page 13: Converting Gas Type On Burner Control Unit
Commissioning, Inspection and Maintenance Vitocrossal 200 CM2 186 to 311 Service Steps – Commissioning, Inspection and Maintenance (continued) Note: Burner commissioning can be done either at the Altitude adjustment burner control interface or at the GW6B boiler To implement the changes the burner has to be in control under coding level 2 ‘combustion controller’... -
Page 14: Reducing Operational Output (If Required)
Commissioning, Inspection and Maintenance Vitocrossal 200 CM2 186 to 311 Service Steps – Commissioning, Inspection and Maintenance (continued) Checking the static and the supply pressure Reducing operational input (if required) To implement the changes the burner has to be in stand-by, Status “0”, Service “0”. -
Page 15: Supply Pressure For Ng And Lpg
Commissioning, Inspection and Maintenance Vitocrossal 200 CM2 186 to 311 Service Steps – Commissioning, Inspection and Maintenance (continued) Supply pressure for NG and LPG. Note: The supply pressure should be between 4“w.c. 1. Start the burner and 14”w.c. The gas pressure switch for the inlet Note: For commissioning, see page 10. -
Page 16: Checking The Co Level
Commissioning, Inspection and Maintenance Vitocrossal 200 CM2 186 to 311 Service Steps – Commissioning, Inspection and Maintenance (continued) Checking the CO level Test at the upper heating input Preparing the test 1. Press button E until the service display B has incremented to “100“(= 100 %). -
Page 17: Co Test At The Lower Heating Output
Commissioning, Inspection and Maintenance Vitocrossal 200 CM2 186 to 311 Service Steps – Commissioning, Inspection and Maintenance (continued) Test at the lower heating output Displaying the ionization current 1. Press button G until the service display B has counted down to “0“ (lower heating output). -
Page 18: Shutting Down The System
Commissioning, Inspection and Maintenance Vitocrossal 200 CM2 186 to 311 Service Steps – Commissioning, Inspection and Maintenance (continued) Shutting down the system Cleaning the combustion chamber and heating surfaces 1. Switch OFF the main circuit breaker or the power supply Thoroughly clean the combustion chamber and heating surfaces with a water jet. -
Page 19: Cleaning And Reconnecting The Condensate Drain System
Commissioning, Inspection and Maintenance Vitocrossal 200 CM2 186 to 311 Service Steps – Commissioning, Inspection and Maintenance (continued) Check neutralization unit (if installed) Cleaning and reconnecting the condensate drain system 1. Check the pH value of the condensate with a pH Note: Clean the inside of the condensate drain system measuring strip (field supplied). -
Page 20: Checking The Ignition And Ionization Electrodes
Commissioning, Inspection and Maintenance Vitocrossal 200 CM2 186 to 311 Service Steps – Commissioning, Inspection and Maintenance (continued) Checking the ignition and ionization electrodes Cleaning the burner Check the ignition electrodes and the ionization electrode 1. Loosen the retaining clamp and disconnect the for correct gap towards the cylinder burner assembly and combustion air flex hose A. -
Page 21: Making The Electrical Burner Connection
Commissioning, Inspection and Maintenance Vitocrossal 200 CM2 186 to 311 Service Steps – Commissioning, Inspection and Maintenance Checking all gas connections for leaks Making the electrical burner connection Note: Never allow cables/leads to come into contact with WARNING hot components. Secure all cables with cable ties if required. -
Page 22: Checking The Flue Gas Temperature Sensor
Commissioning, Inspection and Maintenance Vitocrossal 200 CM2 186 to 311 Service Checking the Flue Gas Temperature Sensor Flue temperature sensor Checking the 15A and 15B flue gas sensor Boilers with a polypropylene flue gas collector are Viessmann NTC 10 kΩ (blue identification) supplied with a flue gas temperature sensor, which must be installed. -
Page 23: Checking The Boiler Temperature Sensor
Commissioning, Inspection and Maintenance Vitocrossal 200 CM2 186 to 311 Service Checking the Boiler Temperature Sensor 3A sensor (NTC 10k Temperature Checking the 3A and 3B boiler temperature sensor Note: Check the burner control for fault F FZ on the display 3B sensor (NTC 20k ... -
Page 24: Replacing The Boiler Temperature Sensor
Commissioning, Inspection and Maintenance Vitocrossal 200 CM2 186 to 311 Service Replacing the Boiler Temperature Sensor Note: The boiler water temperature sensor is located at the boiler supply connection. 1. Remove spring clip (set aside). 2. Insert 6 in. (150 mm) temperature sensor. -
Page 25: Diaphragm Expansion Vessel And System Pressure
Burner Service Vitocrossal 200 CM2 186 to 311 Service Diaphragm Expansion Vessel and System Pressure Check proper expansion tank and system pressures Water Quality The lifetime of the entire heating system is influenced by See expansion tank manufacturer’s instructions. the water quality. A water treatment system will protect against damages caused by corrosion and lime formation. -
Page 26: Combustion Chamber Pressure Monitoring (Air Pressure Switch 2)
Burner Service Vitocrossal 200 CM2 186 to 311 Service Further Details Regarding the Individual Steps (continued) Gas inlet pressure monitoring switch - GDW1 Combustion chamber pressure monitoring (air pressure switch 2) The factory default setting for the gas inlet pressure switch is 10 mbar (4”... -
Page 27: Auxiliary Low Gas Pressure Switch
Commissioning, Inspection, Maintenance Vitocrossal 200 CM2 186 to 311 Service Auxiliary Low Gas Pressure Switch Installation steps 1. Disconnect boiler power supply. 2. If the boiler has already been installed, shut off main gas supply to the boiler and disconnect gas supply piping. -
Page 28: Gas Piping Components
Commissioning, Inspection, Maintenance Vitocrossal 200 CM2 186 to 311 Service Gas Piping Components Note: Typical gas piping shown. Legend A Nipple (supplied with boiler) B Elbow (supplied with boiler) C Reducing tee (kit part) D Short nipple kit (field supplied) -
Page 29: Burner Component Overview
Burner Service Vitocrossal 200 CM2 186 to 311 Service Burner Component Overview CM2 pre-mix cylinder burner 186/246/311 Legend A Boiler door J Ionization electrode B Air pressure switch 1 K Gas pipe C Fan L AC-EMI suppression filter device D Burner display and programming unit... -
Page 30: Accessing The Boiler
Burner Service Vitocrossal 200 CM2 186 to 311 Service Accessing the Boiler 1. Close main gas supply valve. 2. Switch off main power switch. Ensure that main power to equipment being serviced is off. 3. Remove front panel and front side panels. -
Page 31: Burner Control Coding Card
Burner Service Vitocrossal 200 CM2 186 to 311 Service Burner Control (continued) 4. Remove coding card from burner control sub-base and set aside. Note: Ensure there is no power to the burner control when replacing the coding card. 5. Loosen the four screws from the burner control sub-base. -
Page 32: Burner Control Programming Unit
Burner Service Vitocrossal 200 CM2 186 to 311 Service Burner Control Programming Unit 1. Loosen the two programming unit screws. 2. Lift the programming unit off the burner control sub-base and disconnect the cable plug and replace. 3. Reinstall in reverse order. -
Page 33: Gas Valve (Lpg)
Burner Service Vitocrossal 200 CM2 186 to 311 Service Gas Valve (for LPG) 1. Remove the screw and disconnect the electrical plug (black) from the gas valve. 2. Remove the screw and disconnect the electrical plug (white marked GDW2) from the gas pressure switch. -
Page 34: Air Pressure Switch
Burner Service Vitocrossal 200 CM2 186 to 311 Service Air Pressure Switch 1. Disconnect the air tube from the air pressure switch. 2. Remove the M6 (5 mm hex key) screw and ground wire from the burner control bracket and set aside. -
Page 35: Ignition Unit
Burner Service Vitocrossal 200 CM2 186 to 311 Service Ignition Unit 1. Remove plug from ignition unit. 2. Remove ignition cables from ignition unit. 3. Loosen screws of ignition unit. 4. Remove ignition unit. 5. Reinstall in reverse order. Ignition Cable 1. -
Page 36: Ignition Electrode Block
Burner Service Vitocrossal 200 CM2 186 to 311 Service Ignition Electrode Block 1. Disconnect the ignition cables from the ignition electrodes 2. Remove the two M6 (5 mm hex) screws and washers from the ignition electrode block and set aside. -
Page 37: Motorized Burner Inlet Damper
Burner Service Vitocrossal 200 CM2 186 to 311 Service Motorized Burner Inlet Damper 1. Remove four screws from the venturi tube and remove damper. 2. Remove the burner inlet damper from the burner along with the servomotor and linkage. 3. Remove servomotor cover and set aside. -
Page 38: Inlet Damper Linkage
Burner Service Vitocrossal 200 CM2 186 to 311 Service Inlet Damper Linkage 1. Remove the M4 (8 mm hex) nut connecting the linkage to the inlet damper bracket. 2. Loosen the M5 (4 mm hex key) set screw connecting the linkage to the servomotor. -
Page 39: Burner Fan
Burner Service Vitocrossal 200 CM2 186 to 311 Service Burner Fan 1. Loosen the retaining clamp and disconnect the combustion air flex hose and set aside. 2. Disconnect the gas line. 3. Disconnect electrical plugs 100 and 100A from the fan. -
Page 40: Burner Door
Burner Service Vitocrossal 200 CM2 186 to 311 Service Burner Door Replacing the burner door Loosen the retaining clamp and disconnect the combustion air flex hose and set aside. Disconnect the gas line. Disconnect electrical plugs 35, 36, 87, 111 and 122 from the burner control. -
Page 41: Burner Door Refractory
Burner Service Vitocrossal 200 CM2 186 to 311 Service Burner Door Refractory 1. Loosen the retaining clamp and disconnect the combustion air flex hose and set aside. 2. Disconnect the gas line. 3. Remove ionization electrode block. 4. Remove ignition electrode block. - Page 42 Burner Control Unit Vitocrossal 200 CM2 186 to 311 Service Burner Control Unit Display and programming unit Standby A display and programming unit is integrated into the burner control unit. The display indicates the relevant operating conditions, the service and parameter conditions as well as all fault and error messages.
- Page 43 Burner Control Unit Vitocrossal 200 CM2 186 to 311 Service Burner Control Unit (continued) Operating display (continued) Maintenance program Pre-ignition no air pressure Ignition Maintenance program Safety time no gas pressure or Flame established mains under voltage Flame stabilization Forced ventilation...
- Page 44 Burner Control Unit Vitocrossal 200 CM2 186 to 311 Service Burner Control Unit (continued) Information and configuration display Control parameter R62 “Rotational speed minimum input” The information display and the configuration display are The parameter has the consequence that after a “fail of activated from the operating display.
- Page 45 Burner Control Unit Vitocrossal 200 CM2 186 to 311 Service Burner Control Unit (continued) Configurations: Menu item Description Changeover from the operating display of the burner control unit phase to other process information Configuration of control function operating parameters Menu item “5“ is used to display the following process information:...
-
Page 46: Burner Control Unit
Burner Control Unit Vitocrossal 200 CM2 186 to 311 Service Burner Control Unit (continued) Example: to set the maximum operational burner input Example: to set the motorized flue damper (flue gas to between 0 and 100%, press the following buttons: cascade) press the following buttons: 1. -
Page 47: Burner Control Unit Flow Diagram
Flow Diagram Vitocrossal 200 CM2 186 to 311 Service Burner Control Unit Flow Diagram... - Page 48 Flow Diagram Vitocrossal 200 CM2 186 to 311 Service Burner Control Unit Flow Diagram (continued) State description: Phase Display Description Duration System start “A” System start 10 seconds Initialization of fault meter 0.1 second Test power, gas pressure 1 second Fan ramp-up, system start max.
-
Page 49: Faults
Troubleshooting Vitocrossal 200 CM2 186 to 311 Service Faults Fault display Fault memory The fault display is activated automatically if the burner The ten most recent faults are saved and may be called up. control unit switches to a fault state. The most recent The order of scans ranges from the most recent to the fault will then be displayed. -
Page 50: Fault Codes
Troubleshooting Vitocrossal 200 CM2 186 to 311 Service Fault Codes General process errors Fault display on the display interface and programming unit on the burner. Note: Carry out measures in the described order. All fault codes are saved to the fault memory and the last 10 can be called up. - Page 51 Troubleshooting Vitocrossal 200 CM2 186 to 311 Service Fault Codes (continued) Displayed System Characteristics Cause Measures Fault Code F E5 Burner control unit in a fault Internal fault of the burner Replace burner control unit state control unit and during test of...
- Page 52 Troubleshooting Vitocrossal 200 CM2 186 to 311 Service Fault Codes (continued) Displayed System Characteristics Cause Measures Fault Code F F4 Poor start-up characteristics, Servomotor faulty, servomotor Replace connecting cable; replace rotary damper does not close, connecting cable faulty, solenoid servomotor; replace solenoid...
-
Page 53: Faults Without Fault Display
Troubleshooting Vitocrossal 200 CM2 186 to 311 Service Fault Codes (continued) Displayed System Characteristics Cause Measures Fault Code F F9 Varying fan speed Fan faulty, cable “a-ÖA“ faulty or Check cable; replace cable “a-ÖA“ or broken fan if required F F9 No fan feedback Fan faulty;... -
Page 54: Parts Lists
Parts Vitocrossal 200 CM2 186 to 311 Service Parts Lists Model No. Serial No. CM2 186 Boiler 7201753 CM2 246 Boiler 7201754 CM2 311 Boiler 7201755 Ordering Replacement Parts: Please provide Model and Serial Number from ASME rating plate A when ordering replacement parts. - Page 55 Parts Vitocrossal 200 CM2 186 to 311 Service Parts Lists (continued) Model No. Serial No. CM2 186 Boiler 7201753 CM2 246 Boiler 7201754 CM2 311 Boiler 7201755 Ordering Replacement Parts: Please provide Model and Serial Number from CSA rating plate A when ordering replacement parts.
- Page 56 Parts Vitocrossal 200 CM2 186 to 311 Service Parts Lists (continued) Model No. Serial No. CM2 186 Boiler 7201753 CM2 246 Boiler 7201754 CM2 311 Boiler 7201755 Ordering Replacement Parts: Please provide Model and Serial Number from ASME rating plate A when ordering replacement parts.
- Page 57 Parts Vitocrossal 200 CM2 186 to 311 Service Parts Lists (continued) Model No. Serial No. CM2 186 Burner 7542292 Ordering Replacement Parts: Please provide Model and Serial Number from burner rating plate A when ordering replacement parts. Order replacement components from your Viessmann distributor.
- Page 58 Parts Vitocrossal 200 CM2 186 to 311 Service Parts Lists (continued) Model No. Serial No. CM2 246 Burner 7542293 CM2 311 Burner 7542294 Ordering Replacement Parts: Please provide Model and Serial Number from burner rating plate A when ordering replacement parts. Order replacement components from your Viessmann distributor.
- Page 59 Parts Vitocrossal 200 CM2 186 to 311 Service Parts Lists (continued) Model No. Serial No. CM2 186 Burner 7542292 CM2 246 Burner 7542293 CM2 311 Burner 7542294 Ordering Replacement Parts: Please provide Model and Serial Number from CSA rating plate when ordering replacement parts.
-
Page 60: Technical Data
Specifications Vitocrossal 200 CM2 186 to 311 Service Technical Data Boiler Model Input 1112 (kW) (194) (257) (326) Minimum Input (kW) (39) (51) (65) Output* 1078 (kW) (188) (249) (316) Net AHRI rating (kW) (164) (217) (275) Combustion efficiency* Thermal efficiency*... - Page 61 Specifications Vitocrossal 200 CM2 186 to 311 Service Technical Data (continued) Boiler Model Boiler Water Content (306) (292) (279) Heat exchanger surface 72.9 98.8 121.5 water cooled (6.8) (9.2) (11.3) Maximum Operating Temperature °F (°C) 210 (99) 210 (99) 210 (99) Maximum Adjustable High Limit °F (°C)
- Page 62 Specifications Vitocrossal 200 CM2 186 to 311 Service Technical Data (continued) Cylinder Burner Specifications Boiler Model CM2 Product ID see boiler Voltage Frequency Power consumption at max. input at min. input Version modulating Dimensions Length (mm) (450) (450) (450) Total length...
-
Page 63: Burner Control Unit Connection Diagram
Wiring Vitocrossal 200 CM2 186 to 311 Service Burner Control Unit Connection Diagram A Burner control unit interface VUC 310/base F1 Fuse F2 Fuse B Flame sensor aA H1 Hours run meter, modulation (Vitotronic control) C Vitotronic control unit H2 Fault message (Vitotronic control) -
Page 64: Maintenance Record
Vitocrossal 200 CM2 186 to 311 Service Maintenance Record Setting and Test Values Commissioning Maintenance/Service Static Pressure mbar/”w.c. Supply Pressure (running pressure) mbar/”w.c. for natural gas NG mbar/”w.c. for liquid propane gas LPG Tick gas type Carbon Dioxide Content CO ■...