Table of Contents
Advertisement
Quick Links
SERVICE MANUAL
SPECIFICATIONS AND PARTS ARE SUBJECT TO CHANGE FOR IMPROVEMENT
DVD VIDEO CAMERA/RECORDER
March
2002
TK
Contents included
Digital Media Products Division,Tokai
No. 7201E
DZ-MV230A
DZ-MV200A
This service manual does not include
information on drive mechanism unit and
MAN circuit board.
When servicing, replace the entire drive
mechanism unit or the entire MAN circuit
board if necessary.
For fault judgment, see Chapter 6 simplified
circuit board diagrams that show the voltage
values of major ICs on circuit boards (DRC
and HDM) mounted on drive mechanism unit
and MAN circuit board.
Trouble diagnosis and electric circuit
adjustment are explained elsewhere.
Advertisement
Table of Contents

Related Manuals for Hitachi DZ-MV230A


Summary of Contents for Hitachi DZ-MV230A
- Page 1 No. 7201E DZ-MV230A DZ-MV200A SERVICE MANUAL Contents included This service manual does not include information on drive mechanism unit and MAN circuit board. When servicing, replace the entire drive mechanism unit or the entire MAN circuit board if necessary. For fault judgment, see Chapter 6 simplified...
- Page 2 Service Manual. The use of a substitute replacement component which does not have the same safety characteristics as the HITACHI recommended replacement one, shown in the parts list in this Service Manual, may create shock, fire, or other hazards. Product safety is continuously under review and new instructions are issued from time to time.
- Page 3 Lead-Free Solder To conserve global environment, lead-free solder is used in this product. Be sure to read the following before soldering. Be sure to wear protective goggles so that no solder smoke or scattered solder enters the eye. Caution Lead-free solder may scatter at high temperatures (600°C). Indication of lead-free solder used Soldering iron for servicing "F"...
-
Page 4: Notes When Using Service Manual
Notes When Using Service Manual The following shows the contents to be noted when using service manual: 1. Value units used in parts list 3. Identifications of sides A/B in circuit board diagrams Certain symbols are indicated below for value units of resistors, capacitors and coils in parts list. -
Page 5: Table Of Contents
Contents CHAPTER 1 GENERAL INFORMATION LCD case U, MR circuit board, LCD block, AUD circuit board, 1. Specifications ............1-1 Adjustment cap, and L case ......2-11 2. Comparison of Specifications/ Functions with Previous Model ......1-2 Rear block, REF circuit board, Camera block, 3. - Page 6 CHAPTER 6 SCHEMATIC, CIRCUIT BOARD AND BLOCK DIAGRAMS SCHEMATIC DIAGRAMS Internal Wiring Diagram ..........6-1 SE ................6-2 AVJ ................6-3 DRF ................6-3 Regulator [REF] ............6-4 EVF [REF] ..............6-5 EBLB ................6-6 MR ................6-6 DCJ ................6-6 LCD ................
-
Page 7: General Information
Recommended microphone impedance 600 ohm to 1 k ohm Recording mode Video (Movie) [with sound] Photo (Still) [only with DVD-RAM disc] Maximum DVD-RAM disc approx. 36 to 120 minutes (XTRA) [only DZ-MV230A] recordable time (on both sides approx. 60 minutes (FINE) of disc) approx. 120 minutes (STD) DVD-R disc approx. -
Page 8: Comparison Of Specifications/Functions With Previous Model
Incompatible with DVD-R disc Maximum 8 cm DVD-RAM disc XTRA mode: approx. 36-120 minutes FINE mode: approx. 60 minutes video (both sides) (only DZ-MV230A) STND mode: approx. 120 minutes (movie) FINE mode: approx. 60 minutes recordable STD mode: approx. 120 minutes... - Page 9 (still) format (704 × 480 pixels), and JPEG format (704 × 480 pixels), and JPEG recording (1,280 × 960 pixels on DZ-MV230A, (1,280 × 960), recorded simultaneously format 1,024 × 768 pixels on DZ-MV200A), [640 × 480 pixels with external input] recorded simultaneously [640 ×...
- Page 10 Note: A DVD-RAM disc recorded or edited on DZ-MV230A/MV200A can be played back or edited on DZ-MV100A. A DVD-RAM disc recorded or edited on DZ-MV100A can be played back or edited on DZ-MV230A/MV200A, except for scene memo function.
-
Page 11: Formats Concerning Dvd (Dvd-Ram/Dvd-R Discs)
Formats Concerning DVD (DVD-RAM/DVD-R Discs) The contents in this section are correct as of March 2002. 3.1 Formats for DVD-RAM/DVD-R Discs (1) Overview DVD discs can be divided into DVD-RAM, DVD-R, DVD-Video, DVD-Audio, DVD-ROM and DVD-RW. The format for each type is stipulated in format books defined by DVD Forum (*1). -
Page 12: Dvd File Format
3.2 DVD file format DVD format can be divided into physical format (structure and shape of disc), file format (structure of file, directory, etc.), and application format (video, audio, etc.): The file format conforms to UDF (*7) defined by OSTA (*6). This DVD video camera/recorder uses 8 cm DVD-RAM discs (for AV) and 8 cm DVD-R discs (DVD-R for General, for AV), which are initialized according to the UDF version 2.01 file format. - Page 13 Comparison of DVD video recording format and DVD video format Item DVD video recording format DVD video format Video Coding format MPEG-1/MPEG-2 Number of streams 1 stream only Aspect ratio 4:3/16:9 Number of pixels (NTSC) 720 × 480, 704 × 480, 544 × 480, 720 ×...
-
Page 14: Initializing And Finalizing Dvd-Ram/Dvd-R Discs
Initializing and Finalizing DVD-RAM/DVD-R Discs Caution: Always use AC adapter to power the DVD video camera/recorder when initializing or finalizing DVD-RAM/DVD-R disc. Turning power off midway will result in fault in disc, which could make recording or playback impossible. Do not allow any interruption during initializing or finalizing of DVD-RAM/DVD-R disc, such as turning power off: Doing this will result in fault in disc, which could make recording or playback impossible. -
Page 15: How To Finalize Dvd-R Disc
4.3 How to finalize DVD-R disc Caution: The operation is necessary when playing back on another device (DVD player, etc.) a DVD-R disc on which video was recorded using this DVD video camera/recorder. No further recording or editing can be done on a finalized DVD-R disc. When the finalized DVD-R disc is loaded in this DVD video camera/recorder, will appear on the disc thumbnail screen. -
Page 16: Displaying Remaining Disc Capacity
Example of displaying capacity on DVD-RAM/DVD-R disc. Perform the following procedures after turning DVD DVD-RAM disc [For DZ-MV230A] video camera/recorder on and opening the LCD monitor (while viewing LCD screen). Use the buttons, etc. on DVD video camera/recorder for all operations. -
Page 17: Removing Disc From Cartridge Or Caddy
Removing Disc from Cartridge or Caddy Caution: Most generally available 8 cm DVD-RAM/DVD-R discs for video camera use (for AV use) can be removed from cartridge or caddy and then used. Before removing a disc, however, refer to the instructions provided with it, or consult the disc maker to find out if removal is possible. -
Page 18: Disc Packed In Caddy
6.2 Disc packed in caddy (1) Removing the disc from caddy 1) Insert your finger into the hole in the center of disc and lightly lift it up (in the direction of arrow ). (Fig. 6-2a) 2) Hold the disc at its edge and center hole, and remove it in the direction of arrow (obliquely upward). -
Page 19: Battery Pack
Battery Pack Caution: Securely attach a battery pack to the DVD video camera/recorder and charge it, using the provided AC adapter. Charge the battery at normal temperature (10 to 30°C). Charging at ambient temperature under -5°C or over 35°C may result in fault in battery pack. The battery pack will be warm during charging or immediately after charging ends, but this does not indicate a fault. -
Page 20: Demo (Demonstration) Mode
Demo (Demonstration) Mode This section explains the demo (demonstration) mode equipped with this DVD video camera/recorder. Perform the following procedures after turning DVD video camera/recorder on and opening the LCD monitor (while viewing LCD screen). Use the buttons, etc. on this DVD video camera/recorder for all operations. 8.1 How to set demo mode Before starting: Use the joystick to move the cursor to a menu item, and then designate it when the Disc Navigation is in operation. -
Page 21: Details Of Operation
Displays animation in which the disc at the center rotates at gradually higher speed. Displaying logo The DVDCAM logo appears first while it extends to left and right, and then the Hitachi logo appears. Displaying concept Displays the concept of DVD video camera/recorder in sequence. Disc animation... -
Page 22: Resetting Camera Functions
(2) How to reset 1) Set the power switch to "POWER OFF". 2) Detach the AC adapter or battery so that no power source is installed in the DVD video camera/recorder. 3) Use a fine tipped pen, etc. to hold down the RESET button (SW3101) for RESET several seconds. -
Page 23: Explanation Of Trouble Messages
10. Explanation of Trouble Messages This section includes the messages related to servicing which appear on the LCD screen during user operation, and their explanation. Refer to the instruction manual for messages other than those shown here. (The messages are subject to change without notice for improvements on operability.) Messages divided by broken lines will automatically appear in sequence. - Page 24 Message Cause/condition for message to appear Troubleshooting Error has occurred. Appears if abnormality has been detected by "self- Turn power on again or reload a disc, Please restart. diagnosis function" when power was turned on, and following the screen. the abnormality may be remedied when power is Error has occurred.
- Page 25 Message Cause/condition for message to appear Troubleshooting Disc includes Appears if the disc has a program that is write- If the device that has set write-protect protected scenes. protected by a device other than this DVD video can be found, release the write- Delete scenes? camera/recorder.
- Page 26 Message Cause/condition for message to appear Troubleshooting Scene without control info. Appears when Disc navigation is first started with a Choose "YES", following screen, and Update control information? disc that has a scene whose thumbnail cannot be designate. (A thumbnail will be displayed with Disc Navigation (no entry point has automatically produced if it is been attached to the start of program or play list).
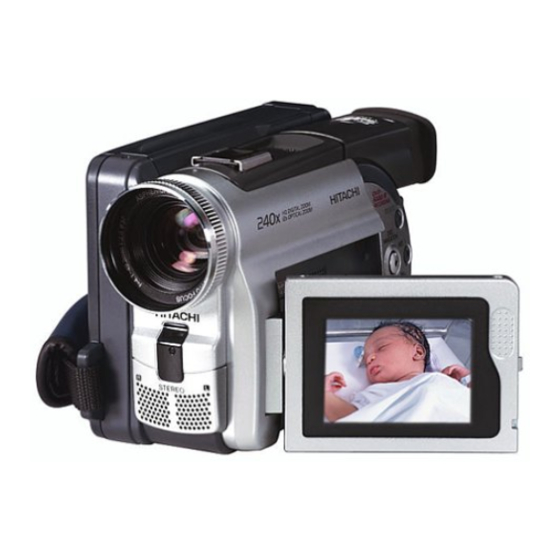
- Page 27 19 20 TO PC A / V 26 27 24 25 11 12 13 14 Optical 12x zoom lens Stereo microphone AV input/output jack Record button (REC) Lens hood 10 2.5" type liquid crystal display PC connection terminal (TO PC) Power switch (inside) PHOTO...
- Page 28 DISPLAY DIGITAL ZOOM ZOOM SELECT DISC NAVIGATION MENU SELECT DISC NAVIGATION MENU DELETE DISPLAY VOL. BRIGHT EXPOSURE FOCUS RESET DZ-RM2W 35 36 Speaker LCD BRIGHT button DISPLAY button ZOOM T button The sound accompanying a movie Press this button to start LCD DIG.
-
Page 29: Chapter 2 Disassembly
CHAPTER 2 DISASSEMBLY Names and Locations of Major Components 1.1 General View (Fig. 1-1) 1. Top cover 2. Heat radiating rubber A 3. R block 4. L block 5. O-ring 6. Hand strap 7. Disc cover 1.2 L Block (Fig. 1-2) Fig. -
Page 30: R Block [2/2]
1.3 R Block [1/2] (Fig. 1-3) 1. Hot shoe 2. DRF circuit board 3. Rear block 4. MAN circuit board 5. REF circuit board 6. Circuit board frame 7. Camera block Fig. 1-3 1.4 R Block [2/2] (Fig. 1-4) 1. Drive block 2. -
Page 31: Rear Block
1.5 Rear Block (Fig. 1-5) 1. Rear cover 2. EVF block 3. Jack cover R 4. Battery terminal 5. DCJ circuit board 6. JACK holder 7. AVJ circuit board 8. Jack cover S Fig. 1-5 1.6 LCD Block (Fig. 1-6) 1. - Page 32 1.7 Camera Block (Fig. 1-7) 1. SE circuit board 2. Lens frame R 3. Lens frame F 4. Lens 5. Crystal filter 6. Light shading rubber 7. CCD image sensor 8. Lens heat radiating plate Fig. 1-7 1.8 EVF Block (Fig. 1-8) 1.
-
Page 33: Before Starting Disassembly
Before Starting Disassembly Prohibition: Do not perform disassembly with power supplied. (Perform work with power supply off.) Execute operation check to be performed after completing attachment/assembly, with all components reassembled. This DVD video camera/recorder incorporates a laser emitter block: Never let the laser beam strike your eye. Essential note: Take antistatic measures: Wear a wrist strap, etc. -
Page 34: Troubleshooting During Disassembly
Troubleshooting during Disassembly 3.1 Removing DVD-RAM/DVD-R disc Perform the following procedure only when the disc loading block does not open (DVD-RAM/DVD-R disc cannot be removed) when the DISC EJECT button is pressed. Caution: The disc loading block of DVD video camera/recorder will normally open even if power supply is not connected. However, if the power supply is removed while the disc is being accessed, the disc loading block will not open. - Page 35 Remove the rear block (E), REF circuit board (F), camera block (G), MAN circuit board (H), circuit board frame (J), and then operate the lock unit (K). (See Fig. 3-2) Caution when disassembling: Be careful not to damage the plugs (PG0501 and CN1501) between REF and MAN circuit boards. (8) Remove the four screws holding the rear block.
-
Page 36: Disassembly Procedure
Disassembly Procedure This section explains the general disassembly procedure for this DVD video camera/recorder. For the order of removing components, follow the disassembly flow chart. Reinstall each component by the reverse procedure to removal unless otherwise specified. Interpreting Disassembly Flowchart Find the component to be removed in flowchart: Trace the arrows (routes) from the left of flowchart, and remove the components in sequence until you reach the target component. -
Page 37: Top Cover, R Block, L Block, And Front Block
4.1 Top cover, R block, L block, and Front block (Fig. 4-1a, 4-1b) Caution when disassembling: Be careful not to damage the plugs (PG1501 and PG6101) between R and L blocks. When separating the R and L blocks, the O-ring (E) will detach automatically: Be careful not to lose it. Be careful not to damage the front case, microphone cable (e) or its connector. -
Page 38: Disc Cover
4.2 Disc cover (Fig. 4-2a, 4-2b, 4-2c) Caution when disassembling: When removing the disc cover, press the DISC EJECT button to open the disc cover attachment block. When the disc loading block does not open even if the DISC EJECT button is pressed, refer to “3. Troubleshooting during Disassembly”. -
Page 39: Lcd Case U, Mr Circuit Board, Lcd Block, Aud Circuit Board, Adjustment Cap, And L Case
4.3 LCD case U, MR circuit board, LCD block, AUD circuit board, Adjustment cap, and L case (Fig. 4-3) Caution when disassembling: Be careful not to damage the MR circuit board. Be careful not to damage the L case. Be careful not to damage the adjustment cap. LCD case U (A), MR circuit board (B) (1) Remove the three screws holding the LCD case U. -
Page 40: Rear Block, Ref Circuit Board, Camera Block, Man Circuit Board, Circuit Board Frame, Drf Circuit Board, And Hot Shoe
4.4 Rear block, REF circuit board, Camera block, MAN circuit board, Circuit board frame, DRF circuit board, and Hot shoe (Fig. 4-4) Caution when disassembling: Be careful not to damage the flat cable on rear block. Be careful not to damage the camera block (lens), and that no foreign object, such as dust, enters the lens. Be careful not to damage the plugs (PG0501 and CN1501) between REF and MAN circuit boards. -
Page 41: Link Bracket, Drive Block, Lock Unit, And R Case
4.5 Link bracket, Drive block, Lock unit, and R case (Fig. 4-5a, 4-5b) Caution when disassembling: Be careful not to damage the cables (a) and (b) on lock unit. Link bracket (A) (1) Remove the two screws holding the link bracket. (Fig. 4-5a) Drive block (B) (2) Remove the two screws holding the hinge, and then open the hinge. -
Page 42: Loader And Drive Mechanism Unit
4.6 Loader and Drive mechanism unit (Fig. 4-6) Loader (A), Drive mechanism unit (B) (1) Remove the two screws holding the loader. A : Loader B : Drive mechanism unit Fig. 4-6 4.7 Microphone cover, Microphone, Lens hood, and Front case (Fig. 4-7) Microphone cover (A), Microphone (B) (1) Push the top of the microphone cover to release the two tabs, and then remove the microphone cover in the direction of the arrow. -
Page 43: Evf Block, Jack Holder, Jack Cover S, Avj Circuit Board, Dcj Circuit Board, Jack Cover R, Battery Terminal, And Rear Cover
4.8 EVF block, Jack holder, Jack cover S, AVJ circuit board, DCJ circuit board, Jack cover R, Battery terminal, and Rear cover (Fig. 4-8) Caution when disassembling: Be careful not to damage the jack holder. EVF block (A) (1) Remove the two screws holding the EVF block. Jack holder (B), Jack cover S (C), AVJ circuit board (D), DCJ circuit board (E) (2) Remove the screw holding the jack holder. -
Page 44: Se Circuit Board, Ccd Image Sensor, And Lens
4.9 SE circuit board, CCD image sensor, and Lens (Fig. 4-9) Caution when disassembling: Be careful not to damage the CCD image sensor. When removing the SE circuit board, the crystal filter (D) and light shading rubber (G) will detach automatically: Be careful not to damage the crystal filter. -
Page 45: Lcd Circuit Board, Lcd Frame, Monitor Backlight, Monitor Lcd, And Lcd Case B
4.10 LCD circuit board, LCD frame, Monitor backlight, Monitor LCD, and LCD case B (Fig. 4-10) Caution when disassembling: Be careful not to damage the monitor LCD or monitor backlight. LCD circuit board (A) (1) Disconnect the flat cable on LCD circuit board. (2) Unsolder the three points on LCD circuit board (three cables on monitor backlight). -
Page 46: Eye Cup, Evf Fulcrum, Evf Case U, Evf Case B, Eblb Circuit Board, Evf Lcd, And Evf Backlight
4.11 Eye cup, EVF fulcrum, EVF case U, EVF case B, EBLB circuit board, EVF LCD, and EVF backlight (Fig. 4-11) Caution when disassembling: Be careful not to damage the EVF LCD or EVF backlight. Eyecup (A) (1) Release the tab, and then remove the eye cup in the direction of the arrow. EVF fulcrum (B), EVF case U (C) (2) Remove the four screws holding the EVF fulcrum, and then remove the EVF fulcrum. -
Page 47: Chapter 3 Subsidiary Functions For Servicing
1.1 Checking firmware versions Example of firmware version display Purpose: To display the versions of the following firmware programs stored in the Version microprocessors of DVD video camera/recorder (Fig. 1-1): Model: DZ-MV230A System firmware: System System: ver 2.1 Camera microprocessor firmware: Cam Ver... -
Page 48: Updating Firmware
Example of updating complete screen Firmware Update Firmware updated. Fig. 1-2d Example of screen for verifying completion of updating Firmware Update Model: DZ-MV230A System: ver. 2.1 Drive (Main): Z99Y.88.79.REV Drive (Core): A11B.22.33.REV Turn off power Fig. 1-2e 3 - 2... -
Page 49: Deleting Files On Dvd-Ram Disc
Deleting Files on DVD-RAM Disc 2.1 Deleting disc control data (RX) file Example of debug menu screen Caution: Executing this operation will delete all the following data on disc. Debug Menu Take note of the details of setting if they will need resetting after deletion: Version Error Cord... -
Page 50: Forced Disc Formatting
2.2 Forced disc formatting Caution: Executing this operation will delete all files on DVD-RAM disc: Copy the necessary files to PC, etc. Formatting will be performed on one and then the other. To format one side only, check the recorded contents (recorded side) before performing this operation. -
Page 51: Displaying Various Types Of Information
Displaying Various Types of Information 3.1 Playback file detailed information display Example of playback file detailed Purpose: information To display the bit rate and elapsed position of the movie or still file being Normal playback information display played back. Pertinent case: RAM 0:11:22 Used as a reference to locate noise that occurs in the middle of a long . - Page 52 Example of error code display 3) Press the SELECT button and release it, and then, within 0.5 second, hold down the following 2 buttons for at least 3 seconds to display the Error code error code (Fig. 3-2a): SELECT FOCUS To restore normal status, press the DISPLAY button.
- Page 53 Electric Circuit Adjustment Test Equipment/Jigs Necessary for Adjustment 1.1 List of jigs and tools The following table shows the jigs and tools, some of them new, used for servicing (electrically adjusting) the DVD video camera/recorder. [ New ] [ New ] DSP-R Jig No.
-
Page 54: Before Starting Adjustment
Before Starting Adjustment 2.1 Connections for adjustment Connect the DVD video camera/recorder and jigs/test equipment as shown in Fig. 2-1. COLOR VIDEO MONITER Remove the adjustment cap TO VIDEO IN TERMINAL A/V JACK AV OUTPUT CABLE DC IN MV230 CONNECTION JACK AC ADAPTER DC POWER... -
Page 55: Setting Test Equipment
7) Take care with the following when pointing the DVD video camera/recorder at a chart (light box): Set the chart 30-50 cm away from the lens surface, and avoid any effects from surrounding light (except where some such designation is given). Aim at the chart and let chart fill the screen (video period). - Page 56 Starting Adjustment Program (MAP) MS-DOS screen 1 The adjustment program will not start or operate normally unless the DVD video C> camera/recorder, PC, jig and test equipment are correctly connected, and power is supplied to each unit: Check the connections referring to "2.1 Connections for adjustment", and then supply power to the DVD video camera/recorder, PC, jig and test equipment.
-
Page 57: List Of Adjustment Items
List of Adjustment Items 4.1 Adjustments Needed After Replacing Major Components The following table shows the adjustment items, their purposes, and whether or not adjustment is required after replacing major components (items with a circle mark must be adjusted). The items shown in the table below are the minimum that must be adjusted after replacing major components: If several components have been replaced - or depending on the cause of a defect - more items may need to be adjusted. - Page 58 4.2 Adjustment Item Transfer Diagram Main Menu *********************************************************** Input Data Initialize MANUAL ADJUSTMENT PROGRAM *********************************************************** Camera Adjustment Menu (*1) DATA INITIALIZE Sampling Pulse Input *********************************************************** Input CAMERA ADJUSTMENT CAMERA ADJUSTMENT AUTO FOCUS Adjustment *********************************************************** STABILIZER SPOT NOISE SAMPLING PULSE Input Auto Iris Control AUTO IRIS CONTROL [ESC] END...
-
Page 59: Data Initialize
Data Initialize Refer to "3. Starting Adjustment Program (MAP)" in advance, then start MAP and display the main menu on PC display. If error message appears on PC display during adjustment, perform troubleshooting, referring to "10. Error Messages". Essential note: Main menu screen After completing this adjustment, be sure to perform all adjustment ***********************************************************... - Page 60 6.1 Sampling Pulse Adjustment Camera adjustment menu screen *********************************************************** Phenomenon due to incomplete adjustment: CAMERA ADJUSTMENT The S/N of output image deteriorates. *********************************************************** Status during adjustment: SAMPLING PULSE AUTO IRIS CONTROL Lens capped (shading light from lens) SHUTTER Procedure: B MATRIX WHITE BALANCE 1) Input 1 to PC on the camera adjustment menu screen.
-
Page 61: Auto Iris Control Adjustment
6.2 Auto Iris Control Adjustment Camera adjustment menu screen *********************************************************** Phenomenon due to incomplete adjustment: CAMERA ADJUSTMENT The output image is extremely bright and/or extremely dark. *********************************************************** SAMPLING PULSE Status during adjustment: AUTO IRIS CONTROL Set zoom to wide-angle end, and point at light box without chart to fill the SHUTTER screen. - Page 62 6.3 Shutter Adjustment Camera adjustment menu screen Phenomenon due to incomplete adjustment: *********************************************************** The still image is too bright or too dark. CAMERA ADJUSTMENT Conditions: *********************************************************** SAMPLING PULSE Point at the light box, without chart inserted, 20 cm away. AUTO IRIS CONTROL Procedure: SHUTTER B MATRIX...
- Page 63 5) When the light amount check complete screen appears, press any key <Continued from preceding page> (except for Esc key) on PC. (*5) 6) The screen for shutter being adjusted (*5) will appear, and then the Light amount check complete screen shutter adjustment complete screen will appear.
- Page 64 6.4 B (Blue) Matrix Adjustment (Fig. 6-1) Camera adjustment menu screen *********************************************************** Caution: CAMERA ADJUSTMENT The B matrix adjustment applies only to the following models: *********************************************************** SAMPLING PULSE The adjustment name will appear on the camera adjustment menu AUTO IRIS CONTROL screen only for models that need this adjustment.
-
Page 65: White Balance Adjustment
Table 6-3, and press Enter. Table 6-3 R-B/Mg-G Offset Codes Model R-B offset code Mg-G offset code Mg-G offset screen DZ-MV230A/MV230A(K) 0 (zero) A 0 (zero) 0 (zero) << WHITE BALANCE ADJUSTMENT >> DZ-MV200A/MV200A(K) INPUT DATA OF OFFSET FOR Mg-G --> 00 DZ-MV238E(AU)/MV238E(SW) - Page 66 PC, press D or U so that the red level Model Oscilloscope Vectorscope on waveform is as specified in Table DZ-MV230A/MV230A(K) A = 540mV ± 20mV B = 190 % ± 5 % 6-4. DZ-MV200A/MV200A(K) A = 430mV ± 20mV B = 150 % ±...
- Page 67 Autofocus Refer to "3. Starting Adjustment Program (MAP)" in advance, start MAP and Main menu screen display the main menu on PC display. If an error message appears on PC *********************************************************** display during adjustment, perform troubleshooting, referring to "10. Error MANUAL ADJUSTMENT PROGRAM *********************************************************** Messages".
-
Page 68: Af Noise Level Adjustment
7.2 AF Noise Level Adjustment AF menu screen Phenomenon due to incomplete adjustment: *********************************************************** AUTO FOCUS ADJUSTMENT It takes too much time to focus subject, or subject is not focused at all. *********************************************************** Status during adjustment: ADJUSTMENT OF ZOOM/FOCUS TRACKING ADJUSTMENT OF AF NOISE LEVEL Point at light box without chart 10 cm away from the lens surface. -
Page 69: Spot Noise
Spot Noise Spot noise refers to bright points that appear on the screen: They are caused by Main menu screen a defect in pixel of CCD image sensor. *********************************************************** MANUAL ADJUSTMENT PROGRAM *********************************************************** Caution: DATA INITIALIZE Perform this adjustment with normal video signal, after completing CAMERA ADJUSTMENT AUTO FOCUS all other adjustments. -
Page 70: Error Messages
10. Error Messages An error message may appear on PC display during electrical adjustment. This section explains error messages, their causes and troubleshooting. 10.1 Error messages during picture control system adjustment Error Message Cause/Troubleshooting ERROR OCCURRED. IRIS TROUBLE Cause: PRESS ANY KEY Defective soldering, pattern damaged in power supply, iris drive circuit Troubleshooting:... - Page 71 Error Message Cause/Troubleshooting D RANGE OVER ERROR ON HALL AMP Cause: IRIS CANNOT OPEN ANY MORE Malfunction of microprocessor PRESS ANY KEY Subject image is too dark. Defective soldering, pattern damaged in Hall amp circuit Troubleshooting: Supply power again and readjust. Check light box.
- Page 72 10.3 Error messages during stabilizer adjustment Error Message Cause/Troubleshooting THIS MODEL NEED NOT BE ADJUSTED Cause: PRESS ANY KEY. Adjustment is to be started for models that do not have a stabilizer function. Model selection was incorrect when adjustment program started, or initial setting for each mode was performed with incorrect mode selection.
- Page 73 DRF CIRCUIT JACK BOARD CIRCUIT BOARD MAN CIRCUIT BOARD ELECTRONIC VIEWFINDER CIRCUIT (EVF) BLOCK BOARD CIRCUIT BOARD CAMERA BLOCK CN3102 CIRCUIT BOARD CIRCUIT BOARD MONITOR BLOCK...
- Page 74 MECHANISM UNIT...
-
Page 75: Camera
Camera CIRCUIT BOARD LCD Monitor CIRCUIT BOARD 4 - 3... -
Page 76: Electronic Viewfinder (Evf)
Electronic Viewfinder (EVF) EBLB CIRCUIT BOARD Accessories AC ADAPTER REMOTE CONTROL (DZ-ACE1) (DZ-RM2) Battery Pack (DZ-BP14(R)) 4 - 4... -
Page 77: Chapter 5 Replacement Parts List
CHAPTER 5 REPLACEMENT PARTS LIST 1. MECHANICAL PARTS LIST SYMBOL SYMBOL P-NO DESCRIPTION P-NO DESCRIPTION MECHANISM SECTION ACCESSARIES JP33354 PWB ASSY MAN[TYPE 230] TS16791 ADPTOR,AC JP33356 PWB ASSY MAN[TYPE 200] EV10861 CORD,POWER UA12151 DVD DRIVE MECHA AS EW12401 CORD,AV NX19503 RING(O) HL11382 REMOTE HAND SET... -
Page 78: Electrical Parts List
2. ELECTRICAL PARTS LIST SYMBOL SYMBOL P-NO DESCRIPTION P-NO DESCRIPTION C0574 AA00968R CERAMIC CAPACITOR 10UF+-20% 6.3V CAMERA & VCR SECTION C0576 0893213 CERAMIC CHIP 2200PF+-10% 50V C0577 AA00951R CERAMIC CAPACITOR 1.0UF+-10% 16V C0501 0893179 CERAMIC CHIP 0.1UF+-10% 16V C0578 0893217 CERAMIC CHIP 4700PF+-10% 50V C0502 0893179... - Page 79 SYMBOL SYMBOL P-NO DESCRIPTION P-NO DESCRIPTION C3604 AA10648R CERAMIC CAPACITOR 15PF+-5% 2KV C6142L 0893135 CERAMIC CHIP 470PF+-5% 50V C3605 AA10648R CERAMIC CAPACITOR 15PF+-5% 2KV C6142R 0893135 CERAMIC CHIP 470PF+-5% 50V C3802 0893193 CERAMIC CHIP 0.01UF+-10% 25V C6143L AA01111R CERAMIC CHIP 1UF 6.3V C3803 0893193 CERAMIC CHIP 0.01UF+-10% 25V...
- Page 80 SYMBOL SYMBOL P-NO DESCRIPTION P-NO DESCRIPTION R0504 0790216 CHIP RESISTOR 4.7KOHM+-5% 1/16W R1001 0790046 CHIP RESISTOR 4.7KOHM+-5% 1/16W[200] R0505 0790225 CHIP RESISTOR 22KOHM+-5% 1/16W R1002 0790024 CHIP RESISTOR 100 OHM+-5% 1/16W R0507 AQ01019R CHIP RESISTOR 8.2KOHM+-0.5% 1/16W R1003 0103823 CHIP RESISTOR 22OHM+-5% 0.1W R0509 0790229 CHIP RESISTOR 47KOHM+-5% 1/16W...
- Page 81 SYMBOL SYMBOL P-NO DESCRIPTION P-NO DESCRIPTION R3814 0790207 CHIP RESISTOR 1KOHM+-5% 1/16W R6147L AQ00835R CHIP RESISTOR 100KOHM+-1% 1/16W R3815 0790228 CHIP RESISTOR 39KOHM+-5% 1/16W R6147R AQ00835R CHIP RESISTOR 100KOHM+-1% 1/16W R3816 0790212 CHIP RESISTOR 2.2KOHM+-5% 1/16W R6148L AQ00205R CHIP RESISTOR 2.7KOHM+-1% 1/16W R3817 0790226 CHIP RESISTOR 27KOHM+-5% 1/16W...
- Page 82 SYMBOL SYMBOL P-NO DESCRIPTION P-NO DESCRIPTION R6321 0790201 CHIP RESISTOR 330 OHM+-5% 1/16W Q3601 CA12381R TRANSISTOR CPH5504 R6322 0790201 CHIP RESISTOR 330 OHM+-5% 1/16W Q3801 1323292 TRANSISTOR 2SA1774 R6323 0790201 CHIP RESISTOR 330 OHM+-5% 1/16W Q3802 1323279 TRANSISTOR DTC114YE R6324 0790024 CHIP RESISTOR 100 OHM+-5% 1/16W Q3891...
- Page 83 SYMBOL SYMBOL P-NO DESCRIPTION P-NO DESCRIPTION CN3102 EK11532 CONNECTOR F0001 FM10351R FUSE 1.5A F0501 FM10351R FUSE 1.5A F0502 FM10351R FUSE 1.5A F0503 FM10351R FUSE 1.5A F0504 FM10351R FUSE 1.5A JK0001 EP10301 JACK JK6001 ER10401 JACK JK6002 EQ10381 JACK JK6003 ER10391 JACK PG0001 EA11595R PLUG...
-
Page 84: Schematic, Circuit Board And Block Diagrams
CHAPTER 6 SCHEMATIC, CIRCUIT BOARD AND BLOCK DIAGRAMS INTERNAL WIRING DIAGRAM DRIVE MECHANISM UNIT LOCK UNIT PG1301 PC CONNECTION (USB2.0) HOT SHOE S-VIDEO POWER SW UNIT PG3952 MONITOR DISC NAVI. EBLB SWITCH UNIT EVF-LCD PANEL 6 - 1... - Page 85 SE SCHEMATIC DIAGRAM -7.0 [TYPE 230] TYPE 230 TYPE 200 14.7 11.3 11.3 10.6 10ns 37ns -7.0 IMAGE CODE PART NAME SENSOR 2SC2620FR XP4501 37ns (27MHz) [TYPE 200] [TYPE 230] [TYPE 230] [TYPE 200] ENC-03JA-07 ENC-03JB-07 [TYPE 200] MAN UNIT CN2001 1.3 1.3 NJU7018M-TE1...
-
Page 86: Avj
AVJ SCHEMATIC DIAGRAM DRF SCHEMATIC DIAGRAM EJECT LT1ED67A CHARGE/ ACCESS INDI. SPC-SPVG21 EXT MIC PC CONNECTION (USB2.0) MAN UNIT DRIVE MAN UNIT PG2001 CN1505 MECHANISM UNIT IN/OUT VOLTAGE:WRITE MODE(EXT MIC INSERT) S-VIDEO 6 - 3... -
Page 87: Regulator [Ref]
REGULATOR [REF] SCHEMATIC DIAGRAM MAN UNIT CN1501 CODE PART NAME 1A-7A 2SB1424R 2SD1766R S-8541B00FN-IMD SW REG CONT. 2SK3019 DTC114YE 1SS353SP SB07-03C DA221 VOLTAGE:READ OR WRITE MODE. SBS004 AF5V REG 8.0 3.1 5.1 2.7 0 C0567 -7.8 10/6.3 -1.3 -7.0 -7.8 15.0 PGJ001 SBS004... -
Page 88: Evf [Ref]
EVF [REF] SCHEMATIC DIAGRAM 11.0 11.0 EVF DECODE 11.0 11.0 10.5 VOLTAGE:READ OR WRITE MODE. EBLB PG3953 REGULATOR 1A-7A EVF [REF] 6 - 5... -
Page 89: Eblb
EBLB SCHEMATIC DIAGRAM MR SCHEMATIC DIAGRAM CODE PART NAME REVERSE 2SC4617 MA133 AN4800A BACK LIGHT OPEN/CLOSE AN4800A PG3502 DCJ SCHEMATIC DIAGRAM VOLTAGE:READ OR WRITE MODE. EBLB [REF] REGULATOR PG3701 [REF] PG0002 EVF-LCD DC JACK PANEL (DC IN 8.4V) 6 - 6... -
Page 90: Lcd
LCD SCHEMATIC DIAGRAM 12.5 BACK 12.5 LIGHT -2.4 INVERTER TRANS -2.4 12.0 0.5Vp-p 13.3 0.5Vp-p 0.5Vp-p -0.5 CN6101 LCD PROCESS/ LCD PROCESS/ DRIVE DRIVE 13.0 13.3 5.0 - MONITOR PANEL PG3401 13.3 13.3 VOLTAGE:READ OR WRITE MODE. 6 - 7... -
Page 91: Aud
AUD SCHEMATIC DIAGRAM PG3501 CODE PART NAME 2SC4617 2SA1774RS XP4501 DTC114YE VOLTAGE:READ AND(WRITE)MODE. ADJ CONNECTOR SPEAKER AUDIO PROCESS 3.3k 1.5 1.5 1.5 1.5 1.5 1.5 1.5 1.5 820p 820p MAN UNIT PG1501 REC: 3.6 RS-21 EXPOSURE RESET FOCUS VOL(+) VOL(-) BRIGHT REMOTE REC: 0... -
Page 92: Ic Block Diagrams
IC BLOCK DIAGRAMS IC6101 IC0501(1/2) LA74206W IC0501(2/2) AUDIO PROCESS MB3881 MB3881 SW REG PWM SW REG PWM CONTROL CONTROL LOGIC MUTE POWER +9dB VREFH MUTE +9dB VCC(O)-2 <CH5> SERIAL VCC(O)-1 <CH1> MUTE COMP.1-5 COMP.1-1 -5dB +11dB BUZZER ERROR DRIVE OUT5 AMP.5 MUTE SHUTTER... -
Page 93: Eblb
IC BLOCK DIAGRAMS EBLB, MR CIRCUIT BOARD DIAGRAMS INPUT MODE/SW OUT LIMIT PICTURE REG AMPLITUDE IC3501 COLOR SUBBRIGHT R RB5P0050M SUBBRIGHT B LCD PROCESS INTERFACE CONTRAST COM AMPLITUDE BRIGHT COM BLACK LEV GAMMA 0 DAC OUT GAMMA 2 VCO OFFSET 1 XRGB, VSH/2 CLAMP... -
Page 94: Drf
SE, DRF, DCJ CIRCUIT BOARD DIAGRAMS DIFFERENCE TABLE NOTE: This table listes the different components marked with asterisks ( ) in the circuit board diagrams. IC1404 SYMBOL IC1404 TYPE230 TYPE200 C1007 C1008 C1009 C1010 IC1403 C1013 C1015 C1016 IC1403 C1017 R1004 R1005 R1006... -
Page 95: Avj
AVJ, LCD CIRCUIT BOARD DIAGRAMS TL3602 TL3603 BACK LIGHT JK6003 [PATTERN No.JA1975-5] JK6001 JK6002 AVJ -SIDE A- AVJ -SIDE B- [PATTERN No.JD1134-5] 6 - 12... -
Page 96: Ref
REF CIRCUIT BOARD DIAGRAM REF -SIDE B- REF -SIDE A- [PATTERN No.JA1975-5] 6 - 13... -
Page 97: Aud
AUD CIRCUIT BOARD DIAGRAM R6102 AUD -SIDE B- AUD -SIDE A- [PATTERN No.JA1975-5] 6 - 14... -
Page 98: Man
MAIN CIRCUIT BOARD DIAGRAM (7.6) (3.1) (3.1) (3.6) (7.6) 3(3.1) 4(5.1) (3.6) (3.1) 11(5.1) (3.1) (3.1) (3.1) (3.1) (5.1) (5.1) (5.1) (3.6) (5.1) (3.2) (3.2) (5.0) (3.2) (8.2) (8.2) (15) (3.1) (3.2) (3.1) (3.1) 77(5.1) 4(5.1) 76(3.0) 75(3.0) (5.1) (3.2) (3.2) (15) (15) -
Page 99: Drive Mechanism Unit
DRIVE MECHANISM UNIT (1) DRC CIRCUIT BOARD DIAGRAM (4.9) (4.9) (3.1) (4.9) (4.9) (3.1) (3.1) (3.1) (4.9) (4.6) (4.9) (3.1) (4.9) (4.6) (3.1) (3.1) (3.1) (3.1) (4.6) (3.1) (4.6) (3.1) (4.6) (3.1) (3.1) (3.1) (3.1) (3.1) (4.9) (4.9) (4.9) (4.9) (4.9) (4.9) (4.9) -
Page 100: Hdm
(2) HDM CIRCUIT BOARD DIAGRAM IDENTIFICATION OF PARTS LOCATION Symbol Parts Symbol Parts Symbol Parts Symbol Parts Symbol Parts Symbol Parts Symbol Parts Location Location Location Location Location Location Location Q3505 C0562 A-4B F0504 A-2A Q3892 A-2C R0564 A-3B C3501 Q3601 BL0001 A-2A... - Page 101 Symbol Parts Symbol Parts Symbol Parts Symbol Parts Symbol Parts Location Location Location Location Location C6165R B-5B Q6111R A-1B R6153 B-4B R6318 A-5C BA1801 A-4B C6166L B-6C R6154 B-4B R6320 A-5C C6166R A-2B R1801 B-6C R6155 A-5B R6321 B-4C C1801 B-6C C6170L A-6C...
-
Page 102: Block Diagrams
BLOCK DIAGRAMS AUDIO/VIDEO SIGNAL PROCESS SECTION DATA EVF BACK BA1801 LIGHT : CCD OUT/REC VIDEO IC3801 BACK-UP LITHIUM B&W EVF BATTERY (3V) : PB VIDEO DECORDER 0.27 inch (B&W) EVF LCD IC1502 : EXT. INPUT VIDEO POWER SELECT/ AC ADAPTER OPERATION RESET SWITCHES... - Page 103 DRIVE MECHANISM UNIT 8cm DVD-RAM/DVD-R Video/Audio DISK Drive Mechanism Unit Signal Process Section Head SPINDLE MOTOR SDRAM ANALOG (16Mbit) FRONT END DATA LASER DIODE STROBE LASER DIODE Recode DRIVE DRIVE DSP (SERVO/DSP/ FRONT MOTOR ATAPI ATAPI/ DET. & AMP ENCORDER/ CONNECT DECORDER) 8 DETECTOR...
- Page 104 DZ-MV230A TK No. 7201E Digital Media Products Division,Tokai DZ-MV200A Copyright © Hitachi, Ltd. 2002. All rights reserved. Printed in Japan (I,I)