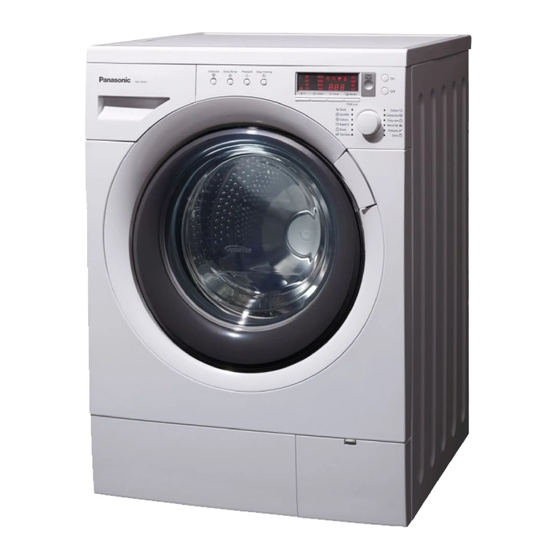
Panasonic NA-16VX1 Service Manual
Drum type washing machine
Hide thumbs
Also See for NA-16VX1:
- Operating instructions manual (40 pages) ,
- Service manual (46 pages)
Table of Contents
Advertisement
This service information is designed for experienced repair technicians only and is not designed for use by the general public.
It does not contain warnings or cautions to advise non-technical individuals of potential dangers in attempting to service a product.
Products powered by electricity should be serviced or repaired only by experienced professional technicians. Any attempt to service
or repair the product or products dealt with in this service information by anyone else could result in serious injury or death.
There are special components used in this equipmen t whic h a re importa nt f or safet y. Thes e par ts a re mark ed b y
Diagrams, Circui t Board Diagrams, Exploded Views and Replacement Parts L ist. It is essential that these critical parts should be replaced
with manufacturer's specified part s to prevent shock, fire or other hazards. Do not modify the orig inal design without permission of
manufacturer.
CONTENTS
7 USING THE BUTTONS
NA-16VX1
NA-16VG1
NA-14VA1
Product Colour :White
Destination
WARNING
!
IMPORTANT SAFETY NOTICE
Page
2
3-7
8
9-12
13
14
15
16
R
Drum Type Washing Machine
:Germany, United Kingdom, France, Spain, Poland,
Czech, Hungary, Romania, Holland, Belgium, Sweden,
Norway, Denmark, Russia, Singapore, Malaysia,
Vietnam, UnitedArab Emirates, Oman, Kuwait,Qatar,
HongKong, Thailand, Iran, New Zealand, Italy
10 CHECK INPUT AND OUTPUT VOLTAGE OF THE PC.BOARD
11 TROUBLESHOOTING GUIDE
Panasonic HA Washing Machine Hangzhou 2009.
C
All rights reserved. Unauthorized copying and
distribution is a violation of law.
Order No.WMH0902141C2
in t he Schematic
!
Page
18-19
20-21
22-23
24-25
26-36
37-46
17
Advertisement
Table of Contents

Related Manuals for Panasonic NA-16VX1


Summary of Contents for Panasonic NA-16VX1
-
Page 1: Important Safety Notice
13 ERROR DISPLAY 24-25 7 USING THE BUTTONS 14 DISASSEMBLY INSTRUCTIONS AND ADJUSTMENTS 26-36 8 DETAILS OF PROGRAMMES 15 LOCATION OF PARTS 37-46 Panasonic HA Washing Machine Hangzhou 2009. All rights reserved. Unauthorized copying and distribution is a violation of law. -
Page 2: Specifications
NA-16VX1/16VG1/14VA1 1 SPECIFICATIONS Model No . NA-16VX1 NA-16VG1 NA-14VA1 Power source AC220V-240V/50Hz AC220V-240V/50Hz AC220V-240V/50Hz Product weight 85kg 85kg 85kg 596*625*845 596*625*845 596*625*845 Dimensions(W*D*H)(mm) Laundry capacity 7.0kg 7.0kg 7.0kg Body Colour White White White Dial+LCD Dial+LED Dial+LED Operation Panel Drum(Wash) r/min. -
Page 3: Product Information
NA-16VX1/16VG1/14VA1 2 PRODUCT INFORMATION 2-1 New Drum washing machine Tilted Drum The drum shall be tilted to save water and increase easy operation. Compared to the Horizontal dram type, Tilted drum can save water. When put laundry into the drum and take out laundry easily from the drum after washing. It is called Universal design . - Page 4 NA-16VX1/16VG1/14VA1 2-3 Model For 16VX1(LCD Display) Process & Cloth Load Indicator Child Lock & Door Lock *Cloth load indicator (after push start button) Indicator *Process indicator (during washing process) Water Temperature Setting Delay Start Setting Process Select & Remain Time Indicator...
- Page 5 NA-16VX1/16VG1/14VA1 2-5 Smart Beat Wash by variable rotation control Previous washing method The drum rotates at a constant speed. Therefore, due to different fabrics and weights of clothing and insufficient penetration of water, dirt can not be beaten out by washing.
- Page 6 NA-16VX1/16VG1/14VA1 2-7 Safety Leak-proof System This system is designed to prevent water leaks from the washing machine, and includes the following components: Water Supply Valve Detect water leakage, stop water Water Hose Valve supply at product side. If the water hose is damaged, detect water leakage and stop water supply at the tap side.
-
Page 7: How To Lock Or Unlock The Door
NA-16VX1/16VG1/14VA1 2-9 How to lock or unlock the door The door is automatically locked while any programme is running. sign is shown while the door is locked. Caution To unlock the door while a programme is running During operation After the drum stops spinning, the door will automatically unlock and will be signaled with a clicking sound. -
Page 8: Know The Washing Machine
NA-16VX1/16VG1/14VA1 3 KNOW THE WASHING MACHINE 3-1 Component Name (Push door opening button and open with the right end of a door) Do not fold the mains lead when the washing machine is running. Drain filter cover... -
Page 9: Moving And Installing
NA-16VX1/16VG1/14VA1 4 MOVING AND INSTALLING 4-1 Carrying the washing machine Two or more people must carry the washing machine. Start by tilting the machine backwards. One person should stand behind it, holding the rear of the top panel. The other person should grip the bottom stands at the front. - Page 10 NA-16VX1/16VG1/14VA1 4-5 The right place for washing machine Sloping Unstable Bumpy Surface Surface Surface Other things to avoid: 4-6 Installing a built-in washing machine Metal cover Separately sold accessories Metal cover (AXW4595-7FH0) (AXW4595-7KG0) (WHITE) 4-7 Washing machine dimensions in millimetres...
-
Page 11: Hose And Cable Lengths
NA-16VX1/16VG1/14VA1 4-8 Hose and Cable Lengths 4-9 Levelling the machine Using a level facilitates the adjustment. When adjusting the machine to make it level, ensure all four stands are supporting it: On each stand, loosen the lock nut by turning it clockwise using the A end of the spanner supplied. -
Page 12: Water Drain Hose
NA-16VX1/16VG1/14VA1 4-11 Water drain hose Points to remember: Do not twist, pull out or bend the drain hose. The machine should be no more than 100cm from the drain outlet. Draining to a sink or wash-basin: Elbow Draining to a wash-basin... - Page 13 NA-16VX1/16VG1/14VA1 -13-...
- Page 14 NA-16VX1/16VG1/14VA1 -14-...
- Page 15 NA-16VX1/16VG1/14VA1 -15-...
- Page 16 NA-16VX1/16VG1/14VA1 -16-...
- Page 17 NA-16VX1/16VG1/14VA1 -17-...
- Page 18 NA-16VX1/16VG1/14VA1 -18-...
- Page 19 NA-16VX1/16VG1/14VA1 10-2 Motor (Brushless type) Rotation speed: Inverter control Quiet operation: Below 55 dB Structure: Simple & Less-trouble <Rated resistance> Coil Approx. Coil Approx. Coil Approx. Thermistor 11.4K at 20 Approx. WHITE Tachogenerator Approx. GREY Thermal protector Approx. THERMISTOR BROWN...
- Page 20 NA-16VX1/16VG1/14VA1 TROUBLESHOOTING -20-...
- Page 21 NA-16VX1/16VG1/14VA1 -21-...
-
Page 22: Operating Test-No Water
NA-16VX1/16VG1/14VA1 12 OPERATING TEST-NO WATER Method to "Operating Test- No Water" 1. Press the power switch to "OFF". 2. Press and hold both the "Intensive" and"Extra Rinse" buttons with one hand. 3. Press the power switch to "ON". 4. Release your fingers from the buttons and power switch you pressed in step (2) and (3) above. - Page 23 NA-16VX1/16VG1/14VA1 -23-...
-
Page 24: Error Display
NA-16VX1/16VG1/14VA1 13 ERROR DISPLAY (Incase of U11) Indication Contents Detect contents Check point Method to clear Unable to drain Incase won't detect Is something wrong with the drain hose? After solving proble- reset point in 12 min. Is lint clogging it? ms, open the door After starting of drain. - Page 25 NA-16VX1/16VG1/14VA1 Indication Contents Detect contents Check point Method to clear Open circuit or Detect abmormal signal Turn off the power Check if condition of the motor s connector. short circuit o from the motor Replace the motor. the motor thermistor TH5...
-
Page 26: Disassembly Instructions And Adjustments
NA-16VX1/16VG1/14VA1 14 DISASSEMBLY INSTRUCTIONS AND ADJUSTMENTS Description Figure Procedure 1 Replacement of 1.Remove the three screws mounting the upper the upper board board. 2.Hold and slide the upper board arrow direction as shown in left figure, and pull it up to remove. - Page 27 NA-16VX1/16VG1/14VA1 Description Figure Procedure 3.Remove the two lead wire holders and the one connector to remove the 3D sensor. 4 Replacement of After remove the upper board, the water level 1.Push the one pawl to outward as shown in figure, detector and pull the water level detector upward.
- Page 28 NA-16VX1/16VG1/14VA1 Description Figure Procedure 4.pull all pawls up to remove the detergent case A from the body joint. 5.Remove the two screws mounting the feed valve unit as shown in left figure. 6.Remove the three connectors from the feed valve unit, and pull it out to remove by a screwdriver.
- Page 29 NA-16VX1/16VG1/14VA1 Description Figure Procedure 5.Remove the one lead wire holder from the PC Board. 6.Turn the PC Board up, remove the five screws and the seven pawls mounting the PC Board, and remove the PC Board cover. Note: Please spread a cloth on to the washine machine to prevent scratch on the surface of the panel face board.
- Page 30 NA-16VX1/16VG1/14VA1 Description Figure Procedure 2.Remove the seven screws mounting the body band A. 3.Remove the body band B. 4.Take out the body band A. 9 Replacement of After remove the door unit, and the body band A, the door lock 1.Remove the two screws mounting the door lock...
- Page 31 NA-16VX1/16VG1/14VA1 Description Figure Procedure 11 Replacement 1.Open the filter cover. of the panel A 2.Remove the two screws mounting the panel A. 3.Remove the hose out from the hose holder. 4.slide the panel A to left slightly to remove as shown in left figure.
- Page 32 NA-16VX1/16VG1/14VA1 Description Figure Procedure 13 Replacement After remove the body B of the wringer 1.Remove the body band B fixing the wringer frame frame packing packing by using 2 long nose pliers. 2.Remove the wringer frame packing. Note: Incase to mounting the wringer frame packing A, cutting portion shall be set to the marking portion of the outer tub cover.
- Page 33 NA-16VX1/16VG1/14VA1 Description Figure Procedure 3.Remove the hose clamp from the outer tub, and remove the feed hose A. 4.Remove the nineteen bolts mounting the outer tub cover by a box wrench (size 10mm). 5.Pull out the outer tub cover to remove.
- Page 34 NA-16VX1/16VG1/14VA1 Description Figure Procedure 18 Replacement 1.Remove the two hose clamps and 2 hoses from of the drain pump the drain pump. 2.Remove the three screws mounting the drain pump. 3.Remove the two covers and remove the three connectors from the drain pump.
- Page 35 NA-16VX1/16VG1/14VA1 Description Figure Procedure 21 Replacement (TH4 detects water temperature in the drum) of the thermistor-4 After lay down the washing machine on it left side and remove the hole cover, 1.Remove the two screws mounting the thermistor-4. Note: Please spread a cloth to prevent scratch on the body.
- Page 36 NA-16VX1/16VG1/14VA1 Description Figure Procedure 3.Turn the large pulley and remove the belt outward. 24 Replacement After remove the rear panel lay down the washing of the Motor machine on it left side and remove the hole cover, 1.Remove the insulation cover .
-
Page 37: Location Of Parts
NA-16VX1/16VG1/14VA1 15 LOCATION OF PARTS-A -37-... - Page 38 NA-16VX1/16VG1/14VA1 REPLACEMENT PARTS LIST-A (U):U indicates parts at the remarks that can be replaced by user. :Components identified by Mark have special characteristics important for safety. When replacing any of these components use only manufacture's specified parts. :Indicates parts that are supplied by PPSC/Japan.
- Page 39 NA-16VX1/16VG1/14VA1 LOCATION OF PARTS-B -39-...
- Page 40 NA-16VX1/16VG1/14VA1 REPLACEMENT PARTS LIST-B Model No . Ref. Q'ty Part No. Description Remarks No . 16VX1 16VG1 14VA1 AXW24S-7FH06 CONTROLLER UNIT A AXW24S-7FJ06 CONTROLLER UNIT A AXW146-7FH0 CONTROLLER PLATE AXW146-7FJ0 CONTROLLER PLATE AXW146-7FK0 CONTROLLER PLATE AXW149-7FH0 COURSE SELECT KNOB Germany...
- Page 41 NA-16VX1/16VG1/14VA1 LOCATION OF PARTS-C -41-...
- Page 42 NA-16VX1/16VG1/14VA1 REPLACEMENT PARTS LIST-C Model No . Ref. Q'ty Part No. Description Remarks No . 16VX1 16VG1 14VA1 AXW1231-7FH1 BALANCING WEIGHT AXW1231-7FH2 BALANCING WEIGHT SUSPENSION AXW3441-6YK1 AXW24N-7FH0 3D SENSOR AXW448-20120 CHEMIAL COVER AXW2259-6YK1 COVER CAP Includes C12 OUTER TUB COVER AXW32G-7FH0 Includes C21.C37...
- Page 43 NA-16VX1/16VG1/14VA1 LOCATION OF PARTS-D Accessories -43-...
- Page 44 NA-16VX1/16VG1/14VA1 REPLACEMENT PARTS LIST-D Model No . Ref. Q'ty Part No. Description Remarks No . 16VX1 16VG1 14VA1 AXW1150-7FH0 TUB SUPPORT PLATE AXW2331-6YK3 DAMPER SPRING Includes D05 AXW1AB7FH0 BODY UNIT AXW135-7FH0 HOOK AXW3I-7EU0 LEG PLATE UNIT (U) Includes Seal rings...
- Page 45 NA-16VX1/16VG1/14VA1 PACKING INSTRUCTIONS PACKING PARTS LIST Ref. Model No . Part No. Description Remarks Q'ty No . 16VX1 16VG1 14VA1 AXW9001-7FH0 CASE A GE/UK/FR/SP/PO/IT/CZ/ HU/RO/HO/BE/SW/NO/ AXW9001-7FJ0 CASE A AXW9001-7FK0 CASE A HK/Iran AXW9001-7KG0 CASE A HK/Iran AXW9001-7KH0 CASE A AXW9001-7KJ0 CASE A N.Z./VN/MY/SG/AE/OM/KW/QA/TH...
- Page 46 NA-16VX1/16VG1/14VA1 SMALL STANDARDIZED METAL PARTS Model No . Ref. Q'ty Part No. Description Remarks No . 16VX1 16VG1 14VA1 XTWAXW466J SCREW XTB4+16CFJ SCREW XTB4+10FFJ SCREW XTB4+16CXR SCREW XTBAXW437J SCREW XTBAXW438J SCREW XST4+16V SCREW XTT4+12FXR SCREW XWL10J27FJ WASHER XTWAXW8503J SCREW XWL7J27FJ...