Table of Contents
Advertisement
INDEX
WATCH INFORMATION AND CARE
OPERATING INSTRUCTIONS
ANALOG & DIGITAL MODELS
SPECIAl MODElS
HIGH PERfORMANCE MODElS
TIDE, TEMPERATURE & COMPASS
SOLAR
DEPTH
Page
2 - 5
6 - 7
8 - 9
10 - 13
14 - 15
15 - 53
54 - 63
64 - 67
68 - 71
72 - 75
CONGRATULATIONS ON OWNING YOUR NEW NAUTICA WATCH
76 - 81
DEVELOPED FROM ADVANCED ELECTRONICS TECHNOLOGY,
THE MOVEMENT IS MANUFACTURED FROM THE BEST QUALITY
82 - 83
84 - 87
COMPONENTS AND POWERED BY A LONG LIFE BATTERY.
Advertisement
Table of Contents

Related Manuals for NAUTICA VX3J


Summary of Contents for NAUTICA VX3J
- Page 1 TIDE 68 - 71 WORLD TIME 72 - 75 HIGH PERfORMANCE MODElS CONGRATULATIONS ON OWNING YOUR NEW NAUTICA WATCH TIDE, TEMPERATURE & COMPASS 76 - 81 DEVELOPED FROM ADVANCED ELECTRONICS TECHNOLOGY, THE MOVEMENT IS MANUFACTURED FROM THE BEST QUALITY SOLAR 82 - 83 COMPONENTS AND POWERED BY A LONG LIFE BATTERY.
- Page 2 NAUTICA watches have been developed with the highest attention to ® INDIGlO NIGHT-lIGHT quality, function and detail, as befits the NAUTICA tradition. If your watch has “INDIGLO” on the dial, your watch is equipped with Please read the following instructions carefully to fully understand all the INDIGLO Night-Light.
-
Page 3: Elapsed Time Ring
Some deep-depth water-resistant watches require the setting crown to in units per hour off the tachymeter scale. be screwed in to ensure water-resistancy. If your Nautica watch has a transparent sticker at back of the case back (diagram above) BAND ADJUSTMENT... -
Page 4: Basic Models
BASIC MODElS TIME To set the time: 1. Pull crown to “B” position. 2. Turn crown clockwise /counter clockwise to correct time. 3. Push crown to “A” position. CROWN POSITION CROWN POSITION Y121, 2039, 2036, 608/1010 VX10 / VX51 / YL60 / 4S20 CROWN POSITION 336/168... -
Page 5: Date Models
DATE MODElS TIME To set the time: DATE 1. Pull out crown to “C” position. 2. Turn crown clockwise / counter clockwise to correct time. A B C 3. Push in crown to “A” position. CROWN POSITION CAlENDAR To set the calendar/date: 1. -
Page 6: Multi Models
3. Push crown to “A” position. CROWN CROWN 24 HOUR POSITION POSITION DAy Of WEEK (for VX3J / VX3l / VX3N / VX36 / VX7N / VD79) DATE DATE To set the day: VX3R VX3N / VX7N 1. Pull crown to "C" position. - Page 7 TIME DATE To set the time: 1. Pull crown to “C” position. 2. Turn crown either way to correct time. CROWN POSITION 3. Push crown to “A” position. 24 HOUR DATE 6P27 To set the date : DATE 1. Pull crown to “B” position. 2.
-
Page 8: Indiglo Models
INDIGlO MODElS CAlENDAR To set the date: DATE 1. Pull crown to "B" position. A B C 2. Turn crown counter clockwise or towards you to correct date. 3. Push crown to "A" position. CROWN POSITION Note: The date changes automatically every 24 hours. M905 To activate the Indiglo: Press crown to indicate Indiglo night light. -
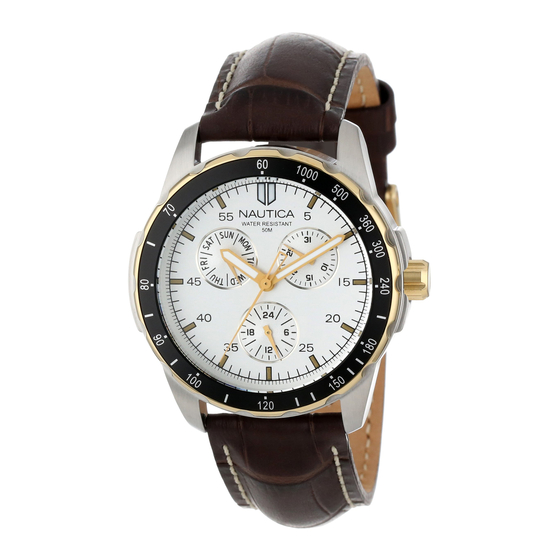
Page 9: Chronograph Models
CHRONOGRAPH MODElS STOPWATCH 1/20SEC. HAND This Chronograph watch has three functions: TIME, CALENDAR, STOPWATCH PUSHER “A” SMAll SECOND HAND TIME To set the time: STOPWATCH SECOND HAND 1. Pull crown to position “C”. STOPWATCH MINUTES HAND STOPWATCH HOUR HAND 2. Turn crown clockwise / counter clockwise to correct time. YM92 3. - Page 10 Before using the stopwatch, reset the stopwatch hands. SPlIT TIME MEASUREMENT: To the “12” and “0” position. 1. Press pusher “A” to start the timing of the first runner. 2. Press pusher “B” to stop and record the timing of the first runner. STANDARD STOPWATCH MEASUREMENT: (Once pusher B is activated, even though the stopwatch 1/20 1.
- Page 11 5. Press pusher “B” repeatedly to set stopwatch second hand to “0” 7. Press pusher “B” to “0” setting for the stopwatch min. / hour hand. position. If the hand is not at “0” or “12” position, then, press pusher “B” 6.
- Page 12 This Chronograph watch has 3 functions: TIME, CALENDAR, STOPWATCH MINUTE HAND 24-HOUR HAND STOPWATCH MUNUTE HAND TIME PUSHER “A” To set the time: A B C HOUR HAND 1. Pull crown to position “C”. CROWN POSITION 2. Turn crown clockwise / counter clockwise to correct time. STOPWATCH SECOND HAND PUSHER “B”...
- Page 13 CORRECTING STOPWATCH HANDS If after resetting the stopwatch hands it is found that they are not at the '12' or '0' position, correct them as follows: 1. Pull crown to “ C” position. 2. Press pusher “A” continuously, the stopwatch hand will advance rapidly until it gets close to the “...
- Page 14 This Chronograph watch has 3 functions: TIME, CALENDAR, STOPWATCH PERMANENT SECOND HAND MINUTE CHRONO HAND TIME PUSHER “A” To set the time: A B C STOPWATCH SECOND HAND 1. Pull crown to position “C”. 2. Turn crown clockwise / counter clockwise to correct time. CROWN POSITION 3.
- Page 15 Before using the stopwatch, reset stopwatch chrono hands to the “12” (Once pusher “B” is activated, even though the chrono minute hand and “0” position. and the big stopwatch sec. hand stop on the dial, the stopwatch still continues to run internally.) Standard Stopwatch Measurement 3.
- Page 16 After finishing the big sec. stopwatch hand adjustment, press crown Press pusher “A” continuously or repeatedly until the hand moves by back to position “A” to terminate the adjustment. each interval and returns to “12” and “0” position. Press crown back to position “A” to terminate the adjustment. TO ADJUST THE 1/10 SECOND COUNT HAND (fOR 5040B) Once finished adjusting all stopwatch chrono hands, press crown back After activating the corrective mode, if the 1/10 second counter hand...
- Page 17 This Chronograph watch has three functions: TIME, CALENDAR, STOPWATCH 24 HOUR HAND STOPWATCH MINUTE HAND TIME PUSHER “A” STOPWATCH MINUTE DISK To set the time: STOPWATCH A B C A B C SECOND HAND 1. Pull crown to position "C". CROWN CROWN 2.
- Page 18 CORRECTING STOPWATCH HAND If after resetting the stopwatch second hand it is found that they are not at the '12' or '0' position, correct as follows: 1. Pull crown to "C" position. 2. Press pusher “A” continuously, the stopwatch second hand will advance rapidly until it gets close to the “12”...
- Page 19 This Chronograph watch has 3 functions: TIME, CALENDAR, STOPWATCH 24-HOUR HAND STOPWATCH MINUTE HAND TIME To set the time: A B C 1. Pull crown to position “C”. CROWN POSITION 2. Turn crown clockwise / counter clockwise to correct time. 3.
- Page 20 TO ADJUST STOPWATCH HAND STANDARD STOPWATCH MEASUREMENT: 1. Pull crown to position "C". 1. Press pusher “A” to start timing. 2. Press pusher "A" continuously or repeatedly to adjust the stopwatch 2. Press pusher “A” to stop timing. second hand to "0" or "12" position. 3.
- Page 21 This Chronograph watch has 3 functions: PERMANENT SECOND HAND STOPWATCH MINUTE HAND TIME, CALENDAR, STOPWATCH PUSHER A A B C STOPWATCH SECOND HAND TIME CROWN POSITION To set the time: DATE PUSHER B 1. Pull crown to position “C”. 2. Turn crown clockwise / counter clockwise to correct time. 8171/201 3.
- Page 22 STOPWATCH TO ADJUST STOPWATCH HAND: The stopwatch is capable of measuring: 1. Pull crown to position "B". 2. Press pusher "A" continuously or repeatedly to adjust the stopwatch 1. 1 minute elapsed up to 30 minutes. second hand to "0" or "12" position. 2.
- Page 23 STOPWATCH MINUTE STOPWATCH HAND DATE This stopwatch is able to measure and display time in 1/20 ( 1/1) second united up to max 11 hrs 59 min 59 sec. A B C The retrograde stopwatch 1/20 ( 1/1) second hands keeps continuously STOPWATCH HOUR HAND running for 60 seconds after starting, and then stops at "0"...
- Page 24 STOPWATCH 24 HOUR HAND This stopwatch is able to measure and display time in 1 second intervals up to max 29 min 59 sec. PUSHER A It will stop automatically after running continuously for 30 minutes. 1. Press pusher "A" to start timing. CROWN POSITION 2.
- Page 25 DAy HAND To set the day: PUSHER A 1. Pull crown to position "B". STOPWATCH MINUTE HAND 2. Turn crown counter clockwise to correct day. A B C 3. Push crown to position "A". CROWN POSITION STOPWATCH SECOND STOPWATCH: HAND PUSHER B This stopwatch is able to measure and display time in 1 second SECOND HAND...
- Page 26 MINUTE HAND CAlENDAR CENTER HAND To set the Calendar: PUSHER A UPPER HAND 1. Pull crown to position ”B” DATE A B C CHRONO HOURS / 2. Turn crown counter clockwise to correct the calendar. TIME zONE CROWN POSITION 3. Push crown back to position “A”. HOUR HAND CHRONO MINUTES SCAlE PUSHER B...
- Page 27 To set the Second Time zone: 1. Pull crown to position “B”. The 4th center hand will display the minutes of the second time zone. 2. Press pusher “A” to set the hour of second time zone. 3. Press pusher “B” to set the minutes. 4.
-
Page 28: Analog & Digital Models
ANAlOG AND DIGITAl MODElS 3. Press MODE to cycle through CHRONO, RECALL, TIMER, ALARM and TIME modes. Press and hold MODE in any mode to return to TIME display. START / STOP 4. When setting digits, press START/STOP to go forward or LAP/ SET / INDIGlO RESET to go backward or hold to change rapidly. - Page 29 5. Press MODE to select MINUTES, YEAR, MONTH, DAY, DAY of WEEK, 12 or 24 time display, MONTH-DAY or DAY-MONTH date display. Press START/STOP or LAP/RESET to advance selected item. 6. Press SET/INDIGLO when done. 7. Press and hold LAP/RESET and wait for beep to change display to second TIME ZONE.
- Page 30 7. Press START/STOP to start or stop LOOP TIMER. Alarm symbol ( ) will appear in TIME display when ALARM is 8. With TIMER stopped, press and hold SET/INDIGLO to reset all armed for that TIME ZONE. LOOPS to zero. Beep will sound when ALARM time is reached.
- Page 31 DIGITAl TIME AND CAlENDAR To set the time and calendar: START / STOP 1. Press “Mode” button until time mode appears. lIGHT 2. Press and hold “Set” button to begin setting time. CROWN 3. Press “Mode” button to select the setting item in the order, Second ➞...
- Page 32 To set the Alarm: ("SPL" will blink on the display if the split time function is active. 1. Press “Mode” button until alarm mode appears. Even though the stop watch is not on display, the timing will 2. Press and hold “Set” button to begin setting alarm. continue to run internally.) 3.
- Page 33 DIGITAl MODElS TIME MODE In time mode, the watch displays the current time information on hour, minute, second, date, month and day of week. It also displays the "ON/OFF" status of Alarm or Chime. ADJUST lIGHT CHRONOGRAPH MODE CROWN The sports watch counts up to 19 hours 59 minutes 59.99 seconds with 1/100 second and split time function.
-
Page 34: Alarm Function
2. Press “Set” button to stop and record the timing of the first runner. Chime function ("Split" will blink on the display if the split time function is active. The Beep will sound every hour after activating the chime function. Even though the stop watch is not on display, the timing will continue to run internally.) TIME SET MODE... -
Page 35: Tide
CAlENDAR SPECIAl fUNCTION MODElS To set the calendar: 1. Pull crown to position “B”. SMAll 2. Turn crown clockwise to correct calendar. SECOND HAND MINUTE HAND 3. Push crown to position “A”. PUSHER A TIDE AMPlITUDE AND MOON PHASE COUNTER HAND TIDE fUNCTION A B C CROWN POSITION... - Page 36 To set the Tide Amplitude (Moon Phase) – Counter at 10 o’clock small eye The tide amplitude counter performs one revolution in 29 days 12 hours and 44 minutes. 1. Press and hold pusher “A” to 3 seconds after the beep indicated for enter in setting mode.
-
Page 37: World Time
CAlENDAR CENTER HAND To set the CAlENDAR: MINUTE HAND 1. Pull crown to position ”B” 24 CITIES 2. Turn crown counter clockwise to correct the calendar. PUSHER A UPPER HAND DATE 3. Push crown back to position “A”. A B C WORlD TIME SCAlE CROWN POSITION WORlD TIME... - Page 38 4. Press pusher “A” or “B” to move the 4th center hand backward or Note: If no pusher is pressed within five seconds of the hands forward to adjust the world time, respectively, to set the world time stopping, the watch will proceed to the world time setting zone to be the same as the home time zone.
- Page 39 TIME To set the time: PUSHER A 1. Pull crown to position “C” 2. Turn crown clockwise / counter clockwise to correct time A B C 3. Push crown to position “A” CROWN POSITION CAlENDAR To set the calendar: PUSHER C PUSHER B 1.
- Page 40 TIDE / TEMPERATURE SElECTION Tides are influenced by moon and sun and shape of shoreline, so tide clock cannot precisely give times of high and low tides. Tide function: Periodic adjustment may be necessary. - Press B (TIDE) push button to select the tide clock.
- Page 41 6. Press A or B pusher to move the indicator hand west (-) or east (+), field around the watch. Do not store the watch near any source of respectively, to point to your location’s declination angle using the magnetism, such as a computer, appliance, or television, as the watch declination scale.
-
Page 42: Solar
SOlAR POWER The guideline for charging time Illumination Source of A B C Environment (Approx. (Approx. (Approx. (Lx) light Hours) Hours) Minutes) Inside the office A fluorescent lamp 3,000 30W 20cm CROWN POSITION 10,000 Cloudy Sun light 100,000 Fine weather 36 minutes * For reference: 1,000Lx is 70cm under from 30W fluorescent lamp VS37... -
Page 43: Depth
DEPTH SCAlE CAlENDAR To set the calendar: 1. Pull crown to position “B” A B C 2. Turn crown counter clockwise to correct calendar CROWN 3. Push crown to position “A” POSITION 4TH CENTER HAND Note: Don't change the date between 10pm and 2am as it could PUSHER damage the movement. - Page 44 Note: If the readings remain in the range of 0 to 2 meters (0-6 feet) for and Replace Battery Level, with each level indicated by the movement 5 minutes, the sensor will turn off automatically. of the second hand. Turn off the Sensor: In Normal Level, the second hand will move one hand position every one second.