Table of Contents
Advertisement
Quick Links
Advertisement
Chapters
Table of Contents

Related Manuals for Nikon Speedlight SB-30


Summary of Contents for Nikon Speedlight SB-30
- Page 1 スピードライ ト Speedlight SB-30 使用説明書 Instruction Manual...
-
Page 2: 安全上のご注意
安全上のご注意 ご使用の前に 「安全上のご注意」 をよくお読みの上、 正しくお使いください。この 「安全上のご注意」 は製品 を正しく使用していただき、 あなたや他の人々への危害や財産への損害を未然に防止するために、 重要な 内容を記載しています。お読みになった後は、 お使いになる方がいつでも見られるところに必ず保管して ください。 表示と意味は次のようになっています。 この表示を無視して、 誤った取り扱いをすると、 人が死亡または重傷を負う可能性が想定される内容を 警 告 示しています。 この表示を無視して、 誤った取り扱いをすると、 人が傷害を負う可能性が想定される内容および物的損 注 意 害の発生が想定される内容を示しています。 お守りいただく内容の種類を、 次の絵表示で区分し、 説明しています。 絵表示の例 △記号は、 注意 (警告を含む) を促す内容を告げるものです。図の中や近くに具体的な注意内容 (左図 の場合は感電注意) が描かれています。 記号は、 禁止 (してはいけないこと) の行為を告げるものです。図の中や近くに具体的な禁止内容 (左 図の場合は分解禁止)... - Page 3 警 告 スピードライ トについて 分解したり修理 ・ 改造をしないこと 感電したり、 異常動作をしてケガの原因となります。 分解禁止 落下などによって破損し、 内部が露出したときは、 露出部に手を触れないこと 撮 感電したり、 破損部でケガをする原因となります。 影 接触禁止 すぐに修理依頼を 電池を抜いて、 販売店または当社サービス機関 (-P 36)に修理を依頼してください。 の 前 熱くなる、 煙が出る、 こげ臭いなどの異常時は、 速やかに電池を取り出すこと に そのまま使用すると火災、 やけどの原因となります。 電池を取り出す際、 やけどに十分注意してください。電池を抜いて、 販売店または当社 電池を取る すぐに修理依頼を サービス機関 (-P 36)に修理を依頼してください。 水につけたり、...
- Page 4 スピードライトを人の目に近づけて発光しないこと 視力障害の原因となります。 発光禁止 特に乳幼児を撮影するときは1m以上離れてください。 発光窓を人体やものに密着させて発光させないこと やけどや発火の原因となります。 発光禁止 使用説明書に表示された電池を使用すること 正しい電池を使用しないと、 液もれ、 破裂、 発火の原因となります。 警告 マンガン乾電池、 アルカリ電池、 リチウム電池は非充電式ですので、 充電しないこと 液もれ、 破裂、 発火の原因となります。 禁止 電池からもれた液が目に入ったときはすぐにきれいな水で洗い、 医師の治療を受けること そのままにしておくと、 目に傷害を与える原因となります。 注意 電池からもれた液が皮膚や衣服に付いたときは、 すぐにきれいな水で洗うこと そのままにしておくと、 皮膚がかぶれたりする原因となります。 注意 注 意 スピードライ トについて ぬれた手でさわらないこと 感電の原因になることがあります。 感電注意...
- Page 5 製品は幼児の手の届かない所に置くこと なめて感電したり、 ケガの原因となることがあります。 保管注意 強い衝撃を与えないこと 内部が故障し、 破裂、 発火の原因になることがあります。 注意 シンナーやベンジンなどの有機溶剤を使ってふかないこと 撮 影 また、ナフタリン、しょうのうの入った場所に保管しないこと の 溶剤清掃禁止 プラスチックケースが割れて火災や感電の原因となることがあります。 前 に 保管するときには電池を外すこと 発火、 液もれの原因となることがあります。 電池を抜く 警 告 電池について 電池を火に入れたり、 加熱しないこと 液もれ、 発熱、 破裂の原因となります。 禁止 電池をショート、 分解しないこと 液もれ、 発熱、 破裂の原因となります。 分解禁止...
- Page 6 電池に表示された警告 ・ 注意を守ること 液もれ、 発熱、 破裂の原因となります。 警告 使用説明書に表示された電池を使用すること 液もれ、 発熱、 破裂の原因となります。 警告 電池は幼児の手の届かない所に置くこと 幼児の飲み込みの原因となります。万一飲み込んだ場合は直ちに医師にご相談ください。 保管注意 電池の 「+」 と 「−」 の向きをまちがえないようにすること 液もれ、 発熱、 破裂の原因となります。 警告 水につけたり、 濡らさないこと 液もれ、 発熱の原因となります。 水かけ禁止 充電式電池以外は充電しないこと 液もれ、発熱の原因となります。 禁止 電池を廃棄するときは、テープなどで接点部を絶縁すること 他の金属と接触すると、発熱、破裂、発火の原因となります。 警告 お住まいの自治体の規則に従って正しく廃棄してください。...
-
Page 7: はじめに
はじめに このたびはニコンスピードライ トSB-30をお買い上げいただきありがとうございます。 SB-30は、 TTL、 外部自動調光、 マニュアルの各モードによるスピードライ ト撮影に加え、 ワイヤレ スでの増灯撮影が可能な、 ガイ ドナンバー16 (照射角28mm、 ISO100・m、 20℃) の小型軽量、 撮 多機能スピードライ トです。 影 の 次のような用途に最適です。 前 ・ スピードライ トを内蔵していない一眼レフカメラのハンディなスピードライ トとして。 ( TTL、 外部自動調 に 光、 マニュアルの各モード撮影) ・デジタルカメラCOOLPIX(クールピクス) やスピードライトを内蔵する一眼レフカメラと組み合わせ、 増灯用スピードライ トとして。 ( ワイヤレス増灯撮影) ・下方バウンスによるカメラに取り付けたままの近接撮影、 内蔵赤外フィルタで他のスピードライ トの発光 を制御する赤外線リモートコマンダー撮影も手軽に行えます。... -
Page 8: ご確認ください
ご確認ください 本製品には保証書とカスタマ登録カードが添付されていますのでご確認ください。 ● ・保証書の詳細は 「アフターサービスと保証について」 ( +P.34) をご覧ください。 使用説明書の内容が破損などによって判読できなくなったときは、当社サービス機関 ● (+P.36) にて新しい使用説明書をお求めください (有料) 。 大切な撮影 (結婚式や海外旅行など) をするときには、 必ず試し撮りをして、 スピードライ ● トが正常に機能するかを事前に確認してください。 ・本製品の故障に起因する付随的損害 (撮影に要した諸費用及び利益喪失等に関する損害) についての 補償はご容赦願います。 本製品は、 当社製のカメラ及びアクセサリーに適合するように作られておりますので、 当 ● 社製品との組み合わせでご使用ください。 ・他社製品との組み合わせ使用により、 事故、 故障などが起こることもございます。... -
Page 9: Table Of Contents
目 次 撮影の前に COOLPIXカメラと組み合わせ、 遠くの 安全上のご注意 ............i 被写体まで撮影する はじめに..............1 ワイヤレス・スレーブ (補助灯) 撮影....20 ご確認ください ............2 内蔵スピードライトに連動させて、 より遠くまで撮るには ..22 撮 各部の名称..............4 離れた位置から補助灯の光を当てて撮影するには ..24 影 の セレクタダイヤルのセッ ト位置......5 壁の影を消したり、遠い背景を浮き立たせるには ..26 前 フラッシュヘッ ドの回転角度 .........5 赤外線リモートコマンダー撮影 ......27 に 電池の入れ方............6 コード接続での増灯撮影........27 電源のON/OFFとスタンバイ機能.......7 応用撮影 アクセサリーシューへの取り付け方法....9 近接撮影/ワイ ドパネル........28 カメラ別の接続方法と使用可能な... -
Page 10: 各部の名称
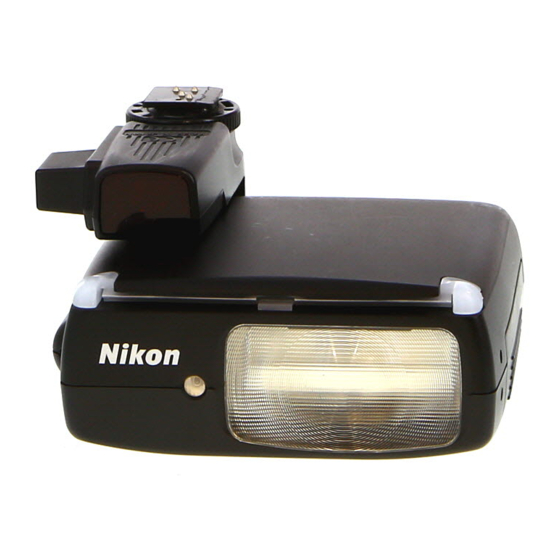
各部の名称 フラッシュヘッ ド 外部自動調光用受光窓 (-P.13) 赤外フィルタ ワイ ドパネル (-P.28) (-P.27) スタンバイ復帰 レディライ ト (-P.8) / (-P.7、 13) 取り付け脚 スレーブ発光禁止ボタン (-P.23) 電池ぶた ロックピン 露出補正スイ ッチ (-P.30) カメラ セレクタ 連動接点 電源スイ ッチ ダイヤル (-P.7) (-P.5) ワイヤレス ・ ■付属品 スレーブ センサー窓 ソフ トケースSS-30 ロックレバー... -
Page 11: セレクタダイヤルのセット位置
セレクタダイヤルのセット位置 フラッシュヘッ ドの回転角度 75° 75° :通常の撮影時 50° 50° :撮影距離が約0.4m以下 の場合 (-P.29) 撮 13° :格納時 影 13° の 前 に 1 TTLモード (-P.12、 14) 2 外部自動調光モード (-P.13、 16) 3 マニュアルモード (-P.18) 4 ワイヤレス・スレーブモード (補助灯) 注 意 フラッシュヘッ ドが13° の位置では、 アクセサ (-P.20) リーシューから引き抜かないこと。... -
Page 12: 電池の入れ方
電池の入れ方 1 電源スイ ッチをOFFにします。 2 電池ぶたを矢印の順に開けます。 3 +−表示の向きに電池を入れ、 電池ぶたを押さえながらスライ ドさせて閉じます。 ・3Vリチウム電池 (CR123AまたはDL123Aタイプ) を1本使用します。他の電池は使用できません。 ・交換の際は、 必ず電源スイ ッチをOFFにしてください。ONまたはSTBYのまま電池を交換すると、 誤って発光したり、 正常に電源がONにならない場合があります。このような場合は、 電源スイ ッチをいったんOFFにしてからON (または STBY) にセッ トしてください。 ( +P.7) 発光回数、 発光間隔と電池交換の目安 ・発光回数は、 新品電池を使用して約250回 (M1/1発光時) です。 ・M1/1発光後に次の発光が可能になるまでの時間は、 約4秒です (新品電池使用時) 。 ・電源ONや発光後、 レディライ ト点灯までの時間が30秒以上になったら、 電池を交換してください。... -
Page 13: 電源のOn/Offとスタンバイ機能
電源のON/OFFとスタンバイ機能 撮 影 の 前 1 電源スイ ッチをONまたはSTBYにセッ トします。 に ・電源スイ ッチをSTBYにセッ トすると、 スタンバイ機能が働きます。 ( +P.8) ・アクセサリーシューのないCOOLPIXカメラではSTBYは使用できません。必ずONにセッ トしてください。 2 レディライ トの点灯を確認します。 ・レディライ トが点灯すると、 SB-30は発光可能状態です。 3 使用しないときは、 電源スイ ッチをOFFにセッ トします。 ・SB-30を使用しないときは、 電源スイ ッチは必ずOFFにセッ トしてください。... - Page 14 スタンバイ機能 ・電源スイッチをSTBYにセッ トすると、 電池の無駄な消費を防ぐスタンバイ機能が働きま す (セレクタダイヤルがTTL、 外部自動調光、 マニュアルにセッ トされている場合) 。 ・SB-30およびカメラを操作しない状態が約40秒間続くと、 スタンバイ機能により自動的 に電源がOFFになります (スタンバイOFFの状態) 。 ・セレクタダイヤルがワイヤレス・スレーブにセッ トされている場合は、 スタンバイ機能は働 かず、 電源ONのままとなります。電池の消耗にご注意ください。 スタンバイ機能でOFFになった電源は、 以下の操作で電源ONになります。 ・スタンバイ復帰/スレーブ発光禁止ボタンを押す。 ・TTLモードでの撮影が可能なカメラに装着時は、 カメラのシャッターボタンを半押しする。...
-
Page 15: アクセサリーシューへの取り付け方法
アクセサリーシューへの取り付け方法 取り付け/取り外しの方法 1取り付け脚をアクセサリーシューに差し込み、 2ロックレバーをLOCK 位置まで回します。 撮 ・スピードライト外れ防止用のピン受け穴がないアクセサリーシューに 影 取り付けてご使用の場合は、SB-30がやや外れやすくなりますので、 の 前 ご注意ください。 に ・取り外すときは、 フラッシュヘッ ドを75° か50° にセッ トし、 ロックレバー を反時計回りに90° 回してロックを解除してから引き抜いてください。 スピードライト内蔵カメラに装着時のご注意 ・スピー ドライ ト内蔵カメラのアクセサリーシューにSB-30を装着した場合 は、 内蔵スピー ドライ トは収納したままにし てください。 ・内蔵スピー ドライ トを上げて使用すると、 内蔵スピー ドライ トまたはSB-30 のいずれか一方のみが発光しますが、 これは異常ではありません。... -
Page 16: カメラ別の接続方法と使用可能なセレクタダイヤル位置、 推奨発光モード
カメラ別の接続方法と使用可能なセレクタダイヤル位置、 推奨発光モード 銀塩フ ィ ルム式一眼レフカメラとの組み合わせ ◎:推奨発光モード × :使用不可 使用可能なセレクタダイヤル位置 カメラとの カメラの種類/機種名 接続方法 外部自動調光 マニュアル ワイヤレス (M) ワイヤレス (A) TTLモード可能カメラ ス ピ ◎ アクセサリ F5・F100・F90Xシリーズ・F90シリーズ・F4シリーズ・ ○ ○ − − ー シュー (+P.14) F-801s・F-801・F-601M・F-501・F-301・FM3A・FA・ ド ラ FE2・FG・F3シリーズ *1 イ ト TTLモード不可カメラ 非 ◎... - Page 17 デジタルカメラとの組み合わせ ◎:推奨発光モード × :使用不可 使用可能なセレクタダイヤル位置 カメラとの カメラの種類/機種名 接続方法 外部自動調光 マニュアル ワイヤレス (M) ワイヤレス (A) ◎ アクセサリ × ○ − − D1シリーズ *1 ・D100 シュー (+P.16) 撮 ◎ アクセサリ ○ ○ − − COOLPIX5000・5700 影 シュー (+P.14) の ◎ 前 ○ ○...
-
Page 18: ハンディなスピードライ トとして
一眼レフカメラに装着して撮影する ハンディなスピードライ トとして 自動調光撮影について 本機では、 TTLモードと外部自動調光モードの2つの自動調光撮影が行えます。 TTLモード撮影 TTLモード撮影が可能な一眼レフカメラとの組み合わせ時に可能です。カメ ラのシャッターを押した (SB-30が発光開始した) 瞬間、 被写体からの反射光 をカメラのレンズを通して測光し、 適正露出になるようにカメラがSB-30の 発光を停止させます。 SB-30でTTLモード撮影が行えるカメラは 「カメラ別の接続方法と使用可能 なセレクタダイヤル位置、 推奨発光モード」 ( +P.10) をご覧ください。 ご使用のカメラやレンズ等の組み合わせにより、 マルチBL調光、 TTL-BL調光、 簡易TTL-BL調光、 スタン ダードTTL調光などのTTLモード撮影が可能です。詳細はカメラの使用説明書をご覧ください。 ・本機はモニター発光機能がないため、 3D-マルチBL調光はできません。 ・SB-30にはD-TTLモード機能はありません。... - Page 19 外部自動調光モード撮影 デジタル一眼レフを含む、 すべての一眼レフカメラとの組み合わせ時に可能です。 カメラのシャッターを押した (SB-30が発光開始した) 瞬間、 SB-30が被写体から の反射光を外部自動調光用受光窓を通して測光し、 適正露出になるようにSB-30 が発光停止します。このため、 TTLモード撮影ができないカメラとの組み合わせで 自動調光撮影が行えます。 撮 SB-30で使用可能な絞り値は、 ISO100ではF2.8、 4、 5.6、 8、 ISO400では 影 方 F5.6、 8、 11、 16です。 法 自動調光撮影時の露出不足警告 TTLモードまたは外部自動調光モードでの撮影時に、 SB-30がフル発光して 露出不足の可能性がある場合は、 発光直後にレディライトが約1.5秒間点滅 します。撮影距離を短くするか、 カメラ側の絞り値を開放 (小さい数値) 側に セッ トするなどして、 撮影し直してください。...
-
Page 20: Ttlモード撮影の手順
TTLモード撮影の手順 1 SB-30のセレクタダイヤルをDにセッ トします。 2 カメラの露出モード、測光モード、 シンクロモード、 シャッタースピードなどをセッ トします。 ・カメラ側の設定が不適切でTTLモード撮影ができない場合は、 カメラファインダー内のレディライ トが点滅して警告を 表示します。設定を再確認してください。 3 絞り値と調光範囲を確認します。 ・ 「絞り値と撮影可能範囲」 ( -P.15) を参照して、 主要被写体が調光範囲にあることを確認してください。 ・カメラの露出モードが “A” 絞り優先オート (または “M” マニュアル) 時は、 表から求めた絞り値の中から適当な絞り値 をカメラにセッ トします。 4 SB-30のレディライトの点灯を確認して、撮影します。 ・発光直後にファインダー内レディライ トが点滅した場合は、 ( -P.13)... - Page 21 絞り値と撮影可能範囲 (m) ISO感度 撮影可能範囲 (m) ワイ ドパネルなし ワイ ドパネル使用時 − 1∼8m 0.7∼5m T 0.7∼5.6m 0.5∼3.5m モ 外 T ー 部 L 0.6∼4m 0.3∼2.5m ド 自 モ 撮 動 0.6∼2.8m 0.3∼1.7m ー 影 調 撮 ド 0.6∼2m 0.3∼1.2m 光 撮 影 0.6∼1.4m 0.3∼0.8m 影...
-
Page 22: 外部自動調光モード撮影の手順
外部自動調光モード撮影の手順 1 カメラの露出モード、 シンクロモード、 シャッタースピードなどをセッ トします。 ・FM3A、 NewFM2、 FEなどのカメラでシャッタースピードの設定が間違っている場合は、 カメラファインダー内のレ ディライ トが点滅して警告します。設定を再確認してください。 2「絞り値と撮影可能範囲」 (+P.15) を参照して主要被写体が撮影可能範囲内になる絞り値を求め、 その値にSB-30のセレクタダイヤルをセッ トします。 ・使用可能な絞り値は、 「 絞り値と撮影可能範囲」 ( -P.15) をご覧ください。 3 カメラ (またはレンズ) にSB-30と同じ絞り値をセッ トします。 ・カメラ (レンズ) の絞り値はSB-30にセッ トした絞り値と同じにして適正露出が得られます。 ・ズーミングする (焦点距離を変える) と絞り値が変わるレンズをご使用の場合には、 絞り値をセッ トする際に、 「ズーミ ングによる絞りの変化」 ( -P.17) を参照してください。 4 SB-30のレディライトの点灯を確認して、撮影します。... - Page 23 ズーミングによる絞りの変化 ・ズーミングする (焦点距離を変える) と絞り値が変わるレンズをご使用の場合には、 絞り 値をセッ トする際に、 以下の点にご注意ください。 ・詳細は、 ご使用のカメラ、 レンズの使用説明書をご覧ください。 撮 影 カメラの表示パネルやファインダー (液晶表示) で絞り値を確認する場合 方 ・レンズの絞りリングを最小絞り (最も大きい数値) に固定し、 ズーミングして焦点距離を 法 決めた後に、 カメラの表示パネルまたはファインダーに表示される絞り値がカメラにセ ッ トされた絞り値となります。 レンズの絞りリングで絞り値を確認する場合 ・ズーミングして焦点距離を決めた後に、 以下の要領で読み取った絞り値が、 セッ トされた 絞り値です。 広角側の焦点距離での撮影時:緑色 (または線) の絞り指標の絞り値がカメラ側 (レンズ) の設定値です。 望遠側の焦点距離での撮影時:黄色 (または点) の絞り指標の絞り値がカメラ側 (レンズ) の設定値です。 中間の焦点距離での撮影時:2つの絞り指標の中間の絞り値がカメラ側...
-
Page 24: マニュアルモード撮影について
マニュアルモード撮影について SB-30はM1/1、 M1/8、 M1/32に発光量 (ガイ ドナンバー) を設定できます。 ガイ ドナンバーと撮影距 離、 レンズの絞り値を組み合わせて適正露出になるように撮影します。 カメラの露出モードを “A” 絞り優先オートまたは “M” マニュアル以外にセッ トするとシャッターがきれないカメラがありま ・ すのでご注意ください。 ガイ ドナンバー (m) とISO感度 ISO感度 1600 M1/1 発 光 量 M1/8 M1/32 M1/1 発 光 量 M1/8 (ワイ ドパネル使用時) M1/32 ・下記の計算式から、 撮影距離に応じて適正な露出が得られる絞り値とガイ ドナンバーを求めることができます。 絞り値... - Page 25 マニュアルモード撮影の手順 撮 影 1 カメラの露出モード、 シンクロモード、 シャッタースピードなどをセッ トします。 方 法 2 主要被写体までの距離に見合う絞り値と発光量を求めます。 ・SB-30のガイ ドナンバーは、 セレクタダイヤルの設定とワイ ドパネルの有無によって、 表 (-P.18) の通り変化します。 3 絞り値をカメラ (またはレンズ) に、 発光量をSB-30にセッ トします。 4 レディライ トの点灯を確認して、 撮影します。 ・マニュアルモードでは、 撮影後の露出不足警告は行われません。...
-
Page 26: Coolpixカメラと組み合わせ、 遠くの被写体まで撮影する ワイヤレス・スレーブ (補助灯) 撮影
COOLPIXカメラと組み合わせ、 遠くの被写体まで撮影する ワイヤレス・スレーブ (補助灯) 撮影 ここでは、 SB-30を、 カメラ内蔵スピードライ トやカメラに装着したスピードライ ト (主灯) の発光に同期 して発光させる補助灯として使用するワイヤレス・スレーブ撮影について説明します。SB-30を補助灯と して使用すると、 以下のようなワイヤレス増灯撮影が行えます。 ・ワイヤレス・スレーブにセッ トすると、 スタンバイ機能は働きません。電池の消耗にご注意ください。 ( -P.8) COOLPIXカメラなどのカメラ内蔵スピードライ トと組み合わせて、 より遠くまで撮ることができます。 (-P.22) SB-30をカメラの横に置き、 内蔵スピードライ トの発光に連動させてワイヤレス・スレーブで発光させると、 内蔵 スピードライ トだけでは届かない遠い被写体まで撮影することができます。 カメラから離れた位置から補助灯の光を当てて撮影できます。 (-P.24) カメラから離れた位置にSB-30を設置して増灯撮影を行うと、 立体感を演出したり、 画面全体に光が回った写真 を撮ることができます。 強い光を当てて壁の影を消したり、 遠い背景を浮き立たせたりすることができます。 (-P.26) SB-30をM1/1発光させることにより、 強い光を当てて影を消したり、 遠い背景を浮き立たせたりすることができます。 赤外線で他のスピードライ... - Page 27 2つのワイヤレス・スレーブ撮影方法 SB-30はセレクタダイヤルにより、 2つのワイヤレス・スレーブ撮影が可能です。 ワイヤレス・スレーブA (オート) : ・主灯の発光開始と発光停止に連動して、 SB-30も発光開始と発光停止をワイヤレスで 行います。 ・主灯の発光開始と発光停止を感知できる距離は、 直線で約5m以内です。 ワイヤレス・スレーブM (マニュアル) : 撮 影 ・主灯の発光開始に連動して、 SB-30がワイヤレスでM1/1発光します。 方 ・主灯の発光を感知できる距離は、 直線で約40m以内です。 法 ワイヤレス・スレーブ撮影時のご注意 ・補助灯のSB-30は、 主灯の光がワイヤレス・スレーブセンサー窓に入るように配置します。特に、 手持ちで撮影する場合、 主灯の光が確実にワイヤレス・スレーブセンサー窓に入るように注意してください。 ・ワイヤレス・スレーブ撮影では、 主灯がモニター発光を行うと適正な露出が得られません。以下の方法で、 モニター発光 を止めてください。COOLPIXカメラが行う連続的な2回発光は問題ありません。 F80シリーズ、 F70Dカメラ カメラの露出モードをMマニュアルにセッ トする。 F5、 F100、 F90xシリーズ、 カメラに取り付けたスピードライ トがモニター発光しないようにセッ トする。 F90シリーズカメラ...
- Page 28 COOLPIXカメラなどのカメラ内蔵スピードライ トと組み合わせて、 より遠くまで撮るには SB-30をカメラの横に置き、 内蔵スピードライトの発 光に連動させてワイヤレス・スレーブ撮影を行わせる と、 内蔵スピードライトだけでは届かない遠い被写体 まで撮影することができます。セレクタダイヤルをワ イヤレス・スレーブA (オート) にセッ トすると、 SB-30 主要被写体 は自動調光撮影を行います。 ・C O O L P I X 9 0 0 や 、内 蔵 ス ピ ード ラ イト が 2 回 発 光 す る COOLPIX2500、...
- Page 29 COOLPIXカメラでの撮影の手順 1 カメラを通常のスピードライト撮影と同様にセッ トします。 2 補助灯のSB-30をワイヤレス・スレーブA (オート) にセッ トします。 ・ワイヤレス・スレーブ撮影では、 SB-30の露出補正スイッチによる補正は行えません。カメラ側で補正してください。 3 絞りや撮影距離を確認して撮影します。 ・周囲のスピードライ トの発光に応答して補助灯のSB-30が発光するのを防ぐには、 スタンバイ復帰/スレーブ発光禁 撮 影 止ボタンを押してください。ボタンを押している間、 SB-30はスレーブ発光しません。 方 法 銀塩フィルム式一眼レフカメラでの撮影の手順 1 主灯 (カメラ内蔵スピードライ トまたはカメラに装着したスピードライ ト) が発光するようにセッ トします。 ・必ず主灯のモニター発光を止めてください。 ( -P.21) 2 補助灯のSB-30をワイヤレス・スレーブA (オート) にセッ トします。 ・ワイヤレス・スレーブ撮影では、 SB-30の露出補正スイッチによる補正は行えません。カメラ側で補正してください。 3 絞りや撮影距離を確認して撮影します。...
- Page 30 カメラから離れた位置から補助灯の光を当てて撮影するには カメラから離れた位置にSB-30などの補助灯を設置 して増灯撮影を行うと、 立体感を演出したり、 画面全体 に光が回った写真を撮ることができます。SB-30をワ イヤレス・スレーブ A (オート) にセッ トすると、 ワイヤ レスでTTLモードや外部自動調光モードを使った増灯 撮影が行えます。 ・C O O L P I X 9 0 0 や 、内 蔵 ス ピ ード ラ イト が 2 回 発 光 す る COOLPIX2500、 700系、 800系でも使用できます。 主要被写体...
- Page 31 撮影の手順 1 カメラを通常のスピードライト撮影と同様にセッ トします。 2 補助灯のSB-30をワイヤレス・スレーブ A (オート) にセッ トします。 ・ワイヤレス・スレーブ撮影では、 SB-30の露出補正スイッチによる補正は行えません。カメラ側で補正してください。 3 主灯のスピードライトの発光モードをTTLにセッ トします。 撮 ・必ず、 主灯のモニター発光を止めてください。 ( -P.21) 影 ・主灯のモニター発光がキャンセルできない場合は、 TTL以外のモードにセッ トします。 方 法 ・D-TTLモードは使用できません。デジタル一眼レフカメラ使用時は外部自動調光または絞り連動自動調光モードにセ ッ トします。 4 絞りや撮影距離を確認して撮影します。...
- Page 32 強い光を当てて壁の影を消したり、 遠い背景を浮き立たせたりするには SB-30をワイヤレス・スレーブ M (マニュアル) にセッ トすると、 M1/1発光するため、 強い光を当てて影を 消したり、 遠い背景を浮き立たせたりすることができ 壁 ます。 ・主灯の発光を感知できる距離は、 直線で約40m以内です。 影 撮影の手順 主要被写体 1 補助灯のSB-30をワイヤレス・スレーブ M (マニュ 補助灯: アル) にセッ トします。 SB-30 2 補助灯が照明する被写体までの距離とカメラ側 (レ ンズ) の絞り値で露出を決めて撮影します。 ・ 「マニュアルモー ド撮影について」 ( -P.18)をご覧ください。 カメラ :すべての一眼レフカメラ ・壁にできる影を消すような場合は、 影ができる壁がSB- 主灯:内蔵スピードライトまたはカメラ...
-
Page 33: 赤外線リモートコマンダー撮影
赤外線リモートコマンダー撮影 カメラに取り付けたSB-30 (主灯) の内蔵赤外 フィルタをセッ トすると、 離れた場所のワイヤ レス補助灯の発光を制御する赤外線リモートコ マンダー撮影が可能です。この場合、 赤外線は 撮 撮影に影響しないため、 正面からのスピードラ 補助灯2 影 イ ト光がない、 補助灯だけのライティングとなります。 方 補助灯1 : 主要被写体 法 ・TTLモード撮影を行ってください。外部自動調光撮影はおす SB-30 赤外光 すめしません。 赤外光 赤外光 ・赤外フィルタはワイ ドパネルと一緒にセッ トされます。 カメラ:一 眼 レ フ カ メ ラ、 ・赤外フィルタの両端から光が漏れますが、 撮影には影響ありません。 デジタルカメラ... -
Page 34: 近接撮影/ワイ ドパネル
近接撮影 (約0.3∼1m) /ワイ ドパネル SB-30をカメラのアクセサリーシューに固定したまま、 近接撮影が行えます。 ・近接撮影を行う場合には必ずワイ ドパネルをご使用ください。 ・使用レンズの口径が大きい場合や、 レンズフードを使用して近接撮影すると、 レンズ先端の影が写り込 むことがありますのでご注意ください。 1 SB-30のセレクタダイヤルをDにセッ トします。 ・TTLモー ドを使用できないカメラとの組み合わせ時は、 外部自動調光またはマニュアルモー ドにセッ トしてください。 2 カメラの露出モード、 測光モード、 シンクロモード、 シャッタースピードなどをセッ トします。 ・カメラ側の設定が不適切でTTLモード撮影ができない場合は、 カメラファインダー内のレディライトが点滅して警告 を表示します。設定を再確認してください。 3 ワイドパネルを引き上げて、 セッ トします。 ・赤外フィルタ (黒色) が前にかからないようにご注意ください。... - Page 35 4 撮影距離が約0.4m以下の場合、 フラッシュヘッ ドを下向きにセッ トします。 ・撮影距離が約0.4m 以下の場合は、 SB-30を50° 位置にセッ トすると、 被写体の下側にもスピードライ ト光が充分に 回るようになります。 5 「絞り値と撮影可能範囲」 ( -P.15) の 「ワイ ドパネル使用時」 の表から絞り値を求め、 カメラ側にセッ ト します。 ・外部自動調光モード撮影時は、 求めた絞り値をSB-30のセレクタダイヤルにもセッ トします。 応 6 レディライトの点灯を確認して、撮影します。 用 撮 ・発光直後にファインダー内レディライ トが点滅した場合は (-P.13) 影 ワイドパネル ・ワイ ドパネルは、 近接撮影時以外にも使用できます。 ・SB-30の照射角度は、...
-
Page 36: 露出補正
露出補正 セレクタダイヤルが外部自動調光あるいは、 M1/32、 M1/8のとき、 露出補正スイッチにより発光量をコ ントロールすることができます。 主要被写体の明るさを、より明るくしたいときは+1/2へ、明るさを抑えたいときは−1/2へセットし ます。 COOLPIXカメラでは、モニタ画面で画像を確認しながら光量を調節して撮影し直すことができるので 便利です。 露出補正スイッチ +1/2:+1/2段分、 発光量が増加 (被写体が明るく写ります) +1/0:補正なし。補正しない場合は、 スイッチをゼロにセッ トしてください。 −1/2:−1/2段分、 発光量が減少 (被写体が暗く写ります) ・セレクタダイヤルがTTL、 M1/1、 ワイヤレス・スレーブモードのときは、 露出補正スイッチでの補正はできません。... -
Page 37: 別売アクセサリー
別売アクセサリー SK-9 ブラケッ トセッ ト COOLPIX700系、 800系、 900系カメラや一眼レフカメラの横にSB- 30を並べて設置するためのブラケッ トセッ トです。ブラケッ トSK-9、 TTL増灯アダプターAS-18、 COOLPIX900系 (COOLPIX900を除く) カメラとAS-18を接続するシンクロコードSC-25で構成されています。 資 料 増灯ブラケッ ト SK-E900/増灯アダプタ AS-E900 編 デジタルカメラ COOLPIX900系にSK-E900を装着し、 AS-E900で COOLPIXの増灯ターミナルと接続すると、 SB-30を補助灯として使用 できます。 SK-E900はAS-E900を1個、 標準装備しています。... -
Page 38: 故障かな?と思ったら
故障かな?と思ったら 修理をご依頼になる前に、 下記をご確認ください。 故障かな? ご確認ください 対策/参照項目 電源スイッチがONまたはSTBYの状態で電池を交換しませんでしたか 「電池の入れ方」 ( -P.6) レディライ トが点灯しない 電池の+−の方向が間違っていませんか 「電池の入れ方 (-P.6) 電池が消耗していませんか 「電池の入れ方 (-P.6) 「電源のON/OFFとスタンバイ機能」 ( -P.7) スタンバイ機能で、 電源が自動的にOFFになっていませんか 電池の電極またはSB-30の接触部分が汚れていませんか 乾いた布で汚れを拭き取ってください。 「絞り値と撮影可能範囲」 ( -P.15) 撮影直後、 レディライ トが 撮影距離が調光範囲外ではありませんか 約1.5秒間点滅する レディライ トが点灯するまで 電池が消耗していませんか 「電池の入れ方 (-P.6) の時間が長い 連続発光によって、 電池が発熱していませんか 熱が下がるまで、... -
Page 39: 取扱い上のご注意/電池について
取扱い上のご注意/電池について ■お手入れの方法 ・テレビ塔や高圧鉄塔に近い場所では、 強い磁気や電波が発生して おり、 誤作動することがあります。 ・ブロアーでゴミやホコリを軽く吹き払った後、 柔らかい清潔な布 ・SB-30をワイヤレス・スレーブモードに設定時は、 ちらつきのあ で軽く拭いてください。特に、 海辺で使った後は、 真水を数滴たら る蛍光灯の近くなどでは誤発光することがあります。 した柔らかい清潔な布で塩分を拭き取ってから、 乾いた布で軽く 拭いて乾かしてください。 ■新品の3Vリチウム電池 (CR123AまたはDL123Aタ ■保管の方法 イプ) を1本使用してください。 資 ・大切な撮影に際しては、 早めに電池を交換するか、 予備の電池を ・カビや湿気による故障を防ぐため、 風通しの良い乾燥したところ 料 に保管してください。 携行してください。 編 ・ナフタリンや樟脳、 磁気を発生する器具の近くには、 置かないで ・電池の両極が汗や油などで汚れていると、 接触不良の原因となり ます。乾いた布でよく拭いてから使用してください。 ください。 ・極度に高温になるところ (夏期の車内やストーブなどの近く) には、 ■低温時には新しい電池を使用してください。... -
Page 40: アフターサービスと保証について
アフターサービスと保証について ■この製品についてのお問い合わせは 製品の保証について ご意見、 ご質問はニコンカスタマーサポートセンターでお受け 1 この製品には 「保証書」 がついていますのでご確認ください。 しています。 (+P.36) 2 保証書はお買い上げの際、 ご購入店からお客様に直接お渡し ■修理を依頼される場合は することになっています。 ご購入店、または当社サービス機関にご依頼ください。 「ご愛用者氏名」 および 「ご住所」 「 購入年月日」 「 購入店名」 が ・ ご転居、 ご贈答品などでご購入店に修理を依頼することができ すべて記載された保証書をお受け取りになり、 内容をよくお ない場合は、 最寄りの販売店、 または当社サービス機関にご相 読みのうえ、 大切に保管してください。 談ください。 (+P.36) 3 保証規定による保証修理は、 ご購入日から1年間となってお ■補修用性能部品について... - Page 41 仕 様 型 式 直列制御方式TTL自動調光スピードライト 使用電池 3Vリチウム電池 (CR123AまたはDL123Aタイプ) 1本 ガイドナンバー 16:照射角28mm (ワイドパネルなし) (ISO100・m) 10:照射角17mm (ワイドパネル使用時) 照射角 28mmのレンズの画角をカバー (ワイドパネルなし) 17mmのレンズの画角をカバー (ワイドパネル使用時) 資 電源スイッチ OFF/ON/STBYの切換え式 料 ON/STBYポジションにて電源ON 編 STBYポジションで無操作状態が約40秒間続くと、 自動的に電源OFF 発光間隔/発光回数 発光間隔:約4秒 (M1/1発光、 新品電池使用時) 発光回数:約250回 (M1/1発光、 新品電池使用時) セレクタダイヤル TTL、 外部自動調光 (4段階) 、 マニュアル (3段階) 、 ワイヤレス (A、 M) の切換え式 レディライト...
-
Page 42: 当社サービス機関
■アフターサービスのご案内 ■使い方に関するお問い合わせのご案内 <ニコンカスタマーサポートセンター> 140-0015 東京都品川区西大井1-4-25 (コア・スターレ西大井第一ビル2階) 0570-02-8000 市内通話料金でご利用いただけます。 営業時間 9:30∼18:00 (土・日曜日・祝日を除く毎日) このほか年末年始、 夏期休暇等、 休業する場合があります。 携帯電話、 PHS等をご使用の場合は、 03-5977-7033におかけください。 FAXでのご相談は、 03-5977-7499におかけください。... -
Page 43: Preparation Foreword
• The SB-30 is suitable as a slave flash unit in wireless or wired multiple flash operation when used in combination with the COOLPIX or Nikon SLRs cameras having a built-in Speedlight. • Close-up flash photography using with the flash head tilted down is possible without detaching the Speedlight from the camera. -
Page 44: Tips On Using The Speedlight
N4004, and N4004s are sold exclusively in the U.S.A. • The Nikon N80-Series and N65-Series are sold exclusively in the U.S.A. and Central and South America. • The Nikon N2020 and N2000 are sold exclusively in the U.S.A and Canada. - Page 45 Contents Preparation Foreword ............37 Shooting a subject when the SB-30 is placed away from the camera..........60 Tips on using the Speedlight ......38 Softening the shadows cast on the wall by the Speedlight parts..........40 master flash unit or lightening the background..62 Mode selector dial ..........41 Multiple flash operation using the SB-30 as an Flash head tilting angle........41...
-
Page 46: Speedlight Parts
Speedlight parts 1 Flash head 8 Battery chamber lid 14 Standby resume button (p. 44)/Slave 2 Infrared filter (p. 63) 9 Ready-light (pp. 43, 49) flash firing cancel button (p. 59) 3 Mounting foot 10 Exposure compensation 15 Mounting foot lock lever (p. 45) 4 Mount pin switch (p. -
Page 47: Mode Selector Dial
Mode selector dial Flash head tilting angle 75° 75°: for shooting normal 50° subjects 50°: for shooting subjects closer than 0.4m (1.3 ft.) 13° (p. 65) 13°: when not in use. 1 TTL auto flash mode (pp. 48, 50) 2 Non-TTL auto flash mode (pp. 49, 52) 3 Manual flash mode (p. -
Page 48: Installing The Battery
Installing the battery 1 Set the SB-30’s power switch to the OFF position. 2 Open the battery chamber lid as indicated by the arrows. 3 Install the battery following the + and – marks as shown. Then close the battery chamber lid by sliding it into place while pressing down. -
Page 49: Turning The Power On/Off And The Standby Function
Turning the power ON/OFF and the Standby function 1 Set the SB-30’s power switch to the ON or STBY position. • When set to the STBY position the Standby function is activated. (p. 44) • The Standby function does not work with COOLPIX digital cameras having no hot-shoe contacts. In this case, set the SB-30 to the ON position. - Page 50 Conserving battery power using the Standby function • If the SB-30’s power switch is set to the STBY position, the Standby function is activated only when the Mode selector dial is set to either TTL auto, Non-TTL auto, or Manual flash mode.
-
Page 51: Attachment To The Accessory Shoe
Attachment to the accessory shoe Attaching and detaching the Speedlight Slide the SB-30’s mounting foot 1 into the camera’s accessory shoe, then turn the lock lever 2 in the direction of the arrow to lock the unit. • When the SB-30 is attached to an accessory shoe not equipped with a mount pin hole to prevent accidental detachment, take care that the SB-30 does not fall off. -
Page 52: Usable Cameras And Available Flash Modes
Usable cameras and available flash modes Available flash modes with film-based SLRs cameras : Recommended flash mode : Usable flash mode ×: Not usable −: Not applicable ◎ ○ Mode selector dial settings Connection Camera type and model to the camera TTL auto Non-TTL auto Manual... - Page 53 Available flash modes with digital cameras : Recommended flash mode : Usable flash mode ×: Not usable −: Not applicable ◎ ○ Mode selector dial settings Connection Camera type and model to the camera TTL auto Non-TTL auto Manual Wireless (M) Wireless (A) ◎...
-
Page 54: Using The Sb-30 With Slrs Cameras As A Handy Speedlight Auto Flash Modes
Using the SB-30 with SLRs cameras As a handy Speedlight Auto flash modes Two auto flash modes are available with the SB-30: TTL auto flash and Non-TTL auto flash TTL auto flash mode This mode is possible with SLRs cameras compatible with TTL auto flash. At the instant the shutter is released and the SB-30 starts firing, the camera’s built-in TTL auto flash sensor measures the flash illumination through-the-lens that is reflected back from the subject and adjusts the SB-30’s flash output,... -
Page 55: Non-Ttl Auto Flash Mode
Non-TTL auto flash mode This mode is possible with all Nikon SLRs cameras including Digital SLRs. At the instant the shutter is released and the SB-30 starts firing, the SB-30’s built-in light sensor for Non-TTL auto flash measures the flash illumination that is reflected back from the subject, automatically controlling the SB-30’s flash output to provide the correct exposure. - Page 56 Taking flash pictures in the TTL auto flash mode 1 Set the SB-30’s Mode selector dial to D. 2 Set the camera’s exposure mode, metering system, sync mode, shutter speed, etc. • The ready-light inside the camera’s viewfinder blinks to warn you that the setting on the camera is not correct and TTL auto flash is not possible.
- Page 57 Determining the aperture and flash shooting distance range (m/ft.) ISO sensitivity Flash shooting distance range (m/ft.) No wide-flash adapter in place With wide-flash adapter in place − f/1.4 f/2.8 f/5.6 1–8/3.3–26 0.7–5/2.3–16 f/1.4 f/2.8 f/5.6 0.7–5.6/2.3–18 0.5–3.5/1.6–11 f/2.8 f/5.6 f/11 0.6–4/2–13 0.3–2.5/1–8.2 f/2.8...
- Page 58 Taking flash pictures in the Non-TTL auto flash mode 1 Set the camera’s exposure mode, sync mode, shutter speed, etc. • The ready-light inside the camera’s viewfinder blinks to warn you that the shutter speed is not correctly set with cameras FM3A, New FM2, and FE. In this case, make sure the camera settings are correct. 2 Determine the correct aperture to match the shooting distance range by referring to the table “Determining the aperture and flash shooting distance range”...
- Page 59 Variable apertures after zooming in or out • With zoom lenses having a variable aperture, take note of the following before setting the aperture on the SB-30. • For details, refer to your camera and lens instruction manuals. Reading the aperture on the camera’s LCD panel or in the viewfinder •...
-
Page 60: Manual Flash Mode
Manual flash mode The SB-30’s flash output level can be set manually at M1/1, M1/8, or M1/32. In the Manual mode, you must determine the correct exposure by calculation using a combination of the guide number, shooting distance, and lens aperture. •... - Page 61 Taking flash pictures in the Manual flash mode 1 Set the camera’s exposure mode, sync mode, shutter speed, etc. 2 Determine the aperture and flash output level to match the flash shooting distance. • The guide number varies as shown in the guide number table on page 54, depending on the flash output level with and without the wide-flash adapter in place.
-
Page 62: Illuminating A Distant Subject Using The
Illuminating a distant subject using the SB-30 and cameras such as the COOLPIX Wireless slave flash shooting In this section, the SB-30 is used as a slave flash unit that starts and stops firing in sync with the master Speedlight mounted on the camera or the camera’s built-in Speedlight. With the SB-30, the following types of wireless slave flash shooting can be performed. - Page 63 Two methods of wireless slave flash shooting Wireless slave flash can be performed in two ways by setting the Mode selector dial: (1) Auto wireless slave flash (A) mode: • The SB-30 starts and stops firing in sync with the master Speedlight. •...
-
Page 64: Shooting A Distant Subject Using The Sb-30 In Conjunction With Cameras Such As The Coolpix That Have A Built-In Speedlight
Shooting a distant subject using the SB-30 in conjunction with cameras such as the COOLPIX that have a built-in Speedlight By placing the camera and SB-30 side-by-side to fire the SB-30 in sync with the built-in Speedlight, you can illuminate a distant subject, creating pictures not possible when using the built-in Speedlight alone. - Page 65 Taking flash pictures with the COOLPIX 1 Make the necessary settings on the camera as with a normal Speedlight. 2 Set the SB-30’s Mode selector dial to Wireless slave flash (A). • In wireless slave flash shooting, exposure compensation using the SB-30’s Exposure compensation switch is not possible.
-
Page 66: Shooting A Subject When The Sb-30 Is Placed Away From The Camera
Wireless Slave Flash Controller SU-4, is usable. • In the wireless slave flash (A) mode, the maximum shooting distance of the SB-30’s light sensor is approx. Camera: All Nikon SLRs and Digital cameras. 5m (16 ft.). Master flash unit: Built-in Speedlight or Speedlight mounted on the camera •... - Page 67 Taking flash pictures 1 Make the necessary settings on the camera as with a normal Speedlight. 2 Set the SB-30’s Mode selector dial to Wireless slave flash (A). • In wireless slave flash shooting, exposure compensation using the SB-30’s Exposure compensation switch is not possible.
-
Page 68: Softening The Shadows Cast On The Wall By The Master Flash Unit Or Lightening The Background
Softening the shadows cast on the wall by the master flash unit or lightening the background Set the SB-30’s Mode selector dial to Wireless slave flash (M), and the Speedlight will fire at M1/1 output, allowing you to eliminate shadows or lighten the back- ground for creating more natural-looking pictures. -
Page 69: Multiple Flash Operation Using The Sb-30 As An Infrared Remote Commander
Multiple flash operation using the SB-30 as an infrared remote commander With the built-in infrared filter in place, you can use the SB-30 as an infrared remote commander to perform wireless multiple flash, using slave flash units only to illuminate the subject without the use of a master flash unit. -
Page 70: Close-Up Flash Operation From Approx. 0.3 To 1M
Close-up flash operation from approx. 0.3 to 1m (1 to 3.3 ft.) with the built-in wide-flash adapter With the SB-30 attached to the camera’s accessory shoe, close-up flash shooting can be performed. • Be sure to use the built-in wide-flash adapter when taking close-up flash photographs. •... - Page 71 4 When taking close-ups where the subject is less than approx. 0.4m (1.3 ft.), tilt the flash head down. • Tilt the flash head down to 50° when taking a subject closer than 0.4m (1.3 ft.) to illuminate the subject sufficiently.
-
Page 72: Exposure Compensation
Exposure compensation Adjusting the SB-30’s flash output is possible by using the Exposure compensation switch when the Mode selector dial is set to Non-TTL auto, M1/32, or M1/8. Set the Exposure compensation switch to +1/2 position to make the main subject brighter, or to –1/2 to make the subject darker. -
Page 73: Optional Accessories
COOLPIX 900 to the AS-18. Multi-Flash Bracket Unit SK-E900/Multi-Flash Adapter AS-E900 The SB-30 can be used as a slave flash unit with Nikon COOLPIX 900 series cameras by attaching the COOLPIX to Multi-Flash Bracket Unit SK-E900 and connecting the SB-30 to the multi-flash terminal of the COOLPIX using the Multi-Flash Adapter AS-E900. -
Page 74: Troubleshooting
Troubleshooting Use the following chart to determine the cause of the problem before you take your Speedlight to a Nikon service center for repair. Problem Possible cause Reference/remedy The ready-light does The battery is replaced while the power switch is set Installing the battery (p. -
Page 75: Tips On Speedlight Care And Notes On Batteries
Tips on Speedlight care and Notes on batteries Cleaning inside for a while, then expose the SB-30 gradually to the outside temperature. • Use a blower brush to remove dirt and dust from the • Avoid exposing the SB-30 to strong magnetism or radio SB-30 and clean it with a soft, clean cloth. -
Page 76: Specifications
Specifications Electronic construction Mode selector dial Automatic Insulated Gate Bipolar Transistor (IGBT) and Four positions provided: TTL auto flash, Non-TTL auto series circuitry flash (4 steps), Manual flash (3 steps), Wireless slave flash (A or M) Battery Ready-light One 3V lithium battery (CR123A or DL123A) Lights up when SB-30 is recycled and ready to fire. - Page 77 中國語 前言 多謝閣下購買這一具尼康閃光燈SB-30- 這一具SB-30是小巧﹑輕盈﹑以及多功能的閃光燈﹐閃光指數為GN 16/52(於28mm涵蓋角度﹐ ISO 100﹐米/英呎﹐20℃/68℉)-它擁有多種閃光模式﹐包括TTL自動閃光﹐非TTL自動閃光﹑ 以及手動閃光-此外﹐它亦可以用作無線多重閃光操作- SB-30的主要特點 ‧ 這一具SB-30是十分有用的隨身閃光燈﹐當您使用沒有內置閃光燈的尼康單鏡反光相機時﹐它可以隨時 為您提供TTL自動﹑非TTL自動﹐以及手動閃光- ‧ 當配合有內置閃光燈的COOLPIX或尼康單鏡反光相機時﹐SB-30可以用作從屬閃光燈作無線或連線的多 重閃光操作之用- ‧ 當要進行近距閃光攝影時﹐它的閃光燈頭可以向下俯低而不需要把閃光燈由相機上拆出-這一具SB-30 預 亦可以在無線多重閃光操作中用作紅外線遙控的控制器﹐用以控制其他從屬閃光燈作閃光- 備 要盡情發揮您的閃光燈﹐請在使用前先詳細閱讀您的相機的使用說明書- ‧ 由於SB-30的TTL閃光操作與SB-22s的是相同的﹐因此﹐假如您的相機使用說明書的閃光攝影部分中並沒 有列出SB-30﹐請參閱SB-22s的部分- ‧ (第XX頁)顯示要參考的頁面-...
-
Page 78: 使用本閃光燈的提示
使用本閃光燈的提示 ‧ 在拍攝重要的場合前﹐例如婚禮或畢業禮﹐請先進行試拍- ‧ 這一具尼康閃光燈SB-30與尼康相機/配件及鏡頭一併使用時﹐可以達到最佳的效能-使用其他生產商製 造的相機/配件或不能達到尼康的規格標準﹐而使用不適配的相機/配件更可能會損壞SB-30的零件-當配 合非尼康品牌的產品使用時﹐尼康便不能保證SB-30的效能- 注意 ‧ 尼康N90s﹑N90﹑N70﹑N60﹑N55﹑N50﹑N8008﹑N8008s﹑PRONEA 6i﹑N6006﹑N6000﹑N5005﹑N4004﹑ 及N4004s是只在美國出售的型號- ‧ 尼康N80系列及N65系列只在美國﹑中美及南美出售- ‧ 尼康N2020及N2000只在美國及加拿大出售-... - Page 79 目錄 預備 前言 ................71 使用SB-30與有內置閃光燈的相機例如 使用本閃光燈的提示 ..........72 COOLPIX一起拍攝遠距的主體 ......92 閃光燈各部分名稱............74 以與相機分開的SB-30拍攝主體 ......94 模式選擇盤 ..............75 利用主體閃光燈柔化在牆上的陰影或把 閃光燈頭俯仰角度............75 背景照明..............96 安裝電池................76 利用SB-30作紅外線遙遠控制器作多重閃光 設定電源開關ON/OFF及備用功能......77 操作................97 安裝到配件插座............79 利用連線作多重閃光操作..........97 可使用的相機及可獲得的閃光模式......80 先進操作 配合單鏡反光相機使用SB-30 利用內置廣角閃光擴射片進行大約0.3到1米 預 作為隨身的閃光燈 (1到3.3英呎)的近距閃光攝影 ......98 備 自動閃光模式 ...............82 曝光補償..............100 TTL自動閃光模式 ...........82 參考資料 非TTL自動閃光模式 ..........83 另購配件..............101 手動閃光模式...
-
Page 80: 閃光燈各部分名稱
閃光燈各部分名稱 1 閃光燈頭 7 內置廣角閃光擴射片 (第98頁) 14 備用重新啟動按鈕(第78頁)/ 2 紅外線濾鏡(第97頁) 8 電池室蓋 從屬閃光發射取消按鈕 3 接駁腳 9 預備燈(第77﹑83頁) (第93頁) 4 接駁針 10 曝光補償掣(第100頁) 15 接駁腳鎖桿(第79頁) 5 熱腳觸點 11 電源開關掣(第77頁) 附同配件 6 供非TTL自動閃光(第83頁) 12 模式選擇盤(第75頁) 軟套SS-30 用的光線感應窗 13 無線從屬閃光用的光線感應窗 (第90-96頁)... -
Page 81: 模式選擇盤
模式選擇盤 閃光燈頭俯仰角度 75゜ 75°:供拍攝正常主體之用 50゜ 50°:供拍攝0.4m(1.3英呎) 內的主體之用(第99頁) 13゜ 13°:不使用時的位置 1 TTL自動閃光模式(第82﹑84頁) 預 2 非TTL自動閃光模式(第83﹑86頁) 備 3 手動閃光模式(第88頁) 4 無線從屬閃光模式(第90頁) 注意! 若閃光燈頭置於13°的位置時﹐切勿把閃光燈拆除﹐ 否則閃光燈或相機可能會被刮花-... -
Page 82: 安裝電池
安裝電池 1 把SB-30的電源開關掣設定到關閉的OFF位置- 2 按照箭頭所指的方向把電池室蓋打開- 3 如圖示的+及-極方向安裝電池-之後在按下它的同時把它推回原位﹐以便把電池室蓋關好- ‧ 安裝一枚3V鋰電(CR123A或DL123A)-請勿使用其他類型的電池- ‧ 當更換電池的時候﹐請確保把電源開關掣設定到關上的OFF位置-假如當電池開關掣設定在開啟ON或 STBY(備用)時更換電池﹐閃光燈便有可能意外地閃光或電源有可能未能正確地打開-在此情況下﹐ 可以把SB-30的電源開關掣設定到關閉的OFF位置﹐之後再把它設定回開啟ON或STBY位置(第77頁)- 電池表現 ‧ 當使用新的電池時﹐如SB-30以M1/1輸出閃光﹐大約可以閃光250次- ‧ 當安裝了新的電池時﹐SB-30在以M1/1輸出後的回電時間大約是4秒- ‧ 當閃光燈剛打開時或於閃光後﹐假如預備燈需充電多於30秒才能夠亮起﹐請更換電池-... -
Page 83: 設定電源開關On/Off及備用功能
設定電源開關ON/OFF及備用功能 1 把SB-30的電源開關掣設定到ON或STBY的位置- ‧ 當設定到STBY的位置時﹐備用功能便會被啟動(第78頁)- ‧ 沒有熱靴接觸點的COOLPIX數碼相機不能配合備用功能工作-在此情況下﹐把SB-30設定到ON的位置- 2 確定預備燈已亮起- ‧ 當預備燈亮起時﹐表示SB-30已完全充電及預備閃光- 預 3 當不使用SB-30時﹐把它的電源開關設定到OFF的位置- 備 ‧ 當不使用SB-30時請確保把它的電源開關設定到OFF位置﹐以節省電池能源-... - Page 84 利用備用功能節省電源 ‧ 假如這一具SB-30的電源開關是設定到STBY位置﹐只有當模式選擇盤已設定到TTL自動﹑ 非TTL自動﹑或手動閃光模式時﹐備用功能才會啟動- ‧ 假如這一具SB-30與相機均有大約40秒沒有使用﹐這一項備用功能便會啟動﹐並自動把 SB-30關掉以節省電池能量-這一情況稱為備用狀態- ‧ 假如模式選擇盤已設定到無線從屬閃光模式﹐備用功能便不能發生功效-請注意電源仍然 接通而且一直在耗電- 當SB-30已進入備用狀態時要把它再次啟動﹐您可以: ‧ 按下備用重新啟動按鈕/從屬閃光發射取消按鈕- ‧ 輕按兼容TTL自動閃光模式的相機上的快門釋放鈕-...
-
Page 85: 安裝到配件插座
安裝到配件插座 安裝及拆除閃光燈 把SB-30的接駁腳l推入相機的配件插座﹐然後按照箭咀的方向旋轉鎖桿 2把閃光燈鎖緊- ‧ 當要把SB-30安裝到並沒有防止意外鬆脫的接駁針孔的配件插座時﹐則 請小心勿讓SB-30跌出- ‧ 當要拆除SB-30時﹐把閃光燈頭設定到上仰75°或50°﹐之後把鎖桿以反 方向轉90°使閃光燈的鎖解開﹐之後便可以把閃光燈抽出- 預 備 把SB-30安裝到有內置閃光燈的相機時的注意事項 當要把SB-30安裝到相機的配件插座時﹐請勿升起相機的內置閃光燈-否則﹐只有其中之一個閃光燈 會發出閃光-可是﹐這並非一種故障-... -
Page 86: 可使用的相機及可獲得的閃光模式
可使用的相機及可獲得的閃光模式 配合使用菲林的單鏡反光相機時可獲得的閃光模式 :建議閃光模式 :可使用閃光模式 :不可使用 :不適用 模式選擇盤的設定 連接到 相機類型及型號 相機 TTL自動 非TTL自動 手動 無線 (M)無線 (A) 兼容TTL自動閃光模式 並 沒 F5﹑F4系列﹑F100﹑F90X/N90s﹑F90系列/N90﹑ 有 配件座 (第84頁) F-801s/N8008s﹑F-801/N8008﹑F-601 /N6000﹑F-501/N2020﹑ 內 置 F-301/N2000﹑FM3A﹑FA﹑FE2﹑FG﹑F3系列 閃 不兼容TTL自動閃光模式的相機 光 配件座 (第86頁) 燈 ﹑ FM2﹑ New FM2﹑ FE﹑ FG20﹑ EM﹑ FM10﹑ FE10 有配件插座的相機... - Page 87 配合數碼相機可獲得的閃光模式 :建議閃光模式 :可使用閃光模式 :不可使用 :不適用 模式選擇盤的設定 連接到 相機類型及型號 相機 TTL自動 非TTL自動 手動 無線 (M)無線 (A) 配件 D1系列 ﹑D100 (第86頁) 插座 配件 COOLPIX 5000/5700 (第84頁) 插座 *2 *3 連線 (第84頁) COOLPIX 900/910/950/990/995/4500 無線 (第91頁)(第91頁) 預 備 COOLPIX 700/775/800/880/885/2000/2500/3500/4300 無線 (第91頁) COOLPIX 100/300/600 /5000 /5700 無線...
-
Page 88: 自動閃光模式
配合單鏡反光相機使用SB-30 作為隨身的閃光燈 自動閃光模式 這一具SB-30備有兩種自動閃光模式:TTL自動閃光及非TTL自動閃光 TTL自動閃光模式 這一個模式可以配合兼容TTL自動閃光的單鏡反光相機-在快門釋放的同一時 間﹐SB-30會開始發出閃光-相機的內置TTL自動閃光感應器會以透過鏡頭的方 式量度由主體反射的光線﹐並調節SB-30的閃光輸出以提供正確曝光- 關於可以配合使用的相機﹐請參閱「可使用的相機及可獲得的閃光模式」 (第80頁)- 視乎所使用的相機及鏡頭﹐可以獲得的TTL自動閃光模式例如多重感應均衡補 充閃光﹑矩陣均衡補充閃光﹑偏重中央補充閃光/重點補充閃光﹐或標準TTL閃 光-有關詳情﹐請參閱您的相機的使用說明書- ‧ 並不可作3D多重感應均衡補充閃光﹐因為這一具SB-30並不會發出連串的預閃光(監察預閃)- ‧ 這一具SB-30不能提供D-TTL自動閃光模式-... -
Page 89: 非Ttl自動閃光模式
非TTL自動閃光模式 這一個模式可以配合所有尼康單鏡反光相機包括數碼單鏡反光相機-在快門釋 放的一剎那及SB-30開始閃光時﹐SB-30內供非TTL自動閃光的內置光線測量器 會量度由主體反射而來的閃光照明﹐並自動控制SB-30的閃光輸出﹐以提供正 確的曝光-因此﹐可以配合不兼容TTL自動閃光的相機作自動閃光拍攝-可以 運用的四級拍攝光圈:在ISO 100時有f/2.8﹑f/4﹑f/5.6及f/8﹐而在ISO 400時則有 f/5.6﹑f/8﹑f/11及f/16- 於各自動閃光模式中的閃光光線不足夠警告 當此閃光燈以最高的輸出發出閃光或有可能曝光不足時﹐其預備燈便會閃爍大 約1.5秒-要作出補救﹐請使用較大的光圈或向主體靠近﹐然後重拍- 基 本 操 作... - Page 90 於TTL自動閃光模式拍攝閃光照片 1 把SB-30的模式選擇盤設定到D- 2 設定相機的曝光模式﹑測光系統﹑同步模式及快門速度等- ‧ 相機取景器內的預備燈閃爍是向您提醒相機的設定並不正確﹐使TTL自動閃光沒法工作-在此情況下﹐ 請確定相機的各項設定均已正確- 3 檢查光圈及閃光拍攝距離範圍- ‧ 參閱「決定光圈及閃光拍攝距離範圍」圖表(第85頁)確認主體是於這範圍內- ‧ 假如相機的曝光模式設定到光圈先決自動(A)或手動(M) ﹐在相機上設定其中一個由相機上的圖表 獲得的適當光圈- 4 確定SB-30的預備燈已亮起﹐之後拍攝- ‧ 假如在相機的取景器內的預備燈在拍攝後閃爍﹐請參閱第83頁-...
- Page 91 決定光圈及閃光拍攝距離範圍(米/英呎) ISO感光度 閃光拍攝距離範圍(米/英呎) 沒有安裝廣角閃光擴射片 安裝了廣角閃光擴射片 — f/1.4 f/2.8 f/5.6 1–8/3.3–26 0.7–5/2.3–16 T f/1.4 f/2.8 f/5.6 0.7–5.6/2.3–18 0.5–3.5/1.6–11 自 非 T f/2.8 f/5.6 f/11 0.6–4/2–13 0.3–2.5/1–8.2 動 T L 閃 T 自 f/2.8 f/5.6 f/11 f/16 0.6–2.8/2–9.1 0.3–1.7/1–5.5 光 L 動 f/5.6 f/11 f/16...
- Page 92 於非TTL自動閃光模式中拍攝閃光照片 1 設定相機的曝光模式﹑同步模式及快門速度等- ‧ 使用FM3A﹑New FM2及FE時﹐在相機的取景器內閃動的預備燈是提示您相機的快門速度並沒有正確 設定-在此情況下﹐確定相機的設定是正確的- 2 按照“決定光圈及閃光拍攝距離範圍”圖表(第85頁)決定正確光圈以配合拍攝距離範圍-在SB-30的 模式選擇盤上設定相同的光圈- ‧ 關於可獲得的光圈﹐請參閱“決定光圈及閃光拍攝距離範圍”圖表(第85頁) 3 在相機或鏡頭上設定與SB-30相同的光圈- ‧ 否則﹐不可以獲得正確的曝光- ‧ 當使用擁有可變光圈的變焦鏡頭時﹐請參閱“於遠近變焦後的光圈改變” (第87頁)後才設定光圈- 4 確定SB-30的預備燈已亮起後才拍攝- ‧ 假如在相機取景器內的預備燈於拍攝後閃爍﹐請參閱第83頁-...
- Page 93 於變焦遠近後的光圈改變 ‧ 使用擁有可變光圈的變焦鏡頭﹐請在設定SB-30的光圈時注意以下要點- ‧ 有關詳情﹐請參閱您的相機及鏡頭的使用說明書- 在相機的LCD屏或於取景器內讀取光圈 ‧ 把鏡頭的光圈鎖定到其最細小﹐並於變焦遠近作構圖之後﹐在相機的LCD屏或在取景器內 讀取所出現的光圈- 使用鏡頭上的尺度讀出光圈 基 ‧ 於遠近變焦選擇出適合的構圖後﹐用以下的方式讀出光圈: 本 於廣角變焦設定﹐以綠色指示(或線)讀取光圈值- 操 作 於遠攝設定﹐以黃色指示(或點)讀取光圈值- 於中間設定﹐以兩個指示間讀取光圈-...
-
Page 94: 手動閃光模式
手動閃光模式 這一具SB-30的閃光輸出水平可以手動地設定到M1/1﹑M1/8或M1/32-在手動模式之中﹐您必需綜合閃光指 數﹑拍攝距離及鏡頭光圈以計算出正確的曝光- ‧ 假如相機的曝光模式設定到光圈先決自動(A)或手動(M)以外的模式﹐快門則有可能無法打開﹐此 點會視乎不同的相機而定- 閃光指數(米/英呎)及ISO感光度 ISO感光度 1600 M1/1 8/26 11/36 16/52 22/72 32/105 45/148 64/210 閃光輸出水平 M1/8 2.8/9 4/13 5.6/18 8/26 11/36 16/52 22/72 M1/32 1.4/4.6 2/6.6 2.8/9.2 4/13 5.6/18 8/26 11/36 M1/1 5/16 7.1/23 10/33 14/46 20/66 28/92 40/131 閃光輸出水平... - Page 95 於手動閃光模式拍攝閃光照片 1 設定相機的曝光模式﹑同步模式﹑快門速度等- 2 決定光圈及閃光輸出水平以配合閃光拍攝距離- ‧ 正如第88頁的閃光指數圖表所示﹐閃光指數是可變化的﹐視乎閃光的輸出水平及是否安裝了 廣角閃光擴射片- 基 本 3 在相機或鏡頭上設定光圈及在SB-30上設定閃光輸出水平- 操 作 4 確定SB-30的預備燈已亮起﹐然後拍攝- ‧ 於手動閃光模式﹐在拍攝後預備燈並不會閃爍作為光線有可能不足夠作正確曝光的提示-...
-
Page 96: 使用Sb-30及相機例如Coolpix照明遠距的主體 無線從屬閃光拍攝
使用SB-30及相機例如COOLPIX照明遠距的主體 無線從屬閃光拍攝 在此情況下﹐SB-30會用作從屬閃光燈﹐與安裝在相機上的主體閃光燈或其內置閃光燈同步發出及停止閃 光-使用這一具SB-30﹐可以提供以下類型的無線從屬閃光拍攝- ‧ 假如模式選擇盤被設定到無線從屬閃光模式﹐則備用功能便不可以工作- 注意電源仍然接通及正在耗電- 使用有內置閃光燈的相機例如COOLPIX拍攝遠距離的主體(第92頁) 把相機及這一具SB-30並排擺放﹐並使SB-30與內置閃光燈同步發出閃光﹐您便可以照明遠處的主體﹐可以 拍攝出只利用內置閃光燈本身不能拍攝到的照片- 使用SB-30作為從屬閃光燈作離機使用(第94頁) 在多重閃光中﹐若以離機方式使用SB-30﹐您可以創造出更為自然的照片﹐使整張照片均有充份照明- 以主體閃光燈把牆上造成的陰影柔化或把背景照明(第96頁) 使用SB-30作全光(M1/1)輸出﹐您可以把礙眼的陰影消除﹐或把背景照明﹐以拍攝出自然的照片- 利用紅外線遙遠控制器作多重閃光操作(第97頁)- 當安裝了紅外線濾鏡後﹐SB-30便可以用作紅外線遙遠控制器﹐用以引發其他從屬閃光燈-... - Page 97 無線從屬閃光拍攝的兩種方法 利用模式選擇盤的設定可以作兩種無線從屬閃光的操作: (1)自動無線從屬閃光(A)模式: ‧ SB-30會與主體閃光燈同步地開始及停止發出閃光- ‧ SB-30的光線感應器的最遠拍攝距離大約是5米(16英呎)- (2)手動無線從屬閃光(M)模式: ‧ 這一具SB-30只可以用M 1/1輸出與主體閃光燈同步- ‧ 這一具SB-30的光線測量器的最遠距離大約是40米(131英呎)- 注意 ‧ 擺放這一具從屬閃光燈(SB-30)時要注意主體閃光燈的光線需要可以到達從屬閃光燈的光線感應器- 當您以手持從屬閃光燈拍攝時此點尤為重要- ‧ 假如主體閃光燈射出一連串預閃光(監察預閃)便不能達致正確的曝光-利用以下所載的方法取消主體 基 本 閃光燈的監察預閃-此點為必須的步驟﹐但由於COOLPIX的預閃光不會影響正確曝光﹐故此得以例外- 操 作 F80系列/N80系列﹑F70系列/N70 把相機的曝光模式設定到手動(M) F5﹑F100﹑F90X/N90s﹑F90系列/N90 取消安裝在相機上的閃光燈的監察預閃光- D1系列 把安裝在相機上的閃光燈的閃光模式設定到非TTL自動或手動-...
-
Page 98: 使用Sb-30與有內置閃光燈的相機例如Coolpix一起拍攝遠距的主體
使用SB-30與有內置閃光燈的相機例如COOLPIX一起拍攝遠距的主體 把相機及這一具SB-30並排擺放﹐並使SB-30與內置閃光 燈同步發出閃光﹐您便可以照明遠處的主體﹐可以拍攝 出只利用內置閃光燈本身不能拍攝到的照片-把SB-30 的模式選擇盤設定到無線從屬閃光(A)模式以執行自 動閃光- ‧ COOLPIX 900﹑COOLPIX 700系列﹑COOLPIX 800系列及 主體 COOLPIX 2500相機均只會發出一次預閃﹐故均可以使用- ‧ Pronea S並沒有配件插座﹐而F55/N55的配件座並沒有TTL 自動閃光功能﹐但仍可以配合SB-30作TTL自動閃光- ‧ 當安裝SB-30到例如COOLPIX 700系列﹑COOLPIX 800系 從屬閃光燈: 列﹐可使用另外選購的托架套件SK-9﹐請參閱SK-9使用 托架套件SK-9 SB-30 說明書- (另外選購) 相機:COOLPIX 700系列﹑ COOLPIX 800系列﹑ COOLPIX 2500等 主體閃光燈:內置閃光燈... - Page 99 以COOLPIX拍攝閃光照片 1 正如配合正常的閃光燈在相機上作出必需的設定- 2 把SB-30的模式選擇盤設定到無線從屬閃光(A)- ‧ 於無線從屬閃光拍攝之中﹐並不可以使用SB-30的曝光補償掣作曝光補償-在此情況下﹐在相機上作 曝光補償- 3 檢查光圈及閃光拍攝距離﹐然後拍攝- ‧ 按下備用重新啟動按鈕/從屬閃光發射取消按鈕以避免因與其他閃光燈同步意外閃光-當這一個掣按 下時﹐SB-30將不會閃光- 使用菲林單鏡反光相機拍攝閃光照片 基 1 設定主體閃光燈﹐以及相機內置閃光燈或安裝在相機上的閃燈來閃光- 本 ‧ 請確定把主體閃光燈的監察預閃取消(第91頁)- 操 作 2 把SB-30用作為從屬閃光燈並設定到無線從屬閃光(A)模式- ‧ 於無線從屬閃光拍攝時﹐使用SB-30的曝光補償掣作曝光補償是不可能的﹐在此情況﹐請在相機上作 曝光補償- 3 檢查光圈及閃光拍攝距離﹐之後拍攝- ‧ 按下備用重新啟動按鈕/從屬閃光發射取消按鈕以避免因與其他閃光燈同步意外閃光-當這一個掣按 下時﹐SB-30將不會閃光-...
-
Page 100: 以與相機分開的Sb-30拍攝主體
以與相機分開的SB-30拍攝主體 當SB-30置於離開相機的位置以提供多重閃光﹐您可以 拍攝有足夠照明的更自然的照片-於TTL自動或非TTL 自動閃光模式中把SB-30的模式選擇盤設定到無線從屬 閃光(A)以提供無線多重閃光操作- ‧ COOLPIX 900﹑COOLPIX 700系列﹑COOLPIX 800系列及 COOLPIX 2500相機只會發出一次預閃光﹐故均可以使用- ‧ 備有無線多重閃光功能的閃光燈﹐例如SB-30﹑SB-80DX﹑ SB-50DX等均可以用作從屬閃光燈-此外﹐任何其他閃光 燈若可以兼容TTL自動閃光﹐當安裝了另外選購的無線從 主體 屬閃光控制器SU-4時﹐亦可以使用- 從屬 從屬 ‧ 於無線從屬閃光(A)模式中﹐SB-30的光線感應器的最 閃光燈1: 閃光燈2* 遠拍攝距離大約是5米(16英呎)- SB-30 ‧ 把從屬閃光燈置於只有主體閃光燈的光線可以到達其光 線感應器的地方-假如有太多其他從屬閃光燈的光線直 相機:所有尼康單鏡反光相機及數碼相機 接或間接進入從屬閃光燈的光線感應器﹐便有可能無法 主體閃光燈:內置閃光燈或安裝在相機上的閃光燈 進行正確的操作- * 任何兼容TTL自動閃光的閃光燈安裝到另外選購的 無線從屬閃光控制器SU-4-... - Page 101 拍攝閃光照片 1 如配合正常閃光燈般在相機上進行的必需的設定- 2 把SB-30的模式選擇盤設定到無線從屬閃光(A)- ‧ 於無線從屬閃光拍攝中﹐不能利用SB-30曝光補償掣進行曝光補償-在此情況下﹐可在相機上進行曝 光補償- 3 把主體閃光燈的閃光模式設定到TTL自動閃光- ‧ 請確保取消主體閃光燈的監察預閃(第91頁)- ‧ 假如監察預閃不能夠取消﹐可把閃光模式設定到TTL自動閃光模式以外的其他閃光模式- ‧ SB-30沒有D-TTL自動閃光模式-當配合數碼單鏡反光相機時﹐把閃光模式設定到非TTL自動閃光或自 動光圈閃光- 基 4 檢查光圈及閃光拍攝距離﹐然後拍攝- 本 操 作...
-
Page 102: 利用主體閃光燈柔化在牆上的陰影或把背景照明
利用主體閃光燈柔化在牆上的陰影或把背景照明 把SB-30的模式選擇盤設定到無線從屬閃燈(M) ﹐而閃 光燈會以M1/1的輸出發出閃光﹐可以讓您把陰影消除或 把背景照亮﹐以便拍攝出看來更自然的照片- ‧ 主體閃光燈的光線感應器的最遠拍攝距離大約是40米 牆壁 (131英呎)- 陰影 拍攝閃光照片 1 把SB-30用作從屬閃光燈並把它設定到無線從屬閃光 主體 (M)模式- 從屬 2 利用閃光燈到主體間的距離及設定在相機或鏡頭上的 閃光燈1: SB-30 光圈﹐決定正確的曝光﹐然後拍攝- ‧ 請參閱第88頁的“手動閃光模式”- ‧ 要消除例如投射在牆壁上的陰影﹐可使用相當於 拍攝牆壁上的照明度的兩級或以上的曝光過度- 相機:所有單鏡反光相機 主體閃光燈:安裝在相機上的閃光燈或相機的內置閃 光燈-... -
Page 103: 利用Sb-30作紅外線遙遠控制器作多重閃光
利用SB-30作紅外線遙遠控制器作多重閃光操作 當安裝了內置的紅外線濾鏡﹐您可 以把SB-30用作紅外線遙遠控制器 以執行無線多重閃光﹐只是利用從 屬閃光燈照明主體而並沒有使用主 體閃光燈作照明- ‧ 把閃光模式設定到TTL自動閃光; 從屬 不建議使用非TTL自動閃光- 閃光燈2* 主體 從屬 ‧ 紅外線濾鏡可以和廣角閃光擴射片一併使用- 閃光燈1: 紅外線 紅外線 SB-30 ‧ 雖然在紅外線濾鏡的兩旁會有閃光溢出﹐但此舉不 紅外線 會影響正確的曝光- 基 ‧ 假如沒有使用這紅外線濾鏡﹐主體閃光燈便會如正 相機:單鏡反光相機或數 本 碼相機 常閃光燈般工作﹐而主體亦會被此閃光燈所照明- 操 主體閃光燈:SB-30 作 * 任何兼容TTL自動閃光的閃光燈安裝在另外選購的 無線從屬閃光控制器SU-4上- 利用連線作多重閃光操作 與其他兼容TTL自動閃光模式的閃光燈一樣﹐這一具SB-30亦都可以利用另外選購的TTL遙控線SC-17/SC-24﹑ TTL多重閃光同步線SC-18/SC-19或TTL多重閃光適配器AS-10作TTL多重閃光-有關詳情﹐請參閱您的相機 或配件的使用說明書或有關產品小冊子-... -
Page 104: 利用內置廣角閃光擴射片進行大約0.3到1米(1到3.3英呎)的近距閃光攝影
利用內置廣角閃光擴射片進行大約0.3到1米(1到3.3英呎)的近距閃光攝影 把SB-30安裝到相機的配件插座﹐便可以進行近距閃光拍攝- ‧ 當拍攝近距閃光照片時﹐請緊記要使用內置的廣角閃光擴射片 ‧ 當使用大直徑的鏡頭或遮光罩等作近距閃光拍攝時﹐有可能出現暈影現象 1 把SB-30的模式選擇盤設定到D- ‧ 如使用不兼容TTL自動閃光模式的閃光燈﹐把選擇盤設定到非TTL自動閃光或手動閃光模式- 2 設定相機的曝光模式﹑測光系統﹑同步模式﹐及快門速度等- ‧ 在相機取景器內的預備燈會閃爍提示您相機的設定並不正確﹐使TTL自動閃光無法進行-在此情況下﹐ 請檢查相機的各項設定- 3 把廣角閃光擴射片抽出並設定到位- ‧ 小心黑色的紅外線濾片並沒有在閃光擴射片前造成障礙-... - Page 105 4 當進行少於大約0.4米(1.3英呎)的近攝時﹐把閃光燈頭俯低- ‧ 當拍攝距離少於0.4米(1.3英呎)的主體時﹐把閃光燈頭俯低到50°的位置以便作有效的照明- 5 利用“決定光圈及閃光拍攝距離範圍(米/英呎) ” (第85頁)以決定正確的光圈﹐以及在相機上設定相 同的光圈- ‧ 於非TTL自動閃光模式中﹐亦要在SB-30的模式選擇盤上設定相同的光圈- 6 檢查SB-30的預備燈已亮起﹐然後拍攝- ‧ 假如在相機取景器內的預備燈於拍攝後閃爍﹐請參閱第83頁- 內置廣角閃光擴射片 ‧ 內置廣角閃光擴射片亦可以在近距閃光拍攝以外的情況下使用- ‧ SB-30的涵蓋角度可以配合28mm鏡頭﹐ 利用內置廣角閃光擴射片更可以把涵蓋角度擴闊到配合17mm鏡頭﹐ 先 但閃光指數則會由16/52降低到10/33(ISO 100米/英呎)- 進 操 ‧ 當安裝了內置廣角閃光擴射片使用17mm鏡頭時﹐相機與主體間的距離由畫面的中央到邊緣便有極大的 作 差異﹐因此﹐在某些情況下邊緣的位置便會有照明不足的情況-...
-
Page 106: 曝光補償
曝光補償 當SB-30的模式選擇盤設定到非TTL自動﹐M 1/32﹐或M 1/8時﹐便可以利用曝光補償掣調節SB-30的輸出- 把曝光補償掣設定到+1/2的位置可以使主體更明亮﹐而設定到-1/2則會使主體暗一些- 當配合COOLPIX相機使用時﹐您可以在顯示屏上監看影像的光度以設定閃光的輸出﹐然後再次拍攝- 曝光補償掣 +1/2: 增加閃光燈的輸出到+1/2 EV以使主體更明亮 0: 並沒有補償-當曝光無需作補償時﹐把此掣設定到零(0) -1/2: 減低閃光燈的輸出到-1/2 EV以使主體暗一些 ‧ 假如模式選擇盤設定到TTL自動閃光﹐M1/1或無線從屬模式﹐便不可以使用此掣作曝光補償-... -
Page 107: 另購配件
另購配件 托架套件 SK-9 這一個SK-9可以讓COOLPIX(COOLPIX 700系列﹑800系列及900系列)或各 款單鏡反光相機與SB-30並排安裝在一起-這一個托架套件包括托架SK-9﹑ TTL多重閃光適配器AS-18﹐以及同步線SC-25以便把COOLPIX 900以外的各 款COOLPIX 900系列相機連接到AS-18- 多重閃光托架 SK-E900/多重閃光適配器 AS-E900 把COOLPIX安裝到多重閃光托架SK-E900並利用多重閃光適配器AS-E900把 SB-30連接到COOLPIX的多重閃光終端﹐則SB-30便可以用於尼康COOLPIX 參 900系列相機作為從屬閃光燈- 考 資 SK-E900包括了一個AS-E900多重閃光適配器- 料... -
Page 108: 疑難排解
疑難排解 在您把您的閃光燈送往尼康服務中心修理前﹐請先閱讀下表找出引致問題的原因- 問題 可能的原因 參考/補救 預備燈沒有亮起 當電源開關掣設定到ON或者STBY的位置時更換電池 安裝電池(第76頁) 電池沒有正確地安裝 安裝電池(第76頁) 電池微弱 安裝電池(第76頁) 備用功能正在啟動及正在操作 調校電源開關及備用功能 (第77頁) 電池終端或SB-30的電池觸點不清潔 把終端或觸點清潔 於發出閃光後預備燈閃爍約1.5秒 拍攝距離超出了可獲的閃光拍攝距離範圍 確認光圈及閃光拍攝距離範 圍(米/英呎) (第85頁) 預備燈需要較長時間才亮起 電池微弱 安裝電池(第76頁) 由於連續閃光使電池發熱 等候SB-30冷卻 雖然預備燈已亮起﹐但快門不能釋放 模式選擇盤設定到非TTL自動或手動﹐而相機的曝 非TTL自動閃光模式(第86頁) 光模式設定到程式自動或快門先決自動 手動閃光模式(第88頁)... -
Page 109: 閃光燈護理提示及電池注意事項
閃光燈護理提示及電池注意事項 清潔 ‧ 避免把SB-30曝露於強烈磁場或來自電視或高壓輸電塔的 輻射﹐因為此舉會導致它出現故障- ‧ 使用氣泵掃來清除SB-30上的污垢及塵埃﹐並使用柔軟﹑ ‧ 當SB-30的閃光模式設定到無線從屬閃光時﹐這一具閃光 潔淨的布來抹拭-於接近鹹水的地方使用SB-30之後﹐使 燈便有可能在有閃爍螢光管的環境中意外地發出閃光- 用輕微沾了清水﹑柔軟和潔淨的布來輕輕抹拭﹐然後再 用乾布把它抹乾- 安裝一枚3V鋰電池(CR123A或DL123A) 貯存 ‧ 當拍攝重要項目時﹐應先行更換電池﹐或帶備額外的電 池- ‧ 把SB-30貯存於陰涼﹑乾燥的地方﹐以防止因濕度高而引 ‧ 假如電池的電極受污了﹐或被您的手油所弄污﹐請使用 致故障﹐並可以防止發霉或結露- 乾布清潔電極﹐受污的電極會引致接觸不良- ‧ 把SB-30貯藏於遠離化學物品的地方﹐例如臭丸或樟腦- ‧ 不應把SB-30存放於高溫的地方或在高溫的地方使用﹐例 於低溫下使用新的電池 如暖爐和 爐﹐因為此舉會導致閃光燈損壞- ‧ 當在低溫下使用已消耗的電池﹐SB-30有可能無法正常操 參 ‧ 若有多於兩個星期不使用SB-30﹐請確保把它貯藏之前先 考 作- 行把電池移去﹐以免因電池洩漏液體而導致故障- 資 ‧... - Page 110 規格 電子結構: 模式選擇盤: 自動絕緣閘二極晶體管(IGBT)及串聯電路 共有四檔:TTL自動閃光﹐非TTL自動閃光(4級) ﹐手動閃 光(3級) ﹐無線從屬閃光(A或M) 電池: 一枚3V鋰電池(CR123A或DL123A) 預備燈: 當SB-30回電完成並預備閃光時便會亮起-當它以全光輸出 閃光指數(ISO 100﹐米/英呎): 便會閃爍﹐顯示閃光的光線可能並不足夠(於TTL自動閃光 於28mm的涵蓋角度時為16/52(沒有使用廣角閃光擴射片) 及非TTL自動閃光模式)-當相機在TTL自動閃光模式的設 於17mm的涵蓋角度時為10/33(使用了廣角閃光擴射片) 定並不正確時﹐在相機的取景器內的預備燈便會閃動- 涵蓋角度: 備用重新啟動按鈕/從屬閃光發射取消按鈕: 涵蓋28mm鏡頭的畫面角度(並沒有安裝廣角閃光擴射片) 當SB-30進入備用狀態後把它重新啟動-防止SB-30在從屬閃 涵蓋17mm鏡頭的畫面角度(安裝了廣角閃光擴射片) 光操作時意外地發出閃光- 電源開關: 閃光時間 提供(關/開/備用)三個位置:OFF/ON/STBY 於M1/1輸出時為1/2800秒 ON/STBY位置:電源接通 STBY:當閃光燈閒置約40秒的時候﹐SB-30便會自動關掉以 體積(闊×高×厚) 節省電池 大約58.5×83.5×36mm(2.3×3.3×1.4英吋) 回電時間及閃光數目: 重量(不連電池) 最短回電時間:大約4秒(當使用全新電池並以M1/1輸出閃光) 大約92克(3.2安士) 閃光數目:大約250次(當使用全新電池並以M1/1輸出閃光) 所有表現數據及規格以在常溫(20℃/68℉)下使用全新的 電池為準-規格及設計如有變更恕不另行通知...
-
Page 111: 預備 前言
中國語 前言 多謝閣下購買這一具尼康閃光燈SB-30。 這一具SB-30是小巧、輕盈、以及多功能的閃光燈,閃光指數為GN 16/52(於28mm涵蓋角度, ISO 100,米/英呎,20℃/68℉) 。它擁有多種閃光模式,包括TTL自動閃光,非TTL自動閃光、以 及手動閃光。此外,它亦可以用作無線多重閃光操作。 SB-30的主要特點 ‧ 這一具SB-30是十分有用的隨身閃光燈,當您使用沒有內置閃光燈的尼康單鏡反光相機時,它可以隨時 為您提供TTL自動、非TTL自動,以及手動閃光。 ‧ 當配合有內置閃光燈的COOLPIX或尼康單鏡反光相機時,SB-30可以用作從屬閃光燈作無線或連線的 多重閃光操作之用。 ‧ 當要進行近距閃光攝影時,它的閃光燈頭可以向下俯低而不需要把閃光燈由相機上拆出。這一具SB-30 亦可以在無線多重閃光操作中用作紅外線遙控的控制器,用以控制其他從屬閃光燈作閃光。 要盡情發揮您的閃光燈,請在使用前先詳細閱讀您的相機的使用說明書。 預 ‧ 由於SB-30的TTL閃光操作與SB-22s的是相同的,因此,假如您的相機使用說明書的閃光攝影部分中並 備 沒有列出SB-30,請參閱SB-22s的部分。 ‧ (第XX頁)顯示要參考的頁面。... -
Page 112: 使用本閃光燈的提示
使用本閃光燈的提示 ‧ 在拍攝重要的場合前,例如婚禮或畢業禮,請先進行試拍。 ‧ 這一具尼康閃光燈SB-30與尼康相機/配件及鏡頭一併使用時,可以達到最佳的效能。使用其他生產商製 造的相機/配件或不能達到尼康的規格標準,而使用不適配的相機/配件更可能會損壞SB-30的零件。當 配合非尼康品牌的產品使用時,尼康便不能保證SB-30的效能。 注意 ‧ 尼康N90s、N90、N70、N60、N55、N50、N8008、N8008s、PRONEA 6i、N6006、N6000、 N5005、N4004、及N4004s是只在美國出售的型號。 ‧ 尼康N80系列及N65系列只在美國、中美及南美出售。 ‧ 尼康N2020及N2000只在美國及加拿大出售。... - Page 113 目錄 預備 前言 ..............105 使用SB-30與有內置閃光燈的相機例如 使用本閃光燈的提示 ........106 COOLPIX一起拍攝遠距的主體 ....126 閃光燈各部分名稱...........108 以與相機分開的SB-30拍攝主體 ....128 模式選擇盤 .............109 利用主體閃光燈柔化在牆上的陰影或把 閃光燈頭俯仰角度...........109 背景照明 ...........130 安裝電池 ............110 利用SB-30作紅外線遙遠控制器作多重閃光 設定電源開關ON/OFF及備用功能....111 操作..............131 安裝到配件插座 ..........113 利用連線作多重閃光操作 ........131 可使用的相機及可獲得的閃光模式....114 先進操作 配合單鏡反光相機使用SB-30 利用內置廣角閃光擴射片進行大約0.3到1米 作為隨身的閃光燈 (1到3.3英呎)的近距閃光攝影 .....132 自動閃光模式..........116 曝光補償 ............134 TTL自動閃光模式........116 預 參考資料 備...
-
Page 114: 閃光燈各部分名稱
閃光燈各部分名稱 1 閃光燈頭 7 內置廣角閃光擴射片 (第132頁) 14 備用重新啟動按鈕(第112頁)/ 2 紅外線濾鏡(第131頁) 8 電池室蓋 從屬閃光發射取消按鈕 3 接駁腳 9 預備燈(第111、117頁) (第127頁) 4 接駁針 10 曝光補償掣(第134頁) 15 接駁腳鎖桿(第113頁) 5 熱腳觸點 11 電源開關掣(第111頁) 附同配件 6 供非TTL自動閃光(第117頁) 12 模式選擇盤(第109頁) 軟套SS-30 用的光線感應窗 13 無線從屬閃光用的光線感應窗 (第124-130頁)... -
Page 115: 模式選擇盤
模式選擇盤 閃光燈頭俯仰角度 75゜ 50゜ 75°:供拍攝正常主體之用 50°:供拍攝0.4m(1.3英呎) 內的主體之用 (第133頁) 13゜ 13°:不使用時的位置 1 TTL自動閃光模式(第116、118頁) 2 非TTL自動閃光模式 (第117、120頁) 3 手動閃光模式(第122頁) 預 4 無線從屬閃光模式(第124頁) 備 注意! 若閃光燈頭置於13°的位置時,切勿把閃光燈拆除, 否則閃光燈或相機可能會被刮花。... -
Page 116: 安裝電池
安裝電池 1 把SB-30的電源開關掣設定到關閉的OFF位置。 2 按照箭頭所指的方向把電池室蓋打開。 3 如圖示的+及-極方向安裝電池。之後在按下它的同時把它推回原位,以便把電池室蓋關好。 ‧ 安裝一枚3V鋰電(CR123A或DL123A) 。請勿使用其他類型的電池。 ‧ 當更換電池的時候,請確保把電源開關掣設定到關上的OFF位置。假如當電池開關掣設定在開啟ON或 STBY (備用) 時更換電池,閃光燈便有可能意外地閃光或電源有可能未能正確地打開。在此情況下,可 以把SB-30的電源開關掣設定到關閉的OFF位置,之後再把它設定回開啟ON或STBY位置(第111頁) 。 電池表現 ‧ 當使用新的電池時,如SB-30以M1/1輸出閃光,大約可以閃光250次。 ‧ 當安裝了新的電池時,SB-30在以M1/1輸出後的回電時間大約是4秒。 ‧ 當閃光燈剛打開時或於閃光後,假如預備燈需充電多於30秒才能夠亮起,請更換電池。... -
Page 117: 設定電源開關On/Off及備用功能
設定電源開關ON/OFF及備用功能 1 把SB-30的電源開關掣設定到ON或STBY的位置。 ‧ 當設定到STBY的位置時,備用功能便會被啟動(第112頁) 。 ‧ 沒有熱靴接觸點的COOLPIX數碼相機不能配合備用功能工作。 在此情況下,把SB-30設定到 ON的位置。 2 確定預備燈已亮起。 ‧ 當預備燈亮起時,表示SB-30已完全充電及預備閃光。 3 當不使用SB-30時,把它的電源開關設定到OFF的位置。 預 ‧ 當不使用SB-30時請確保把它的電源開關設定到OFF位置,以節省電池能源。 備... - Page 118 利用備用功能節省電源 ‧ 假如這一具SB-30的電源開關是設定到STBY位置,只有當模式選擇盤已設定到TTL自 動、非TTL自動、或手動閃光模式時,備用功能才會啟動。 ‧ 假如這一具SB-30與相機均有大約40秒沒有使用,這一項備用功能便會啟動,並自動把 SB-30關掉以節省電池能量。這一情況稱為備用狀態。 ‧ 假如模式選擇盤已設定到無線從屬閃光模式,備用功能便不能發生功效。請注意電源仍然 接通而且一直在耗電。 當SB-30已進入備用狀態時要把它再次啟動,您可以: ‧ 按下備用重新啟動按鈕/從屬閃光發射取消按鈕。 ‧ 輕按兼容TTL自動閃光模式的相機上的快門釋放鈕。...
-
Page 119: 安裝到配件插座
安裝到配件插座 安裝及拆除閃光燈 把SB-30的接駁腳1推入相機的配件插座,然後按照箭咀的方向旋轉鎖桿 2把閃光燈鎖緊。 ‧ 當要把SB-30安裝到並沒有防止意外鬆脫的接駁針孔的配件插座時,則 請小心勿讓SB-30跌出。 ‧ 當要拆除SB-30時,把閃光燈頭設定到上仰75°或50°,之後把鎖桿以反 方向轉90°使閃光燈的鎖解開,之後便可以把閃光燈抽出。 預 把SB-30安裝到有內置閃光燈的相機時的注意事項 備 當要把SB-30安裝到相機的配件插座時,請勿升起相機的內置閃光燈。否則,只有其中之一個閃光 燈會發出閃光。可是,這並非一種故障。... -
Page 120: 可使用的相機及可獲得的閃光模式
可使用的相機及可獲得的閃光模式 配合使用菲林的單鏡反光相機時可獲得的閃光模式 ◎ ○ × :建議閃光模式 :可使用閃光模式 :不可使用 —:不適用 模式選擇盤的設定 連接到 相機類型及型號 相機 TTL自動 非TTL自動 手動 無線 (M)無線 (A) 兼容TTL自動閃光模式 並 沒 F5、F4系列、F100、F90X/N90s、F90系列/N90、 ◎ ○ ○ 配件座 — — 有 F-801s/N8008s、F-801/N8008、F-601 /N6000、F-501/N2020、 (第118頁) 內 F-301/N2000、FM3A、FA、FE2、FG、F3系列 置 閃 不兼容TTL自動閃光模式的相機 ◎ 光 ×... - Page 121 配合數碼相機可獲得的閃光模式 ◎ ○ × :建議閃光模式 :可使用閃光模式 :不可使用 —:不適用 模式選擇盤的設定 連接到 相機類型及型號 相機 TTL自動 非TTL自動 手動 無線 (M)無線 (A) ◎ 配件 × ○ D1系列 、D100 — — (第120頁) 插座 ◎ 配件 ○ ○ COOLPIX 5000/5700 — — (第118頁) 插座 ◎ 連線 *2 *3 ○...
-
Page 122: 自動閃光模式
配合單鏡反光相機使用SB-30 作為隨身的閃光燈 自動閃光模式 這一具SB-30備有兩種自動閃光模式:TTL自動閃光及非TTL自動閃光 TTL自動閃光模式 這一個模式可以配合兼容TTL自動閃光的單鏡反光相機。在快門釋放的同一時 間,SB-30會開始發出閃光。相機的內置TTL自動閃光感應器會以透過鏡頭的 方式量度由主體反射的光線,並調節SB-30的閃光輸出以提供正確曝光。 關於可以配合使用的相機,請參閱「可使用的相機及可獲得的閃光模式」 (第114頁) 。 視乎所使用的相機及鏡頭,可以獲得的TTL自動閃光模式例如多重感應均衡補 充閃光、矩陣均衡補充閃光、偏重中央補充閃光/重點補充閃光,或標準TTL 閃光。有關詳情,請參閱您的相機的使用說明書。 ‧ 並不可作3D多重感應均衡補充閃光,因為這一具SB-30並不會發出連串的預閃光(監察預閃) 。 ‧ 這一具SB-30不能提供D-TTL自動閃光模式。... -
Page 123: 非Ttl自動閃光模式
非TTL自動閃光模式 這一個模式可以配合所有尼康單鏡反光相機包括數碼單鏡反光相機。在快門釋 放的一剎那及SB-30開始閃光時,SB-30內供非TTL自動閃光的內置光線測量 器會量度由主體反射而來的閃光照明,並自動控制SB-30的閃光輸出,以提供正 確的曝光。因此,可以配合不兼容TTL自動閃光的相機作自動閃光拍攝。可以 運用的四級拍攝光圈:在ISO 100時有f/2.8、f/4、f/5.6及f/8,而在ISO 400時 則有f/5.6、f/8、f/11及f/16。 於各自動閃光模式中的閃光光線不足夠警告 當此閃光燈以最高的輸出發出閃光或有可能曝光不足時,其預備燈便會閃爍大 約1.5秒。要作出補救,請使用較大的光圈或向主體靠近,然後重拍。 基 本 操 作... - Page 124 於TTL自動閃光模式拍攝閃光照片 1 把SB-30的模式選擇盤設定到D。 2 設定相機的曝光模式、測光系統、同步模式及快門速度等。 ‧ 相機取景器內的預備燈閃爍是向您提醒相機的設定並不正確,使TTL自動閃光沒法工作。在此情況 下,請確定相機的各項設定均已正確。 3 檢查光圈及閃光拍攝距離範圍。 ‧ 參閱「決定光圈及閃光拍攝距離範圍」圖表(第119頁)確認主體是於這範圍內。 ‧ 假如相機的曝光模式設定到光圈先決自動(A)或手動(M) ,在相機上設定其中一個由相機上的圖 表獲得的適當光圈。 4 確定SB-30的預備燈已亮起,之後拍攝。 ‧ 假如在相機的取景器內的預備燈在拍攝後閃爍,請參閱第117頁。...
- Page 125 決定光圈及閃光拍攝距離範圍(米/英呎) ISO感光度 閃光拍攝距離範圍(米/英呎) 沒有安裝廣角閃光擴射片 安裝了廣角閃光擴射片 — f/1.4 f/2.8 f/5.6 1–8/3.3–26 0.7–5/2.3–16 T f/1.4 f/2.8 f/5.6 0.7–5.6/2.3–18 0.5–3.5/1.6–11 自 非 T f/2.8 f/5.6 f/11 0.6–4/2–13 0.3–2.5/1–8.2 動 T L 閃 T 自 f/2.8 f/5.6 f/11 f/16 0.6–2.8/2–9.1 0.3–1.7/1–5.5 光 L 動 f/5.6 f/11 f/16...
- Page 126 於非TTL自動閃光模式中拍攝閃光照片 1 設定相機的曝光模式、同步模式及快門速度等。 ‧ 使用FM3A、New FM2及FE時,在相機的取景器內閃動的預備燈是提示您相機的快門速度並沒有 正確設定。在此情況下,確定相機的設定是正確的。 2 按照“決定光圈及閃光拍攝距離範圍”圖表(第119頁)決定正確光圈以配合拍攝距離範圍。在SB-30 的模式選擇盤上設定相同的光圈。 ‧ 關於可獲得的光圈,請參閱“決定光圈及閃光拍攝距離範圍”圖表(第119頁) 3 在相機或鏡頭上設定與SB-30相同的光圈。 ‧ 否則,不可以獲得正確的曝光。 ‧ 當使用擁有可變光圈的變焦鏡頭時,請參閱“於遠近變焦後的光圈改變” (第121頁)後才設定光圈。 4 確定SB-30的預備燈已亮起後才拍攝。 ‧ 假如在相機取景器內的預備燈於拍攝後閃爍,請參閱第117頁。...
- Page 127 於變焦遠近後的光圈改變 ‧ 使用擁有可變光圈的變焦鏡頭,請在設定SB-30的光圈時注意以下要點。 ‧ 有關詳情,請參閱您的相機及鏡頭的使用說明書。 在相機的LCD屏或於取景器內讀取光圈 ‧ 把鏡頭的光圈鎖定到其最細小,並於變焦遠近作構圖之後,在相機的LCD屏或在取景器內 讀取所出現的光圈。 使用鏡頭上的尺度讀出光圈 ‧ 於遠近變焦選擇出適合的構圖後,用以下的方式讀出光圈: 於廣角變焦設定,以綠色指示(或線)讀取光圈值。 基 於遠攝設定,以黃色指示(或點)讀取光圈值。 本 於中間設定,以兩個指示間讀取光圈。 操 作...
-
Page 128: 手動閃光模式
手動閃光模式 這一具SB-30的閃光輸出水平可以手動地設定到M1/1、M1/8或M1/32。在手動模式之中,您必需綜合閃 光指數、拍攝距離及鏡頭光圈以計算出正確的曝光。 ‧ 假如相機的曝光模式設定到光圈先決自動(A)或手動(M)以外的模式,快門則有可能無法打開,此 點會視乎不同的相機而定。 閃光指數(米/英呎)及ISO感光度 ISO感光度 1600 M1/1 8/26 11/36 16/52 22/72 32/105 45/148 64/210 閃光輸出水平 M1/8 2.8/9 4/13 5.6/18 8/26 11/36 16/52 22/72 M1/32 1.4/4.6 2/6.6 2.8/9.2 4/13 5.6/18 8/26 11/36 M1/1 5/16 7.1/23 10/33 14/46 20/66 28/92 40/131 閃光輸出水平... - Page 129 於手動閃光模式拍攝閃光照片 1 設定相機的曝光模式、同步模式、快門速度等。 2 決定光圈及閃光輸出水平以配合閃光拍攝距離。 ‧ 正如第122頁的閃光指數圖表所示,閃光指數是可變化的,視乎閃光的輸出水平及是否安裝 了廣角閃光擴射片。 3 在相機或鏡頭上設定光圈及在SB-30上設定閃光輸出水平。 基 4 確定SB-30的預備燈已亮起,然後拍攝。 本 ‧ 於手動閃光模式,在拍攝後預備燈並不會閃爍作為光線有可能不足夠作正確曝光的提示。 操 作...
-
Page 130: 使用Sb-30及相機例如Coolpix照明遠距的主體 無線從屬閃光拍攝
使用SB-30及相機例如COOLPIX照明遠距的主體 無線從屬閃光拍攝 在此情況下,SB-30會用作從屬閃光燈,與安裝在相機上的主體閃光燈或其內置閃光燈同步發出及停止閃 光。使用這一具SB-30,可以提供以下類型的無線從屬閃光拍攝。 ‧ 假如模式選擇盤被設定到無線從屬閃光模式,則備用功能便不可以工作。 注意電源仍然接通及正在耗電。 使用有內置閃光燈的相機例如COOLPIX拍攝遠距離的主體(第126頁) 把相機及這一具SB-30並排擺放,並使SB-30與內置閃光燈同步發出閃光,您便可以照明遠處的主體,可 以拍攝出只利用內置閃光燈本身不能拍攝到的照片。 使用SB-30作為從屬閃光燈作離機使用(第128頁) 在多重閃光中,若以離機方式使用SB-30,您可以創造出更為自然的照片,使整張照片均有充份照明。 以主體閃光燈把牆上造成的陰影柔化或把背景照明(第130頁) 使用SB-30作全光(M1/1)輸出,您可以把礙眼的陰影消除,或把背景照明,以拍攝出自然的照片。 利用紅外線遙遠控制器作多重閃光操作(第131頁) 。 當安裝了紅外線濾鏡後,SB-30便可以用作紅外線遙遠控制器,用以引發其他從屬閃光燈。... - Page 131 無線從屬閃光拍攝的兩種方法 利用模式選擇盤的設定可以作兩種無線從屬閃光的操作: (1)自動無線從屬閃光(A)模式: ‧ SB-30會與主體閃光燈同步地開始及停止發出閃光。 ‧ SB-30的光線感應器的最遠拍攝距離大約是5米(16英呎) 。 (2)手動無線從屬閃光(M)模式: ‧ 這一具SB-30只可以用M1/1輸出與主體閃光燈同步。 ‧ 這一具SB-30的光線測量器的最遠距離大約是40米(131英呎) 。 注意 ‧ 擺放這一具從屬閃光燈(SB-30)時要注意主體閃光燈的光線需要可以到達從屬閃光燈的光線感應器。 當您以手持從屬閃光燈拍攝時此點尤為重要。 ‧ 假如主體閃光燈射出一連串預閃光(監察預閃)便不能達致正確的曝光。利用以下所載的方法取消主體閃 光燈的監察預閃。此點為必須的步驟,但由於COOLPIX的預閃光不會影響正確曝光,故此得以例外。 基 F80系列/N80系列、F70系列/N70 把相機的曝光模式設定到手動(M) 本 操 F5、F100、F90X/N90s、F90系列/N90 取消安裝在相機上的閃光燈的監察預閃光。 作 D1系列 把安裝在相機上的閃光燈的閃光模式設定到非TTL自動或手動。...
-
Page 132: 使用Sb-30與有內置閃光燈的相機例如Coolpix一起拍攝遠距的主體
使用SB-30與有內置閃光燈的相機例如COOLPIX一起拍攝遠距的主體 把相機及這一具SB-30並排擺放,並使SB-30與內置閃光 燈同步發出閃光,您便可以照明遠處的主體,可以拍攝 出只利用內置閃光燈本身不能拍攝到的照片。把SB-30 的模式選擇盤設定到無線從屬閃光(A)模式以執行自 動閃光。 ‧ COOLPIX 900、COOLPIX 700系列、COOLPIX 800系 主體 列及COOLPIX 2500相機均只會發出一次預閃,故均可以 使用。 ‧ Pronea S並沒有配件插座,而F55/N55的配件座並沒有TTL 自動閃光功能,但仍可以配合SB-30作TTL自動閃光。 從屬閃光燈: ‧ 當安裝SB-30到例如COOLPIX 700系列、COOLPIX 800 托架套件SK-9 SB-30 系列,可使用另外選購的托架套件SK-9,請參閱SK-9使 (另外選購) 用說明書。 相機:COOLPIX 700系列、 COOLPIX 800系列、 COOLPIX 2500等 主體閃光燈:內置閃光燈... - Page 133 以COOLPIX拍攝閃光照片 1 正如配合正常的閃光燈在相機上作出必需的設定。 2 把SB-30的模式選擇盤設定到無線從屬閃光(A) 。 ‧ 於無線從屬閃光拍攝之中,並不可以使用SB-30的曝光補償掣作曝光補償。在此情況下,在相機上作 曝光補償。 3 檢查光圈及閃光拍攝距離,然後拍攝。 ‧ 按下備用重新啟動按鈕/從屬閃光發射取消按鈕以避免因與其他閃光燈同步意外閃光。當這一個掣按 下時,SB-30將不會閃光。 使用菲林單鏡反光相機拍攝閃光照片 1 設定主體閃光燈,以及相機內置閃光燈或安裝在相機上的閃燈來閃光。 ‧ 請確定把主體閃光燈的監察預閃取消(第125頁) 。 基 2 把SB-30用作為從屬閃光燈並設定到無線從屬閃光(A)模式。 本 ‧ 於無線從屬閃光拍攝時,使用SB-30的曝光補償掣作曝光補償是不可能的,在此情況,請在相機上作 操 曝光補償。 作 3 檢查光圈及閃光拍攝距離,之後拍攝。 ‧ 按下備用重新啟動按鈕/從屬閃光發射取消按鈕以避免因與其他閃光燈同步意外閃光。當這一個掣按 下時,SB-30將不會閃光。...
-
Page 134: 以與相機分開的Sb-30拍攝主體
以與相機分開的SB-30拍攝主體 當SB-30置於離開相機的位置以提供多重閃光,您可以 拍攝有足夠照明的更自然的照片。於TTL自動或非TTL 自動閃光模式中把SB-30的模式選擇盤設定到無線從屬 閃光(A)以提供無線多重閃光操作。 ‧ COOLPIX 900、COOLPIX 700系列、COOLPIX 800 系列及COOLPIX 2500相機只會發出一次預閃光,故均 可以使用。 ‧ 備有無線多重閃光功能的閃光燈 , 例如SB-30 、 SB-80DX 、 SB-50DX等均可以用作從屬閃光燈。此外,任何其他閃 主體 光燈若可以兼容TTL自動閃光,當安裝了另外選購的無 從屬 從屬 線從屬閃光控制器SU-4時,亦可以使用。 閃光燈1: 閃光燈2* ‧ 於無線從屬閃光(A)模式中,SB-30的光線感應器的最 SB-30 遠拍攝距離大約是5米(16英呎) 。 ‧ 把從屬閃光燈置於只有主體閃光燈的光線可以到達其光 相機:所有尼康單鏡反光相機及數碼相機 線感應器的地方。假如有太多其他從屬閃光燈的光線直 主體閃光燈:內置閃光燈或安裝在相機上的閃光燈 接或間接進入從屬閃光燈的光線感應器,便有可能無法 進行正確的操作。 * 任何兼容TTL自動閃光的閃光燈安裝到另外選購的... - Page 135 拍攝閃光照片 1 如配合正常閃光燈般在相機上進行的必需的設定。 2 把SB-30的模式選擇盤設定到無線從屬閃光(A) 。 ‧ 於無線從屬閃光拍攝中,不能利用SB-30曝光補償掣進行曝光補償。在此情況下,可在相機上進行曝 光補償。 3 把主體閃光燈的閃光模式設定到TTL自動閃光。 ‧ 請確保取消主體閃光燈的監察預閃(第125頁) 。 ‧ 假如監察預閃不能夠取消,可把閃光模式設定到TTL自動閃光模式以外的其他閃光模式。 ‧ SB-30沒有D-TTL自動閃光模式。當配合數碼單鏡反光相機時,把閃光模式設定到非TTL自動閃光 或自動光圈閃光。 4 檢查光圈及閃光拍攝距離,然後拍攝。 基 本 操 作...
-
Page 136: 利用主體閃光燈柔化在牆上的陰影或把背景照明
利用主體閃光燈柔化在牆上的陰影或把背景照明 把SB-30的模式選擇盤設定到無線從屬閃燈(M) ,而閃 光燈會以M1/1的輸出發出閃光,可以讓您把陰影消除 或把背景照亮,以便拍攝出看來更自然的照片。 ‧ 主體閃光燈的光線感應器的最遠拍攝距離大約是40米 牆壁 (131英呎) 。 陰影 拍攝閃光照片 1 把SB-30用作從屬閃光燈並把它設定到無線從屬閃光 主體 (M)模式。 從屬 2 利用閃光燈到主體間的距離及設定在相機或鏡頭上的 閃光燈1: SB-30 光圈,決定正確的曝光,然後拍攝。 ‧ 請參閱第122頁的“手動閃光模式” 。 ‧ 要消除例如投射在牆壁上的陰影,可使用相當於 拍攝牆壁上的照明度的兩級或以上的曝光過度。 相機:所有單鏡反光相機 主體閃光燈:安裝在相機上的閃光燈或相機的內置閃 光燈。... -
Page 137: 利用Sb-30作紅外線遙遠控制器作多重閃光操作
利用SB-30作紅外線遙遠控制器作多重閃光操作 當安裝了內置的紅外線濾鏡,您可 以把SB-30用作紅外線遙遠控制器 以執行無線多重閃光,只是利用從 屬閃光燈照明主體而並沒有使用主 體閃光燈作照明。 ‧ 把閃光模式設定到TTL自動閃光 ; 從屬 不建議使用非TTL自動閃光。 閃光燈2* 主體 從屬 ‧ 紅外線濾鏡可以和廣角閃光擴射片一併使用。 閃光燈1: 紅外線 紅外線 SB-30 ‧ 雖然在紅外線濾鏡的兩旁會有閃光溢出,但此舉不 紅外線 會影響正確的曝光。 相機:單鏡反光相機或數 ‧ 假如沒有使用這紅外線濾鏡,主體閃光燈便會如正 碼相機 常閃光燈般工作,而主體亦會被此閃光燈所照明。 主體閃光燈:SB-30 基 * 任何兼容TTL自動閃光的閃光燈安裝在另外選購的 本 無線從屬閃光控制器SU-4上。 操 作 利用連線作多重閃光操作 與 其 他 兼 容 T T L 自 動 閃 光 模 式 的 閃 光 燈 一 樣 , 這 一 具 S B - 3 0 亦 都 可 以 利 用 另 外 選 購 的 T T L 遙 控 線 SC-17/SC-24、TTL多重閃光同步線SC-18/SC-19或TTL多重閃光適配器AS-10作TTL多重閃光。有關詳... -
Page 138: 利用內置廣角閃光擴射片進行大約0.3到1米(1到3.3英呎)的近距閃光攝影
利用內置廣角閃光擴射片進行大約0.3到1米(1到3.3英呎)的近距閃光攝影 把SB-30安裝到相機的配件插座,便可以進行近距閃光拍攝。 。 ‧ 當拍攝近距閃光照片時,請緊記要使用內置的廣角閃光擴射片 。 ‧ 當使用大直徑的鏡頭或遮光罩等作近距閃光拍攝時,有可能出現暈影現象 1 把SB-30的模式選擇盤設定到D。 ‧ 如使用不兼容TTL自動閃光模式的閃光燈,把選擇盤設定到非TTL自動閃光或手動閃光模式。 2 設定相機的曝光模式、測光系統、同步模式,及快門速度等。 ‧ 在相機取景器內的預備燈會閃爍提示您相機的設定並不正確,使TTL自動閃光無法進行。在此情況 下,請檢查相機的各項設定。 3 把廣角閃光擴射片抽出並設定到位。 ‧ 小心黑色的紅外線濾片並沒有在閃光擴射片前造成障礙。... - Page 139 4 當進行少於大約0.4米(1.3英呎)的近攝時,把閃光燈頭俯低。 ‧ 當拍攝距離少於0.4米(1.3英呎)的主體時,把閃光燈頭俯低到50°的位置以便作有效的照明。 5 利用“決定光圈及閃光拍攝距離範圍(米/英呎) ” (第119頁)以決定正確的光圈,以及在相機上設定相 同的光圈。 ‧ 於非TTL自動閃光模式中,亦要在SB-30的模式選擇盤上設定相同的光圈。 6 檢查SB-30的預備燈已亮起,然後拍攝。 ‧ 假如在相機取景器內的預備燈於拍攝後閃爍,請參閱第117頁。 內置廣角閃光擴射片 ‧ 內置廣角閃光擴射片亦可以在近距閃光拍攝以外的情況下使用。 ‧ SB-30的涵蓋角度可以配合28mm鏡頭,利用內置廣角閃光擴射片更可以把涵蓋角度擴闊到配合17mm 鏡頭,但閃光指數則會由16/52降低到10/33(ISO 100米/英呎) 。 ‧ 當安裝了內置廣角閃光擴射片使用17mm鏡頭時,相機與主體間的距離由畫面的中央到邊緣便有極大的 先 差異,因此,在某些情況下邊緣的位置便會有照明不足的情況。 進 操 作...
-
Page 140: 曝光補償
曝光補償 當SB-30的模式選擇盤設定到非TTL自動,M1/32,或M1/8時,便可以利用曝光補償掣調節SB-30的輸出。 把曝光補償掣設定到+1/2的位置可以使主體更明亮,而設定到-1/2則會使主體暗一些。 當配合COOLPIX相機使用時,您可以在顯示屏上監看影像的光度以設定閃光的輸出,然後再次拍攝。 曝光補償掣 +1/2: 增加閃光燈的輸出到+1/2 EV以使主體更明亮 0: 並沒有補償。當曝光無需作補償時,把此掣設定到零(0) -1/2: 減低閃光燈的輸出到-1/2 EV以使主體暗一些 ‧ 假如模式選擇盤設定到TTL自動閃光,M1/1或無線從屬模式,便不可以使用此掣作曝光補償。... -
Page 141: 另購配件
另購配件 托架套件 SK-9 這一個SK-9可以讓COOLPIX(COOLPIX700系列、800系列及900系列)或 各款單鏡反光相機與SB-30並排安裝在一起。這一個托架套件包括托架SK-9、 TTL多重閃光適配器AS-18,以及同步線SC-25以便把COOLPIX 900以外 的各款COOLPIX 900系列相機連接到AS-18。 多重閃光托架 SK-E900/多重閃光適配器 AS-E900 把 C O O L P I X 安 裝 到 多 重 閃 光 托 架 S K - E 9 0 0 並 利 用 多 重 閃 光 適 配 器 AS-E900把SB-30連接到COOLPIX的多重閃光終端,則SB-30便可以用... -
Page 142: 疑難排解
疑難排解 在您把您的閃光燈送往尼康服務中心修理前,請先閱讀下表找出引致問題的原因。 問題 可能的原因 參考/補救 預備燈沒有亮起 當電源開關掣設定到ON或者STBY的位置時更換電池 安裝電池(第110頁) 電池沒有正確地安裝 安裝電池(第110頁) 電池微弱 安裝電池(第110頁) 備用功能正在啟動及正在操作 調校電源開關及備用功能 (第111頁) 電池終端或SB-30的電池觸點不清潔 把終端或觸點清潔 於發出閃光後預備燈閃爍約1.5秒 拍攝距離超出了可獲的閃光拍攝距離範圍 確認光圈及閃光拍攝距離範 圍(米/英呎) (第119頁) 預備燈需要較長時間才亮起 電池微弱 安裝電池(第110頁) 由於連續閃光使電池發熱 等候SB-30冷卻 雖然預備燈已亮起,但快門不能釋放 模式選擇盤設定到非TTL自動或手動,而相機的曝 非TTL自動閃光模式 (第120頁) 光模式設定到程式自動或快門先決自動 手動閃光模式(第122頁)... -
Page 143: 閃光燈護理提示及電池注意事項
閃光燈護理提示及電池注意事項 清潔 ‧ 避免把SB-30曝露於強烈磁場或來自電視或高壓輸電塔 的輻射,因為此舉會導致它出現故障。 ‧ 使用氣泵掃來清除SB-30上的污垢及塵埃,並使用柔 軟、潔淨的布來抹拭。於接近鹹水的地方使用SB-30之 ‧ 當SB-30的閃光模式設定到無線從屬閃光時,這一具閃光 後,使用輕微沾了清水、柔軟和潔淨的布來輕輕抹拭, 燈便有可能在有閃爍螢光管的環境中意外地發出閃光。 然後再用乾布把它抹乾。 安裝一枚3V鋰電池(CR123A或DL123A) 貯存 ‧ 當拍攝重要項目時,應先行更換電池,或帶備額外的電池。 ‧ 把SB-30貯存於陰涼、乾燥的地方,以防止因濕度高而 ‧ 假如電池的電極受污了,或被您的手油所弄污,請使用 乾布清潔電極,受污的電極會引致接觸不良。 引致故障,並可以防止發霉或結露。 ‧ 把SB-30貯藏於遠離化學物品的地方,例如臭丸或樟腦。 於低溫下使用新的電池 ‧ 不應把SB-30存放於高溫的地方或在高溫的地方使用, ‧ 當在低溫下使用已消耗的電池,SB-30有可能無法正常 例如暖爐和焗爐,因為此舉會導致閃光燈損壞。 操作。 ‧ 若有多於兩個星期不使用SB-30,請確保把它貯藏之前 ‧ 當溫度下降時電池能量會減弱,使回電的時間增加,並 先行把電池移去,以免因電池洩漏液體而導致故障。 減少可以閃光的數目。當溫度回升到正常時,電池能量 ‧ 應每月把SB-30取出,放入電池並讓它閃光數次,使電 參... - Page 144 規格 電子結構: 模式選擇盤: 自動絕緣閘二極晶體管(IGBT)及串聯電路 共有四檔:TTL自動閃光,非TTL自動閃光(4級) ,手動 閃光(3級) ,無線從屬閃光(A或M) 電池: 一枚3V鋰電池(CR123A或DL123A) 預備燈: 當SB-30回電完成並預備閃光時便會亮起。當它以全光輸出 閃光指數(ISO 100,米/英呎): 便會閃爍,顯示閃光的光線可能並不足夠(於TTL自動閃 於28mm的涵蓋角度時為16/52(沒有使用廣角閃光擴射片) 光及非TTL自動閃光模式) 。當相機在TTL自動閃光模式的 於17mm的涵蓋角度時為10/33(使用了廣角閃光擴射片) 設定並不正確時,在相機的取景器內的預備燈便會閃動。 涵蓋角度: 備用重新啟動按鈕/從屬閃光發射取消按鈕: 涵蓋28mm鏡頭的畫面角度(並沒有安裝廣角閃光擴射片) 當SB-30進入備用狀態後把它重新啟動。防止SB-30在從屬 涵蓋17mm鏡頭的畫面角度(安裝了廣角閃光擴射片) 閃光操作時意外地發出閃光。 電源開關: 閃光時間 提供(關/開/備用)三個位置:OFF/ON/STBY 於M1/1輸出時為1/2800秒 ON/STBY位置:電源接通 STBY:當閃光燈閒置約40秒的時候,SB-30便會自動關掉 體積(闊×高×厚) 以節省電池 大約58.5×83.5×36mm(2.3×3.3×1.4英吋) 回電時間及閃光數目: 重量(不連電池) 最短回電時間:大約4秒(當使用全新電池並以M1/1輸出閃光) 大約92克(3.2安士) 閃光數目:大約250次(當使用全新電池並以M1/1輸出閃光) 所有表現數據及規格以在常溫(20℃/68℉)下使用全新的...
- Page 145 新しい使用説明書をお求めください。 ( 有料) No reproduction in any form of this manual, in whole or in part (except for brief quotation in critical articles or reviews), may be made without written authorization from NIKON CORPORATION. FUJI BLDG., 2-3, MARUNOUCHI 3-CHOME, CHIYODA-KU, TOKYO 100-8331, JAPAN...