Table of Contents
Advertisement
Quick Links
®
Spirit Healthcare Ltd.
Spirit House, Selbury Drive, Oadby,
Leicester, LE2 5NG
Customer Support Tel : 0800 881 5423
i-SENS, Inc.
27-36, Gwangun-ro, Nowon-gu
Seoul 139-845, Korea
www.i-sens.com
Medical Technology Promedt
Consulting GmbH, Altenhofstrasse 80,
D-66386 St. Ingbert, Germany
© 2014 i-SENS, Inc. All Rights Reserved
PGC8E3056 REV0 11/2014
®
Owner's Booklet
Advertisement
Table of Contents

Related Manuals for Spirit CareSens N


Summary of Contents for Spirit CareSens N
- Page 1 ® Owner’s Booklet ® Spirit Healthcare Ltd. Spirit House, Selbury Drive, Oadby, Leicester, LE2 5NG Customer Support Tel : 0800 881 5423 i-SENS, Inc. 27-36, Gwangun-ro, Nowon-gu Seoul 139-845, Korea www.i-sens.com Medical Technology Promedt Consulting GmbH, Altenhofstrasse 80, D-66386 St. Ingbert, Germany ©...
- Page 2 * No part of this document may be reproduced in any form or by any means without the prior written consent of i-SENS. * The information in this manual is correct at the time of printing. However, i-SENS reserves the right to make any necessary changes at any time without notice as our policy is one of continuous improvement.
- Page 3 Welcome to the Blood Glucose Monitoring System Thank you for choosing the Blood Glucose Monitoring System. The system provides you with safe, convenient and less painful blood glucose in vitro (i.e., outside the body) diagnostic monitoring. You can obtain accurate results in just 5 seconds with a small (0.5 µL) blood sample.
-
Page 4: Table Of Contents
Additional Functions Monitoring System Meter Memory Inserting or Replacing the Batteries Setting the Alarm Function CareSens N Blood Glucose Test Strip Maintenance CareSens N Blood Glucose Meter Caring for Your System CareSens N Blood Glucose Meter Display Understanding Error Messages... -
Page 5: Important Information
The following chart explains the symbols Important Information: you’ll find in the Owner's Booklet, Read This First! product packaging, and product inserts. To receive safe and optimum system benefits, please read the entire manual contents before For in vitro diagnostic use using the system. - Page 6 Inaccurate results may occur in patients undergoing monitoring by using the no-coding function. oxygen therapy. • The Blood Glucose Meter should If you need assistance, please contact Spirit be used only with the Blood Healthcare Customer Support at 0800 881 Glucose Test Strips.
-
Page 7: Specifications
• Before using the meter, check the battery Weight 51.5 g (with batteries) compartment and insert batteries if empty. • Please contact Spirit Healthcare at 0800 881 Operating ranges 5423 if any component is missing or damaged. Temperature 5-50˚C (41-122˚F) •... -
Page 8: Inserting Or Replacing The Batteries
-23. in the direction of the arrow to open the battery • Note : compartment. Batteries can be ordered free from Spirit Healthcare call 0800 881 5423. Step 2 Remove the used batteries one at a time. Slip your index finger under the battery to lift and pull out as shown. -
Page 9: Blood Glucose Test Strip
Warning! Blood Glucose Test Strip • The Test Strips should be Blood Glucose Monitoring used only with fresh capillary whole blood System measures blood glucose quickly and samples. accurately. It automatically absorbs the small • Do not reuse test strips. blood sample applied to the narrow edge of the •... -
Page 10: Blood Glucose Meter
Test Strip Port Insert test strip here to turn meter on • Note: The cable for data transmission to PC can be ordered separately. Please contact Spirit Healthcare at 0800 881 5423. -
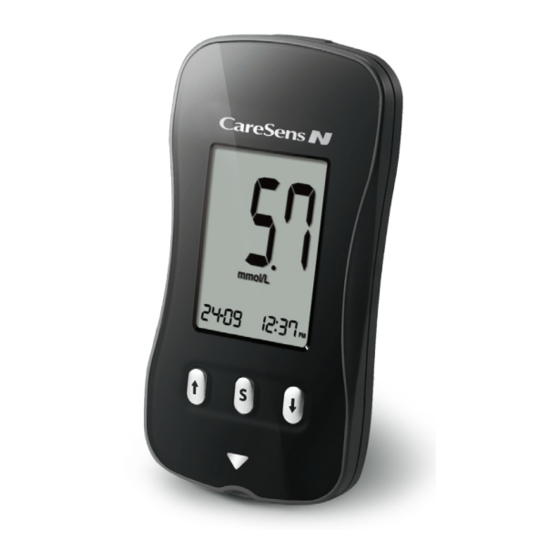
Page 11: Blood Glucose
Blood Glucose Meter Display unit for measuring blood glucose appears when the post-meal alarm has been set appears during post-meal testing and when post-meal test results are displayed indicates meter is ready for the application of a drop of blood or control solution Day Month Hour Minute appears when the time alarm has been set Your meter has been preset and locked... -
Page 12: Setting Up Your System
Setting Up Your System Step 3 Setting the Month Press and hold the S button for 3 seconds to enter the SET mode. After all settings are finished, A number indicating the month will be blinking on the left corner of press and hold the S button for 3 seconds to turn off the meter. -
Page 13: Setting The Sound On/Off
• When you push the button or Step 6 Setting the Hour button to turn on the meter Press or until the correct hour • When the test strip is inserted appears. After the hour is set, press in the meter the S button to progress to setting •... -
Page 14: Checking The System
Checking the System opened plus three (3) months) in the space You may check your meter and provided on the label. test strips using the • Make sure your meter, test strips, and Control Solution(control A and/ control solution are at room temperature or B). -
Page 15: Control Solution Testing
Control Solution Testing After the symbol appears on the display, apply the solution to the narrow edge of the Step 1 test strip until the meter beeps. Make sure the Insert a test strip into the confirmation window fills completely. meter’s test strip port, with the contact bars facing upwards. -
Page 16: Comparing The Control Solution Test Results
Step 3 Comparing the Control Solution Test Results A test result will appear after the The test result of each control solution should be meter counts down from 5 to 1. within the range printed on the label of test strip After your control solution result vial. -
Page 17: Using The Lancing Device
Barrel • Note : Window Control Solution can be obtained separately from Spirit Healthcare on 0800 881 5423. • The lancing device should not be used by more than one individual. Ensure the lancing device is not shared among different users. -
Page 18: Preparing The Lancing Device
Step 2 • Caution : Unscrew and To avoid infection when drawing a sample, remove the do not use a lancet more than once, and: lancing device tip. • Do not use a lancet that has been used by others. •... -
Page 19: Preparing The Meter And Test Strip
Step 5 • Note : Select a desired depth The skin depth to get blood samples will vary of one-to-seven (1-7) for various people at different sample sites. on the lancing device's The lancing device's adjustable tip allows adjustable tip. Choose the best depth of skin penetration to get an a depth by rotating adequate sample size. -
Page 20: Marking Post-Meal Test Results
Applying Blood Sample Marking Post-meal Test Results Step 9 meter allows you to mark a Obtain a blood sample using result of a post-meal test with symbol. The the lancing device. Place post-meal test mark ( ) can be attached the device against the pad just before applying the blood sample. - Page 21 It is recommended that the application of blood Step 11 sample to the test strip be performed virtually Apply the blood sample vertical to the sample site as shown in the to the narrow end of the diagram below. test strip until you hear a `beep'.
-
Page 22: Discarding Used Lancets
Alternative Site Testing Discarding Used Lancets What is AST(Alternative Site Testing)? Usually when someone tests their glucose, they Step 1 take the blood sample from the tip of the finger. Unscrew lancing device tip. However, since there are many nerve endings distributed there, it is quite painful. - Page 23 Alternative Site Blood Sampling (forearm, as lifestyle and ingested food have an effect on palm, thigh, calf) glucose levels. Select clean, soft and fleshy sample site area Acceptable situations for AST free of visible veins and hair and away from bones.
-
Page 24: Hi And Lo Messages
• Note : • Note : If the sample drop of blood runs or spreads Please contact Spirit Healthcare Customer due to contact with hair or with lines on your Support at 0800 881 5423 if such messages skin, do not use that sample. -
Page 25: Target Blood Glucose Ranges
Before lunch or dinner cable connects the meter with computer. 1 hour after meals For more information, please contact Spirit 2 hours after meals Healthcare Customer Support at 0800 881 Between 2 a.m. and 4 a.m. 5423 or visit www.spirit-healthcare.co.uk. -
Page 26: Meter Memory
Meter Memory Step 2 meter can save up to 1,000 Press the to view 7, 14, 30 and 90 day average glucose test results with time and date. If the values and the number of tests performed for the memory is full, the oldest test result will be deleted last test period. - Page 27 Step 4 Viewing Test Results Stored in the Meter’s Press the to view 1, 7, 14, 30 and 90 day Memory average values and the number of tests Step 1 performed for the last test period. Press the or S button to turn the meter on. button The current date and time will be displayed on the bottom of the screen for 2 seconds, followed...
-
Page 28: Setting The Alarm Function
Setting the Alarm Function Four types of alarms can be set in the meter: one post-meal alarm (PP2 alarm) and three button time set alarms (alarm1-3). The PP2 alarm goes off 2 hours after setting the alarm. The alarms ring for 15 seconds and can be silenced by pressing , ... - Page 29 Setting the Time Alarms (alarm1-3) Step 1 Without inserting a test strip, Step 2 Setting the PP2 alarm OFF press and the S button To turn off the PP2 alarm, press and hold simultaneously for 3 seconds to for 3 seconds.
-
Page 30: Caring For Your System
Caring for Your System Step 4 On pressing , the number Use a soft cloth or tissue to wipe the meter exterior. indicating the minute will start If necessary, the soft cloth or tissue might be dipped blinking. Press to set the in a small amount of alcohol. -
Page 31: Understanding Error Messages
• Repeat the test with a new test repeat the test after the meter strip. and test strips have reached a temperature within the operating range. • Note : If the error messages persist, contact Spirit Healthcare Customer Support at 0800 881 5423. -
Page 32: General Troubleshooting
• Repeat the test after inserting the blood a new test strip. sample on the • Note : strip. If the problem is not resolved, please contact Spirit Healthcare Customer Support at 0800 881 5423. -
Page 33: Performance Characteristics
Performance Characteristics System accuracy results for glucose concentration ≥ 5.55 mmol/L The performance of Blood Glucose Monitoring System has been evaluated in laboratory Within ± 5% 266/414 (64.3%) and in clinical tests. Within ± 10% 395/414 (95.4%) Accuracy: The accuracy of the Within ±... - Page 34 Interferences Total Precision The effect of various interfering substances was evaluated in whole blood samples on glucose Control avg. 2.2 mmol/L SD = 0.1 mmol/L measurements. Control avg. 6.7 mmol/L CV = 3.5% Difference Averages 17.7 mmol/L CV = 2.6% Control avg.
-
Page 35: Warranty Information
Xylose -0.04 mmol/L -1.0% To obtain warranty service, you must return the defective meter or meter part to Spirit Healthcare. User Performance Evaluation Please contact Customer Support on 0800 881 A study evaluating glucose values from fingertip 5423 for further information.