Table of Contents
Advertisement
Advertisement
Table of Contents

Related Manuals for Motorola ex560 xls


Summary of Contents for Motorola ex560 xls
-
Page 3: Table Of Contents
Getting Started ....16 CONTENTS Battery Charge Status ... . . 17 Contents. - Page 4 Receiving a Call Alert™ Page ..29 Trunked System ....41 Radio Check ..... . . 29 Making a Phone Call D Through a Editing a Radio Call List K .
-
Page 5: Computer Software Copyrights
COPYRIGHTS directly or by implication, estoppel, or otherwise, any license under the copyrights, The Motorola products described in this patents or patent applications of Motorola, manual may include copyrighted Motorola except for the normal non-exclusive license to... -
Page 6: Safety
For a list of Motorola-approved antennas, batteries, SAFETY and other accessories, visit the following website which lists approved accessories: PRODUCT SAFETY AND RF http://www.motorola.com/governmentandenterprise EXPOSURE COMPLIANCE Before using this radio, read the operating instructions for safe usage contained in the Product... -
Page 7: Radio Overview
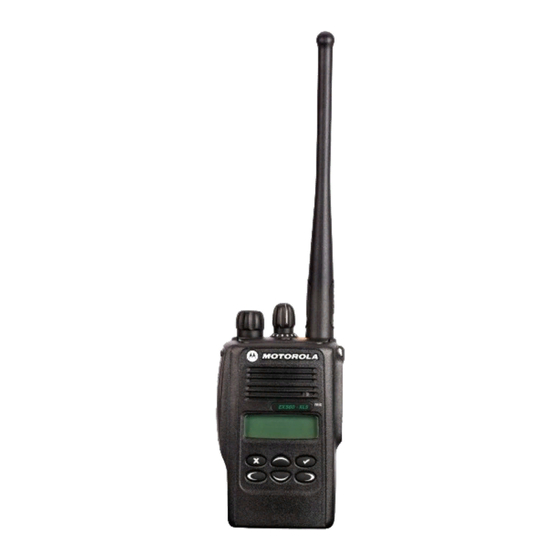
RADIO OVERVIEW EX560•XLS Model Zone, Talkgroup, or Side Channel Selector Knob Connector (Programmable) Cover Top Button (C) (programmable) On/Off/Volume Knob LED Indicator Microphone LCD Screen Push-to-Talk (PTT) Button Menu Keys Side Button 1 (A) (programmable) (P1, P2, P3) (programmable) Side Button 2 (B) (programmable) English... -
Page 8: Ip67 Battery Label
IP67 corrode. Note: IP67 water submersible radios MUST be fitted with Motorola authorized IP67 batteries to ensure proper functionality. Warning: When charging a IP67 battery, make sure that the IP67 battery (or IP67 battery with IP67 radio) is not wet prior to placing in the charger. -
Page 9: On/Off/Volume Knob
On/Off/Volume Knob LED Color Indicates Turns the radio on or off, and adjusts the Double blinking Selective call received radio’s volume. yellow Channel or Zone Selector Knob Momentary Radio has powered-up green successfully Switches the radio to different trunked or Single System or All Group Scan conventional zones. - Page 10 Menu/Select Key ) Right Key > Used to enter menu mode. When in menu mode, Moves the cursor right or inserts a space when this key is also used to make menu selections. editing call, scan, and phone lists. This key can also be programmed with a radio feature (see Exit Key ( page 11).
-
Page 11: Lcd Screen
LCD Screen Symbol Indication An Emergency Siren is being sounded. Emergency Call Received A Selective Call or Call Alert has been received (trunked Call Received operation only). When the green LED is The top two screen rows display menu and blinking, indicates that the radio status information: System or All Group Scan... - Page 12 Symbol Indication Symbol Indication • When the green LED is on, The number of bars (0 – 4) indicates activity on a shown indicates the charge Battery Level Priority 2 talkgroup or remaining in your battery. channel during System Not Currently Assigned Scan.
-
Page 13: Programmable Buttons
Programmable Buttons The table on page 12 summarizes the programmable features available and shows Several of your radio’s buttons can be the page number where the feature is programmed by your dealer as shortcuts to explained. many of the radio’s features. In the “Button”... - Page 14 Programmable Features Feature Indicator Short Press Long Press Hold Down Page Button — — Check the battery’s Battery Gauge Color charge status. Sound a tone for — Volume Set — — adjusting your radio’s volume level. Toggle between using a conventional —...
- Page 15 Programmable Features (Continued) Feature Indicator Short Press Long Press Hold Down Page Button Toggle transmit power level between — Power Level † high and low. — Access your favorite trunked talkgroup — — Home Channel † or conventional channel. Revert —...
-
Page 16: Audio Indicators For Programmable Buttons
AUDIO INDICATORS FOR Button High-Low Tone Low-High Tone PROGRAMMABLE BUTTONS Scan Stop scan Start scan High power Low power Power Level High-Low Tone selected selected Squelch (no Normal squelch Tight squelch visual indicator) Low-High Tone Keypad Lock Unlocked Locked In addition to having visual indicators, some Uses Does not use Repeater/... -
Page 17: Trunked Radio Systems
TRUNKED RADIO SYSTEMS When an LTR trunked radio user wants to communicate with another radio, the user’s The EX560•XLS radio can operate in both radio sends a “channel request” to the home LTR™ trunked and conventional radio repeater. The system then sends back a systems. -
Page 18: Battery Information
GETTING STARTED LED Color Battery/Charger Status BATTERY INFORMATION Steady Red Battery in rapid-charge mode. Charging the Battery Blinking Yellow Battery in charger, not in rapid- If a battery is new or its charge level is very charge mode but waiting to be low, you need to charge it before you can use charged. -
Page 19: Battery Charge Status
Battery Charge Status You can check your battery’s charge status in Battery Status Indicator two ways: Level Indicator • The charge status is shown by the P status indicator symbol on the LCD screen. High Green This does not require any action by you; the symbol is shown automatically. - Page 20 Battery charges will only charge the Motorola authorized batteries listed below; other batteries may not charge. Table 1: IP54 Battery List Table 2: IP67 Battery List Part No. Description Part No. Description *JMNN4023_ Slim Li-Ion, 1000 mAh, 7.5 V PMNN4073_...
-
Page 21: Attaching The Battery
Attaching the Battery Removing the Battery Battery Latches 1 Turn off the radio (see page 21). 1 Fit the extensions at the bottom of the battery into the bottom slots on the radio. 2 Slide both battery latches, on both sides of the battery, downwards. -
Page 22: Accessory Information
ACCESSORY INFORMATION Attaching the Antenna Removing the Antenna 1 Align the threaded end of the antenna with the 1 Turn the antenna counterclockwise to remove radio’s antenna connector. 2 Turn the antenna clockwise to attach it. English... -
Page 23: Draining Water From The Ip67 Ex560 Xls Speaker
DRAINING WATER FROM THE IP67 TURNING THE RADIO ON OR OFF EX560 XLS SPEAKER • Turn the On/Off/ Turn the On/Off/ Volume knob Volume knob counterclockwise until clockwise. you hear a click. If power-up is successful, you hear If you accidentally drop your EX560•XLS radio the Self-Test Pass into water, pick up the radio, and gently tap the Tone... -
Page 24: Adjusting The Volume
ADJUSTING THE VOLUME Up to 15 LTR trunked zones (containing 16 talkgroups each) can be programmed into your Turn the On/Off/Volume Control knob radio. clockwise to increase the volume or To select a trunked zone and talkgroup: counterclockwise to decrease the volume. Note: The selection of zones can be –or–... -
Page 25: Sending A Trunked Call
5 ) to select the desired zone. 4 Press and hold the PTT button. –or– 6 + or ? until you see the desired Press and release the PTT button and wait 3 preprogrammed talkgroup on the display. seconds. SENDING A TRUNKED CALL •... -
Page 26: Selecting A Conventional Zone And Channel
5 With the PTT button depressed, speak clearly 3 ) to select Zone into the microphone. 4 + or ? until you see the desired zone 6 Release the PTT button to listen. on the display. 5 ) to select the desired zone. SELECTING A CONVENTIONAL ZONE AND CHANNEL 6 + or ? until you see the desired... -
Page 27: Receiving A Trunked Or Conventional Call
REPEATER OR TALKAROUND J 3 Hold the radio in a vertical MODE position at a distance of about 1 to 2 inches (2.5 to 5 cm) (CONVENTIONAL OPERATION ONLY) from your mouth. Talkaround mode enables you to communicate with another radio when either: 4 Press the PTT button and speak clearly into •... -
Page 28: Home Channel Revert
SOUNDING AN EMERGENCY SIREN 3 ) to select Rptr/Talkarnd In the event of an emergency, you may need to 4 + or ? until Rptr/Talkarnd quickly get the attention of others for help. The Emergency Siren feature (if programmed by –or–... -
Page 29: Radio Calls
RADIO CALLS 5 ) to select Selective Call MAKING A SELECTIVE CALL 6 + or ? to locate the desired ID in the Radio Call List. You can make a selective call to a particular –or– radio or group of radios, as programmed by your dealer, provided that the receiving Enter the ID number of the radio you want to radio(s) has the associated decode capability. -
Page 30: Receiving A Selective Call F
RECEIVING A SELECTIVE CALL F 3 ) to select Radio Call When you receive a selective call: • The LCD screen displays F and the 4 + or ? until Call Alert preprogrammed name or ID of the calling radio. 5 ) to select •... -
Page 31: Receiving A Call Alert™ Page
To answer the page, press the PTT button; to 8 If the Call Alert page is received by the target cancel the page, press any other key. radio, you see: Note: Your radio displays only the last Call Alert Acknowledge page received. - Page 32 4 + or ? until 8 If the Radio Check is received by the target Radio Check radio, you see: Acknowledge 5 ) to select Radio Check If not received, you see: 6 + or ? to locate the desired ID in the Radio Call list No Acknowledge –or–...
-
Page 33: Editing A Radio Call List K
EDITING A RADIO CALL LIST K 5 ) to select RadioCall List Your radio has a Radio Call list that contains the names and radio IDs of several talkgroups or individuals. 6 + or ? until Edit Entry? The ID numbers in the Radio Call List are programmed by your dealer, and cannot be changed from your radio. -
Page 34: Name And Call Alert Tone Tagging
NAME AND CALL ALERT TONE 6 + or ? until you see the name you want TAGGING to tag. You can program your radio to sound a 7 ) to confirm the selection. particular alert tone when a specific user is calling (name tone tagging), or when receiving 8 + or ? until you see and hear the tone a particular type of radio call (call tone... - Page 35 4 + or ? until 9 ) to confirm the selection. Call Tone Tag You see: Call Tone Set 5 ) to select Call Tone Tag 10 ( to return to Call Tone Tag 6 + or ? until you see the call type you –or–...
-
Page 36: Scan
or channel appears and remains on the display SCAN until scanning resumes. Your dealer can program the amount of time you can respond Your radio is equipped with the Scan feature, (or “TALKBACK”) to the caller before your which allows you to search for, lock onto, and radio resumes scanning. -
Page 37: All Group Scan G (Ltr Trunked Operation Only)
To start Auto Group Scan: Group Scan operation; it stops blinking when the radio switches to an active talkgroup. Select a talkgroup that has been programmed Note: If you enter menu mode while the radio is for Auto Group Scan by your dealer. scanning, scanning stops. -
Page 38: System Scang
To start or stop a System Scan operation: –or– All Group Off? Press the preprogrammed System Scan button (see page 12) to start or stop scanning, 5 ) to confirm your selection. –or– SYSTEM SCAN Do the following: System Scan scans trunked talkgroups and 1 ) to enter menu mode. -
Page 39: Deleting A Nuisance Channel/Talkgroup
DELETING A NUISANCE CHANNEL/ EDITING A SCAN LIST TALKGROUP SYSTEM SCAN OPERATION ONLY (SYSTEM SCAN OPERATION ONLY) One Scan list is assigned to each of the 16 If a talkgroup or channel continually generates positions on the Zone/Channel Selector knob. unwanted calls (a “nuisance”... -
Page 40: Adding Or Deleting Talkgroups Or Channels In A Scan List
Adding or Deleting Talkgroups or Channels 8 + or ? until you see the talkgroup or in a Scan List channel you want to add or delete. Note: You cannot delete the Primary talkgroup off a Scan List. 1 ) to enter menu mode. 9 ) to confirm your selection. -
Page 41: In A Scan List
Prioritizing a Talkgroup or Channel in a Setting Priority Talkgroups or Channels Scan List 1 ) to enter menu mode. You may want to check the activity on one or two talkgroups or channels more frequently 2 + or ? until Program Lists than others. - Page 42 You see the current priority talkgroup or Hold down ( to exit menu mode. channel. Note: You cannot reprioritize a Priority 1 9 ) to select the desired priority level. channel or talkgroup to Priority 2 channel or talkgroup. If you want to reprioritize all 10 + or ? until you see the talkgroup or channels or talkgroups, you must delete channel you want to prioritize.
-
Page 43: Phone
To initiate a phone call: PHONE Do the following: Your radio allows you to place and receive 1 Select a trunked zone and talkgroup that have telephone calls through trunked and been programmed for telephone. conventional systems (depending on phone line availability). - Page 44 to confirm + or ? to Phone XXX-XXX-XXXX select a number from the phone list. appears on the LCD when you are in Press and release the PTT button again to Phone mode. send the number. 5 Press and Release the PTT button. Hold the radio in a vertical position with the •...
-
Page 45: Making A Phone Call Dthrough A Conventional System
MAKING A PHONE CALL D (For conventional operation with auto access THROUGH A CONVENTIONAL only). You hear a series of tones, indicating SYSTEM that an access code is being sent automatically, and see your access code: To initiate a phone call: –or–... - Page 46 a Press and release the preprogrammed Press and release the PTT button, if required Speed Dial button (see step 6) to use the for your radio. Speed Dial feature. Hold the radio in a vertical position with the b Press the key (1 to 9) corresponding to the microphone 1 to 2 inches (2.5 to 5 cm) away number you want to call, or press 0 if you from your mouth.
-
Page 47: Receiving A Phone Call Dthrough An Ltr Trunked Or Conventional System
RECEIVING A PHONE CALL D MODIFYING THE PHONE LIST THROUGH AN LTR TRUNKED OR Your radio contains a Phone list that holds up CONVENTIONAL SYSTEM to 25 phone numbers. The Phone list is shared between trunked and conventional Phone To receive a phone call: operation. - Page 48 To Add an Entry: You see: Enter Phone # ) to enter menu mode. 10 Use the keypad to enter the phone number. + or ? until Program Lists You can also add a dash (press >) and a Pause Indicator (hold down # until the # character on the LCD screen changes to a ) to select Program Lists...
- Page 49 To Delete an Entry: 10 You see: Delete? ) to enter menu mode. ) again to confirm the deletion. + or ? until Program Lists You see: Entry Deleted ) to select Program Lists 11 ( to return to Delete Entry? + or ? until Phone List –or–...
- Page 50 ) to select 11 ) to confirm your selection. Phone List 12 Use the keypad to edit the entry (see page 9), –or– + or ? until Edit Entry? + or ? until you see the location where you want to store the phone number. ) to select Edit Entry? 13 ) to store the information.
-
Page 51: Audio/Tone Settings
AUDIO/TONE SETTINGS 4 + or ? until you see the feature you want to change (see the table on the next page). You can customize the audio and tone feature settings on your radio by 5 ) to select the feature. You see the feature’s current setting. - Page 52 Audio/Tone Settings Feature What it Does Settings Name Tone Tag ‡ Assigns a specific ring tone when receiving a call from a Standard specific user (see page 32 for details). Alert #1 – #7 Call Tone Tag ‡ Assigns a specific tone when receiving a specific type of Standard radio call (see page 32 for details).
-
Page 53: Utilities
UTILITIES 4 + or ? until you see the feature you want to change (see the Utilities Features table). You can customize some of your radio’s 5 ) to select the feature. You see the feature by: feature’s current setting. 1 ) to enter menu mode. - Page 54 Utilities Features (Continued) Feature What it Does Settings Sets the time, or turns the clock on or off (see page 54). Clock Clock On Clock Off Set Time Sets the alarm, or turns it on or off (see page 54). Reminder Alarm Alarm On Alarm Off...
-
Page 55: Setting Tight Or Normal Squelch (Conventional Operation Only)
SETTING TIGHT OR NORMAL SQUELCH ) to select Squelch (CONVENTIONAL OPERATION ONLY) + or ? until Sqlch Tight? Use this feature to filter out nuisance (unwanted) calls and/or background noise. –or– However, tightening squelch could cause calls Sqlch Normal? until from remote locations to be filtered out as well. -
Page 56: To Set The Power Level
Note: Be aware that a message received from a + or ? until Power High? nearby radio might change your radio’s power level to low. This may cause radios –or– that are farther away not to receive your Power Low? until transmissions. - Page 57 + or ? until Set Time? < or > to move to the previous or next setting. ) to select ) to save your changes. Set Time? When a setting is blinking, you can change it to return to Utilities with + or ?.
-
Page 58: Warranty
One (1) Year warrant the installation, maintenance or service of the Product. Motorola, at its option, will at no charge either repair the Product (with new or MOTOROLA cannot be responsible in any reconditioned parts), replace it (with a new... - Page 59 MOTOROLA'S responsibilities regarding SOME STATES DO NOT ALLOW THE the Product. Repair, replacement or refund EXCLUSION OR LIMITATION OF of the purchase price, at MOTOROLA’s INCIDENTAL OR CONSEQUENTIAL option, is the exclusive remedy. THIS DAMAGES OR LIMITATION ON HOW WARRANTY IS GIVEN IN LIEU OF ALL LONG AN IMPLIED WARRANTY LASTS, OTHER EXPRESS WARRANTIES.
- Page 60 G)Rechargeable batteries if: service. You can also call Motorola at 1- 1)any of the seals on the battery enclosure 800-927-2744 US/Canada. of cells are broken or show evidence of tampering.
- Page 61 PROVISIONS: parts as established by MOTOROLA. MOTOROLA will defend, at its own expense, MOTOROLA will have no liability with respect to any suit brought against the end user purchaser any claim of patent infringement which is based to the extent that it is based on a claim that the...
- Page 62 MOTOROLA software may be used in only the VII.GOVERNING LAW: Product in which the software was originally embodied and such software in such Product This Warranty is governed by the laws of the may not be replaced, copied, distributed, State of Illinois, USA.
-
Page 63: Accessories
*JMNN4025_ NiMH, 700 mAh, 7.5 V FM Approved Many of the available accessories are listed Battery below. For a complete list, see your Motorola PMNN4073_ Li-Ion FM IP67 Standard Battery dealer. PMNN4074_ Li-Ion Non-FM IP67 Standard Battery... -
Page 64: Antennas
UHF (430-470 MHz) 9cm Stubby ANTENNAS 8515969H02 Antenna 8505644V01 VHF 136-150.8 MHz (IP67) 8571019M01 VHF Helical Antenna (136-147 MHZ) NAD6567_ VHF 150.8-162 MHz (IP67) 8571020M01 VHF Helical Antenna (147-160 MHZ) 8505644V03 VHF 162-174 MHz (IP67) 8571021M01 VHF Helical Antenna (160-174 MHZ) PMAE4022_ UHF1 403-470 MHz (IP67) PMAE4025_... - Page 65 Selecting a Trunked Zone and Talkgroup 1. Turn Zone Selector knob to appropriate trunked zone. 2. + or ? until you see desired preprogrammed talkgroup on the display. ™ EX560•XLS Radio Quick Reference Card Sending a Trunked Call 1. Press PTT. If trunked system access was successful — LED = steady red; Record the functions for your radio’s programmable buttons in the table provided if unsuccessful —...
- Page 66 Menu Navigation Chart — Available in LTR trunked zones only (Refer to Menu Navigation guidelines — † — Available in conventional zones only lower, left-hand corner of this page) Rptr/ System Scan All Group Audio/Tones (LTR) Program Phone Utilities Talkarnd† (p.