
Related Manuals for Invacare Top End Force-3


Summary of Contents for Invacare Top End Force-3
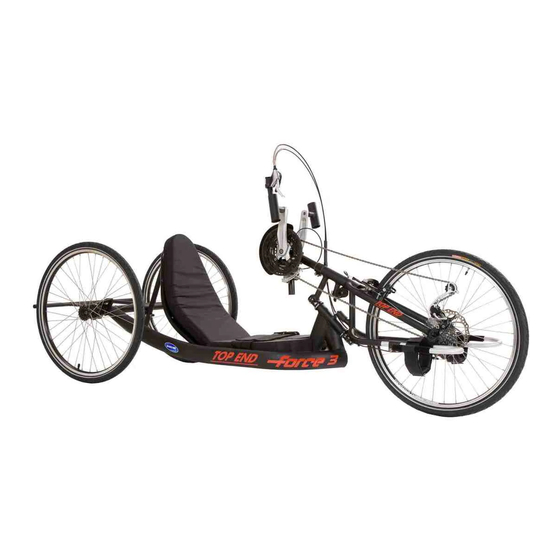
- Page 1 Assembly Instructions Invacare® Top End® Force™-3 Handcycle 1181408 REV A Be sure to record your serial number and read the owners manual.
- Page 2 What you will receive: Before disposing of packaging material be sure all components are accounted for. Box includes: » 1 – wrap around frame with seat upholstery and back frame attached » 2 – complete wheel assemblies » 1 – fork/crank/front wheel assembly »...
- Page 3 What you will need: ¼” Allen wrench 4mm and 5mm Allen wrenches 10mm and 15mm open end wrenches Recommended: Someone to assist Assembly time is approximately 1-1 ½ hours 1181408 REV A...
- Page 4 Step 1: Set up Remove all contents from box and use Take the cardboard off of the box as a mat for assembling. the frame and leave the Double check the box to be sure all parts plastic on the frame to avoid are removed.
- Page 5 Step 2: Attach the Rear Wheels Insert one axle into each of the two rear wheels. The bearings in the wheel hub will be facing in. This is the flat side. Insert the wheels (which are marked left and right on a little tab on the wheel) on the ...
- Page 6 Step 3: Securing the Backrest Loosen the pivot clamp and then insert backrest support tube into the pivot clamp that is welded to the camber bar. Use a 5mm Allen wrench to tighten securely. Note: It will be easier to attach the cushion if the backrest is tightened in the most reclined position.
- Page 7 Step 4: Installing Drafting Bumper Loosen the drafting bumper receiver clamps using a 5mm Allen wrench. Insert drafting bumper into receiver clamps. Use 5mm Allen wrench to tighten the receiver clamps. 1181408 REV A...
- Page 8 Step 5: Installing the Cushions • Bend seat cushion in half to fit under seat straps. • Fit to desired position; this can be moved in the future. • Remove the loop fastener strip from the back cushion (it has a yellow film covering the adhesive side) •...
- Page 9 Step 6: Attaching the Fork To prepare for attaching the fork: 1. Use a 4mm Allen wrench to remove the headtube caps. 1, 2 and 3 2. Remove the cardboard spacers and discard. 3. Reattach the headtube caps, leaving them loose. 4.
- Page 10 Step 6: Attaching the Fork (continued) 1. Line up the split half clamps on the fork to rest on each side of the silver spindle (headtube) on the bike frame. 2. Put the screw that was removed from the dampener through the elongated hole (on the tab welded to the headtube) into the dampener.
- Page 11 Notes To make sure there is no play in the fork, you will want to position yourself on the riders left of the bike, grab the front of the frame and the bottom left of the fork and pull down. There should be no movement.
- Page 12 Step 7: Installing the Footrests Engage parking brake. Remove the box from under the handcycle. Loosen both bolts on the footrest clamp on each side using 4mm Allen wrench. Insert the footrest into the clamps. Tighten securely using 4mm Allen wrench and 10mm wrench. ...
- Page 13 Step 8: Attaching the Footrest Straps Take the two straps and unfasten the two longer bottom hook and loop straps. Wrap the straps around the footrests so they are securely fastened to the hook and loop fastener located on the footrest post. 1181408 REV A...
- Page 14 Step 9: Installing the Safety Flag Insert the two posts of the flag together and then insert into the flag holder on the back of the bike. 1181408 REV A...
- Page 15 Before Riding Your New Handcycle Before you take the bike out, you will want to make sure everything is tight, including the fork clamp. Release your parking brake and watch the lower derailleur to make sure your chain is not slipping while you run through all your gears(by cranking the handpedals).
- Page 16 Before Riding Your New Handcycle (CONT.) Engage your hand brake, and make sure the disc brake caliper engages. Check your parking brake again, and make sure not only that it engages but also that the pads are lined up on the metal part of the wheel rim. Pump up your tires to 100 PSI.
- Page 17 If you have any questions, please call Invacare Top End customer service at 1-800- 532-8677. ©2015 Invacare Corporation. All rights reserved. Trademarks are identified by the symbols ™ and ®. All trademarks are owned by or licensed to Invacare 1181408 REV A...