Advertisement
Table of Contents
- 1 Table of Contents
- 2 Important Safeguards
- 3 About Your Pressure Cooker
- 4 Short Cord Purpose/Polarized Plug
- 5 Parts Identification
- 6 Pressure Cooker Lid Markings
- 7 Rubber Seal Ring Assembly
- 8 Before First Use
- 9 Preparing Your Pressure Cooker
- 10 Menu Button Time Chart
- 11 Operating Instructions
- 12 Cleaning & Maintenance
- 13 Troubleshooting
- 14 Cooking Time Chart
- 15 Recipes
- 16 Warranty and Return Instructions
- Download this manual
Advertisement
Table of Contents

Related Manuals for Cook's essentials K42027


Summary of Contents for Cook's essentials K42027
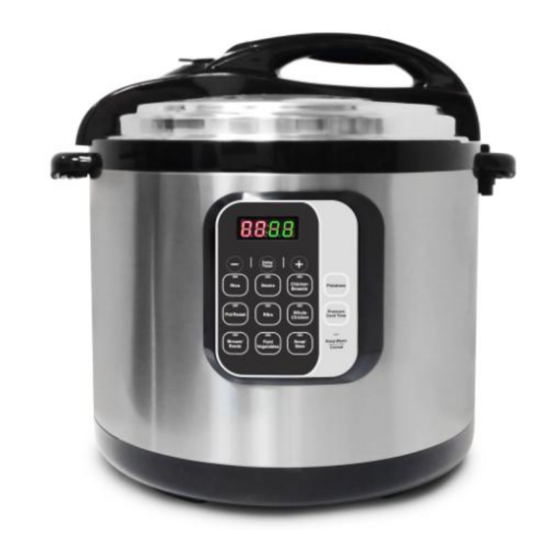
- Page 1 10Qt. Electric Pressure Cooker Model K42027 INSTRUCTION MANUAL Before operating your new appliance, please read all instructions carefully and keep for future reference.
-
Page 2: Table Of Contents
TABLE OF CONTENTS IMPORTANT SAFEGUARDS ABOUT YOUR PRESSURE COOKER SHORT CORD PURPOSE/POLARIZED PLUG PARTS IDENTIFICATION PRESSURE COOKER LID MARKINGS RUBBER SEAL RING ASSEMBLY BEFORE FIRST USE PREPARING YOUR PRESSURE COOKER 11-13 MENU BUTTON TIME CHART OPERATING INSTRUCTIONS 14-22 CLEANING & MAINTENANCE TROUBLESHOOTING 23-24 COOKING TIME CHART... -
Page 3: Important Safeguards
IMPORTANT SAFEGUARDS When using pressure cookers, basic safety precautions should always be followed: Read all instructions before operation. Do not operate while unattended. Do not touch hot surfaces. Use handles or knobs. Close supervision is necessary when the pressure cooker is used near children. DO NOT allow children to operate under any circumstance. - Page 4 25. Food should not be kept warm for more than 4 hours in order to maintain the freshness of the food. The pressure cooker should not be used for more than 6 hours continuously. Serious Injury and/or damage may occur if any safeguards are ignored.
- Page 5 SAFETY WARNING: There is a potential risk of fire, electric shock or injury to persons if the product is not used as instructed. Protection against electric shock is assured only if the main power cord is connected to a properly grounded 120V | 60Hz power receptacle. ...
-
Page 6: About Your Pressure Cooker
It may seem like a complicated unit but rest assured, this pressure cooker is simple to use, makes meals quick and easy, and overall it saves you money! Please accept our thanks for purchasing a Cook's Essentials' Pressure Cooker and Enjoy! PRESSURE COOKER WITH MULTIPLE FUNCTIONS: ... -
Page 7: Short Cord Purpose/Polarized Plug
SHORT CORD PURPOSE NOTE: A short power cord is provided to reduce the risk of personal injury resulting from becoming entangled in or tripping over a longer cord. Longer power-supply cords or extension cords are available and may be used if care is exercised in their use. -
Page 8: Parts Identification
PARTS IDENTIFICATION 1. Handle 9. Upper Ring 15. Bottom Ring 2. Lid 10. Control Panel 16. Seal Ring for Float Valve 3. Pressure Limiting Valve 11. Power Cable 17. Filter 4. Float Valve (external view) 12. Condensation Cup 18. Rubber Seal Ring 5. -
Page 9: Pressure Cooker Lid Markings
PRESSURE COOKER LID MARKINGS Please note the "UNLOCK" and "LOCK" markings on the handle (1) and the rim of your pressure cooker body (13). (Figure 1A). To properly close and secure the pressure cooker lid (2), always line up the "LOCK" markings on the handle (1) and the rim of cooker body (13). -
Page 10: Rubber Seal Ring Assembly
RUBBER SEAL RING ASSEMBLY Always ensure the Rubber Seal Ring (18) is properly and securely fitted onto the metal ring in the interior of the Lid (2). The Rubber Seal Ring (18) should be placed into the Lid (2) by fitting it around the outer part of the entire metal ring making sure that the crease in the Rubber Seal Ring (18) meets... -
Page 11: Before First Use
BEFORE FIRST USE Working Maximum Keep Warm Delay Timer Pressure Pressure Temperature 0~70kPa 12 PSI 90kPa 140ºF ~ 175 ºF 0.5~24 HR Remove packaging materials such as cardboard, plastics or Styrofoam and discard appropriately. Clean all the parts by wiping with a soft damp cloth or sponge and dry thoroughly. LID ASSEMBLY: How to open the lid: Hold the handle (1) firmly, turn the lid (2) clockwise until it loosens and lift vertically.(Figures 3-4);... -
Page 12: Preparing Your Pressure Cooker
PREPARING YOUR PRESSURE COOKER Opening the lid: Hold the handle (1) firmly, turn the lid (2) clockwise until it loosens and lift vertically. (See Figures 9-10); the lid (2) can stand on the lid rest (20) (Figure 11). OPEN OPEN OPEN Remove the inner pot (6) and add desired ingredients. - Page 13 Closing the Lid: Make sure the Rubber Seal Ring (18) is fitted properly onto the metal ring on the inside of the lid (2). Observe the Rubber Seal Ring (18) inside the lid (2) and ensure that it is fitted on the outer part of the metal ring all the way around the metal ring.
- Page 14 NOTES & TIPS #1: Please note that the Pressure Limiting Valve (3) will be loose when you are not using the unit for cooking. It will rock slightly and will turn 360° manually. Once the pressure cooker is in operation and the pressure has built up to its capacity, the Pressure Limiting Valve (3) will tighten but on the surface it will resemble a bobble-head, only allowing itself to be turned to “Exhaust”.
-
Page 15: Menu Button Time Chart
OPERATING INSTRUCTIONS HOW TO USE THE BUTTONS There are ten Pre-Set MENU BUTTONS programmed for your pressure cooker. They are RICE, BEANS, CHICKEN BREASTS, POTATOES, POT ROAST, RIBS, WHOLE CHICKEN, FISH/ VEGETABLES, SOUP/STEW, AND BROWN/SAUTE. The default times are preset for quick and easy cooking for small portions of food. - Page 16 NOTES & TIPS #4: When pressing a MENU BUTTON, the LED screen will not immediately change until the pressure has built up to capacity. This may take approximately 5-10 minutes depending on the quantity of food you are cooking. IMPORTANT! If your cooker begins to build pressure and heat up, but in about 5- minutes it beeps 3 times and goes to Keep Warm without cooking your food completely, please read below: ...
- Page 17 NOTES & TIPS #5: When cooking soups or stews with other hearty ingredients such as potatoes or meat, as much as 5 or 6 cups of liquid must be used to prevent ingredients from over-cooking or burning. Always be certain the pressure is released completely before unlocking the lid (2) and opening it.
- Page 18 HOW TO USE THE BUTTONS WITH THE BUTTONS Prepare desired food and place into cooking pot. Secure the Lid (2) onto the unit, turn it Counter-clockwise to lock it properly in place. Make sure the Pressure Limiting Valve (3) is set to the “Airtight” position. Plug the power cord into a 120V power outlet that is by itself and not shared with any other electrical appliances.
- Page 19 HOW TO USE THE If you wish to Program your pressure cooker to automatically cook prepared food at a later time, you can program the pressure cooker to delay cooking by up to 24-hours. (*See Notes & Tips #7). This setting is used in combination with the PRE-SET MENU BUTTON SELECTIONS in the chart shown on page 14 and with the PRESSURE COOK TIME BUTTON.
- Page 20 NOTES & TIPS #7: During the cooking process, when the pressure cooker enters into the Pressurized Sequence, the first digit on the LED screen will display the letter “P”. For foods with a high volume of liquid (Stews, soups, porridges, etc.) IT IS NOT RECOMMEND TO USE QUICK RELEASE.
- Page 21 M BUTTON: HOW TO USE THE Food can be prepared at an earlier time and kept warm inside the pressure cooker using the KEEP WARM function. Food should not be kept warm for more than 4-hours. Additional time may cause a change in flavor, appearance and cause food to spoil. Prepare desired food and place into cooking pot.
- Page 22 Always use canning supplies specifically manufactured for canning purposes. It is recommended to use mason jars that are 32-ounces or smaller. Do not stack jars on top of each other. Always inspect your canning supplies to ensure proper function and safety. Avoid using jars with chips, nicks, cracks or other imperfections in the glass, rims or lids.
-
Page 23: Cleaning & Maintenance
NOTES & TIPS #9: If recipes require the use of a trivet, riser (wire rack), foil, or heat-resistant/pressure- resistant oven-safe cookware, you may use these accessories in this pressure cooker. If you do not have a wire rack that will fit, simply use 3-4 mason jar lids or regular jar lids for a simple 1-inch riser. -
Page 24: Troubleshooting
TROUBLESHOOTING PROBLEM SOLUTION If you are not cooking or using the unit, the Valve (3) will be loose. It will turn 360 degrees and may even come off if you pull on it. Once you start using the Is the pressure cooker and the pressure has built up, and the Valve is set to Airtight/Exhaust “Airtight”... - Page 25 PROBLEM SOLUTION See Notes & Tips #2. The Rubber Seal Ring (18) did not make a proper seal. Cancel all the Steam is being released functions. Exhaust any remaining pressure and steam. Open the lid and around the rim of the lid remove it entirely.
-
Page 26: Cooking Time Chart
COOKING TIME CHART Courtesy of www.healthfoods.com Please note that all the below information is for your reference only and can be adjusted according to the user’s preference. Meat/Poultry Always cook meat or poultry with at least 1-3 cups of liquid. If the cooking time exceeds 15 minutes, use 2 cups of liquid. - Page 27 Vegetables Always cook with at least 1-2 cups of liquid. Add 1-2 additional minutes to cooking time when preparing frozen vegetables. Use the quick-release release method at the end of cooking cycle so vegetables will not become soggy. (Below chart is for quantity approximately half a pot). Approximate Cooking Pressure Type of Vegetable...
- Page 28 Dried Beans and Other Legumes Place beans or legumes in pressure cooker. Add 3 cups of water for each cup of beans or legumes. Add 1 tablespoon of vegetable oil for each cup of water to cut down on foaming. Do not add salt until after cooking.
-
Page 29: Recipes
RECIPES Recipes are courtesy of www.recipezaar.com and www.fastcooking.ca. Please note that all of the information is for your reference only and can be adjusted according to the user’s preference. CHICKEN PICCATA SERVES 6 Ingredients 6 chicken breast halves 1 cup pimento stuffed olive, minced 1/2 cup all-purpose flour 1/4 cup sour cream 1/4 cup olive oil... - Page 30 SPARE RIBS SERVES 6 -8 Ingredients 1 cup brown sugar 1/4 teaspoon cayenne 1/4 cup soy sauce 1 teaspoon garlic powder 1/2 teaspoon paprika 2 lbs pork ribs 1 tablespoon vinegar 1 cup of chicken/beef stock Directions Prepare sauce ingredients inside cooking pot. Divide ribs up evenly so it fits into the pressure cooker.
- Page 31 JAMBALAYA SERVES 4-6 Ingredients 1 tablespoon vegetable oil 1 onion, chopped 1/2 lb boneless skinless chicken breasts, cut 3 garlic cloves, minced into 1" pieces 1 green bell pepper, chopped 1/2 lb fully cooked Andouille or Italian 3 stalks celery, sliced sausage, sliced 1 cup long grain rice 1/2 lb uncooked shrimp, peeled and...
- Page 32 MACARONI PUTTANESCA SERVES 4-5 Ingredients 1 26oz jar of puttanesca, marinara or your favorite sauce 1 16oz box of macaroni 1 bag of frozen meatballs 1 onion, diced 1 bell pepper, diced (any color) 2 cloves garlic, minced salt & pepper Olive oil for browning (recipe may be doubled for larger portions) Directions...
- Page 33 BALSAMIC CHICKEN AND ONIONS SERVES 4 Ingredients 2 lbs. Chicken Thighs (You can use chicken 2 Bay Leaves breast to cut down on calories.) 4 Cloves of Garlic 1 Ham Hock 1 Cup Balsamic Vinegar 2 Cups Chopped Carrots (Frozen or fresh, 1 Cup Red Wine Vinegar but don’t use baby carrots) 1/2 Cup Chicken Broth (Optional: since the...
- Page 34 Once the cooking cycle is finished, release pressure and unlock lid. The chicken and pineapples will have released liquids during the pressure cooking process so there will be lots of liquid inside. Remove just the chicken with a pair of tongs and set aside temporarily. At this time, you can use a potato masher and mash down the pineapples so they become pulpier.
- Page 35 ST. PATRICK’S BANGERS AND MASH SERVES 4 Ingredients 1 Package of 6-8 Bangers 1/2 Cup Butter 5-6 Baking Potatoes (Peeled and Diced) Salt & Pepper 1 Cup Milk 1 Whole Onion (Sliced into rings) FOR THE POTATOES: OTHER EQUIPMENT: 1/2 Cup Sour Cream Potato Masher 1/2 Cup Parmesan Cheese Sheet of Foil...
- Page 36 ITALIAN POTATO, RICE, & SPINACH SOUP SERVES 6 Ingredients 1/4 cup olive oil 2 tablespoons fresh lemon juice 6 leeks, white part only, sliced 3 tablespoons tomato paste 3 garlic cloves, crushed 1 tablespoon light brown sugar 2 carrots 10 ounces fresh spinach, rinsed, cut in large 1/2 cup Arborio rice pieces 3 potatoes, cut in large chunks...
- Page 37 Directions: Follow the "BROWNING" instructions in this manual: heat oil and sauté the onion and garlic until onion is wilted. Add beef and cook until browned. Mix cumin, chili powder, oregano, bay leaf, celery seed, salt and flour. Stir in crushed tomato and beef stock. Cancel "BROWNING." Add the beans.
- Page 38 FISHERMAN’S SEAFOOD CHOWDER SERVES 4 The Soup Base Ingredients A Mild Roux Mix 1 Tbsp Butter 1 Tbsp Flour 1 Cup White Wine The Stock & Other Ingredients 2 Cups Water 1/2 Cup Celery (Optional) 1 Cup Chicken Stock 4 Cloves of Garlic (Chopped) 1 Whole Onion (Chopped) 1 Can Tomato Sauce 2 Whole Tomatoes (Chopped)
- Page 39 LEEK & ASPARAGUS RISOTTO SERVES 4 -6 Ingredients 1 1/2 tablespoons olive oil 1 1/2 cups Arborio rice 1 1/2 tablespoons butter 4 cups vegetable broth 1 1/2 tablespoons water 1/4 lb asparagus, chopped into 1 inch 2 garlic cloves, minced segments 1 1/2 cups leeks, sliced 1 1/4 cups parmesan cheese, shredded...
- Page 40 PRESSURE COOKER CORN ON THE COB SERVES 10 Ingredients 10 ears sweet corn, halved 3 cup water Directions Pour the water in the bottom of your pressure cooker pot. Arrange the corn in pot standing up. Secure the lid and set the Valve to Airtight. Press FISH & VEGETABLES button. When the pressure cooker has finished the cooking cycle, release all pressure by carefully setting the valve to Exhaust on the top of the lid.
- Page 41 BROWN RICE SERVES 4-6 Ingredients 4 cups water 3 dashes Mrs. Dash seasoning mix, original 2 cups long brown rice 3 tablespoons butter 4 chicken bouillon cubes pepper Directions Add all ingredients to Inner Pot. Lock on the lid and set Valve to Airtight. Press RICE button. When the pressure cooker has finished the cooking cycle, release all pressure by carefully setting the valve to Exhaust on the top of the lid.
- Page 42 Close and lock lid securely, set the Valve to Airtight. Press POT ROAST button. When the pressure cooker has finished the cooking cycle, release all pressure by carefully setting the valve to Exhaust on the top of the lid. Once all pressure has released, the lid can be turned and unlocked. Thin gravy with beef stock or thicken to your own taste.
- Page 43 LEMON CHICKEN SERVES 4 Ingredients 3 1/2 lb chicken cut into serving pieces 2 teaspoons oregano 1/4 cup plus 2 tablespoons olive oil Salt and freshly ground pepper to taste 1/4 cup lemon juice 1/2 cup chicken stock Directions: In a small bowl, mix together 1/4 cup oil, lemon juice, oregano, salt and pepper. Pour over the chicken and marinate for several hours, or overnight.
- Page 44 DESSERT RECIPES APPLESAUCE Makes about 4 1/2 cups Ingredients 3 lb apples, peeled, cored, and quartered Optional: Grated lemon zest 3/4 teaspoon ground cinnamon Optional: Fresh lemon juice 1/3 cup water or apple juice Optional: Honey Directions Place the apples, cinnamon, and water (or juice) into pot. Close and lock lid securely, set the Valve to Airtight.
- Page 45 Once all pressure has released, the lid can be turned and unlocked. Remove the pan from the pressure cooker using the foil handle. Loosen the foil, cool, then chill for at least 4 hours or overnight. Before serving, arrange fruit or spread fruit preserves in a thick layer over the cheesecake. Release and remove the rim of the spring-form pan.
- Page 46 OLD FASHIONED RICE PUDDING SERVES 4 It's recommended to eat on the same day or the rice may become chewy. Ingredients 1 tablespoon butter 1 egg 1/4 cup long grain rice 1/4 cup evaporated milk 2 cups milk 1/2 teaspoon vanilla 1 cup water Cinnamon 1/3 sugar 1/2 teaspoon salt...
- Page 47 setting the valve to Exhaust. Once all pressure has released, the lid can be turned and unlocked. Carefully remove only the pears and transfer to a deep container. Boil down the remaining sauce until it is syrup. Cool, then pour over the pears and keep at room temperature overnight.
- Page 48 vanilla bean into the pot and swish it around. Add the whole vanilla pod also and bring the whole mixture to a light simmer. Cancel BROWNING. Add rice and give it a quick stir. Close lid and turn to lock into place. Adjust the Pressure Valve to Airtight.
- Page 49 CANNING RECIPES Recipes courtesy of www.allrecipes.com DILL PICKLES Ingredients 8lbs 3 to 4 in long pickling cucumbers 16 garlic cloves, peeled and halved 4 cups white vinegar 8 sprigs fresh dill weed 12 cups water 8 heads fresh dill weed 2/3 cup of pickling salt Directions Wash cucumbers, and place in the sink with cold water and lots of ice cubes.
- Page 50 Ladle into sterilized jars and follow the instructions for “How to use the Pressure Cooker for CANNING” in this manual and process sealed jars for 5 minutes in a boiling water bath. When the unit has reached optimum pressure, it will begin to pressure-seal the mason jars. The programmed time will begin to count down until it reaches zero.
- Page 51 FRESH GARDEN SALSA Ingredients 7 cups of fresh tomatoes, peeled, cored, ½ cup of vinegar seeded and diced 2 Tbsp lime juice 6 green onions, sliced 4 drops of hot pepper sauce 2 or 3 jalapeno peppers, diced 2 Tbsp fresh minced cilantro 4 cloves of garlic, minced 2 tsp salt Directions:...
- Page 52 Follow the instructions for “How to use the Pressure Cooker for CANNING” in this manual and process sealed jars for 10 minutes in a boiling water bath. When the unit has reached optimum pressure, it will begin to pressure-seal the mason jars. The programmed time will begin to count down until it reaches zero.
-
Page 53: Warranty And Return Instructions
LIMITED WARRANTY* ONE (1) YEAR WARRANTY IS ONLY VALID WITH A DATED PROOF OF PURCHASE Your small kitchen appliance is built with precision, inspected and tested before leaving our factory. It is warranted, to the original purchaser to be free from any manufacturing defects under normal use and conditions for one (1) year, cord excluded. - Page 54 RETURN INSTRUCTIONS RETURNS: Any return of defective merchandise to the manufacturer must be processed accordingly by first contacting customer service (contact information shown below) to obtain an RA # (Return Authorization Number). We will not accept any returns of merchandise without an applicable RA #.