Miele KM 5840 Operating And Installation Instructions
Miele cooktop user manual
Hide thumbs
Also See for KM 5840:
- Installation instructions manual (20 pages) ,
- Installation instructions manual (19 pages) ,
- Operating and installation instructions (68 pages)

Related Manuals for Miele KM 5840


Summary of Contents for Miele KM 5840
- Page 1 Operating and Installation Instructions Ceramic Cooktop KM 5840 KM 5860 KM 5880 en - US, CA To prevent accidents and appliance damage, read these instructions before installation or use. M.-Nr. 07 844 710...
-
Page 3: Table Of Contents
Clean the cooktop ........ -
Page 4: Important Safety Instructions
SAVE THESE INSTRUCTIONS for a future user. Correct usage Only use the cooktop for residential cooking, and for the purposes described in this manual. Other uses are not permitted and can be dangerous. - Page 5 Technical safety Installation, repair and maintenance work should be performed by a Miele authorized service technician. Work by unqualified persons could be dangerous and may void the warranty. Be sure your appliance is properly installed and grounded by a qualified technician.
- Page 6 COOKING AREA - During operation, the cooking area and its surroundings will get hot and can cause burns. When the cooktop is shut off, the surface may remain hot enough to cause harm, even though the glow is not visible through the dark glass.
- Page 7 IMPORTANT SAFETY INSTRUCTIONS To prevent damage to the cooktop do not use pots and pans with thin bases on the cooktop. Never heat an empty pan unless the pan manufacturer states that you can do so. Before using glass, glass/ceramic,...
- Page 8 NEVER set down hot pots or pans in the area of the control panel. This can damage the underlying electronics. If the cooktop built in behind a cabinet door, it should only be operated with the door open. Close the door only when the appliance is shut off and the Residual Heat indicators have gone out.
-
Page 9: Description Of The Appliance
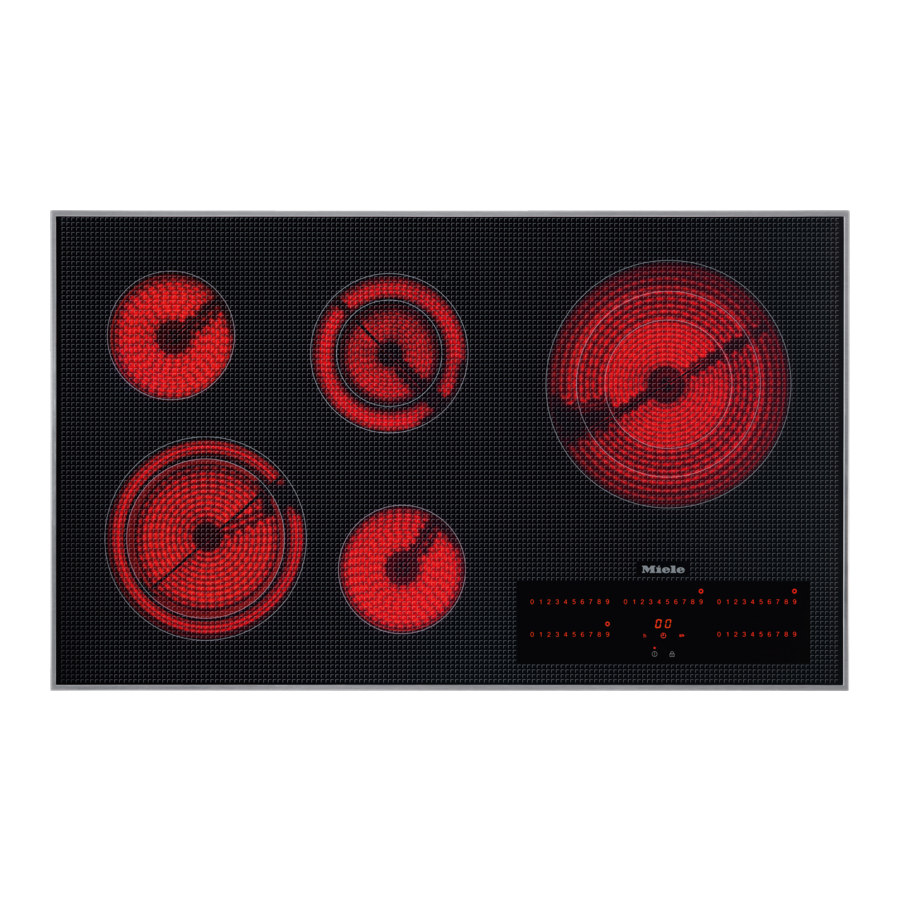
KM 5840 Two-zone variable burners One-zone burner Control panel Burner Left front Left rear Center rear Right rear Description of the appliance C Diameter inches 7 1/16" 9 1/16" 5 11/16" 14.5 4 3/4" 7 1/16" 7 1/16" 9 1/16"... - Page 10 Description of the appliance KM 5860 Two-zone variable burners One-zone burners Three-zone variable burner Control panel Burner Left front Left rear Center rear Right rear Center front C Diameter inches 7 1/16" 9 1/16" 5 11/16" 14.5 4 3/4" 7 1/16" 5 11/16"...
- Page 11 KM 5880 Two-zone variable burners One-zone burner Three-zone variable burner Control panel Burner Left front Left rear Center rear Right rear Center front Description of the appliance C Diameter inches 7 1/16" 9 1/16" 5 11/16" 14.5 5 11/16" 14.5 8 1/4"...
-
Page 12: Control Panel
Description of the appliance Control panel Touch controls Cooktop On/Off Settings bar = Burner On/Off 1 - 9 = Setting the power level Child safety lock Variable burner On/Off Settings bar for the center rear burner and timer = Burner On/Off... -
Page 13: Before Using For The First Time
Before using for the first time Heat the cooktop Only for facet cooktops: A small gap between the cooktop and the work surface may be visible in the first days of operation. It will become smaller during use. Despite this small gap, the electrical safety of your appliance is always ensured. -
Page 14: How The Burners Operate
How the burners operate One-zone burners use one heating strip; two-zone burners and grill zones have two heating strips. Depending on the model, the heating strips may be separated by a ring. Each burner has overheating protection (internal temperature limiter) feature to prevent the ceramic glass from overheating (see "Overheat protection"). -
Page 15: Use
^ Touch the s On/Off touch control . All the touch controls and the power-ON indicator light will come on. If no further entry is made, the cooktop will turn itself off after a few seconds for safety reasons. To turn a burner On ^ Touch "0"... -
Page 16: Power Settings
Power settings The cooktop is factory-programmed with 9 power levels. If you would like finer setting control, you can extend the power levels (see "Programming"). Cooking process Melting butter, chocolate, etc. Dissolving gelatin Preparing yogurt Thickening sauces containing only egg yolk and butter... -
Page 17: Cooking With Auto-Heat
Cooking with Auto-heat When Auto-heat has been activated, the burner automatically turns on at the highest setting (heat-up boost) and then switches to the previously selected continued power level. The heat-up time depends on which continued power level has been chosen (see chart). -
Page 18: Variable Burner
Variable burner With some cooktop models (see "Description of the appliance"), you can turn on a second or third burner zone when using larger pots. If you add another burner zone, the "variable burner" touch control will be brighter than normal. With the... -
Page 19: Turning Off And Residual Heat Indicators
9 on the settings bar go out. If the cooking zone is still hot, the residual heat will be displayed. To turn the cooktop off ^ Touch the s control. This turns off all the burners. After several seconds the power-ON indicator light and the numbers 1 to 9 on the settings bar go out. -
Page 20: Selecting Cookware
These melt at high temperatures. – Copper bottom and aluminum pans may leave a residue on the cooktop in the form of metallic lines. This is normal. These lines can be removed using a non-abrasive ceramic cooktop cleaner or a shielded scraper blade. -
Page 21: Timer
Timer The cooktop must be turned on to use the timer. The timer can be used for two different functions: – To time kitchen activities – To set a burner to turn off automatically. You can select a time from 1 minute (01) to 9 hours (9^). -
Page 22: Setting The Timer
Setting the timer Minutes Example: You want to set a time of 15 minutes. ^ Turn the cooktop on. ^ Touch the m control. The m touch control flashes. 00 appears in the timer display, and the right 0 will flash. - Page 23 Timer To change the set time ^ Touch the m control. ^ Set the desired time as described in "Setting the timer". To clear the set time ^ Touch the m control. ^ Touch "0" on the settings bar.
-
Page 24: Turning A Burner Off Automatically
Timer Turning a burner off automatically You are able to set a time in which a burner turns off automatically. If desired, all of the burners can be programmed at the same time. If the programmed time is longer than the maximum time allowed, the burner will turn off automatically after the maximum time allowed (see... -
Page 25: Using Both Timer Functions At The Same Time
Timer Using both timer functions at the same time The kitchen timer and automatic shut-off functions can be used at the same time. If you have programmed one or more shut-off times and would also like to set the kitchen timer: Tap the m touch control until the indicator lights for the programmed burners come on steady and 00... -
Page 26: Safety Features
Safety features Child safety lock / System lock Your appliance is equipped with a safety lock to prevent the cooktop and the burners from accidentally being turned on or any settings changed. The Child safety lock can be activated when the cooktop is turned on. When... -
Page 27: Stop And Go
1. The burner power-levels and the timer setting cannot be changed, the cooktop can only be turned off. When Stop and Go is deactivated, the cooking zones resume at the power level which was last set. -
Page 28: Safety Shut-Off
An F will flash in the timer display. ^ Clean the control panel or remove the object covering the control. F will go out. The cooktop can now be time in hours used again. -
Page 29: Overheat Protection
Overheat protection Each burner is equipped with a temperature limiter. This feature automatically turns off the heating element before the glass ceramic surface becomes too hot. When the overheat protection is triggered, the heating element turns on and off even at the highest power level. Once the glass ceramic surface has cooled to a safe temperature the heating element will automatically turn... -
Page 30: Cleaning And Care
Stubborn soiling is best removed with a shielded scraper blade. ^ Apply a ceramic cleaner (available from Miele) using a soft cloth or paper towel. ^ To remove any limescale deposits or metallic residue apply a ceramic cleaner using a soft cloth or use a shielded scraper blade if necessary. -
Page 31: Programming
This is completed when an indicator above the On/Off s touch control lights up briefly. Do not turn the cooktop on again until the reset process is completed. To start programming ^ With the cooktop turned off, touch... - Page 32 Programming Program* Demo mode and factory default settings Extended power levels Keypad tone when a control is touched Audible timer tone Child safety lock System lock * Programs / settings not shown here have no allocation. ** The factory default settings are shown in bold. Status** Setting Demo mode On Demo mode Off...
- Page 33 Program* Auto-heat Miele|home (only on communication-enable d appliances fitted with a communication module) Second burner zone of the left front burner Second burner zone of the right front burner Second burner zone of the right back burner Second burner zone of...
-
Page 34: Frequently Asked Questions
"dE" appears in the timer display for several seconds after switching on the cooktop. Burners do not heat up. The device is in demo mode. Deactivate demo mode (see "Programming"). The cooktop turns off while it is in use. One of the burners has been on for too long. - Page 35 The cooktop turns off while in use, and a flashing F appears in the timer display. Possible fault One or several of the touch controls are covered, for example by fingers, food boiling over or by an object. Auto-heat is turned on, but the food does not start cooking.
- Page 36 There is a fault in the electronics. Solution First, ensure that the cooktop is not in direct sunlight or strong artificial light and that the area around the cooktop is not too dark. Make sure that neither the cooktop or the touch controls are covered.
-
Page 37: Technical Service
In the event of a fault which you cannot easily fix yourself, please contact the Miele Technical Service Department at the address on the back of this booklet. When contacting Technical Service please quote the serial number and model of the appliance. -
Page 39: Installation Instructions
Installation Instructions IMPORTANT: SAVE FOR THE LOCAL ELECTRICAL INSPECTOR'S USE Information is subject to change. Please refer to our website to obtain the most current product specification, technical & warranty information. To prevent accidents and appliance damage read these instructions before installation or use. -
Page 40: Important Installation Safety Instructions
However, under certain conditions it may be possible for installation in these applications. Please contact the Miele Technical Service Department with specific requirements. You must ensure the power cable... -
Page 41: Safety Distances Above The Appliance
Safety distance from divider Installation of a divider under the cooktop is not required. If a divider is fitted under the cooktop, the distance between the upper edge of the work surface and the upper edge of the divider must be at least 4 ½ "... - Page 42 (for instance, a high cabinet) or a room wall. KM 5840 = 2" (50 mm) KM 5860 / KM 5880 = 4" (100 mm) 2" (50 mm) minimum distance from the left of the countertop cut-out to...
-
Page 43: Installation
Safety distance from the wall covering If a wall covering is installed, a minimum safety distance must be maintained between the countertop cut-out and the covering, since high temperatures can damage these materials. If the covering is made of a combustible material (such as wood), the distance between the countertop cut-out and the wall covering must be a minimum of 2"... -
Page 44: Sealing
Installation Frame/Facet Cooktops Sealing The appliance must not be permanently sealed into the countertop when installed. The sealing strip under the edge of the appliance provides a sufficient seal for the countertop. If the appliance is sealed into position, the countertop or appliance could be damaged if it needs to be removed for maintenance or service. -
Page 45: Installation Dimensions
Installation dimensions KM 5840 Spring clips Front Installation height Connecting cable, Length = 56 11/16" (1440 mm) Rating label... - Page 46 Installation dimensions KM 5860 Spring clips Front Installation height Connecting cable, Length = 56 11/16" (1440 mm) Rating label...
- Page 47 Installation dimensions KM 5880 Spring clips Front Installation height Connecting cable, Length = 56 11/16" (1440 mm) Rating label...
-
Page 48: Installation
"Installation dimensions" of each unit. Facet cooktops: A special sealing strip ensures the slip-proof seating of the cooktop in the cutout. The gap between the frame and the countertop will narrow after a little time has passed. ^ Create the countertop cutout as shown in the "Installation... - Page 49 (for facet cooktops only) The spring clips and the securing strips must be on or flush with the top edge of the cooktop. ^ Coat the lateral edges and the lower edge of the spring clips and securing strips with silicon.
- Page 50 Installation Insert the cooktop ^ Feed the power cord down through the cut-out. ^ Place the cooktop lightly on the spring clips. ^ With a hand on each side of the appliance press down evenly on the edges until it clicks into position.
-
Page 51: Electrical Connection
Black wire: connect to L1 (hot) Red wire: connect to L2 (hot) Green wire: connect to GND (ground) KM 5840 208/240 V, 60 Hz, 40 A fuse rating KM 5860 280/240 V, 60 Hz, 50 A fuse rating KM 5880... -
Page 52: Help Protect Our Environment
Help protect our environment Disposal of packing materials The cardboard box and packing materials are biodegradable and recyclable. Please recycle. Ensure that any plastic wrappings, bags, etc. are disposed of safely and kept out of the reach of children. Danger of suffocation! Disposal of an old appliance Old appliances contain materials that can be recycled. - Page 56 Alteration rights reserved / 4210 M.-Nr. 07 844 710 / 01 INFORMATION IS SUBJECT TO CHANGE. PLEASE REFER TO OUR WEBSITE TO OBTAIN THE MOST CURRENT PRODUCT SPECIFICATIONS, TECHNICAL & WARRANTY INFORMATION.