Table of Contents
Advertisement
Quick Links
Advertisement
Table of Contents

Related Manuals for Spice S-909


Summary of Contents for Spice S-909
- Page 1 SPICE S-909 User Manual...
-
Page 2: Table Of Contents
Contents Welcome Phonebook Package contents Overview Adding contacts Specifications Searching for a contact Menu Map Shortcut to contact entries Getting started Copying contacts Deleting Contacts Inserting the SIM card, microSD™ card, Caller Groups and battery Extra Number Charging the battery Settings Turning the phone on/off My vCard... - Page 3 Viewing and Managing Photos Creating a shortcuts list Photo Capture Settings Creating joystick shortcuts Recording Videos File Manager Viewing and Managing Videos Phone Video Capture Settings DRM Rights Photo Artist Handset Manager Multimedia Installing the Handset Manager Camera/Video Recorder/ Video Player 46 Starting the Handset Manager Image Viewer Main Panel...
-
Page 4: About This Manual
Preface Congratulations on your purchase of an SPICE S-909 mobile phone. Read this manual carefully and keep it in a safe place for future reference. About this manual Every effort has been made to ensure that the contents of this manual are correct and up to date. -
Page 5: Welcome
Welcome Congratulations on your purchase of an SPICE S-909 cell phone. The following illustration displays the package contents of your new phone. Package contents PQRS WXYZ Headset connector Spice S-909 Spice 750 mAh Spice SAC-03 Spice SAD-02 Spice SAH-03 Mobile handset... -
Page 6: Overview
Overview The S-909 is a stylish and fashionable new phone from Spice, with all the functions and utilities to make it a useful tool in today’s mobile world. The S-909 comes equipped with a built-in camera, MMS/SMS messaging capability, organizer, audio player, Bluetooth capability, WAP, GPRS, and a microSD™... -
Page 7: Specifications
Specifications System supported Triband GSM900/1800/1900; GPRS Class B/Multi-Slot Dimensions 99.9 (L) x 48.1 (W) x 17.2 (T) mm Battery 750 mAh Li-ion Standby time 200~300 hours Talk time 2.5 ~ 5 hours Main display 1.9” TFT, 262K colors, 176 x 220 pixels Phonebook 500 multiple entries Messaging Supports SMS, EMS, MMS, Email Camera 2.0 Megapixel CMOS Video recording... -
Page 8: Menu Map
Menu Map Delete Call Log Phonebook Call Time Quick Search Call Cost Search Entry SMS Counter Add New Entry GPRS Counter Copy All Move All Settings Delete Phone Setup Caller Group • Time and Date Extra Number • Schedule Power On/Off - Owner Number •... - Page 9 Multimedia Call Setting • Caller ID Camera • Call Waiting • Album • Call Divert • Camera Setting • Call Barring • Image Setting • Line Switching • White Balance • Call Time Reminder • Scene Mode • Call Time Display •...
- Page 10 File Manager Unit Converter • Weight Phone • Length DRM Rights Currency Converter Fun & Game Shortcuts Games Game Setting User Profiles Normal Meeting Outdoor Indoor Headset Organizer Calendar To Do List Alarm World Clock Services Data Account Extra Bluetooth Shortcuts Calculator...
-
Page 11: Getting Started
Getting started Inserting the SIM card, 3. Insert the SIM card into the holder. The gold microSD™ card, and battery contacts of the SIM card When you register with a service provider, you should face down. receive a Subscriber Identity Module (SIM) card. Your phone must have a SIM card in order To insert the microSD™... -
Page 12: Charging The Battery
turning the phone on/off Caution: • Use only the battery recommended by the To turn the phone on: manufacturer. Using an incompatible battery with the phone may cause risk of an explosion. • Hold down the power/end key until • Dispose of the used batteries according to the the screen lights up. - Page 13 Call/OK key Down joystick key • Press to dial or answer calls. • Press to scroll down through menu items. • Press to confirm selection of a menu item. • Press to open Shortcuts when the phone is in standby mode. • Press to display the call logs or to redial the last number called.
-
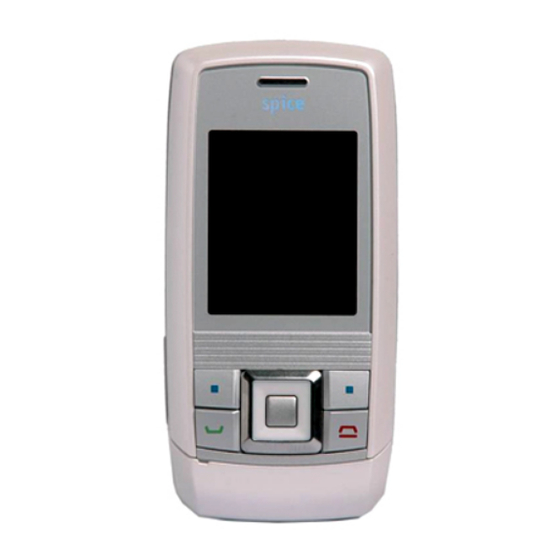
Page 14: Front View
Front view Earpiece Screen Joystick Up joystick key Left soft key Right soft key Right joystick key Left joystick key Call key Power/end key Down joystick key Alphanumeric keypad PQRS WXYZ NOtE: Refer to the previous page for function key descriptions. -
Page 15: Left View
Left view top view Unlocking the Keypad and Slide The keypad and the slide lock of the phone can be locked automatically after a specific time interval to prevent tampering or accidental pressing of any buttons. Refer to Security Setup in the Settings section to learn how to lock the keypad and slide lock. -
Page 16: Standby Mode
Standby Mode Phone is using GPRS network. When your phone is on, but not in use, it is in standby mode. During standby mode, the upper Phone is in roaming mode. part of the display screen shows various icons. The date and time are displayed in the top of Ringtone is enabled. -
Page 17: Text Entry
• Press the right soft key to select Clear, right soft key under Back to exit the on the lower right corner of the screen, to menu. delete a letter if you make a mistake. • To quickly exit from the menu, press the •... - Page 18 From any text entry screen, such as a text correct word by pressing the keys repetitively message window, select Options > Input and scrolling through the words suggested Method. by the phone. By reducing the number of keystrokes, the smart ABC helps some users to Multitap input type messages more quickly.
-
Page 19: Connecting To A Computer
message composed of numbers. To use this method, select Option > Input Method and then select Numeric. Now you can directly input the numbers using the keypad. Symbols text entry With this method, you can enter various types of symbols. Select Option > Input Method >... -
Page 20: Calls And Call History
Calls Making a call 1. Press the Call key to answer the call. To place a call: 1. Enter the number you want to dial using 2. Press the Power/end key to end the the keypad. If you make a mistake, select call and disconnect. -
Page 21: Redialing A Number
Redialing a number To view a complete list of missed calls: 1. Select Call History > Missed Calls. The phone provides a quick method to redial a 2. Scroll through the list and select the previously dialed number. desired call. Press the Call key to To redial a number: call the number. -
Page 22: Call Time/Cost
Price Per Unit. Some of these settings require Deleting call logs that you enter a PIN that can be obtained from To delete call logs: your service provider. 1. Select Call History from the main menu and then select Delete Call Log. SMS Counter 2. -
Page 23: Other Call Options
want to send an SMS during a call. • Voice Recorder: Starts recording the conversation. To stop recording, select Stop. • Mute: Mutes a call. • DtMF: Enables the Dual Tone Multi- Frequency (DTMF), which allows the recipient to hear key press tones. • H-Free: Switches to hands-free (loudspeaker) mode. -
Page 24: Phonebook
Phonebook Adding contacts entries in Phone Book > Option Setting > Fields. See the section “Settings” in this chapter for more information. Read this section to learn how to add new contacts to your phonebook Searching for a contact Read this section to learn how to search for Adding a new entry contacts in your phonebook. -
Page 25: Shortcut To Contact Entries
Search Entry Copy You can then select whether to copy the entry Use the Search Entry function to search for to SIM or handset. a specific entry. Follow these steps to use the search entry function: You can also select Option > Move transfer 1. From the main menu, select Phone a SIM contact entry to the Handset, and vice Book >... -
Page 26: Caller Groups
Select From Phone to delete all contacts To assign an incoming ring tone: stored in the phone. 1. Follow steps 1 and 2 of the previous NOtE: When you attempt to delete all the contacts from the procedure. SIM or phone, you are asked for a password. The default 2. -
Page 27: Extra Number
Settings 5. Press the Left Soft Key to enter the options menu. The phonebook settings menu enables you to 6. Use the joystick to highlight the Add or view memory status, set the preferred storage Delete option. media, determine which fields appear in the 7. Press the Left Soft Key to confirm. phonebook, and edit/send a vCard. -
Page 28: My Vcard
To edit the phonebook fields: 1. From the main menu, select Phone Book > Settings > Fields. A list of fields is displayed. 2. Highlight a field and select On to activate a field or Off to deactivate. My vCard A vCard is a virtual calling card that you can send to people. It can contain your name, cell phone number, home number, office number, fax number, company name, and e-mail address. -
Page 29: Messages
Messages Read this section to learn how to use the SMS • Insert Object and MMS messaging features of your new • Format Text phone. You can even send e-mail and use text • Input Method chat. Objects you can insert can include a picture, This section also covers voice mail features, an animation, a sound, a phonebook name, or broadcasting messages, and setting the... -
Page 30: Message Settings
template and lets you change it. unauthorized access. The Template feature contains common text phrases that you can conveniently insert to your To move messages to the Secret SMS folder: message. There are 10 preset common words 1. From the main menu, go to Messages > phrase that you can use or edit. -
Page 31: Mms
a GSM or GPRS network, the phone then uses To create an MMS message: the network of your preference. 1. From the main menu, select Messages > MMS > Write Message. To set the preferred bearer option: 2. Select the to field then select Edit. 1. -
Page 32: Chat
Done. 3. Edit the to, Cc, Bcc, and Subject fields as described in the previous procedure. You have just created one slide. Repeat the process to add more slides. 4. Edit the content if required as described in the previous procedure. To send the MMS message: 5. -
Page 33: Email
Select Option > Done when finished. To The profile menu is displayed. Here enter a Remote Number (the destination you can configure profile settings, the number), select Search. The phonebook outgoing server, the incoming server, and opens. Choose the contact entry, then your signature. press OK. 4. Use the joystick to highlight the Profile 5. When finished, press the left soft key Setting option, then press OK to confirm. to press OK >... -
Page 34: Broadcast Message
2. Use the joystick to highlight a voicemail account, then select Option > Edit to edit the voice mail details. 3. Type in the voice mail name and number. You can also connect to a voice mail account here. NOtE: Voice mail is a service provider feature. Contact your service provider for voice mail numbers and settings or other voice mail assistance. -
Page 35: User Profiles
User Profiles The phone can be set to behave in a number 4. Select a feature to customize from the list of manners. Each manner is saved as a profile and press the enter key to confirm. and is designed to be used in a particular The feature submenu is displayed. environment. For instance, if you are in a For example, for Alert Type, you can meeting you may want your phone to alert you select Ring, Vibration Only, Vibra and... -
Page 36: Settings
Settings Phone Setup 3. Use the joystick to move between HH: MM and YYYY/MM/DD and daylight The Phone Setting menu enables you to saving. configure handset features including time and 4. Use the keypad to enter the year, month date, scheduling power on and off, language, and day. -
Page 37: Default Encoding Type
Schedule Power On/Off Started chapter for details on inputting text. The phone can be set to turn on or off Default Encoding type automatically. The Settings > Phone Setup > The Settings > Phone Setup > Default Schedule Power On/Off option enables you to Encoding type option enables you to choose schedule times to turn power on or off. - Page 38 option, then press OK. Power On/Off Display 3. Use the joystick to highlight the Status This item allows you to choose the animation option and use the left and right joystick display each time you turn the phone on/off. keys to set the screen saver to On or Off You may choose from the available animations status.
-
Page 39: Call Setup
Number keys 2~9 can be assigned one speed Settings > Phone Setup > Auto update dial number each. Pressing and holding a key of date and time to take advantage of this with an assigned speed dial number calls that service, if offered by your service provider. - Page 40 Caller ID answered, if busy, or divert all data calls. Select Cancel to deactivate call forwardingss. Go to Settings > Call Setup > Caller ID to withhold your number, so that when you call Call Barring someone, your number is not shown. Call barring is a service available through your You can choose to activate or deactivate this service provider.
-
Page 41: Network Setup
Call time Reminder To activate this feature, go to Settings > Call Setup > Auto Redial. Use the Left Soft Key to Use this feature if you want to limit the length highlight your choice between On and Off. of your calls. After the time limit specified, your Closed User Group phone sounds a reminder for you. -
Page 42: Security Setup
With the Settings > Network Setup > Network To set, go to Settings > Network Setup Selection option, you can select available > GPRS Connection. Use the joystick to networks manually from various service highlight your choice between Always and providers, or you can set the network selection When Needed, then press OK to set. -
Page 43: Restore Factory Settings
the phone cannot be used until a password is To enable the option, highlight the Barred Dial entered to unlock it. option from the Security Setup menu and press the left soft key to toggle the option to On NOtE: The default password is 1122. See the section ”Change Password”... -
Page 44: Camera
Camera The phone is equipped with a high quality Go to Multimedia > ImageViewer to view and camera for capturing still pictures and video. manage the still images in your album. taking Photos To open ImageViewer: 1. While in capture mode, select Option > To capture still pictures with your phone: Album, or Slide to open the cover of the phone. -
Page 45: Recording Videos
A list of photo capture settings then appears. White Balance Select from the six mode: Auto, Daylight, Camera Setting Tungsten, Fluorescent, Cloud, and Use the camera setting option to set the shutter Incandescence. sound, EV, Banding frequency, Delay Timer, Scene Mode and Cont Shot. -
Page 46: Viewing And Managing Videos
press OK to enter video capture mode. 3. To edit files, select Option. You can play, forward, rename, delete, or sort files. You 3. Point the camera lens at the subject and can also set the default storage location. use the LCD screen to frame your video. 4. Press OK or the capture button to begin Some video playing features are explained in recording. -
Page 47: Video Capture Settings
section of the screen. frequency of electrical current in your area. Video Setting Volume Use the Video Setting option to set the video To adjust volume, press the up and down quality, file size limit, and record time limit. You joystick keys. may also turn the audio on and off, and set the encode format. -
Page 48: Photo Artist
joystick up and down keys, then press the handset memory and the DRM. You can OK to apply the setting. start choosing image files from the stored data to be edited; select an image file from one Storage of the handset’s folders and then choose to automatically resize it or to prepare it so you Use the default storage option to set where can later use it as your LCD clip. - Page 49 list and press the enter key to add that • Flip: Use the joystick keys to flip the icon to your picture. Use the right and image horizontally or vertically. Press the left joystick key to change the position of left soft key to apply the setting, or the the icon, then press OK to apply.
-
Page 50: Multimedia
Multimedia Camera/Video Recorder/ Rename Renames the current image. Video Player Delete These functions can be accessed from the Deletes the current image. Multimedia menu. See “Camera ” for more details about how to use the camera and video Delete All files recorder functions. - Page 51 5. Select List to open the Main Menu, computer it will appear in Windows ® which displays a list of available digital Explorer as two removable disk drives. music files sorted according to play One drive is the internal phone memory list, album, artist, genre, and song. The and the other is the microSD™...
-
Page 52: Sound Recorder
settings: options menu. • Play List. Set the location of the playlist 3. Select the Record option and press the as either handset or memory card. Enter key. Recording begins immediately. • List Auto Gen. When set to Activate, a Press the Right Soft Key to end the playlist is automatically generated from recording or the Enter key to pause. - Page 53 Other Radio Settings on the left side of the phone before you listen to FM radio. Option > Settings allows you to select the Radio Option Background Play, Record Format, and Record Multimedia > FM Radio > Option contains Storage. Use the left/right joystick keys to toggle functions including Channel List, Manual Input, settings: Preset Auto Search, Settings, Record, Append,...
-
Page 54: Schedule Fm Record
Schedule FM Record • Add a vibration effect by pressing This effect is marked with a phone icon You can set the recording time to record on the staff. your favorite broadcasts. • Add an effect to turn the screen on 1. -
Page 55: Organizer
Organizer to view details, OR The organizer menu gives you access to a Select Option to view the Option menu. number of features including calendar, alarm The Option menu enables you to view, task list, world clock add, edit, delete, or send a task. Calendar See the “To Do List”... -
Page 56: Alarm
joystick keys. Alarm. If you chose to activate the alarm, set a A list of alarms is displayed. frequency for the alarm in the Repeat 2. Highlight an alarm to program then select field. Select Once, Everyday, Day Edit. The Set screen is displayed. (Monday through Friday), Weekly, or 3. Highlight fields to edit. Enter new values Monthly, using the right and left joystick... -
Page 57: Services
Services Browsing WAP pages The Network menu gives you access to wireless services, such as WAP web browsing Browsing WAP pages is much like browsing or WAP push. web pages with your computer. However, rather than using a mouse, you navigate with the Service Provider Settings joystick keys and with the OK key. -
Page 58: Data Account
You can also highlight a profile then select 2. Highlight a data account from the list, Option. You can then either select Activate and press OK to view details, including Profile or Edit Profile. If you select Edit account name, APN, user name, Profile, you can view and edit the profile password, and Authority type. settings. -
Page 59: Fun & Games
Fun & Game The Fun and Games option includes games. To display the Fun and Games menu Select the Fun and Games icon from the main menu. Games The following games are preloaded on your phone: • Panda - Control the panda to attack enemies or prevent touching them. -
Page 60: Extra
Extra The Extra menu gives you access to a number Desktop of useful applications including the Bluetooth, Use the remote control function under Desktop, Calculator, Unit Converter, Currency Converter, you can use the phone to open or close a file, Health, and Skype. and can explore the PC just like mouse and keyboard. -
Page 61: Calculator
Setting The number stored in memory appears in [brackets] at the top of the screen. Note that Configures your Bluetooth parameters to do the most of the functions are selected with the following: joystick alone, with no need to press OK or the Turn on/off the Visibility, Enter key. -
Page 62: Currency Converter
• From M to Yard, • From M to Foot, • From Cm to Inch. After the converting type is selected, hight the first line and enter the number. Press the Left Soft Key and the converting outcome will appear in the second line. Press the Right Soft Key to clear the input. -
Page 63: Shortcuts
Shortcuts You can create shortcuts that access specific features directly. Creating a shortcuts list To access to Shortcuts: Go to Menu > Shortcuts, and press the Left Soft Key to enter. Several shortcuts will be shown on the screen. To edit the shortcuts list: Press the Left Soft Key and you can Add, Edit, Delete, or Delete All shortcuts. -
Page 64: File Manager
File Manager DRM Rights The File Manager can be used to view and manage files stored on your phone. To open The DRM rights folder in File manager is the the File Manager, select File Manager from the place to keep DRM content’s rights object. main menu. Users cannot change it, but can only delete it. -
Page 65: Handset Manager
• To uninstall software, click the Add/Remove Programs icon Ensure that the following system requirements in the control panel. Select the Spice S-900 are met: USB-Handset Manager from the list. Click the Remove button and follow the instructions on screen. -
Page 66: Main Panel
Panel. • Select Help Topics to open online help. You can also open online help from the program list: Spice S-900 USB—Handset Manager> User’s Guide. • Under Settings, you can select whether to run the Handset Manager automatically when you start the computer. -
Page 67: Navigating The Handset Manager Tools
• Select Handset Version to see the model NOtE: You must exit one tool before launching another. name and firmware version of the phone, Navigating Media Files when the phone is connected. Select About Handset Manager to see the The interfaces for media tools—MMS, Sound, version of Handset Manager installed in or Album and Video —are quite similar. - Page 68 • Thumbnail views of computer files in the NOtE: To locate handset files using the handset screen, go to Organizer > File Manager. selected location are shown in the lower right pane. Handset Manager Icon A Handset Manager icon appears in the transferring Files to system tray, even when the Handset Manager and from the Handset is minimized.
-
Page 69: Music Manager
Music Manager Control panel columns The Music Manager allows you to transfer and Add playlist organize media files conveniently. You can Add smart playlist create playlists, upload, maintain, and playback Browse by Genre/ Delete playlist Artist/Album digital music through an easy-to-use interface. To launch the Music Manager, simply launch the Handset Manager from your desktop and on This column the main panel, click the Music Manager icon. -
Page 70: Important Notes
Uploading files to the handset the Local Folder. Messages to be moved to the mobile phone should be placed in To upload files to the handset: the Unsent folder. NOtE: Make sure the handset is turned on and the device • Use Insert Objects to add the MIDI ring drivers are installed. - Page 71 function while the handset is in the MMS 3. Select My computer > Mass Storage, menu or sending and receiving MMS.” and select from Audio, Images, Photos, Video folders to store your file. File Manager • You need to select the appropriate folder • When installing Java games, download for the file type. For example, if you want “Java Game.jar”...
- Page 72 Sound • The handset must be connected to the computer in order to save an MP3 clip or update an MP3 clip to the handset. • You may save MP3 ringtone files in any location on your computer, though saving to the assigned Handset Manager folders may be a convenient way to keep files organized. When you update MP3 files, the files are automatically assigned to the correct location in your handset.
-
Page 73: Appendix
Appendix GPRS Internet Setting SOP A. Hardware Connection 1. Make sure the handset is currently in Standby mode. 2. Insert one end of the USB Data Cable into the handset’s system connector port, and the other end to your PC’s USB port. 3. - Page 74 2. Phone and Modem Options window appears. Click New. 3. Create a name for Location Name (eg. GPRS G11) and add the Area code according to your present location. (For example, the area code of Shenzhen is 0755. If you are there, input 755 in the Area code.) Click Apply and then Ok.
- Page 75 4. The new added item appears in the Location list. 5. Choose Modems, and then click Add.
- Page 76 6. Choose “Don’t detect my modem; I will select it from a list”, and then click Next to go on. 7. Choose Standard 33600 bps Modem, and then click Next.
- Page 77 8. Click COM 6 (depends on PC’s COM port setting) and then Next to go on. NOtE: In Windows® XP, you might find no COM ports in the dialog box above. If so, you need to install the USB2 Serial driver. (Go to Control Panel > System > Hardware > Device Manager to Update Driver.) 9. Click Finish.
- Page 78 10. In Modems tab, choose Standard 33600 Modem COM6 and then click Properties to open the window. 11. Click Diagnostics.
- Page 79 12. Click Query Modem.You should see results in Command and Response list. 13. Click Advanced. Enter the Extra initialization commands, and then click OK. In this example, (+CGDCONT=1, “IP”, “cmnet”), the string “cmnet” is service provider dependent. Contact your service provider for this setting.
- Page 80 14. Double click Network Connections in Control Panel. 15. In Network tasks box, click Create a new connection.
- Page 81 16. New Connection Wizard starts. Click Next. 17. Choose Connect to the Internet, and then click Next.
- Page 82 18. Choose Set up my connection manually. Click Next. 19. Choose Connect using a dial-up modem. Click Next.
- Page 83 20. Enter the ISP name. You can create your own ISP name. Click Next. 21. Fill *99# in the Phone number field. Click Next.
- Page 84 22. Click Next. 23. Choose “Add a shortcut to this connection to my desktop”, and then click Finish.
- Page 85 24. On the desktop, double click the shortcut icon to open Connect Dial-up Connection window. 25. Click Dial to activate GPRS connection.
-
Page 86: Additional Information
Additional Information Certification Information (SAR) The use of this equipment may be subject to local rules and regulations. The following rules this model phone meets EU requirements and regulations may be relevant in some or all for exposure to radio waves. areas where your handset will be in operation. -
Page 87: Proper Disposal
Proper Disposal network. The closer you are to a base station, the lower the device power output. The symbol of the crossed out bin indicates that The highest SAR value for this mobile phone the product (electrical and electronic equip- when tested for use and compliance to ment) should not be placed in municipal waste. -
Page 88: Safety Warnings
Safety Warnings • When driving, find a safe place to stop the vehicle before using the phone. Read the following safety warnings carefully • Do not speak into a hands-free before using your cell phone. microphone if it will distract you from • This equipment is intended for use driving.