Table of Contents
Advertisement
Quick Links
Advertisement
Table of Contents

Related Manuals for Pyramid CDR45DX


Summary of Contents for Pyramid CDR45DX
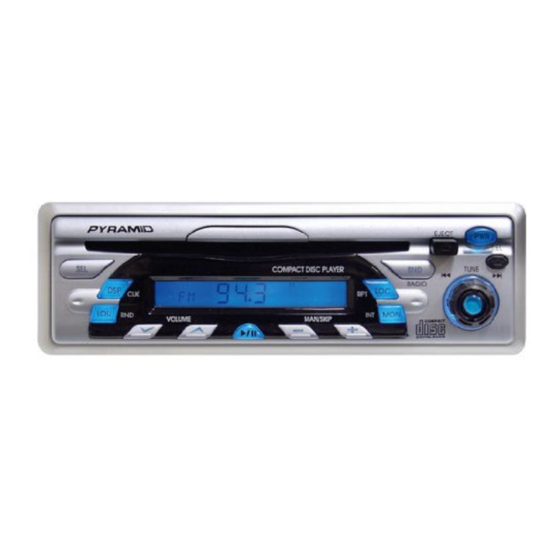
- Page 1 OWNER’S MANUAL PLL SYNTHESIZER STEREO RADIO WITH COMPACT DISC PLAYER DIGITAL...
-
Page 2: Installation
INSTALLATION Notes: • Choose the mounting location where the unit will not interfere with the normal driving function of the driver. • Before finally installing the unit, connect the wiring temporarily and make sure it is all connected up properly and the unit and the system work properly. •... -
Page 3: Din Rear-Mount (Method B)
1. Dashboard 2. Nut (5mm) 3. Spring washer 4. Screw (5 x 25mm) 5. Screw 6. Strap Be sure to use the strap to secure the back of the unit in place. The strap can be bent by hand to the desired angle. (Fig. -
Page 4: How To Remove And Install The Front Panel
HOW TO REMOVE AND INSTALL THE FRONT PANEL (OPTIONAL) 1. Press the release button and pull-off the front panel. Keep front panel into the case. 2. To install the front panel, insert the panel into the housing and make sure the panel is properly installed, otherwise, abnormalities occurs on the display or some keys will not function properly. -
Page 5: Wiring Connection
WIRING CONNECTION 1. All connections should be soldered and insulated with electrical tape. 2. Be sure to connect the red power input lead to + 12V power terminal after all the other leads have been properly connected. 3. Run all ground wires to a common ground. 4. -
Page 6: Main Unit
WIRING CONNECTION FOR 2 X 7W SYSTEM MAIN UNIT ANTENNA CONNECTOR IGNITION SWITCH (B+) (GREY) CHOKE BOX RCA CABLE Rch RED PINK MEMORY BACK-UP Lch WHITE GROUND (B–) BLACK (FOR RCA LINE OUT VERSION ONLY) YELLOW POWER ANTENNA (FOR POWER ANT. VERSION ONLY) GREEN GREY LEFT... -
Page 7: General Operation
OPERATION GENERAL OPERATION • ON/OFF Press PWR button (1) to turn on the unit. Press it again to turn it off. • FACEPLATE RELEASE Press REL button (2) to detach the removable faceplate. - Page 8 • SELECT AUDIO MODE Press SEL button (3) to change audio mode through volume, bass, treble, balance and fader modes. Use (4) and (5) buttons to adjust the selected mode. When mode has not been adjusted for 3 seconds, display returns to normal radio or CD display.
-
Page 9: Radio Operation
RADIO OPERATION • SELECT BAND Press BND button (7) to change bands as below: 3 bands: 2 bands: • SELECT STATION Rotate the TUNE knob (8) clockwise or anti-clockwise to choose the desired frequency. • SELECTING LOCAL/DISTANT In radio operation, press RPT/LOC button (9) select between local setting for reception of strong station and distant setting for reception of weak stations when tuning. - Page 10 CD OPERATION • DISC PLAY Push a compact disc with the label side facing up into the disc slot (13) and you will hear a click sound. If no sound heard, the CD should be incorrectly inserted into the disc slot. (As figure shows) Then it automatically starts playing the first track of the disc.
-
Page 11: Specification
SPECIFICATION GENERAL Power Supply Requirements : DC 12 Volts, Negative Ground Chassis Dimensions : 178 (W) x 155 (D) x 50 (H) Tone Controls - Bass (at 100 Hz) : + 10 dB / – 10 dB - Treble (at 10 KHz) : + 10 dB / –... -
Page 12: Troubleshooting
TROUBLE SHOOTING Before going through the check list, check wiring connection. If any of the problems persist after check list has been made, consult your nearest service dealer. Symptom Cause Solution No power. The car ignition is not on. If the power supply is properly connected to the car accessory terminal, switch the ignition key to “ACC”.