Table of Contents
Advertisement
Quick Links
Advertisement
Table of Contents
Troubleshooting

Related Manuals for Airstream 360 XL


Summary of Contents for Airstream 360 XL
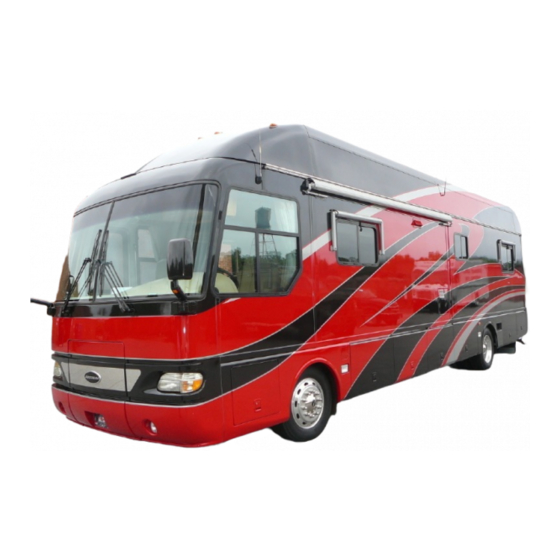
- Page 1 AIRSTREAM AN AMERICAN LEGEND 390/396 390 Sky Deck XL MOTORHOME OWNERS MANUAL 2005...
- Page 3 • To place the great wide world at your doorstep for you who yearn to travel with all the comforts of home. • To provide a more satisfying, meaningful way of travel that offers complete travel independence, wherever and whenever you choose to go or stay.
- Page 4 AIRSTREAM 390/396 XL INTRODUCTION The Owners Manual for your new Airstream Motorhome is designed to respond to the most frequent inquiries regarding the operation, function and care of the many systems that make modern motor homing a joy. Airstream realizes our customers possess varying degrees of expertise in the area of repairing and maintaining the appliances in their motorhome.
-
Page 5: Specifications
AIRSTREAM 390/396 XL WARRANTY AND SERVICE INTERIOR FURNISHINGS AND ACCESSORIES Warranty Lounges & Tables Warranty Explanation Fabric Care Service Features & Fixtures Reporting Safety Defects Maintenance Schedule PLUMBING DRIVING LP (Liquid Petroleum) Gas Water System Wide Body Limitations Water Pump... - Page 6 30,000 miles, whichever comes first, and the application date of all warranties is that indicated on the owner's Limited Warranty. Defects in items covered under this Warranty will be corrected without cost upon the return, at the owner's expense, of the motorhome or defective part to an authorized Airstream dealer.
-
Page 7: Care And Maintenance
Factory Service Center at the owner's expense. DEALER REPRESENTATION EXCLUDED The full extent of the basic Airstream Limited Warranty is set forth-in detail in the folder, and in the explanation of the basic Airstream Limited Warranty covered in the Airstream Motorhome Owner's Manual. -
Page 8: Warranty Transfer
Warranty transfer application forms are available from your dealer or the Airstream Inc. Service Administration Department. CHANGES IN DESIGN Airstream Inc. reserves the right to make changes in design and improvements upon its product without imposing my obligation upon itself to install the same upon its products theretofore manufactured. CONSUMER ARBITRATION PROGRAM Airstream, Inc. -
Page 9: Warranty Explanation
Airstream's responsibility. When you receive your Limited Warranty file it for safekeeping. Upon proof of purchase date to any Airstream Dealer Service Center, defects in materials or workmanship will be repaired or replaced without cost to the owner for a period of twenty four (24) months from the original purchase date, or 30,000 miles, whichever occurs first. - Page 10 When you take delivery of your new motorhome you will receive a complete checkout. Please contact your dealer if you need service. Major service under your Airstream Limited Warranty is available through our nationwide network of Airstream Dealer Service Centers. An up-to-date list of Dealer Service Centers has been provided with your new motorhome.
-
Page 11: Reporting Safety Defects
AIRSTREAM 390/396 XL You Should Also be Aware of the Following: Airstream is not responsible for any consequential or incidental damages incurred as a result of any defect. Consequential damages include, but are not limited to, travel expenses, gasoline, oil, lodging, meals, telephone tolls, loss of work and loss of use of the motorhome. -
Page 12: Maintenance Schedule
AIRSTREAM 390/396 XL MAINTENANCE SCHEDULE Warning : FAILURE TO MAINTAIN YOUR COACH CAN CAUSE PREMATURE AND UNEXPECTED PARTS BREAKAGE AND/OR ERRATIC OPERATION THAT MAY BE HAZARDOUS. Note: See Freightliner and appliance manufacturer's literature for further information. EVERY 1,000 MILES OR 60 DAYS Escape Window Check operation of latches and upper hinge. -
Page 13: Maintenance Records
AIRSTREAM 390/396 XL MAINTENANCE RECORDS DATE DEALER SERVICE PERFORMED... -
Page 14: Wide Body Limitations
Thor vehicles offered in the standard 96" width. LOADING Below is a sample of the weight information chart provided in all Airstream vehicles. This information can be found in your vehicle in one of the lounge overhead lockers. -
Page 15: Safety Checklist
Rating when loading your vehicle. SAFETY CHECK LIST Your Airstream motorhome should be given a thorough safety check before a trip. Regular use of the following list will provide safe operation of your motorhome and will help you spot any malfunctioning equipment and correct the problem as soon as possible. -
Page 16: Safety Seat Belts
AIRSTREAM 390/396 XL INTERIOR CHECK LIST (BEFORE DRIVING OFF) (continued) 11. Adjust the driver's seat so that you can easily reach and operate all controls. Make sure seat is locked in position. Do not adjust driver's seat swivel or fore and aft mechanism while vehicle is moving. -
Page 17: Dash Switches
AIRSTREAM 390/396 XL NOTE: Switches will vary according to options on vehicle. AIRSTREAM CAB CONTROLS Most automotive gauges and controls are standard instruments provided by the chassis manufacturer. Their function and use is described in your Drivers Manual. The exception on automotive controls is the heater/air conditioner. -
Page 18: Trailer Towing And Driving Tips
: The maximum loaded trailer weight that you can pull with your vehicle is listed on the hitch. Vehicles should be properly equipped for towing trailers. Information on trailer hauling capabilities and special equipment required may be obtained from your Airstream dealer. WARNING: Gross Combination Weight Rating (GCWR) means the maximum allowable loaded weight of this motorhome and any towed trailer or towed vehicle. - Page 19 AIRSTREAM 390/396 XL Procedure for Weighing A RV 1. Fill in first row from Specification Section of this manual. 2. Weigh vehicle as shown in row 2 (Scale Weight) and fill in blanks. 3. Weigh one side of vehicle as shown In Individual Wheel Position Weight.
-
Page 20: Engine Access
AIRSTREAM 390/396 XL CHASSIS The Airstream motorhome is built on a Freightliner chassis. Operation of the engine and other related components are discussed in the Freightliner Owners and Drivers Manual supplied with each coach. If repairs are needed it can be difficult to determine which parts of the chassis are warranted by Freightliner, and which are Airstream's responsibility. - Page 21 The Michelin Technical Group provides the following information. Michelin provides a Recreational Vehicle Tire Guide with each Freightliner chassis that is passed along to you in the Airstream Owner’s Packet. Please take the time to read it as it has information on the loading, weighing, and inflation of your RV and its tires.
- Page 22 AIRSTREAM 390/396 XL INCORRECT One tire or a portion of one tire is supporting the full load. Portion of two tires are supporting the full load. CAUTION : Tires incorrectly supported, as shown above, may be damaged which could lead to casing failure resulting in serious injury or property damage.
-
Page 23: Tire Inflation Information
Michelin provides a Recreational Vehicle Tire Guide with each Freightliner chassis that is passed along to you in the Airstream Owner’s Packet. Please take the time to read it as it has information on the loading, weighing, and inflation of your RV and its tires. -
Page 24: Dash Air Conditioner/Heater
AIRSTREAM 390/396 XL DASH AIR CONDITIONER/HEATER Specific Climate Systems Inc. 1200 West Risinger Road Fort Worth, Texas Technical Assistance: 1-800-275-7524 OPERATION The dash heater control is very similar to many automobiles The center rotary switch marked "cold-hot" controls the amount of hot water flowing through the heater core. - Page 25 AIRSTREAM 390/396 XL...
- Page 26 AIRSTREAM 390/396 XL...
- Page 27 AIRSTREAM 390/396 XL...
- Page 28 AIRSTREAM 390/396 XL...
- Page 29 AIRSTREAM 390/396 XL C-10...
-
Page 30: Electric Step
AIRSTREAM 390/396 XL ELECTRIC STEP Manufacturer: Kwikee Products Company Division of Ashton Corporation P.O. Box 638 Drain, Oregon 97435 Phone: 503-836-2126 The step is easy and convenient to operate. Just inside the main door is a wall switch for the step. -
Page 31: Electric Schematic
AIRSTREAM 390/396 XL ELECTRIC SCHEMATIC C-12... -
Page 32: Operating The Step
AIRSTREAM 390/396 XL OPERATING THE STEP 1. After the installation is complete and with the entrance door open, turn the power switch on. 2. Close the door. The step should retract and lock in the "up" position. 3. Open the door. The step should extend and lock in the "down" position with the understep light on. - Page 33 AIRSTREAM 390/396 XL General Service Notes If the power wire to the step is disconnected from its source and reconnected, a spark is common. This is caused by the momentary charging of the control unit and does not necessarily indicate the system is staying on, which would cause a drain on the battery.
-
Page 34: Step Test Procedure
AIRSTREAM 390/396 XL FIGURE 6 STEP TEST PROCEDURE This Step Test Procedure has been provided as the easiest and quickest way to troubleshoot and test all of the Kwikee automatic electric step functions. It is designed to initially check the step basic functions separately from the RV wiring, thereby determining whether or not the step is malfunctioning. - Page 35 AIRSTREAM 390/396 XL 6. With the power and ground connections complete, all functions of the control unit can be checked at the leads to the 4-way extended-wire pigtail. The brown wire is the door switch, the white wire is the power switch, and the yellow wire is the ignition override.
- Page 36 AIRSTREAM 390/396 XL 14.To check the power switch, connect the voltmeter between the white wire from the four-way plug (vehicle half) and the terminal at the end of the control unit's 10-gauge green ground wire (see Figure 8). The reading should be a minimum of 12 volts DC (The same as in Step 13) when the switch is on, and zero (0) volts when the switch is off.
-
Page 37: Step Motor Assembly Diagram
AIRSTREAM 390/396 XL STEP MOTOR ASSEMBLY DIAGRAM C-18... -
Page 38: Lubrication And Maintenance Schedule
AIRSTREAM 390/396 XL LUBRICATION AND MAINTENANCE SCHEDULE Clean all mud, salt, and road grime from step before lubricating. Lubricate all moving parts (bearings, pivot points, slides, clevis pin, and drive linkage ball) every 30 days with a good quality moisture and heat resistant penetrating grease. Kwik-Lube Spray Grease is specially formulated to lubricate Kwikee Electric Steps and is recommended for lubricating all moving parts. -
Page 39: Step Well Cover
AIRSTREAM 390/396 XL STEP WELL COVER Your motorhome is equipped with a pneumatically powered step well cover. The switch (valve) is a black lever located in the front of the passenger right hand armrest. The air pressure is supplied by the chassis air ride system. It is normal for the air system to leak down so you may find the cover to be inoperable if the engine has been shut off for a period of time. - Page 40 AIRSTREAM 390/396 XL Composite Headlamp Your new Motor Home is equipped with a composite headlamp system. Composite headlamps are designed much differently than the sealed beam units of the ’70-80s; they are a plastic lens and chrome plated reflector assembly designed around a replaceable halogen bulb. Composite lamps produce significantly greater light offering better visibility and safety for the driver.
- Page 41 AIRSTREAM 390/396 XL Cleaning is the most effective maintenance that you can perform on your lights, dirt and road grime build up can cut light output by 40% or more. • When cleaning your headlamps, please observe the following: do not rub them dry, and never use abrasives or strong solvents.
- Page 42 AIRSTREAM 390/396 XL Replacement of the halogen bulb: • When replacing the halogen bulb do not touch the glass portion of the bulb with your bare hands since even small amounts of impurities burn into the surface and reduce the service life of the bulb. Use a clean cloth, paper napkin, or similar material to hold the bulb during installation.
- Page 43 AIRSTREAM 390/396 XL CAMPING SAFETY As always, safety should be one of your top priorities. Make sure you, and everyone traveling with you, can operate the main door and exit window rapidly without light. WARNING : The escape windows(s) are identified by their red release handles. Pull red handle toward window center.
- Page 44 AIRSTREAM 390/396 XL NOTE: DENSE SMOKE WILL OVERRIDE THE HUSH CONTROL FEATURE AND SOUND A CONTINUOUS ALARM. CAUTION : BEFORE USING THE ALARM HUSH FEATURE, IDENTIFY THE SOURCE OF THE SMOKE AND BE CERTAIN A SAFE CONDITION EXISTS. FLASHING L.E.D. LIGHT: This smoke detector is equipped with a flashing red indicator light. The light is located under the test button and will flash every 30-40 seconds to indicate that the smoke detector is receiving power.
- Page 45 AIRSTREAM 390/396 XL NOTE: IF AFTER BATTERY REPLACEMENT, THE UNIT CONTINUES TO CHIRP, WAIT FOR APPROXIMATELY 7 MINUTES. THE "HUSH" FEATURE MAY HAVE BEEN ACTIVATED ACCIDENTALLY WHILE CHANGING THE BATTERIES AND WILL RESET AUTOMATICALLY CLEANING YOUR DETECTOR: To clean your detector remove it from the mounting bracket as outlined in the beginning of this section.
- Page 46 AIRSTREAM 390/396 XL WHAT TO DO WHEN THE ALARM SOUNDS: • Leave immediately by your escape plan. Every second counts, so don't waste time getting dressed or picking up valuables. • In leaving, don't open any inside door without first feeling its surface. If hot, or if you see smoke seeping through cracks, don't open that door! Instead use your alternate exit.
-
Page 47: Maintenance
AIRSTREAM 390/396 XL ALARM CONDITION If the COSTAR senses unsafe levels of CO, the RED L.E.D. will light up and the alarm will sound. The alarm condition will be signified by a repetitive alarm-sounding pattern of approximately 4.5 seconds on 1.5 second off. - Page 48 The failure of any circuit component will cause the detector to display a continuous orange LED fault light and a short beep indicating failure. If this occurs, immediately contact your dealer or Airstream Customer Service for the name of the nearest detector service center.
-
Page 49: Overnight Stop
Booklets are available which list these dumping stations. When you stop for the night, your Airstream motorhome is built to be safely parked in any spot that is relatively level and where the ground is firm. Your facilities are with you. You are self- contained. Try to pick as level a parking spot as possible. - Page 50 AIRSTREAM 390/396 XL 4. Leave cabinet doors, bed doors and wardrobe doors slightly open at flight to allow circulation of air in and around all furniture components 5. Use propylene glycol type antifreeze in waste and drain water tanks to prevent freezing. Quantity of antifreeze needed will vary with ambient temperature and the amount of liquids in tank.
-
Page 51: Extended Stay
AIRSTREAM 390/396 XL EXTENDED STAY Making a long trip is not very different from making a weekend excursion. Since everything you need is right at hand, you are at home wherever you go. When packing for an extended trip, take everything you need, but only what you need. -
Page 52: Effects Of Prolonged Occupancy
AIRSTREAM 390/396 XL EFFECTS OF PROLONGED OCCUPANCY Your motorhome was designed primarily for recreational use and short-term occupancy. If you expect to occupy the motorhome for an extended period, be prepared to deal with condensation and the humid conditions that may be encountered. The relatively small volume and tight compact construction of... -
Page 53: About Molds
AIRSTREAM 390/396 XL TIPS TO CONTROLLING CONDENSATION (continued) The natural tendency would be to close the vehicle tightly during cold weather. This will actually compound the problem. Simply put, you need to remove some of the warm air, and allow some cool outside air to get inside the vehicle, so the furnace will not recycle the humid interior air. -
Page 54: Slide Out Operation
AIRSTREAM 390/396 XL SLIDE OUT OPERATION CAUTION : Read and follow all warning labels in the coach and safety instructions in the Power Gear owner manual and as posted inside your coach. To operate the SLIDE-OUT rooms you MUST first remove the interior travel locks. These are located on the top of the room on the interior of the coach and are out of your normal sight. - Page 55 AIRSTREAM 390/396 XL SKY DECK The Airstream Sky Deck will make your travels a unique experience. The opportunities from this vantage point are endless. Whether viewing your favorite outdoor spectator sport or watching the sunset across a lake at your favorite parking spot, the safety of yourself and your companions should be utmost in your mind.
- Page 56 AIRSTREAM 390/396 XL SKY DECK Travel Preparation Turn barbecue gas bottle off. Close all cabinet doors and lids. Stow Sky Deck umbrellas and lights in a secure location. Check Sky Deck area for any loose objects. Remove any loose objects found to a secure location.
- Page 57 AIRSTREAM 390/396 XL EXTERIOR The roof of your Airstream Land Yacht motorhome is a fiberglass compound. If it is damaged contact the Airstream customer service department and ask for the Service Bulletin on roof repairs. The walls, front, and rear end are fiberglass that is custom painted by Carrera Designs with an automotive finish.
- Page 58 AIRSTREAM 390/396 XL Roof Ladder and Storage For traveling, the lower section of the ladder should be removed and stored in one of your lower compartments. To remove, pull out the cross pins in the lower sockets then pull the bottom of the ladder out of the sockets.
- Page 59 AIRSTREAM 390/396 XL INTERIOR The luxurious interior of your Airstream motorhome has been designed for comfort, convenience, durability and appearance. An understanding of the operational procedures and maintenance techniques of the interior appointments will add to your pleasures, as well as to the long life of your motorhome.
- Page 60 AIRSTREAM 390/396 XL The following are the cleanability code instructions for the various fabrics used in the Airstream motorhomes: Cleanability Codes CODE W-S Fabric care. Spot clean this fabric either with a mild solvent or a water-based cleaning agent. When using a solvent or dry cleaning product, follow instructions carefully and clean only in a well-ventilated room.
-
Page 61: Shower Stall
AIRSTREAM 390/396 XL COUNTER AREAS The counter areas around the sink are Corian and can be cleaned with soap and water, or you can use a common solvent on tough spots. Be sure no abrasive cleaner is used, as there is the possibility it could scratch the surface. - Page 62 AIRSTREAM 390/396 XL NOTES...
-
Page 63: Lpg System
Replace any regulator that has had water in the spring case, or shows evidence of external corrosion, or corrosion inside the spring case. Closely examine regulators directly connected to the container valve by means of a solid POL adapter (horizontal mounting) for signs of corrosion. (An Airstream Service Center is recommended for this service.) -
Page 64: Basic Rules For Safety
AIRSTREAM 390/396 XL BASIC RULES FOR SAFETY WARNING: DO NOT store LP containers within vehicle. LP containers are equipped with safety devices that vent gas should the pressure become excessive. WARNING : DO NOT use cooking appliances for comfort heating. Cooking appliances need fresh air for safe operation. -
Page 65: Lp Tank Installation
AIRSTREAM 390/396 XL LP TANK INSTALLATION The regulator at the L.P. tank is under a black plastic cover. The protective cover certainly helps to keep the vent on the regulator from getting clogged by wasps or ice, but should still be checked regularly to make sure the vent remains clear. - Page 66 AIRSTREAM 390/396 XL...
-
Page 67: Water System - Self-Contained
AIRSTREAM 390/396 XL WATER SYSTEM - SELF-CONTAINED Most plumbing functions are accomplished in the plumbing utility compartment on the roadside of your motorhome. To fill your water tank, hook up a garden hose to the city water inlet then open the water tank fill valve in the upper right corner of the compartment. -
Page 68: Water Pump And Strainer
AIRSTREAM 390/396 XL WATER PUMP AND STRAINER Water pump access is in the lower exterior compartment on the curbside just in front of the rear wheels. Once the exterior door is raised, the pump can be found behind the small access door in the upper right corner of the storage area. -
Page 69: Water Pump
AIRSTREAM 390/396 XL WATER PUMP Manufacturer: Aquatec 17422 Pullman Street Irvine, CA 92614 800 975-9995 949 225-2200 Fax 949 225-2222 www.aquatec.com Aquajet RV Series. This revolutionary pump employs state-of-the-art electronics to automatically control motor speed the pump actually adjusts its speed as you open and close water fixtures. The Aquajet RVs exclusive soft start feature eliminates annoying rapid cycling, and its exclusive 5-valve design can deliver twice the flow and pressure conventional RV industry pumps. -
Page 70: Motor Does Not Operate
AIRSTREAM 390/396 XL ELECTRICAL: A. The Aquajet RV pump has a motor speed controller that is factory pre-set to operate at a minimum current of 10 amps while operating on a 12 VDC system. A 15-amp fuse must protect the electrical system. - Page 71 AIRSTREAM 390/396 XL AIRSTREAM 390/396 XL...
- Page 72 AIRSTREAM 390/396 XL NOTES G-10...
-
Page 73: City Water Hookup
AIRSTREAM 390/396 XL CITY WATER HOOKUP In your utility compartment on the roadside of the motorhome are the city water hose connection and various other valves. They are clearly marked and your dealer should have explained the functions of each at time of purchase. -
Page 74: Water Filtration Safeguards
AIRSTREAM 390/396 XL GALLEY FAUCET, MOEN PURETOUCH® 1-800-374-6542 WATER FILTRATION SAFEGUARDS Your Moen PureTouch® Filtering Faucet System integrates carbon block filtration technology designed by Culligan International into a faucet spout. This technology is fast and effective at reducing contaminants commonly found in water and is certified by NSF International. The PureTouch Filtering Faucet System and installation must comply with State and Local laws and regulations. -
Page 75: Parts Description
AIRSTREAM 390/396 XL PARTS DESCRIPTION 1. Solid Handle Body 2. Set Screw 3. Plug Button 4. Dome 5. Cartridge Screw 6. Handle Adapter 7. Handle Connector 8. Pivot Retainer 9. Wave Spring Washer 10. Pivot Stop 11. Retainer Nut 12. Bearing Washer 13. - Page 76 AIRSTREAM 390/396 XL OPERATING INSTRUCTIONS Controlling The Water The PureTouch System has three options for water delivery; unfiltered stream, unfiltered spray and filtered water. The spray and stream actuating buttons are on the sides of the pullout spout; the filtered water button is located on the front of the spout.
- Page 77 AIRSTREAM 390/396 XL MICROTECH™ FILTER INSTALLATION NOTE: Faucet will not operate in any mode without filter. Filter should be left in protective bag until ready for installation, The MicroTech™ filter is a high performance carbon block filter developed specially for the PureTouch Filtering Faucet System.
- Page 78 AIRSTREAM 390/396 XL OPERATING INSTRUCTIONS Successful Installation of a new Filter When the depleted filter is replaced with a new filter three beeps are sounded and the 100% filter life is displayed momentarily. The new filter has been successfully installed and the electronic indicator has reset.
- Page 79 AIRSTREAM 390/396 XL OPERATING INSTRUCTIONS Helpful Tools: large flat tip screwdriver, small Phillips screwdriver (#I). Battery and Upper Housing Replacement 1. With faucet off, push filtered water button and record percentage of remaining usable filter life. When battery is changed, filter life...
- Page 80 AIRSTREAM 390/396 XL NOTE: When reinstalling screws and filter outlet nut, insert into hole, turn counter clockwise with screwdriver until a click is felt then turn clockwise until snug. DO NOT OVER TIGHTEN! 11. Reinstall 2 short and 1 long upper housing screws until snug. Refer to picture (7 & 11) on previous page for placement of long screw.
-
Page 81: Filter Replacement
AIRSTREAM 390/396 XL FILTER REPLACEMENT MicroTech™ replacement filter cartridges may be purchased at the same location as the faucet. For the dealer nearest you, call 1-800-BUY-MOEN. Use only MicroTech filter cartridges with the PureTouch® Filtering Faucet System. Do not remove the filter until it is to be replaced. -
Page 82: Troubleshooting
AIRSTREAM 390/396 XL TROUBLESHOOTING PROBLEM: Water drips from hose and quarter turn connection SOLUTION: Make sure screen washer (17) is in place. PROBLEM: Slow or uneven water flow in unfiltered modes. SOLUTION: The screen washer has become clogged. Ensure faucet handle is in a closed position. Remove pullout spout from receptor and tie a rag around the hose to keep it from slipping back into the spout receptor. - Page 83 AIRSTREAM 390/396 XL MOEN FAUCET CARTRIDGE REPLACEMENT CAUTION : Always turn water OFF before removing existing faucet or disassembling the valve. Open faucet handle to relieve water pressure and ensure that complete water shut-off has been accomplished. 1. Remove plug button (3) from the handle by prying the button upwards from the bottom center. Be careful not to scratch the handle.
- Page 84 AIRSTREAM 390/396 XL LAVATORY FAUCET, MOEN DISASSEMBLY: CAUTION : Turn OFF BOTH water supplies and open BOTH faucet handles relieve water pressure insure that COMPLETE water shut off has been accomplished. 1. Remove handle cap or plug button (for Concentric handle models unscrew...
- Page 85 AIRSTREAM 390/396 XL MOEN SHOWER MIXING VALVE ASSEMBLY 1. Handle Cover 2. Handle 3. Cartridge 4. Handle Screw 5.Valve Body 6. Stop Tube 7. Retainer Clip SHOWER MIXING VALVE CARTRIDGE REMOVAL Shut off water pressure for entire system. Disassemble: Remove handle cover. Take out handle screw and remove handle and stop tube. Lift out retaining clip and pull the cartridge out of the body by the stem.
- Page 86 Cover the sky deck area or put the motorhome in an inside storage facility. Follow all winterizing and storage procedures outlined in this manual. Twice a year, or after a long storage period, we suggest you take your unit into your Airstream dealer for a check-up and cleaning of the gas operated appliances...
- Page 87 8. Disconnect the hose length from pump inlet fitting and reconnect water system inlet line. Winterize Your Optional Icemaker Remove the Airstream installed supply hose and the small clear Dometic supply water line from the solenoid located in the exterior refrigerated compartment. The solenoid is mounted to back of the refrigerator.
- Page 88 AIRSTREAM 390/396 XL WINTERIZATION FOR SPLENDIDE WASHER/DRYER COMBO If needed, follow these steps to winterize your machine: With the machine power OFF, put ½ quart of R.V.-type antifreeze in the drum. Close door. Turn the Program Selector knob to spin. Turn the power ON. Let the machine spin for 1-2 minutes.
- Page 89 AIRSTREAM 390/396 XL G-27...
- Page 90 AIRSTREAM 390/396 XL Sky Deck Fresh Water System 1. 801698-03 QQSFC33XPXP, ½” B x ½” FPT swivel adapter 2. 801698-07 QV477X, ½” barb RB, Shut off valve 3. 801698-11 QQT333X, ½” barb tee 4. 801698-10 QQE33X, ½” barb el 5. 801698-04 QQE33BTX, ½”...
-
Page 91: Drain And Waste System
AIRSTREAM 390/396 XL DRAIN AND WASTE SYSTEM The drain and waste system of your motorhome includes waste holding tanks made from molded plastic. The BLACK WATER HOLDING TANK enables you to use the toilet for several days away from disposal facilities. -
Page 92: Black Tank Flush
AIRSTREAM 390/396 XL BLACK TANK FLUSH The black water holding tank must be flushed out until all paper and waste material is removed. Close the dump valve and refill the tank with 5 to 10 gallons of clean water and repeat until clean. - Page 93 AIRSTREAM 390/396 XL 390/396 Drain System G-31...
- Page 94 AIRSTREAM 390/396 XL 601160-02 Pipe, ABS 1 ½” (All straight pipe unless otherwise designated.) 1. 6000035 Ell, ABS long sweep 2. 600538 Vent, V-200 automatic 3. 600156 Tee, sanitary 4. 600622 P-trap, 1 ½” w/slip nut & washer 5. 600027 Elbow, ABS long street, 45 degrees 6.
- Page 95 313-769-6000 The RV toilet in your Airstream is a design that has been used for many years. There are two pedals. The large pedal opens and closes the slide mechanism, and the smaller pedal opens and closes a water valve.
- Page 96 AIRSTREAM 390/396 XL NOTES G-34...
-
Page 97: Battery Disconnect Switch
AIRSTREAM 390/396 XL ELECTRICAL SYSTEM 12-VOLT SYSTEM BATTERY CONTROL CENTER Your motorhome is equipped with six batteries. Two batteries will be for the engine and the other 4 batteries for the interior 12-volt circuits on a rollout tray. The Intellitec Battery Control Center is a centralized power switching, fusing, and distribution center. - Page 98 AIRSTREAM 390/396 XL 12-Volt Operation The only thing you have to do is make sure the coach batteries don't run down. In normal usage there isn't any problem, since you would normally drive part of the day and be plugged into a campground at night.
-
Page 99: Wiring Diagrams
AIRSTREAM 390/396 XL To gain access to the bulbs in the round reading lights recessed in the bottom of the overhead lockers you must remove the lens. The lenses are removed by turning counterclockwise about half a turn. The bulb, like other flat base bulbs, pulls straight out of the socket. - Page 100 AIRSTREAM 390/396 XL...
- Page 101 AIRSTREAM 390/396 XL...
- Page 102 AIRSTREAM 390/396 XL...
- Page 103 AIRSTREAM 390/396 XL...
- Page 104 AIRSTREAM 390/396 XL...
- Page 105 AIRSTREAM 390/396 XL...
- Page 106 AIRSTREAM 390/396 XL H-10...
- Page 107 AIRSTREAM 390/396 XL H-11...
- Page 108 AIRSTREAM 390/396 XL H-12...
- Page 109 AIRSTREAM 390/396 XL H-13...
- Page 110 AIRSTREAM 390/396 XL H-14...
- Page 111 AIRSTREAM 390/396 XL H-15...
- Page 112 AIRSTREAM 390/396 XL H-16...
- Page 113 AIRSTREAM 390/396 XL H-17...
- Page 114 AIRSTREAM 390/396 XL H-18...
- Page 115 AIRSTREAM 390/396 XL H-19...
- Page 116 AIRSTREAM 390/396 XL H-20...
- Page 117 AIRSTREAM 390/396 XL H-21...
- Page 118 AIRSTREAM 390/396 XL H-22...
- Page 119 AIRSTREAM 390/396 XL H-23...
- Page 120 AIRSTREAM 390/396 XL H-24...
- Page 121 AIRSTREAM 390/396 XL H-25...
- Page 122 AIRSTREAM 390/396 XL H-26...
- Page 123 AIRSTREAM 390/396 XL 390/396 Located in roadside power cord compartment H-27...
- Page 124 AIRSTREAM 390/396 XL 390-396 Located in Roadside front compartment. H-28...
- Page 125 AIRSTREAM 390/396 XL 390 Sky Deck Located in Roadside front compartment. H-29...
-
Page 126: Monitor Panel
The monitor system has been calibrated at the factory and should never need another calibration. If you feel the system is not operating correctly, please contact CATCON Products or a local Airstream dealer. The following instructions are provided for qualified service technicians. - Page 127 AIRSTREAM 390/396 XL MICROPULSE SYSTEMS MONITOR OPERATION INSTRUCTIONS This example shows the monitor reporting the following: Fresh Water = 1/8 to Empty Gray Water 1 = Empty to 5/8 Gray Water 2 = 3/4 Black Water = Empty to 5/8...
- Page 128 AIRSTREAM 390/396 XL MICROPULSE SYSTEMS MONITOR CALIBRATION PROCEDURE STEP 1 Action: Turn the power on. Result: Display will flash all yellow 1 time, flash all green 5 times and then display all green. This confirms that the monitor is in the calibration mode. Proceed to step two.
- Page 129 AIRSTREAM 390/396 XL STEP 3 Action: Press and release the status switch 1 time. Display will light Fresh Water, Gray Water 1, Gray Water 2, Black Water, and Select Tank LED’s green. After 2 seconds, the Select Tank LED will turn off and the ready for empty LED will turn light green.
- Page 130 AIRSTREAM 390/396 XL STEP 5 Action: Fill all tanks to the level that you want the monitor to report full. Maximum suggested is liquid about 1 inch below the top of the tank and the maximum is 4 inches above the empty level. When all tanks are set to the desired level press and release the status button 1 time.
- Page 131 AIRSTREAM 390/396 XL TV ANTENNA Manufacturer: Winegard Company 3000 Kirkwood Street Burlington, Iowa 52601 Phone: 800-843-4741 Raising Antenna to Operating Position Turn elevating crank in "UP" direction until some resistance to turning is noted. Antenna is now in operating position. Check to make sure switch on front TV jack is on.
- Page 132 AIRSTREAM 390/396 XL Maintenance Lubrication To lubricate the elevating gear apply a liberal amount of silicone spray lubricant to the elevating gear with the lift in the down position, then run the lift up and down a few times to distribute lubricant over gears.
- Page 133 AIRSTREAM 390/396 XL PARTS DESCRIPTION 1. Antenna Head 2. LM-300 Leveling Mount 3. Boot, Coax Cable 4. Pin, Headed/Grooved 5. Ring, Retaining Snap 6. Spacer, Plastic 7. Grommet, Plastic 8. EG-87 Elevating Gear 9. Tube, Square Elevator 10. Elevating Shaft Assy 11.
- Page 134 AIRSTREAM 390/396 XL TV ANTENNA Sky Deck Model RS-3460 Manufacturer: Winegard Company 3000 Kirkwood Street Burlington, Iowa 52601 Phone: 800-843-4741 Winegard's RoadStar omnidirectional antenna provides excellent reception of VHF/UHF TV channels. The RoadStar compact modern styling is unobtrusive and blends well with the designs of recreational vehicles.
- Page 135 12-volt positive wires for CB radio hook-up. SATELLITE ANTENNA PREP In order to facilitate the installation of either roof mount or portable satellite dish antennas Airstream has pre-wired your motorhome. On the drawing on the following page please note the two coaxial cables drawn with heavy double lines.
- Page 136 AIRSTREAM 390/396 XL H-40...
-
Page 137: Volt Power
AIRSTREAM 390/396 XL 110-VOLT POWER The 110-volt system works very much like your home. The circuit breakers, located behind access door in the foot of the rear bed, supply the power to the receptacles and appliances. If a circuit is over loaded or a short circuit occurs, the breakers will "kick"... -
Page 138: Operation Of The Inverter
BATTERY RESERVE CAPACITY Batteries store the energy necessary for the inverter to convert DC to AC power. Your Airstream motorhome has two 4-D batteries dedicated to the inverter's use. Battery performance is affected by temperature and age. Batteries operate best when the temperature is about 77° F. If the batteries are hotter than, or colder than this temperature, performance is reduced. - Page 139 ESTIMATING YOUR OPERATING TIMES With your Airstream inverter installation using two 4-D batteries (your XL has 4) in good condition and fully charged you will find that the total capacity (running times) will depend on the total wattage load of the devices you are powering.
-
Page 140: Troubleshooting Guide
AIRSTREAM 390/396 XL TROUBLE SHOOTING GUIDE SYMPTOMS PROBLEM REMEDY Battery voltage at the inverter's Check the battery condition No power output terminals is too high or low and no LED’s Battery over discharge protection Lower cutout voltage an/or battery bank... - Page 141 AIRSTREAM 390/396 XL H-45...
- Page 142 AIRSTREAM 390/396 XL Locating Shorts and Opens The key in locating shorts and opens is isolation. The first step is to isolate the circuit with the short or open. The second step is to then isolate the section of the circuit with the fault. Once the section is identified, the specific problem can be located.
- Page 143 AIRSTREAM 390/396 XL H-47...
- Page 144 AIRSTREAM 390/396 XL H-48...
- Page 145 AIRSTREAM 390/396 XL SOLAR PANEL, 53 WATT (Optional) Manufacturer: SOLAREX 630 Solarex Court Frederick, Maryland 21703 Customer Service 1-800-521-7652 WARNING Electrical Shocks and Burn Hazards Photovoltaic (PV) modules generate direct current (DC) when exposed to sunlight or other light sources. Even though a single module generates low voltage and current, shocks and burns can result from contact with module output wiring.
-
Page 146: Charging Led
AIRSTREAM 390/396 XL Remote Charge Controller and Monitor Manufacturer: Intellitec 131 Eisenhower Lane North Lombard, Illinois 60148 The solar charger monitor is used to control the output of rooftop-mounted solar panels to the coach and chassis batteries. When the batteries are below... - Page 147 AIRSTREAM 390/396 XL H-51...
-
Page 148: Control Unit Operation
AIRSTREAM 390/396 XL Remote Control Search Light (Optional) SEARCH LIGHT, REMOTE CONTROL Model 60020-Series 135SL Manufacturer: Jabsco 1485 Dales Way, PO Box 2158 Costa Mesa, CA. 92628-2158 Tel: (714) 545-8251 Fax: (714) 957-0609 CONTROL UNIT OPERATION SWITCH FUNCTIONS (A) Light Switch - On/Off switch positions. -
Page 149: Control Replacement
AIRSTREAM 390/396 XL SERVICE CONTROL REPLACEMENT Individual replacement parts are available for the control panel. To replace switches remove the two (2) screws from front of panel and pull forward, exposing wiring. 1 .To remove directional switch push firmly on the front toggle and remove switch from back side of panel. -
Page 150: Air Conditioner
Note: Review the air conditioning literature supplied in your Owner's Packet before proceeding. The roof air conditioner used on Airstream motorhomes is one of the most popular on the market today. In your Owner's Packet is a set of literature covering all operating and maintenance instructions. If the literature is misplaced, please contact the air conditioner manufacturer or your Airstream dealer for replacement. - Page 151 Operating instructions are located in your Owners Packet. If they should become misplaced new literature can be ordered direct from the manufacturer or your Airstream dealer. The manufacturer also offers a detailed service guide for your furnace.
-
Page 152: Operation
AIRSTREAM 390/396 XL REFRIGERATOR Manufacturer: Dometic Sales Corporation 2320 Industrial Parkway P.O. Box 490 Elkhart, Indiana 46514 Phone: 219-295-5228 Review all Dometic Literature supplied in your Owner's Packet or stored in the refrigerator prior to operating. In the absorption refrigerant system, ammonia is liquefied in the finned condenser coil at the top rear of the refrigerator. -
Page 153: Microwave Ovens
AIRSTREAM 390/396 XL RANGE Manufacturer: Magic Chef 28812 Phillips Street Elkhart, Indiana 46514 219-264-9578 People using gas ranges in their home will find little difference in the operation of the range in the motorhome. Other customers, used to electric ranges may be a little apprehensive at first; but will quickly gain confidence. -
Page 154: Water Heater
AIRSTREAM 390/396 XL WATER HEATER Manufacturer: Atwood Mobile Products 4750 Hiawatha Drive P.O. Box 1205 Rockford, Illinois 61105 Phone: 815-877-7461 Note: Review the water heater literature supplied in your Owner's Packet before proceeding, CAUTION : Hydrogen gas can be produced in a hot water system served by this heater that has not been used for a long period of time (generally two weeks or more). -
Page 155: Cleaning Instructions
AIRSTREAM 390/396 XL HIGH VOLUME ROOF VENT (OPTIONAL) Manufacturer: FAN-TASTIC VENT CORP. 4349 S. Dort Hwy. Burton, MI 48529 1-313-742-0330 1-800-521-0298 The optional high-volume roof vent system is designed to quickly exhaust stale, hot air and draw in fresh air. It's great to use when the outside temperature really doesn't call for air conditioning, but heat has built up in your coach. - Page 156 AIRSTREAM 390/396 XL SPECIFICATIONS Airstream constantly strives to improve its product. All specifications are subject to change without notice. Note: all weights and measurements were made on prototype vehicles. Your production motorhome may vary slightly. Please refer to the weight label in your motorhome for weights specific to your unit. The...
- Page 157 AIRSTREAM 390/396 XL INDEX Aisle lights..........B-4 Electrical System ........H-1 Air Brake System Drainage.....C-1 Electric Cord......... D-9, H-41 Air Conditioner......... I-1 Electric Step...........C-10 Air Supply, Exterior ......C-20 Engine Access ......... C-1, F-1 Antenna......H-35, H-38, H-39 Escape Window ......D-1, D-9 Appliances ..........
- Page 158 Winterizing ........... G-24 Step Well Cover ........C-20 Winter Traveling ........D-7 Storage ...........B-1 Wiring, 12 Volt........H-3 Switches, armrest, dash ......B-4 Wiring Diagrams, 12Volt ....... H-4 Wiring, 110 Volt....H-41, H-45, H-47 390 Series XL Owner’ Manual © Airstream, Inc. 2004...