Mitsubishi Heavy Industries FDT User Manual
Packaged
Hide thumbs
Also See for FDT:
- Technical manual (521 pages) ,
- Service manual (134 pages) ,
- User manual (22 pages)
Table of Contents
Advertisement
Available languages
Available languages
USER'S MANUAL
MITSUBISHI HEAVY INDUSTRIES LTD. PACKAGED AIR CONDITIONER
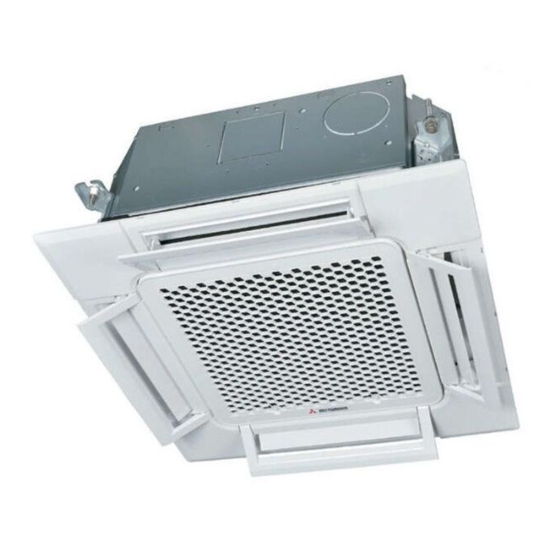
Ceiling cassette -4 way- (FDT)
Ceiling cassette -4 way Compact (600x600mm)- (FDTC)
Ceiling cassette -2 way- (FDTW)
Ceiling cassette -1 way Compact- (FDTQ)
Ceiling cassette -1 way- (FDTS)
Duct connected -High static pressure- (FDU)
Duct connected -Middle static pressure- (FDUM)
Ceiling suspended (FDE)
Wall mounted (FDK)
Floor standing (with casing) (FDFL)
Floor standing (without casing) (FDFU)
Duct connected (Ultra thin) -Low static pressure- (FDQS)
Duct connected -COMPACT&FLEXIBLE- (FDUH)
Duct connected -High static pressure Out door Air processing unit (FDU -F)
This air conditioner complies with EMC Directive 2004/108/EC,
LV Directive 2006/95/EC.
CE marking is applicable to the area of 50 Hz power supply.
Ce climatiseur est conforme a ` la Directive EMC: 2004/108/EC,
LV Directive 2006/95/EC.
La marque CE s'applique aux régions alimentées en courant
de 50 Hz.
Dieses Kimagera ¨t erfu ¨ llt die EMC Direktiven 2004/108/EC, LV
Direktiven 2006/95/EC.
Die CE-Marke gilt für Bereiche mit einer Netzstromversorgung
von 50 Hz.
Questo condizionatore d'aria e ` conforme alla Direttiva EMC:
2004/108/EC, LV Direttiva 2006/95/EC.
Il marchio CE è applicabile alla fascia di alimentazione 50 Hz.
Este acondicionador de aire cumple con la directiva EMC:
2004/108/EC, LV Directiva 2006/95/EC.
La indicación CE sólo corresponde al área de suministro
eléctrico de 50 Hz.
Deze airconditioner voldoet aan EMC Directive 2004/108/EC,
LV Directive 2006/95/EC.
CE-markering is van toepassing op het gebied met een net-
stroom van 50 Hz.
USER'S MANUAL
MANUEL DE L'UTILISATEUR
ANWENDERHANDBUCH
ISTRUZIONI PER L'USO
MANUAL DEL PROPIETARIO
GEBRUIKERSHANDLEIDING
MANUAL DO UTILIZADOR
�����
Este aparelho de ar condicionado está em conformidade com a
Directiva EMC 2004/108/EC, a Directiva LV 2006/95/EC.
A marca CE aplica-se à zona de fornecimento de energia a
50 Hz.
PSA012B728
ENGLISH
FRANÇAIS
DEUTSCH
ITALIANO
ESPAÑOL
NEDERLANDS
PORTUGUÊS
���
Advertisement
Chapters
Table of Contents

Related Manuals for Mitsubishi Heavy Industries FDT


Summary of Contents for Mitsubishi Heavy Industries FDT
- Page 1 USER’S MANUAL MITSUBISHI HEAVY INDUSTRIES LTD. PACKAGED AIR CONDITIONER USER’S MANUAL ENGLISH Ceiling cassette -4 way- (FDT) Ceiling cassette -4 way Compact (600x600mm)- (FDTC) MANUEL DE L’UTILISATEUR FRANÇAIS Ceiling cassette -2 way- (FDTW) Ceiling cassette -1 way Compact- (FDTQ) ANWENDERHANDBUCH...
-
Page 2: Table Of Contents
Electrical installation work must be executed according If ventilation is not sufficient, it may cause oxygen deficiency HOW TO SET THE AIRFLOW DIRECTION (IN CASE OF FDT, FDTC, FDE, FDK) ............9 to the technical standards and other regulations applicable to accident. -
Page 3: Names And Functions Of Remote Control Buttons
HOW TO USE< WIRED REMOTE CONTROL > Do not touch the aluminum fin. PRECAUTIONS FOR RELOCATION OR REPAIRING NAMES AND FUNCTIONS OF REMOTE CONTROL BUTTONS (WIRED REMOTE CONTROL) Otherwise it may lead to injuries. CAUTION Do not clean the inside of the indoor unit by yourself. Never perform any modification. -
Page 4: How To Operate
HOW TO OPERATE HOW TO PERFORM THE TIMER OPERATION (Dehumidifying operation is prohibited for FDU-F.) < WIRED REMOTE CONTROL > < WIRED REMOTE CONTROL > Turn on the power supply of both indoor/outdoor units for six hours before starting the unit to protect the units. (The crankcase ATTENTION THE SELECTION OF TIMER MODE is conducted and the compressor is heated) Do not turn off the power supply. -
Page 5: Setting The Time
HOW TO PERFORM THE TIMER OPERATION < WIRED REMOTE CONTROL > SETTING THE TIME SLEEP TIMER MODE Timer operation is performed base on the time set by the steps described in this section. Make sure to set the After certain period has elapsed, the unit stops operating. Press TIMER button. -
Page 6: On Timer Mode
HOW TO PERFORM THE TIMER OPERATION < WIRED REMOTE CONTROL > ON TIMER MODE WEEKLY TIMER MODE The unit starts to operate at the set time. It is possible to set temperature at which you want to start the operation. �Selection of Weekly timer mode One setting results in one operation only. - Page 7 HOW TO PERFORM THE TIMER OPERATION < WIRED REMOTE CONTROL > � � mark next to a number is switched to light. “ ” or “ ” is displayed. The settings so far are effective and the display buttons to the left diagram.
- Page 8 HOW TO PERFORM THE TIMER OPERATION < WIRED REMOTE CONTROL > �Weekly timer Holiday Setting �Weekly timer Checking It is possible to disable the timer settings temporarily which has been already set by applying Holiday Set on a particular day of the week. When the Holiday Setting is cancelled, the timer setting is enabled again. In the Weekly timer mode, select and set “...
-
Page 9: Timer Cancellation Mode
HOW TO OPERATE IN SILENT MODE < WIRED REMOTE CONTROL > HOW TO PERFORM THE TIMER OPERATION < WIRED REMOTE CONTROL > TIMER CACELLATION MODE SILENT MODE When the silent mode is set, the unit operates more silently reducing noise from the outdoor unit. Press TIMER button. -
Page 10: How To Adjust The Louver
ADJUSTING WITH LOUVER BUTTON (Indoor unit with auto swing function) set, the louver will swing within the range between the top and the bottom when swing operation is chosen. With Ceiling cassete −4 way − FDT, it is also possible to apply different setting to each louver. Press LOUVER button once, and the current status of louver is displayed. -
Page 11: How To Operate Ventilation
HOW TO OPERATE VENTILATION HOW TO SET THE AIRFLOW DIRECTION (WHEN A VENTILATOR IS INSTALLED) < WIRED REMOTE CONTROL > < WIRED REMOTE CONTROL > When the ventilator is set to “NO VENTI LINK”, the ventilator can be turned on and off independently regardless Press SET button (Fixing of the upper of the operation of the air conditioner. -
Page 12: Back Up Display
INSPECTION DISPLAY, FILTER SIGN, AIR CONDITIONER NUMBER, STANDBY, ROOM TEMPERATURE AND BACK UP DISPLAY NAMES AND FUNCTIONS OF REMOTE CONTROL BUTTON <WIRELESS REMOTE CONTROL> < WIRED REMOTE CONTROL > WIRELESS REMOTE CONTROL WHEN THE CHECK INDICATOR LIGHT (RED) FLASHES WHEN THE FILTER CLEANING MESSAGE IS DISPLAYED ROOM TEMP display Indicates set temperature. -
Page 13: How To Operate
HOW TO USE < WIRELESS REMOTE CONTROL > ON – TIMER OPERATION < WIRELESS REMOTE CONTROL > HOW TO OPERATE (Dehumidifying operation is prohibited for FDU-F.) Operation is started at the setting time. [EXAMPLE] If you would like to start the operation at AM 8:00 Turn on the power supply of both indoor/outdoor units for six hours before starting the unit to protect the units. -
Page 14: How To Adjust The Louver
CHECK INDICATION, FILTER SIGN < WIRELESS REMOTE CONTROL > < WIRELESS REMOTE CONTROL > UP AND DOWN ADJUSTING Ceiling cassette −4 way− (FDT) � How to move swing louver Ceiling cassette −4 way Compact (600 x 600 mm)− (FDTC) Press AIR FLOW button when the air conditioner is in operation. -
Page 15: Backup Button
How to clean the Air Filter display part. Clean the filter frequently for economical operation. Ceiling cassette −4 way− (FDT) � Caution Before cleaning, stop the operation and turn off the power supply. Ceiling cassette −4 way Compact (600 x 600 mm)− (FDTC) Otherwise, it may lead to injury as fan inside rotates at high speed. - Page 16 HOW TO MAINTAIN HOW TO MAINTAIN Ceiling cassette −4 way Compact (600 x 600 mm)− (FDTC) Wall mounted (FDK) � � 1. Slide the inlet grille levers in the direction of the arrow ( 1. Pull up the suction grille forward. 2.
-
Page 17: Trouble Shooting
TROUBLE SHOOTING TROUBLE SHOOTING Check the following items before requiring service. The phenomena mentioned below is not malfunction. THE UNIT DOES NOT WORK AT ALL Slapping sounds are heard. These sounds are generated when plastic components are expanded or shrunk by the heat and rubbed with Is the power supply switch Is there a blackout or is the Is the leakage breaker... -
Page 18: Notice
PREPARATION OF HEATING SETTING TO DISABLE BUTTON OPERATION <Wired remote control> The following button operations can be disabled. If the button is pressed, “ ” is displayed provided the button is disabled, and CASES WHEN “ (PREPARATION OF HEATING)” IS DISPLAYED ATTENTION returns to original display. - Page 20 CONSIGNES DE SÉCURITÉ Si l’appareil a été immergé dans l’eau à cause d’une Nous vous remercions d’avoir acheté ce climatiseur monobloc, fabriqué par Mitsubi- Veuillez lire ces « CONSIGNES DE SÉCURITÉ » avant de � catastrophe naturelle comme une inondation ou un ouragan, shi Heavy Industries.
-
Page 21: Mode D'emploi < Télécommande Filaire > Noms Et Fonctions Des Boutons De La Télécommande « Télécommande Filaire
MODE D’EMPLOI < TÉLÉCOMMANDE FILAIRE > Ne touchez pas les ailettes en aluminium. CONSIGNES POUR LE DÉPLACEMENT OU LA RÉPARATION NOMS ET FONCTIONS DES BOUTONS DE LA TÉLÉCOMMANDE (TÉLÉCOMMANDE FILAIRE) Dans le cas contraire, cela pourrait entraîner des blessures. PRUDENCE Ne nettoyez pas vous-même l’intérieur de l’unité... -
Page 22: Comment Faire Fonctionner La Télécommande
COMMENT FAIRE FONCTIONNER LA TÉLÉCOMMANDE COMMENT UTILISER LE MODE DE FONCTIONNEMENT MINUTERIE (La fonction de déshumidification est interdite pour le FDU-F.) < TÉLÉCOMMANDE FILAIRE > < TÉLÉCOMMANDE FILAIRE > r est alimenté ATTENTION SÉLECTION DES MODES MINUTERIE est arrêté, pour empêcher une panne du compresseur à cause de l’accumulation de réfrigérant tout en conservant le compresseur chaud.) Appuyez sur le bouton TIMER. -
Page 23: Réglage De L'heure
COMMENT UTILISER LE MODE DE FONCTIONNEMENT MINUTERIE < TÉLÉCOMMANDE FILAIRE > RÉGLAGE DE L’HEURE MODE SLEEP TIMER Les modes minuterie fonctionnent en se basant sur l’horloge, dont l’heure est définie par la procédure suivante. Assurez- Lorsque la durée programmée est écoulée, l’appareil Appuyez sur le bouton TIMER. -
Page 24: Mode On Timer
COMMENT UTILISER LE MODE DE FONCTIONNEMENT MINUTERIE < TÉLÉCOMMANDE FILAIRE > MODE ON TIMER MODE WEEKLY TIMER L’appareil démarre à l’heure précisée. Il est possible de définir une température précise lors du démarrage de l’appareil. �Sélection du mode Weekly timer Ce réglage ne fonctionne qu’une seule fois. - Page 25 COMMENT UTILISER LE MODE DE FONCTIONNEMENT MINUTERIE < TÉLÉCOMMANDE FILAIRE > � � à côté du numéro s’allume. « » ou « » s’affiche. illustré à gauche. � � � � En appuyant sur le bouton � ou �, il est possible de choisir le paramètre à...
- Page 26 COMMENT UTILISER LE MODE DE FONCTIONNEMENT MINUTERIE < TÉLÉCOMMANDE FILAIRE > �Paramètre vacances du mode Weekly timer �Vérification du mode Weekly timer Il est possible de désactiver temporairement les réglages de la minuterie déjà définis, en appliquant le paramètre vacances sur un jour précis de la semaine. Lorsque le paramètre vacances est annulé, le réglage de minuterie est de En mode Weekly timer, sélectionnez et définissez nouveau activé.
-
Page 27: Annulation Du Mode Minuterie
COMMENT UTILISER LE MODE SILENCE < TÉLÉCOMMANDE FILAIRE > COMMENT UTILISER LE MODE DE FONCTIONNEMENT MINUTERIE < TÉLÉCOMMANDE FILAIRE > ANNULATION DU MODE MINUTERIE MODE SILENCE Lorsque le mode silence est activé, l’appareil fonctionne plus silencieusement, en réduisant le bruit de l’unité extérieure. Appuyez sur le bouton TIMER. -
Page 28: Comment Régler Le Volet
RÉGLAGE AVEC LE BOUTON LOUVER (Unité intérieure avec fonction d’oscillation automatique) déplace dans la plage précisée. Avec les modèles encastrés au plafond de type FDT, un réglage individuel est possible pour chaque volet. Appuyez une fois sur le bouton LOUVER et l’état actuel du volet s’affiche. -
Page 29: Comment Utiliser La Ventilation
COMMENT UTILISER LA VENTILATION (LORSQU’UN VENTILATEUR EST INSTALLÉ) < TÉLÉCOMMANDE FILAIRE > COMMENT ORIENTER LE FLUX D’AIR < TÉLÉCOMMANDE FILAIRE > Lorsque le ventilateur est réglé sur « NO VENTI LINK », le ventilateur peut être démarré ou arrêté indépendamment du Appuyez sur le bouton SET (Confirmation de fonctionnement du climatiseur. -
Page 30: Message D'inspection, Message De Filtre, Numéro De Climatiseur, Message D'attente, Affichage De La Température Ambiante Et Message De Sauvegarde
MESSAGE D’INSPECTION, MESSAGE DE FILTRE, NUMÉRO DE CLIMATISEUR, MESSAGE D’ATTENTE, AFFICHAGE DE LA TEMPÉRATURE AMBIANTE ET MESSAGE DE SAUVEGARDE NOMS ET FONCTIONS DES BOUTONS DE LA TÉLÉCOMMANDE < TÉLÉCOMMANDE SANS-FIL > < TÉLÉCOMMANDE FILAIRE > TÉLÉCOMMANDE SANS-FIL Indicateur AIR FLOW LORSQUE LE VOYANT DE VÉRIFICATION (ROUGE) CLIGNOTE LORSQUE LE MESSAGE DE NETTOYAGE DU FILTRE S’AFFICHE Indicateur ROOM... -
Page 31: Télécommande Sans-Fil
MODE D’EMPLOI < TÉLÉCOMMANDE SANS-FIL > MODE ON – TIMER < TÉLÉCOMMANDE SANS-FIL > COMMENT FAIRE FONCTIONNER LA TÉLÉCOMMANDE ( La fonction de déshumidification est interdite pour le FDU-F.) L’appareil démarre à l’heure précisée. [EXEMPLE] Si vous souhaitez démarrer l’appareil à 8:00 AM (matin) e carter est Appuyez sur le bouton ON timer. -
Page 32: Comment Régler Le Volet
COMMENT RÉGLER LE VOLET VOYANT DE VÉRIFICATION, MESSAGE DE FILTRE < TÉLÉCOMMANDE SANS-FIL > < TÉLÉCOMMANDE SANS-FIL > latine de plafond - 4 voies - (FDT) � RÉGLAGE HAUT ET BAS Platine de plafond - 4 voies compactes (600x600 mm) - (FDTC) �... -
Page 33: Bouton Backup
à côté de l’écran de l’unité intérieure. Nettoyez fréquemment le fi ltre pour un fonctionnement économique. �Platine de plafond - 4 voies - (FDT) Danger Avant le nettoyage, arrêtez l’appareil et mettez-le hors tension. �Platine de plafond - 4 voies compactes (600x600 mm) - (FDTC) Dans le cas contraire, vous pourriez être blessé... - Page 34 COMMENT EFFECTUER LA MAINTENANCE COMMENT EFFECTUER LA MAINTENANCE Platine de plafond - 4 voies compactes (600x600 mm) - (FDTC) ��Montage mural (FDK) � 1. Faites glisser les leviers de la grille d’admission dans la direction de la flèche ( ), et ouvrez-la vers le bas. légèrement et tirez vers vous.
-
Page 35: Dépannage
DÉPANNAGE DÉPANNAGE Vérifiez les points suivants avant de faire appel au service technique. Les événements mentionnés ci-dessous ne sont pas des dysfonctionnements. L’APPAREIL NE FONCTIONNE PAS DU TOUT Des coups se font entendre. Ces bruits sont générés par l’expansion et la contraction des composants en plastique sous l’effet de la chaleur et des Est-ce que l’alimentation Existe-il une panne d’électricité... -
Page 36: Avis
PRÉPARATION DU CHAUFFAGE RÉGLAGE DE DÉSACTIVATION DES BOUTONS < Télécommande filaire > Les boutons suivants peuvent être désactivés. Si le bouton est enfoncé, « » s’affiche puisque le bouton est désactivé, et l’affichage revient AVIS CAS OÙ « PRÉPARATION DU CHAUFFAGE » S’AFFICHE à... -
Page 38: Veiligheidsvoorschriften
Mitsubishi Heavy Industries. Lees deze handleiding door alvorens het product in raadplegen alvorens hem opnieuw in gebruik te nemen. De voorschriften die hier worden beschreven zijn opgedeeld gebruik te nemen en volg de instructies zorgvuldig op. -
Page 39: De < Bedrade Afstandsbediening > Gebruiken Namen En Functies Van De Toetsen Van De Afstandsbediening "Bedrade Afstandsbediening
DE < BEDRADE AFSTANDSBEDIENING > GEBRUIKEN Raak de aluminiumfin niet aan. VOORZORGSMAATREGELEN VOOR HET VERPLAATSEN EN REPAREREN NAMEN EN FUNCTIES VAN DE TOETSEN VAN DE AFSTANDSBEDIENING (BEDRADE AFSTANDSBEDIENING) Dit zou letsel kunnen veroorzaken. LET OP Maak de binnenkant van de binnenapparatuur niet zelf schoon. Pas de apparatuur niet aan. -
Page 40: Het Systeem Bedienen
HET SYSTEEM BEDIENEN DE TIMER GEBRUIKEN < BEDRADE AFSTANDSBEDIENING > (Ontvochtigen is voor FDU-F niet mogelijk.) < BEDRADE AFSTANDSBEDIENING > Schakel de voeding van zowel de binnen- als buitenapparatuur zes uur voor de apparatuur in gebruik te nemen in om beschadiging LET OP DE TIMERMODUS SELECTEREN te voorkomen. -
Page 41: De Tijd Instellen
DE TIMER GEBRUIKEN < BEDRADE AFSTANDSBEDIENING > DE TIJD INSTELLEN SLEEP TIMERMODUS De timer functioneert op basis van de klok die kan worden ingesteld aan de hand van de volgende stappen. Verzeker u ervan De apparatuur schakelt na een korte tijd uit. Druk op de TIMER-toets. -
Page 42: On Timermodus
DE TIMER GEBRUIKEN < BEDRADE AFSTANDSBEDIENING > ON TIMERMODUS WEKELIJKSE TIMERMODUS Het apparaat schakelt in op het tijdstip dat wordt aangegeven. Het is ook mogelijk om de temperatuur in te stellen waarop u wilt �Het selecteren van de wekelijkse timermodus dat het apparaat inschakelt. - Page 43 DE TIMER GEBRUIKEN < BEDRADE AFSTANDSBEDIENING > � �-markering verschijnt naast een nummer. “ ” of “ ” wordt weergegeven. De tot nu toe aangepaste instellingen zijn toegepast en het display verandert zoals hier links staat aangegeven. � � Met behulp van de �- of �-toets kan het item worden gekozen dat dient �...
- Page 44 DE TIMER GEBRUIKEN < BEDRADE AFSTANDSBEDIENING > �Feestdaginstelling van de wekelijkse timer �Controleren van de wekelijkse timer Het is mogelijk om de bestaande timerinstellingen tijdelijk uit te schakelen door de feestdaginstelling toe te passen op een dag van de week. Als de feestdaginstelling wordt geannuleerd, wordt de timerinstelling opnieuw ingeschakeld. Selecteer en stel “...
-
Page 45: Timer Annuleringsmodus
HET SYSTEEM BEDIENEN < BEDRADE AFSTANDSBEDIENING > DE TIMER GEBRUIKEN < BEDRADE AFSTANDSBEDIENING > TIMER ANNULERINGSMODUS STILLE MODUS Als de stille modus is ingeschakeld, functioneert de apparatuur stiller door het geluid van de buitenapparatuur te beperken. Druk op de TIMER-toets. Het systeem past de stille werkingsmodus toe op de in te stellen starttijd en annuleert hem weer als er een bepaalde De timermodus start. -
Page 46: De Lamellen Aanpassen
AANPASSEN MET BEHULP VAN DE LAMELLENTOETS (binnenapparatuur met automatische kantelfunctie) lamellen zich binnen het aangegeven bereik bewegen. In het geval van het op het plafond gemonteerde type FDT, is het individueel instellen van iedere lamel mogelijk. Druk eenmaal op de LOUVER-toets om de huidige status van de lamellen weer te geven. -
Page 47: De Koeling Regelen
DE KOELING REGELEN (ALS DE APPARATUUR IS VOORZIEN VAN EEN VENTILATOR) < BEDRADE AFSTANDSBEDIENING > DE LUCHTSTROOMRICHTING INSTELLEN < BEDRADE AFSTANDSBEDIENING > Als de ventilator is ingesteld op “NO VENTI LINK”, kan hij in en uit worden geschakeld, onafhankelijk van de airconditioner zelf. Druk op de SET-toets (om de bovengrenspositie Als de ventilator is ingesteld op “VENTI LINK”, wordt zijn werking gekoppeld aan die van de airconditioner. -
Page 48: Controledisplay,Filterteken,Nummer Airconditioning, Stand-By, Kamertemperatuur En Back-Up
NAMEN EN FUNCTIES VAN DE TOETSEN VAN DE AFSTANDSBEDIENING CONTROLEDISPLAY,FILTERTEKEN,NUMMER AIRCONDITIONING, STAND-BY, KAMERTEMPERATUUR EN BACK-UP. <DRAADLOZE AFSTANDSBEDIENING> < BEDRADE AFSTANDSBEDIENING > DRAADLOZE AFSTANDSBEDIENING AIR FLOW-display INDIEN HET CONTROLEINDICATIELICHT (ROOD) KNIPPERT ALS HET FILTERSCHOONMAAKBERICHT WORDT WEERGEGEVEN ROOM TEMP-display Geeft de staat vaan de lamellen aan. Zie pagina 13 Geeft de ingestelde temperatuur weer. -
Page 49: Het Systeem Bedienen
DE < DRAADLOZE AFSTANDSBEDIENING > GEBRUIKEN ON – TIMERBEDIENING < DRAADLOZE AFSTANDSBEDIENING > HET SYSTEEM BEDIENEN (Ontvochtigen is voor FDU-F niet mogelijk.) De apparatuur schakelt in op het ingestelde tijdstip. [VOORBEELD] Als u het apparaat om AM 8:00 wilt laten inschakelen. g te Druk op de ON timertoets. -
Page 50: De Lamellen Aanpassen
DE LAMELLEN AANPASSEN CONTROLEINDICATIE, FILTERMARKERING < DRAADLOZE AFSTANDSBEDIENING > < DRAADLOZE AFSTANDSBEDIENING > Plafond cassette -4-weg- (FDT) � OMHOOG EN OMLAAG AANPASSEN Plafond cassette -4-weg Compact (600x600mm)- (FDTC) De lamellen verplaatsen � Druk op de AIR FLOW-toets als de airconditioner actief is. -
Page 51: Backuptoets
Het luchtfilter schoonmaken toets op het displaygedeelte van de binnenapparatuur. Maak het fi lter regelmatig schoon voor een zuinige werking. Plafond cassette -4-weg- (FDT) � Let op Schakel het apparaat en de voeding uit alvorens te beginnen met schoonmaken. Plafond cassette -4-weg Compact (600x600mm)- (FDTC) Anders zou het kunnen leiden tot letsel doordat de inwendige ventilator draait met hoge snelheid. - Page 52 ONDERHOUD ONDERHOUD � � 1. Til het aanzuigrooster iets op en trek dit naar voren. 2. Houd de hendel van het luchtfilter losjes vast, til dit iets op en trek dit 1. Schuif de invoerroosterhendels in de richting van de pijl ( ) en open het Plaats de vingers in de uitsparingen aan beide kanten van het er naar voren uit.
-
Page 53: Verhelpen Van Problemen
VERHELPEN VAN PROBLEMEN VERHELPEN VAN PROBLEMEN De onderstaande fenomenen zijn geen storingen. Neem de volgende items door alvorens om hulp te vragen. DE APPARATUUR WERKT HELEMAAL NIET Kletsende geluiden zijn Is de stroomschakelaar van de Is er een stroomstoring of zijn Is de aardlekschakelaar Schijnt er zonlicht of hoorbaar. -
Page 54: Verwarmingsvoorbereidingen
DE TOETSEN VERGRENDELEN VERWARMINGSVOORBEREIDINGEN <Bedrade afstandsbediening> OPMERKING De volgende toetsfuncties kunnen worden vergrendeld. Als de toets wordt ingedrukt, wordt “ ” weergegeven indien de toets vergrendeld is, GEVALLEN WAARIN “ (PREPARATION OF HEATING)” WORDT WEERGEGEVEN waarna het originele display opnieuw wordt weergegeven. Raadpleeg uw leverancier in verband met de “ ”-instelling. - Page 56 � � � � � � � � � � �...
- Page 58 � � � � � � � � � � –3 � � � � � � � � � � � � COOL � � � � � HEAT � � � � � � AUTO � � � “Fan”...
- Page 59 � � � � � � � � � � � � � � � � � � � � � � � � � �...
- Page 60 � � � � � � � � � � � � � � � � � � � � � � � � � � � � � � � � � � � � � � � � �...
- Page 61 �� � � � � � � � � � � � � � � � � � � �� � � � � � �...
- Page 62 � � � � � � � � � � � � � � � � � � � � � � � � � � �...
- Page 63 � � � � � � � � � � � � � � � � � � � � � � � � � � � � � �� � � � � � � � �...
- Page 64 � � � � � � � � � � � � � � �� �� �� HEAT � � � �� �� �� �� �� ��...
- Page 65 � � � �� �� �� �� �� �� � �...
- Page 66 � �� �� � HI MED LO �� (AUTO) (COOL) (HEAT) (FAN) (DRY) � � MODE � MODE � � � � � � � � �� �� �� �� �� �� �� �� �...
- Page 67 1 · 3 � � � AUTO � COOL (AUTO)* COOL HEAT HEAT � � � � 2 · 4 � � 1·3 � �...
- Page 68 � � � TIMER CHECK RUN � COOL AUTO HEAT � TIMER CHECK RUN...
- Page 69 � TIMER CHECK RUN � � � � � � � �...
- Page 70 � � � � � � � � � � � �...
- Page 71 ∞...
- Page 72 � � � �...
- Page 74 AIR-CONDITIONING & REFRIGERATION SYSTEMS HEADQUARTERS 3-1, Asahi, Nishibiwajima-cho, Kiyosu, Aichi, 452-8561, Japan MITSUBISHI HEAVY INDUSTRIES EUROPE, LTD. AIR-CONDITIONER DIVISION 3rd Floor Thavies Inn House 3-4 Holborn Circus London EC1N 2HA, ENGLAND Phone: 44(0)20 7842 8171 Fax: 44(0)20 7842 8104 MITSUBISHI HEAVY INDUSTRIES AUSTRALIA, PTY.LTD.