
Related Manuals for Samsung MIM-H03U


Summary of Contents for Samsung MIM-H03U
- Page 1 Smart air conditioner APP can be altered without notice for quality improvement and also be deleted depending on the circumstances of manufacturing firms.
- Page 2 Smart AC application MIM-H03U Multi Wi-Fi kit user & installation manual imagine the possibilities EN FR DB68-05787A-00...
-
Page 3: Table Of Contents
Specification of wired/wireless router for Samsung Smart Air conditioner....... . . -
Page 4: Safety Precautions
Safety precautions This installation manual explains how to install a Wi-Fi kit to an indoor unit of Samsung system air conditioners. Read the installation manual thoroughly before installing the Wi-Fi kit. (Refer to the appropriate manual for installing product or other optional parts.) WARNING Hazards or unsafe practices that may result in severe personal injury or death. -
Page 5: Check Before Installing Wi-Fi Kit
Check before installing Wi-Fi kit Parts Assy Wi-Fi kit Cable tie (2) Cable clamp (3) M4×16 screw (5) User & Installation manual U- terminal (6) Wi-Fi kit should be installed by a certified installer. Before installing a Wi-Fi kit, you should check whether the power of the kit is turned off. CAUTION The wire of Wi-Fi kit should be installed in accordance with electric wiring regulation and should also be installed inside the wall so that it cannot be touched by users. -
Page 6: How To Install Wi-Fi Kit
How to install Wi-Fi kit Wi-Fi kit installation For smooth operation, install the Wi-Fi kit and the wireless router in open space with no obstacles between them. Operation may not be possible if the distance between the Wi-Fi kit and the wireless router is too far or if there's any CAUTION obstacle between them. - Page 7 How to install Wi-Fi kit 3. Use two or more screws to fix the rear cover of the Wi-Fi kit to a wall. Then, connect the power cable (V1, V2) and the communication cable to the terminals on the back of the front cover in appropriate length. 4.
- Page 8 5. Reassemble the Wi-Fi kit. Put the front cover of the kit into the upper grooves first and then fit it as shown in the picture. After assembling the Wi-Fi kit, please check if there is any gap because of the connection cable between NOTE front cover and rear cover.
- Page 9 How to install Wi-Fi kit ❋ If an indoor unit does not have V1 and V2 terminal block, use the SUB PBA (sold separately) to supply power to the Wi-Fi kit. SUB PBA (MIM-A00) 12 V COM2 ORG : Connect the ORG wire to V1 RED : Don’t use it YEL : Connect the YEL wire to V2 BLU : Don’t use it...
- Page 10 When installing a Wi-Fi kit with 10 m (32.8 feet) or more wire, the communication wire and power wire of a Wi-Fi kit should be installed separately. (The Wi-Fi kit will malfunction because of electrical fault. ) CAUTION When installing a Wi-Fi kit on the wall, select proper thickness of wires in the consideration of the hole size for wire on the wall.
-
Page 11: Checking The Wi-Fi Kit
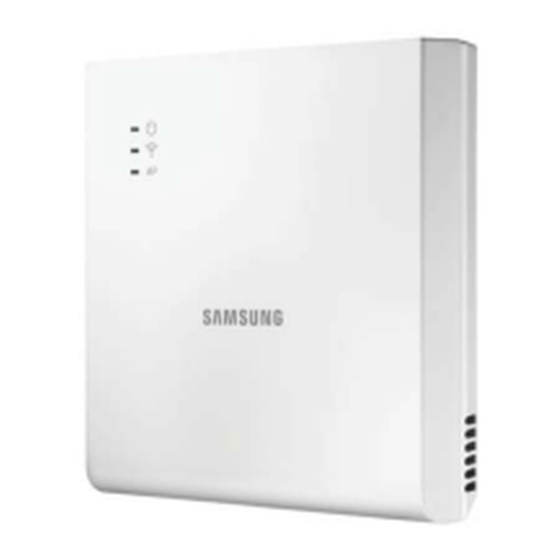
How to install Wi-Fi kit Checking the Wi-Fi kit Power LED Wi-Fi Connect LED Wi-Fi Configure LED AP Button Reset <Wi-Fi kit front view> LED display information LED information Power Wi-Fi Connect Wi-Fi Configure Initialized Normal AP Connection OK. But, Internet is not Blinking Connected Air conditioner... -
Page 12: Initializing User Data
Initializing user data If you want to initialize all the user data to set the Wi-Fi kit as factory default status, press and hold the button (SW3) inside the Wi-Fi kit for 5 seconds. After releasing the button, all the lamps on the Wi-Fi kit are turned on and all the user data is deleted. -
Page 13: Setting The Network
Please refer to the user manual for installation of your wired/wireless router. Wi-Fi kit supports Wi-Fi 2.4 GHz only. Wi-Fi kit supports the IEEE802.11 b/g/n communication protocol. (Samsung Electronics recommends use of IEEE802.11n.) If the wired/wireless router is not Wi-Fi certified product, it may not be connected to the Wi-Fi kit. -
Page 14: Starting Samsung Smart Home App
Starting Samsung Smart Home App Downloading Samsung Smart Home App You can download the Samsung Smart Home App by searching "Samsung Smart Home" on Play store, Galaxy Apps and iPhone App Store. For android phone Korean key word : 삼성 스마트 홈... -
Page 15: Running The Samsung Smart Home App
Running the Samsung Smart Home App Before using the Samsung Smart Home App, register the Samsung account. If you are a Samsung Smart phone user, you can automatically log on to the App with the Samsung account. If you are not a Samsung Smart phone user, the login page appears every time you use the Samsung Smart Home App. -
Page 16: Registering The Product
Search the country where the product will be used and press the Save button. It appears only one time at the first operation. Registering the product Register the Wi-Fi kit on the Samsung Smart Home App. 1. Press the Add new button. 2. Select System AC. - Page 17 - Check that the iPhone is connected to the DIRECT-SMARTDVM wireless router. - Press the Home button on the iPhone to exit the Settings. - Select the Samsung Smart Home App and select the Next on the Set AP mode screen.
-
Page 18: Description Of Screens And Main Functions
When the lock function is set, the authentication process is required every time you run the App. NOTE 7. When the product registration is completed, the main screen of the Samsung Smart Home App appears. - System AC icon is added on the device list. - Page 19 1. Select the icon of smart appliance (System AC) on the main screen to move to the screen of Smart Home Device Control. 2. You can perform integrated control of Samsung smart appliances by 4 types such as Going out, Coming home, Good night, and Good morning.
-
Page 20: Starting System Air Conditioner App
The Smart home device control functions of air conditioner such as Operation, Additional options, On/Off timer, Electric Power, Settings etc. 1. Select the System AC icon on the main screen of Samsung Smart Home App. 2. The loading screen of System Air Conditioner App appears. -
Page 21: Indoor Unit/ Group List Screen
Starting System Air conditioner App Indoor unit/ group list screen You can see the list of individual indoor units or group of indoor units with Wi-Fi kit. Indoor unit Select Indoors button to see the list of all indoor units (with Wi-Fi kit). ⑤... - Page 22 Group ① ② ③ Select Group button to see the list of group with indoor units created by the user. If you select one of the group from the list, you will see the list of indoor units within a group. ①...
-
Page 23: Control Screen
Starting System Air conditioner App Control screen Indoor unit ⑧ ② Classification Item Description ① ① Name The name of the selected air conditioner is displayed. ③ ② Power Turns on or off the air conditioner. ④ ⑤ ③ Mode ⑦... -
Page 24: Setting The Group
Setting the group 1. Press the Group button to add/delete/edit the group. Creating the group ④ ③ ① ② 1. Press the Create group button. 2. Enter the name of the group and press OK button. 3. Select indoor units you wish to add to the group. 4. - Page 25 Starting System Air conditioner App Editing the group ④ ② ③ ① 1. Select the group you wish to edit. 2. Press the Menu Edit button. 3. Select or deselect the indoor unit you wish to add to, or deleted from the group. 4.
- Page 26 Deleting the group ③ ① ② 1. Press the Menu Delete group button. 2. Select the group you wish to delete. 3. Press the Delete button to delete the selected group. Changing the order of group ③ ② ① 1. Press the Menu Change order button.
-
Page 27: Editing The Indoor Unit List
Starting System Air conditioner App Editing the indoor unit list Renaming the indoor unit ① ② ③ 1. Press the Menu Rename button. 2. Select the indoor unit you wish to rename. 3. Rename the indoor unit and press the Save button. Changing the order of indoor unit ③... -
Page 28: Schedule
Schedule Before creating a schedule, you must synchronize the time. (Menu Settings Sync Time) If you do not synchronize the time, schedule may not work on desired time. You only have to synchronize the time CAUTION once. Creating a schedule ③... - Page 29 Starting System Air conditioner App ⑥ ⑤ 5. If you want the schedule to be repeated weekly, select Repeat weekly and set the starting and the end date. If you want the schedule to be repeated indefinitely, select No end date. 6.
-
Page 30: Energy Monitor
You can check the current/daily/weekly/monthly energy usage data. Current and daily, weekly or monthly energy usage of the outdoor unit is just a reference data calculated by Samsung’s own algorithm and it cannot be used as an legal basis. CAUTION... -
Page 31: Settings
Starting System Air conditioner App ② 2. Select Current/Day/Week/Month button. - Press the arrow to check the data for previous period. Energy Monitor displays power consumption which is different from power consumption shown on electricity bills. - This function is only available for the products that provides energy usage data. NOTE Settings 1. -
Page 32: Updating The Wi-Fi Kit
2. You can change the Set temperature unit, temperature range for heating, Synchronize time, or check the information of the Wi-Fi kit. Temperature range can be set differently according to product. Refer to the user manual of the product to check the temperature range. If the unit of set temperature is in Fahrenheit (°F), scale of set temperature is fixed at 1 degree. -
Page 33: Troubleshooting
Before you call a service center, please check the items in the table below. Problem Solution Samsung Smart Home App supports android operating Samsung Smart Home App cannot be searched on Play store, system 4.0 (ICS) or higher. For iPhone, the App supports GALAXY Apps or iPhone App Store. iOS 7 or higher. -
Page 34: Open Source Announcement
The software included in this product contains open source software. You may obtain the complete corresponding source code for a period of three years after the last shipment of this product by sending an email to mailto:oss.request@samsung.com. It is also possible to obtain the complete corresponding source code in a physical medium such as a CD-ROM; a minimal charge will be required.