
Related Manuals for Iridium ICHU1000


Summary of Contents for Iridium ICHU1000
-
Page 1: Operating Instructions
Iridium Satellite LLC 8440 South River Parkway Tempe, AZ 85284 USA Tel. Toll Free 1-866-947-4348 Local or International 1-480-752-5155 E-mail info@iridium.com IRIDIUM ICHU1000 Operating Instructions... - Page 2 0125...
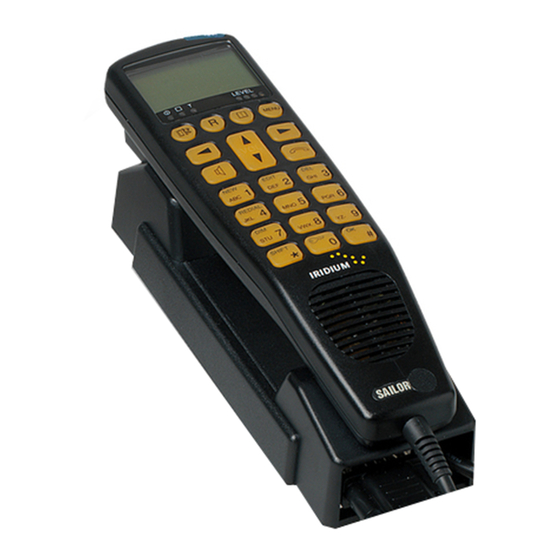
- Page 3 Handset What Is What? 1. Display 8. On/off button 2. Indicator lamps 9. Earpiece Power 10. Signal level Call 11. Opens menu Network 12. Opens phone book 3. Escape key 13. Volume control 4. Call transfer key 14. Hook on/off key 5.
-
Page 4: Introduction
Ready unit, and optional PSTN telephone/PBX. • Occupied • Internal Call You can operate the Iridium equipment in voice mode from a control • External Call handset, fixed control unit, and/or PSTN telephone. To the system • Locked you can connect up to four handsets or fixed control units and one PSTN telephone or PBX switchboard. -
Page 5: Table Of Contents
66 satellites providing world-wide coverage. Making a Manual Call ..............5 Answering a Call ................6 The Iridium system makes it possible for any two locations on Earth Call Transfering ................6 to establish wireless global telephone contact. -
Page 6: Using A Telephone
PBX must function as a PSTN telephone. To dial control unit 1 from a local telephone connected to your Iridium equipment via a PBX, first pick up the phone, then: Telephone Call Syntax For external calls, entering a telephone number on a PSTN 1. -
Page 7: Handset Simple Operation
The indicator lamp Power is flashing briefly every 5 seconds. If any internal or external call is in progress or if for some reason the Iridium network is not available at the time, a different text is shown Enabled State: in the display. -
Page 8: Call Functions
1. Handset removed from hook, but hooked on by hook key. 2. Hook off. 2. To find the right user name on the list, eg. Commander, use: 3. No icon: Handset placed in hook, and hook on. Volume During a conversation, the speaker and earpiece volume can be 3. -
Page 9: Making A Manual Call
For internal calls, entering a telephone number on the handset Enter number Enter number follows the syntax of this example: Type 0 for Internal 1. Hook off either by removing the handset from the hook ext. calls calls only or by pressing the hook key 2. -
Page 10: Answering A Call
2. Now, key in the extension number to which the call should be Answering a Call transferred. NOTE: When the speaker is off you can see that you are being called, (the display will show “Incoming Call”) but there will be no sound in the speaker. -
Page 11: Handset Advanced Operation
Handset Advanced Operation The system features a large number of special functions. For those of the functions that are likely to be used the most, there are special 4. To select “Enable” or “Disable”, use : buttons or shifted functions in connection with the numeric keys. The functions used less often can be found in the menu system. -
Page 12: Phone Book
for instance, will give a “D”; pressing the key twice, will give an “E”, control unit tries to enter one of these modes, and another etc. control unit has done the same, the display will show: Phone push: book occupied. push: push: The phone book can always be entered from an enabled and... -
Page 13: Deleting A Stored Entry In The Phone Book
6. Key in the number using of the numeric keys. Changing a Number Stored in the Phone Book To edit a stored number in the phone book: 7. To store the number, press: 1. To enter the phone book, press: Deleting a Stored Entry in the Phone Book 2. -
Page 14: Redialling
2. To select the “Setup” item, press: The security lock function ensures that only users recognized by the system can unlock the handset and make calls through the Iridium system. Answering incoming calls is not protected by the security lock. The same goes for “Alert”... -
Page 15: Enabling Security Lock
and press: 4. Find the “Disable” item using : 4. To select the “Enable” item, press: and press: 5. Find a user name of priority level 4 or less, using: 5. Find the right user name using: and press: and press: 6. -
Page 16: Users
6. Key in the password, and confirm by 3. To find the “Password” item, use: A new user has now been added to the system with a default priority. The priority is one of the properties that can be edited using the procedure described next. -
Page 17: Call Log
Viewing the Last Private Call Log: The call log for the current user can be retrieved as shown in the 2. To select the “Setup” item, press: following: 1. To enter the function menu, press: 3. To find the “Users” item, use and confirm by 2. -
Page 18: Setting Time And Date
2. Find the item “Call Log” using and confirm by Now, find the user by means of and press Setting Time and Date 3. Find the item “Global” using and confirm by Time and date can be displayed and adjusted manually. The time is used in the call log. -
Page 19: Setting Dimmer And Contrast
GPS update: If this option is chosen, the time written in the display is updated using the connected GPS, if any. Consequently, even if your Iridium system is turned off and then on again, the clock will still be adjusted to the correct time each time a GPS update is received. -
Page 20: Display
Enabling and Disabling PIN Codes Each SIM card has an associated PIN code. In order to prevent unauthorized use of SIM cards, your Iridium equipment is capable of enabling and disabling the associated PIN codes. 4. Find the “Time/date” item using... -
Page 21: Entering The Pin Code
1. Key in the 4-8 digit PIN code and press: and press: Changing the PIN Code 3. Find the “SIM Card” item using: 1. To enter the function menu, press: and press: 2. Find the “System” item using: 4. Find the “PIN enable” item using: and press: and press: 3. -
Page 22: Unblocking A Blocked Sim Card
As mentioned above, choosing a ringing tone affects both the Unblocking a Blocked SIM Card external incoming ringing tone and the internal incoming (local call) If a wrong PIN code has been entered 3 times in a row, the RTU ringing tone according to the following table: blocks the SIM card. -
Page 23: Call Answer
Call Answer If your Iridium equipment includes more than one control unit or a control unit and a PSTN telephone, you may configure the answering and press: of external incoming calls in a number of different ways. The... -
Page 24: Voice Mail
Forwarding on no Answer call is not answered, if your equipment is switched off, if your Iridium Setting a new number to forward to: system is occupied by an internal or external call or cannot, for some 1. -
Page 25: Call Barring
Call barring allows you to bar either all external incoming or all external outgoing calls. If you bar external incoming calls, your Iridium equipment will not receive external incoming calls. If you bar Barring external outgoing calls: external outgoing calls, nobody will be able to place external... -
Page 26: Call Waiting
To switch between two calls: Call Hold [ old password] [new password] NOTE: This feature is only available with RTU software version 3.0.0 and higher. Contact your service provider to find out when this feature will become available. [new password] Putting a call on hold allows you to place a second call without ending the first. -
Page 27: Software Version
To end the conference call, press: Resetting Primarily for service and test purposes, it is possible to reset your Iridium equipment to force it into a well-defined state. The following two different levels of resetting are available: Software Version Primarily for service purposes, it is possible to get information about •... -
Page 28: Tone Signalling
Tone Signalling The system will give you information on its status as well as instructions by means of tone signalling. This is done on four 4. Find the item “Restart” using and press: different frequencies: 450, 900, 1440 and 1800 Hz. Appendix A illustrates what the various tone signalling sounds like. -
Page 29: Tone Signalling
Appendix A Tone Signalling 1800 Hz 1440 Hz 900 Hz 1 sec. 450 Hz RECEIVING CALLS DEEP HIGH ALTERNATING SLOWLY ALTERNATING FAST TRANSMITTING CALLS READY BUSY WAITING FOR CONNECTION EXISTING 36329B 0125... -
Page 30: Function Menu Overview
Appendix B Function Menu Overview To access the function menus, press: To move about in the menus, use the arrow keys: To confirm that you want to select an item, use the OK key: To regret the last step, use the Escape key: Functions marked with an asterisk (*) concern the specific handset. - Page 31 Menu 1st submenu 2nd submenu 3nd submenu Action Setup Ringing tone Deep Sets ringing tone to deep (see Appendix A). High Sets ringing tone to high (see Appendix A). Slow alt. Sets the ringing tone to alternating slowly (see Appendix A). Fast alt.
-
Page 32: Dimmer/Contrast Menu
System Time/date Show Shows the time and date. Sets the time and date. Sys.update Sets the system to update the time and date. GPS update Sets the GPS to update the time and date. SW versions Transceiver Displays the software version number of the transceiver. Displays the software version number of the LBT. - Page 34 EuroCom Industries A/S Lautrupvang 4a DK-2750 Ballerup Denmark • Porsvej 2 DK-9200 Aalborg SV Denmark Tel. +45 7013 7000 +45 4474 8501 • +45 9634 6200 E-mail eci@eci.dk...