
Related Manuals for Nakamichi ARIES 34


Summary of Contents for Nakamichi ARIES 34
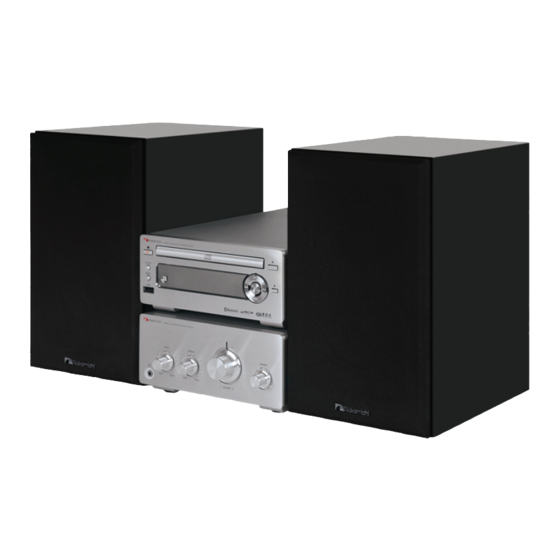
- Page 1 ARIES 34 2-PIECE MICRO HIFI SYSTEM Owner’s Manual Thank you for purchasing this Nakamichi product. Quality Audio Since 1948 Please take the time to register your product at: www.nakamichi.com.au/register...
- Page 2 Thank you for purchasing this Nakamichi product. This unit has been designed and manufactured to meet international standards but, like any electrical equipment, care must be taken if you are to obtain the best results and safety is to be assured.
-
Page 3: Safety Information
Safety Information CAUTION RISK OF ELECTRIC SHOCK CAUTION RISK OF ELECTRIC SHOCK DO NOT OPEN CAUTION: TO REDUCE THE RISK OF ELECTRIC SHOCK DO NOT REMOVE COVER (OR BACK), NO USER SERVICEABLE PARTS INSIDE, REFER SERVICING TO QUALIFIED SERVICE PERSONNEL. DANGEROUS VOLTAGE There is a high voltage, that may be of su cient magnitude to constitue a risk of electric shock to persons is present within this product enclosure. - Page 4 Caution: This product is equipped with low power laser equipment inside, for CLASS 1 your safety, don’t open the laser ra- LASER PRODUCT diation protective equipment. Don’t look at the laser radiation district when the equipment is operating. CAUTION: This product employs low power Laser equipment. To ensure proper use of this product, please read this owner’s manual carefully and retain it for future reference.
- Page 5 CAUTION Danger of explosion if battery is incorrectly replaced. Replace only with the same or equivalent type. WARNING To protect your hearing. At full power, prolonged listening to the player can damage the ears of the user. To prevent possible hearing damage, do not listen at high volume levels for long periods.
-
Page 6: Battery Safety Guidelines
Battery Safety Guidelines Used correctly, domestic batteries are safe and dependable source of portable power. Problems can occur if they are misused or abused - resulting in leakage or, in extreme cases, fire or explosion. Here are some simple guidelines to safe battery use designed to eliminate any such problems. -
Page 7: Table Of Contents
Table of Contents Safety Information Battery Safety Guidelines Pack Contents Product Overview The CD Player The Amplifier Player Remote Control Overview Remote Control Operation Installation of Batteries Connections Connecting the Antenna Connecting the Speakers Connecting Auxiliary Equipment Connecting Control Cable Connecting the Headphone Connecting the AC Power Cable ECO-Power/Standby Features... - Page 8 Listen to music from Bluetooth device Playing NFC (Near Field Communication) enabled devices Playing an external device on Auxiliary Connection Set the alarm timer Activate / deactivate alarm timer Set sleep timer Disc handling Troubleshooting Specifications Nakamichi Service Contact Details...
-
Page 9: Pack Contents
What’s Included Make sure all of the following contents are included: The Unit Speakers x 2 Remote Control FM Antenna Control Cable Owner’s Manual Audio L/R Cable x 1... -
Page 10: Product Overview
Product Overview The CD Player Front Rear 14 15 AUX IN 1 AUX IN 2 ANTENNA CABLE Preset Up Switch Standby Button Previous Button ( Clock Button Preset Down Switch Mode Button Play/Pause Button (BF) USB Jack Remote Sensor Open/Close Button ( Stop Button ( LCD Display Built-in Bluetooth Antenna... -
Page 11: Remote Control Overview
Remote Control Overview Standby Button Bluetooth Function Button (Press & hold to clear the pairing information) CD /USB Button Album Up Button PAIR Preset Up button Previous Button / Fast Backward Button AUX 1/2 Function Button Stop Button Mode Button Display Button Volume Up Button Preset Equalizer Button... -
Page 12: Installation Of Batteries
Installation of Batteries Open the battery compartment. Please Note! If you will not be using the remote for an extended perioid of time it is advised that you remove the batteries. Please avoid the following which may cause your remote to fail: •... -
Page 13: Connections
Connections Caution: Make all connections before plugging the system into an AC power outlet Connecting the Antenna The Antenna Socket The Antenna Connect the supplied FM antenna to the FM antenna socket on the rear of the CD player by turning the antenna’s screw cap clockwise. -
Page 14: Connecting Auxiliary Equipment
Connections Connecting Auxiliary Equipment Connect the AUX IN 1 terminals on the rear of the unit to the line output terminals on the auxiliary equipment with an audio cable illustrated below (1x audio cable supplied). Connecting a device via AUX 1 The CD Player Auxiliary equipment AUX IN 1... -
Page 15: Connecting Control Cable
Connections Connecting Control Cable Connect the control cable between the CD player and the amplifier. AUX IN 1 AUX IN 2 ANTENN A CABL E CABL E Connecting Headphones to the system Connect a pair of headphones to the phone jack. Please Note: No sound will come out of the speakers. -
Page 16: Connecting The Ac Power Cable
Connections Connecting the AC Power Cable Insert the AC Power cable into a wall outlet, then your unit is ready to use. Caution: • Be sure to unplug the power plug from the outlet when going out or when the unit is not in use for an extended period of time. -
Page 17: Eco-Power/Standby Features
ECO-Power / Standby Features Powering ON/OFF When you insert the AC Power Cable into a wall outlet, the unit will be in Power mode. Press the Standby button to switch the unit on. The word “HELLO” will show in the display. Press the Standby button to switch the unit back to ECO POWER mode. -
Page 18: Sound Setting
Sound Setting Adjusting the Volume To increase or decrease the volume, rotate the Volume Control knob (- VOLUME +) on the unit or press the Volume Up/Down buttons on the remote control. Adjusting the Bass Rotate the BASS knob clockwise or counter clockwise on the Amplifier to adjust the intensity of the bass output sound. -
Page 19: Preset Tuning
FM Radio Preset Tuning (Available only after the stations are preset) Repeatedly press the PRESET buttons on the remote control or press the buttons on the front panel to select the desired preset number. Its band and frequency are displayed on the Display panel. -
Page 20: Cd Operation
CD Operation To play a CD Rotate the SOURCE button on the front of the amplifier or press the CD/USB button on the remote control. The word “DISC” will be displayed on the front panel. Press the button on the front panel to open the disc door and place the disc on the disc tray (with the printed side up). -
Page 21: Mp3/Wma Disc Playing
MP3 / WMA Disc Playing Please Note: MP3/WMA music playback from CD maybe a ected due to the type and format of disc or condition of the recording. If you are having trouble playing a certain disc, it is recommended to use USB input instead for best MP3/WMA playback. Rotate the SOURCE button on the unit or press the CD/USB button on the remote control. -
Page 22: Use The Usb
Use the USB By connecting an USB mass storage device (including USB flash memory, USB flash players or memory cards) to this unit, you can enjoy the device’s stored music through the unit. Insert the USB device’s USB plug into the socket on the front of the unit. -
Page 23: Play From Bluetooth Device
Turn on the Bluetooth function on your device (e.g. Smartphone). Search/scan for other Bluetooth device with your device (e.g. Smartphone). Select ARIES 34 in the pairing list on your device (e.g. Smartphone). Your device may request you to enter a passcode during pairing, press “0000” on your device (e.g. -
Page 24: Playing Nfc (Near Field Communication) Enabled Devices
Turn on the NFC function on your device (e.g. Smartphone). Place your device next to the NFC sensor on your unit (front of unit). Some devices may have a pop up screen to confirm the connection to the Aries 34, select YES to accept. -
Page 25: Set The Alarm Timer
Set the alarm timer This unit can be used as an alarm clock. You can select DISC, USB, TUNER as alarm source. Note: • In standby mode, press clock button, then the clock will be shown on the display if you set the clock correctly. -
Page 26: Disc Handling
Disc Handling • To keep the disc clean, please don’t touch the disc’s surface when you are holding it. You should hold the edges. • If the disc is dirty, it will a ect the sound quality. Please use a clean and soft cloth to wipe the disc from inside to outside. -
Page 27: Troubleshooting
If you are having a problem with your unit, check this list for a possible solution before calling for service. If you cannot solve the problem from the hints given here, or the unit has been physically damaged, please contact Nakamichi. Service contact details on page 27. Symptom Possible Cause... -
Page 28: Specifications
Specifications Unit Specifications Power Requirements 220-240V ~ 50/60Hz FM Tuning Range 87.5~108 MHz ≤ Power Consumption 28W (ECO Standby 0.5W) USB port 500mA Output Power @ 10% THD 45W x 2 < 1% (1KHZ/1W) Dimensions (CD) 160(W) x 78(H) x 260(D) mm (Amplifier) 160(W) x 78(H) x 295(D) mm Speaker Specification Impedance... -
Page 29: Nakamichi Service Contact Details
Email: warranty@nakamichi-ap.co.nz Website: www.nakamichi.com.au Address: 84 Kerrs Road, Manukau Auckland 2104 New Zealand Hours of Operation Monday - Friday 9am to 5:00pm excluding Public Holidays Or visit the Nakamichi website anytime 24/7 and use the e-warranty service to make a claim.