Brother MFC-J200 Basic User's Manual
Hide thumbs
Also See for MFC-J200:
- Basic user's manual (138 pages) ,
- User manual (127 pages) ,
- Advanced user's manual (44 pages)

Related Manuals for Brother MFC-J200


Summary of Contents for Brother MFC-J200
- Page 1 Basic User’s Guide MFC-J200 !CAUTION Before using your product, read carefully these instructions for correct operation. Keep the User's Guide in a secure place for future reference. Version 0 CHN-ENG...
- Page 2 Firstly, thank you very much indeed for using our Brother products! Brother focuses on the earth environment concerned. And make a basic policy which is to concern about the earth environment, including any workflow from product development to discard. The local citizen should be responsible for local society and its environment during these environment protection activities.
- Page 3 PDF file / Brother print from OS X v10.7.x, 10.8.x and your iPhone, Solutions Center iPod touch, iPad, or other iOS device to your Brother machine without installing a printer driver. Google Cloud Print This Guide provides details on how to use Google...
-
Page 4: Table Of Contents
Accessing the Advanced User’s Guide and Software and Network User’s Guide..2 Viewing User’s Guides ..................2 How to access Guides for Advanced Features............4 ® Accessing Brother Support (Windows ) ..............5 Accessing Brother Support (Macintosh) ..............5 Control panel overview ..................6 Basic Operations ....................8 Volume Settings.....................8 Ring Volume ....................8 Beep Volume ....................8 Speaker Volume ....................9... - Page 5 Sending a fax How to send a fax ....................23 Stop faxing..................... 24 Setting scanner glass size for faxing ............. 24 Color fax transmission ................... 24 Cancelling a fax in progress ................24 Transmission Verification Report..............25 Receiving a fax Receive Modes ....................
- Page 6 Dialling and storing numbers How to dial ......................40 Manual dialling....................40 Speed Dialling ....................40 Fax Redial .....................40 Storing numbers ....................41 Storing a pause .....................41 Storing Speed Dial numbers................41 Changing and deleting Speed Dial numbers ..........42 Making copies How to copy ......................43 Stop copying....................43 Copy options......................44 Paper Type ....................44...
- Page 7 Machine Information .................... 91 Checking the serial number................91 Checking the firmware version ..............91 Reset functions....................91 How to reset the machine................91 Settings and features tables Using the Settings tables ..................92 Menu keys ......................92 Menu table ......................94 Entering Text .....................
- Page 8 Table of Contents (Advanced User’s Guide) The Advanced User’s Guide explains the following features and operations. You can view the Advanced User’s Guide on the CD-ROM. General setup Routine maintenance IMPORTANT NOTE Cleaning and checking the machine Memory Storage Packing and shipping the machine Sleep Mode Auto Power Off (DCP model) Glossary...
-
Page 9: General Information
Using the WARNING documentation WARNING indicates a potentially hazardous situation which, if not avoided, Thank you for buying a Brother machine! could result in death or serious injuries. Reading the documentation will help you make the most of your machine. CAUTION... -
Page 10: Accessing Brother Utilities (Windows ® 8)
After the printer driver is installed, This Basic User’s Guide does not contain all the information about the machine, such as (Brother Utilities) appears on both the how to use the advanced Fax, Copy, Printer, Start screen and the desktop. - Page 11 CD-ROM into your CD-ROM drive. Turn on your Macintosh. Insert the NOTE Brother CD-ROM into your CD-ROM drive. The following window will appear. If the Brother screen does not appear, go to Computer or My Computer. (For ® ® Windows...
-
Page 12: How To Access Guides For Advanced Features
More information about network setup This Guide provides useful information about (See Software and Network User’s printing from your mobile device and Guide.) scanning from your Brother machine to your ® mobile device when connected to a Wi-Fi network. -
Page 13: Accessing Brother Support (Windows ® )
(Brother Solutions such as web support (Brother Solutions Center) on the CD-ROM. Center) on the CD-ROM. Click Brother Support on the Top Menu. Double-click the Brother Support icon. The following screen will appear: The following screen will appear: ... -
Page 14: Control Panel Overview
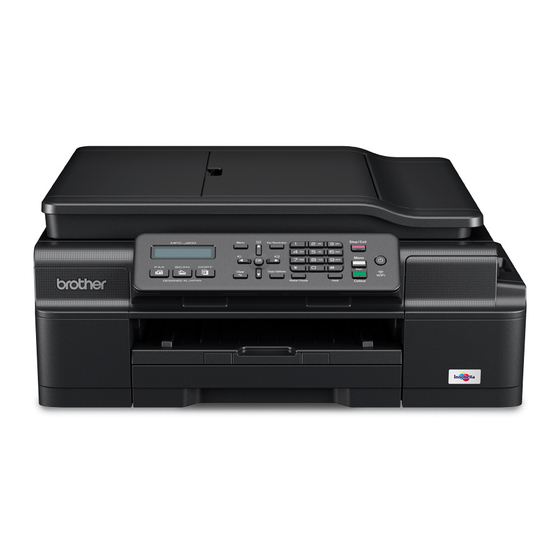
Chapter 1 Control panel overview 01/01 19:45 1 LCD (Liquid Crystal Display) 3 Menu keys: Displays messages on the screen to help you set up and use your machine. While the machine is idle, you can press 2 Mode keys: these keys to adjust the ring volume. - Page 15 General information 5 Telephone keys: Power On/Off Redial/Pause Redials the last number called. It also Press to turn on the machine. inserts a pause when dialling. Hook Press and hold down to turn off the Press before dialling when you want to machine.
-
Page 16: Basic Operations
Chapter 1 Basic Operations Volume Settings The following steps show how to change a Ring Volume setting in the machine. In this example, the Receive Mode setting is changed from You can choose from a range of ring volume Fax Auto to Fax Manual. levels, from High to Off. -
Page 17: Speaker Volume
General information LCD display Speaker Volume You can choose from a range of speaker LCD Contrast volume levels. Press Menu, 2, 4, 3. You can adjust the LCD contrast for a sharper and more vivid display. If you are having Press a or b to choose Low, Med, High difficulty reading the LCD, try changing the or Off. -
Page 18: Setting The Fax Logic (Sending And Receiving Sequence)
Chapter 1 Setting the Fax Logic (sending and receiving sequence) You can change the process of manual fax send or receive. If you often send or receive a fax manually to/from the other party at the end of a conversation, set the Fax Mode to Easy Mode. -
Page 19: Loading Paper
Loading paper Loading paper and Lift the output paper tray cover (1). other print media Load only one size of paper and one type of paper in the paper tray at any time. (For more information about paper size, weight and thickness, see Choosing the right print media on page 19.) Pull the paper tray completely out of the machine. - Page 20 Chapter 2 Fan the stack of paper well to avoid Gently put the paper into the paper tray paper jams and misfeeds. print side down and top edge in first. Check that the paper is flat in the tray. NOTE Always make sure that the paper is not curled or wrinkled.
- Page 21 Loading paper Gently adjust the paper width guides (1) While holding the paper tray in place, to fit the paper. pull out the paper support (1) until it Make sure the paper width guides lightly locks into place, and then unfold the touch the sides of the paper.
-
Page 22: Loading Envelopes
Chapter 2 Loading envelopes Loading envelopes Before loading, press the corners and sides of envelopes to make them as flat About envelopes as possible. Use envelopes that weigh between 80 to IMPORTANT 95 g/m If envelopes are “double-feeding”, put one ... - Page 23 Loading paper Put envelopes in the paper tray with the If you have problems printing on address side down. If the envelope flaps envelopes with the flap on the short edge, are on the long edge, load the try the following: envelopes in the tray with the flap on the Open the envelope flap.
-
Page 24: Unprintable Area
Chapter 2 Unprintable area The printable area depends on the settings in the application you are using. The figures show the unprintable areas on cut-sheet paper and envelopes. The machine can print in the shaded areas of cut-sheet paper when the Borderless print feature is available and turned on. (See Software and Network User’s Guide.) Cut-Sheet Paper Envelopes... -
Page 25: Paper Settings
Paper Type setting. or paper jams. (See Paper Type on page 17.) When you print on Brother Photo paper, Paper Size load one extra sheet of the same photo paper in the paper tray. An extra sheet has... -
Page 26: Recommended Print Media
To get the best print quality, we suggest using • Damaged, curled, wrinkled, or the Brother paper in the table. irregularly shaped paper If Brother paper is not available in your country, we recommend testing various papers before purchasing large quantities. We recommend using 3M Transparency Film when you print on transparencies. -
Page 27: Choosing The Right Print Media
Up to 0.15 mm Up to 120 g/m Envelopes Up to 0.52 mm 80 to 95 g/m Transparencies – – Up to 100 sheets of 80 g/m paper. BP71 (260 g/m ) paper is especially designed for Brother inkjet machines. -
Page 28: Loading Documents
Loading documents How to load Unfold the ADF Document Support (1). documents You can send a fax, make copies, or scan from the ADF (automatic document feeder) and from the scanner glass. Using the ADF The ADF can hold up to 20 pages and feeds each sheet individually. -
Page 29: Using The Scanner Glass
Loading documents After using the ADF, close the ADF Using the document guidelines on the Document Support. Push down on the left and top, place the document upper-left portion of the ADF Document face down in the upper left corner of the Support to close it completely. -
Page 30: Unscannable Area
Chapter 3 Unscannable area The scannable area depends on the settings in the application you are using. The figures show the unscannable areas. Usage Document Top (1) Left (2) Size Bottom (3) Right (4) 3 mm 3 mm Letter 4 mm Legal Copy All paper... -
Page 31: Sending A Fax
Sending a fax How to send a fax You can change the following fax-sending settings. (Basic User’s Guide) The following steps show how to send a fax. For information about changing the Do one of the following to load your following fax-sending settings, see document: pages 24 to 25. -
Page 32: Stop Faxing
Chapter 4 Setting scanner glass size for Press Mono Start or Colour Start. faxing Faxing from the ADF When documents are Letter size, you need to The machine starts scanning the set the Scan Size to Letter. If you do not, the document to be sent. -
Page 33: Transmission Verification Report
Sending a fax Transmission Verification NOTE Report • If you choose On+Image or Off+Image the image will only appear on the Transmission Verification Report if Real You can use the Transmission Verification Time Transmission is set to Off. The Report as proof that you sent a fax. This image will not appear on the report when report lists the sender’s name or fax number, you send a color fax. -
Page 34: Receiving A Fax
Receiving a fax Receive Modes By factory default, the factory setting of Receive Mode is "Fax". Your machine will automatically receive any faxes that are sent to it. There are four receive modes of this machine as below. For more detailed information on the receive modes, see Using Receive Modes on page 27. Operation Display Fax LCD Factory Default Ring Delay... -
Page 35: Using Receive Modes
Receiving a fax Using Receive Modes Mode Function Help Each call Factory setting of Ring Delay is 4 (0-10 times available, Fax(Fax Auto) recognized as fax see Ring Delay on page 28 ). After ringing 4 times, the and send fax signal. fax machine send fax-receiving signals automatically;... -
Page 36: Receive Mode Settings
Chapter 5 Receive Mode settings Fax Detect Ring Delay If Fax Detect is On: Fax Detect is turned On as default. The Ring Delay sets the number of times the The machine receives a fax call machine rings before it answers in Fax Auto automatically, even if you answer the call. -
Page 37: Using Pc-Fax
To include a cover page, click Add Cover Page. Click File, then Print. The Print dialog box appears. NOTE Choose Brother PC-FAX as your You can also click the cover page icon printer, and then click Print. The PC- to create or edit a cover page. -
Page 38: Pc-Fax Receiving (Windows ® )
® (Windows • To change the destination PC, repeat Click (Brother Utilities), and then click steps a to f. the drop-down list and select your model name (if not already selected). Click PC-FAX Receive in the left navigation bar, and then click Receive. -
Page 39: Telephone And External Devices
Telephone and external devices Voice operations Phone line services Your machine supports the Caller ID Tone or Pulse subscriber telephone service that some telephone companies offer. If you have a Pulse dialling service, but need Features like Voice Mail, Call Waiting, Call to send tone signals (for example, for Waiting/Caller ID, RingMaster, answering telephone banking), follow the instructions:... -
Page 40: Telephone Service
DTMF mode, please switch your mode as follows. Contact your local telephone The Caller ID is a telephone service that company or Brother dealer in the case that allows the subscriber to see a display of the the feature does not work normally.Caller caller's phone number as the telephone rings. -
Page 41: Advantages Of Caller Id
Telephone and external devices Advantages of Caller ID Caller ID feature For Business The Caller ID feature of this machine lets you use the Caller ID subscriber service offered All businesses profit from a quicker response by many local phone companies. to customer calls. -
Page 42: Voice Over Internet Protocol (Voip)
Chapter 7 Voice over Internet Viewing the Caller ID List Your machine stores information for the last Protocol (VoIP) thirty calls in the Caller ID list. When the thirty- first call comes into the machine, it replaces VoIP is a type of phone system that uses an information about the first call. -
Page 43: Connecting An External Tad (Telephone Answering Device)
The rather than a traditional phone line. machine cannot hear CNG tones until the • Brother does not recommend the use of a TAD has answered the call, and with four VoIP line. VoIP limitations in general can... -
Page 44: Connection Settings
Chapter 7 Connection settings The external TAD must be connected as LINE shown in the previous illustration. Place both hands under the plastic tabs on both sides of the machine to lift the EXT. scanner cover into the open position. Carefully guide the telephone line cord into the cable channel and out the back of the machine. -
Page 45: Recording An Outgoing Message (Ogm) On An External Tad
Brother does not recommend the use of a PABX line. PABX limitations in general can cause some functions of the fax machine not... -
Page 46: Operation From External And Extension Telephones
Chapter 7 Operation from external and Using remote codes extension telephones Remote Activation Code If you answer a fax call on an extension or an external telephone, you can make your If you answer a fax call on an extension or machine take the call by using the Remote external telephone, you can tell your machine Activation Code. - Page 47 Telephone and external devices Enter the new Remote Activation Code. Press OK. Enter the new Remote Deactivation Code. Press OK. Press Stop/Exit. NOTE • If you are always disconnected when accessing your external TAD remotely, try changing the Remote Activation Code and Remote Deactivation Code to another three-digit code using the numbers 0-9, l, •...
-
Page 48: Dialling And Storing Numbers
Dialling and storing numbers How to dial Fax Redial If you are sending a fax automatically and the Manual dialling line is busy, the machine will redial up to three times at five minute intervals. Load your document. Redial only works if you dialled from the control panel. -
Page 49: Storing Numbers
Dialling and storing numbers Storing numbers Storing Speed Dial numbers You can store up to 40 two-digit Speed Dial You can set up your machine to do the numbers, and each number has a name. following types of easy dialling: Speed Dial When you dial, you will only have to press a and Groups for broadcasting faxes. -
Page 50: Changing And Deleting Speed Dial Numbers
Chapter 8 Changing and deleting Speed Dial numbers If you try to store a Speed Dial number where a number has already been stored, the LCD will show the name or number that has been stored there, and will ask you to do one of the following: #05:MIKE 1.Change... -
Page 51: Making Copies
Making copies How to copy Stop copying To stop copying, press Stop/Exit. The following steps show the basic copy operation. Do one of the following to load your document: Place the document face down in the ADF. (See Using the ADF on page 20.) ... -
Page 52: Copy Options
(See Advanced User’s Guide: Mode Timer (MFC model).) Press a or b to choose Plain Paper, (Basic User’s Guide) Inkjet Paper, Brother BP71, Other Glossy or Transparency. For information about changing the following Press OK. copy settings, see page 44. -
Page 53: How To Print From A Computer
To print from a computer, you must install the printer driver. (For more information, see Software and Network User’s Guide.) Install the Brother printer driver from the CD-ROM. (See Quick Setup Guide.) From your application, choose the Print command. -
Page 54: How To Scan To A Computer
XXXX is your model name)/ControlCenter4. The ControlCenter4 application will open. ® (Windows Click (Brother Utilities), and then click the drop-down list and select your model name (if not already selected). Click SCAN in the left navigation bar, and then click ControlCenter4. The ControlCenter4 application will open. - Page 55 How to scan to a computer If the ControlCenter4 Mode screen appears, choose the Advanced Mode, and then click Make sure the machine you want to use is selected from the Model drop-down list.
- Page 56 Chapter 11 Set the scanning configuration. Click Configuration, and then select Button settings, Scan and File. The configuration dialog box appears. You can change the default settings. 1 Choose PDF (*.pdf) from the File Type drop-down list. 2 You can enter the file name you want to use for the document. 3 You can save the file to the default folder, or choose your preferred folder by clicking the (Browse) button.
- Page 57 How to scan to a computer Click the Scan tab. Click File. Click Scan. The machine starts the scanning process. The folder where the scanned data is saved will open automatically.
-
Page 58: How To Change The Machine's Scan Mode Settings For Pdf Scanning Using Controlcenter4 (Windows ® )
® (Windows Click (Brother Utilities), and then click the drop-down list and select your model name (if not already selected). Click SCAN in the left navigation bar, and then click ControlCenter4. The ControlCenter4 application will open. Make sure the machine you want to use is selected from the Model drop-down list. - Page 59 How to scan to a computer Choose the File tab. You can change the default settings. 1 Choose PDF (*.pdf) from the File Type drop-down list. 2 You can enter the file name you want to use for the document. 3 You can save the file to the default folder, or choose your preferred folder by clicking the (Browse) button.
-
Page 60: How To Scan A Document As A Pdf File Using The Control Panel (Windows ® And Macintosh)
Chapter 11 How to scan a document as a PDF file using the ® control panel (Windows and Macintosh) Load your document. (See How to load documents on page 20.) Press (SCAN). Press a or b to choose Scan to File. Press OK. -
Page 61: A Routine Maintenance
Your machine is equipped with an ink dot optimum performance and reliability when counter. The ink dot counter monitors the used with Brother Original ink cartridges. level of ink in each of the four cartridges. Brother cannot guarantee this optimum... - Page 62 Press the lock release lever (1) as Turn the green release lever on the shown to release the cartridge indicated orange protective packing (1) on the LCD. Remove the cartridge from counterclockwise until it releases the the machine. vacuum seal. Then remove the orange protective packing as shown.
- Page 63 Brother Original cartridge and that it is installed correctly. Remove the ink cartridge and reinstall it slowly and firmly until the cartridge lever lifts.
-
Page 64: Cleaning And Checking The Machine
Cleaning and checking In the ADF unit, clean the white bar (1) and the glass strip (2) with a lint-free the machine cloth moistened with a non-flammable glass cleaner. Cleaning the scanner glass Unplug the machine from the electrical socket. Lift the document cover (1). -
Page 65: Cleaning The Print Head
Try cleaning the print head again up to five more times. If the The LCD asks you if the print quality is print has not improved contact Brother OK for black and then the three colors. customer service or your local Brother Press 1 (Yes) or 2 (No). -
Page 66: Checking The Print Alignment
If you clean the print head at least five times Press Menu, 1, 1. and the print has not improved, try installing a new Genuine Brother Brand replacement ink Press a or b to choose Alignment. cartridge for each problematic color. Try Press OK. -
Page 67: Setting The Date And Time
Routine maintenance Setting the date and NOTE time The LCD shows the date and time. If it is not correct, follow these instructions to re-enter it. You can add the date and time to each fax you send by setting your Station ID. When the print After the print Press Menu, 0, 1, 1. -
Page 68: Troubleshooting
If you think there is a problem with your machine, check each of the items below first and follow the troubleshooting tips. You can correct most problems by yourself. If you need additional help, the Brother Solutions Center offers the latest FAQs and troubleshooting tips. - Page 69 Troubleshooting Scanning problems: Scanning Difficulties on page 88 Software and Network problems: Software Difficulties on page 88 Network Difficulties on page 89...
-
Page 70: Error And Maintenance Messages
The most common error and maintenance messages are shown in the table. You can clear most errors and perform routine maintenance by yourself. If you need additional help, the Brother Solutions Center offers the latest FAQs and troubleshooting tips: Visit us at http://solutions.brother.com/. Error Message... - Page 71 (See Replacing the ink cartridges on page 53.) An ink cartridge is not installed correctly. If you are using non Brother Original Replace the cartridge with a Brother ink, the machine may not detect the Original ink cartridge. If the error ink cartridge.
- Page 72 Contact periodic maintenance items that may Brother customer service or your require replacement after a period of local Brother dealer to have your time to ensure optimum performance machine serviced. from your Brother machine. Because...
- Page 73 Troubleshooting Error Message Cause Action The ink absorber box or flushing box Contact Brother customer service or InkBox NearFull is nearly full. your local Brother dealer. One or more of the ink cartridges are Order a new ink cartridge. You can Ink Low XXXXXXX near the end of their life.
- Page 74 Error Message Cause Action The machine is out of paper or paper Do one of the following: No Paper Fed is not correctly loaded in the paper Refill the paper in the paper tray, tray. and then press Mono Start or Colour Start.
- Page 75 Troubleshooting Error Message Cause Action The machine's memory is full. If a fax-sending or copy operation Out of Memory is in process: Press Stop/Exit and wait until the other operations that are in process finish, and then try again. ...
- Page 76 Error Message Cause Action The Paper Size setting does not 1 Check that the Paper Size you Wrong Paper Size match the size of paper in the tray. Or, choose matches the size of paper you did not set the paper guides in the in the tray.
-
Page 77: Transferring Your Faxes Or Fax Journal Report
You can also transfer the Fax Journal report to see if there are any faxes you need to Click (Brother Utilities), and then transfer. (See Transferring the Fax Journal click the drop-down list and select your report to another fax machine on page 70.) model name (if not already selected). -
Page 78: Document Jam
Transferring the Fax Journal report to Press Stop/Exit. another fax machine IMPORTANT If you have not set up your Station ID, you To avoid document jams, close the ADF cannot enter fax transfer mode. (See Quick cover correctly by pushing it gently in the Setup Guide: Enter personal information centre. -
Page 79: Printer Jam Or Paper Jam
Troubleshooting Removing small documents jammed Pull the paper tray (1) completely out of the machine. in the ADF Lift the Document Cover. Insert a piece of stiff paper, such as cardstock, into the ADF to push any small paper scraps through. Pull the two green levers inside the machine towards you to release the jammed paper. - Page 80 Pull the jammed paper (1) out of the • If the print head is in the right corner as machine. shown in the illustration (2), you cannot move it. Re-connect the power cord. Hold down Stop/Exit until the print head moves to the centre.
- Page 81 Troubleshooting Be sure to look carefully inside the Open the Jam Clear Cover (1) at the machine (1) for any pieces of paper. back of the machine. Remove the jammed paper. Look inside the machine from a lower angle, and make sure there are no pieces of paper remaining.
- Page 82 Close the Jam Clear Cover. CAUTION Make sure the cover is closed correctly. Be careful not to pinch your fingers when you close the scanner cover. While holding the paper tray in place, pull out the paper support until it locks in the open position, and then unfold the paper support flap.
- Page 83 Troubleshooting Pull the two green levers inside the Load one sheet of thick A4 or Letter machine towards you to release the sized paper, such as glossy paper, deep jammed paper. into the machine as shown in the illustration. Place both hands under the plastic tabs on both sides of the machine and lift the scanner cover into the open position.
- Page 84 If the thick paper is pushing any jammed Open the Jam Clear Cover (1) at the paper out, remove the jammed paper. back of the machine. Load one sheet of thick A4 or Letter sized paper, such as glossy paper, deep into the machine as shown in the IMPORTANT illustration.
- Page 85 Troubleshooting If the thick paper is pushing any jammed Close the Jam Clear Cover. paper out, remove the jammed paper. Make sure the cover is closed correctly. Lift the scanner cover (1) to release the lock. Gently push the scanner cover support down (2) and close the scanner cover (3) using both hands.
- Page 86 Put the paper tray firmly back in the machine. Re-connect the power cord.
-
Page 87: If You Are Having Difficulty With Your Machine
• If you think there is a problem with your machine, check the following chart and follow the troubleshooting tips. You can correct most problems by yourself. • If you need additional help, the Brother Solutions Center offers the latest FAQs and troubleshooting tips. - Page 88 Printing Difficulties (continued) Difficulty Suggestions No printout. The document will not print if the old, unprinted data remains in the printer driver spooler. Open the printer icon, and then delete all the data. Your printer icon can (continued) be found in the following way: ®...
- Page 89 The ink cartridge may not have been stored correctly before use. Make sure you are using Brother Original Innobella™ ink. Brother does not recommend the use of cartridges other than Brother Original cartridges or the refilling of used cartridges with ink from other sources.
- Page 90 (See Advanced User’s Guide: Cleaning the paper pick-up rollers.) Photo paper does not feed When you print on Brother Photo paper, load one extra sheet of the same photo correctly. paper in the paper tray. An extra sheet has been included in the paper package...
- Page 91 Troubleshooting Paper Handling Difficulties (continued) Difficulties Suggestions Machine feeds multiple pages. Do the following: (See Loading paper and other print media on page 11.) Make sure the paper is loaded correctly in the paper tray. Remove all the paper from the tray and fan the stack of paper well, then put it back in the tray.
-
Page 92: Printing Received Faxes
Printing Received Faxes Difficulty Suggestions Condensed print Usually this is caused by a poor telephone connection. Make a copy; if your copy looks good, you probably had a bad connection, with static or interference on the Horizontal streaks telephone line. -
Page 93: Receiving Faxes
If your Brother machine shares a line with other telephones and you want it to automatically answer all incoming faxes, select Fax/Tel mode. In Fax/Tel mode, your Brother machine will automatically receive faxes and produce a fast double-ring to alert you to answer voice calls. - Page 94 Set your Brother machine’s Receive Mode to External TAD. (See Receive Modes on page 26.) Make sure your Brother machine’s Fax Detect feature is set to On. Fax Detect is a feature that allows you to receive a fax even if you have answered the call on an external or extension telephone.
-
Page 95: Sending Faxes
For example: If you subscribe to Call Waiting or another custom service and its signal comes through the line while your machine is sending or receiving a fax, the signal can temporarily interrupt the faxes. Brother's ECM (Error Correction Mode) feature should help overcome this problem. This condition is related to the telephone system industry and is common to all devices that send and receive information on a single, shared line with custom features. - Page 96 Scanning Difficulties Difficulty Suggestions TWAIN or WIA errors appear when Make sure the Brother TWAIN/WIA driver is chosen as the primary source. In Presto! PageManager with OCR, click File, Select Source and choose the ® starting to scan. (Windows Brother TWAIN/WIA driver.
- Page 97 It is necessary to set the third-party Security/Firewall Software to allow PC-FAX Rx. To add port 54926 for Network PC-FAX Rx, enter the information below: In Name: Enter any description, for example Brother PC-FAX Rx. In Port number: Enter 54926.
-
Page 98: Dial Tone Detection
• VoIP (Voice over IP) is a type of phone system that uses an Internet connection, rather than a traditional phone line. • Brother does not recommend the use of a VoIP line. VoIP limitations in general can cause some functions of the fax machine... -
Page 99: Machine Information
Speed Dial and Fax Journal) 4 All Settings You can restore all settings to the factory default. Brother strongly recommends performing this procedure before handing over or disposing of the machine. How to reset the machine Press Menu, 0, 6. -
Page 100: C Settings And Features Tables
Settings and features tables Using the Settings Menu keys tables Your machine is easy to set up and operate. All you have to do is press the Menu keys to choose the settings and options you want to set as they are displayed on the screen. We have created step-by-step Settings tables so you can see all the available choices for each setting and feature at-a-glance. - Page 101 Settings and features tables To access the menu mode: Press Menu. Choose an option. You can scroll more quickly through each menu level by pressing a or b. 1.Ink 2.General Setup 3.Fax 4.Copy 5.Network 6.Print Reports 7.Machine Info. 0.Initial Setup Press OK when that option appears on the LCD.
-
Page 102: Menu Table
5 Mins — Sets the type of paper in 2.Paper Type Plain Paper* the paper tray. Inkjet Paper Brother BP71 Other Glossy Transparency See Advanced User’s Guide. See Quick Setup Guide. The default settings are shown in Bold with an asterisk. - Page 103 Settings and features tables Level1 Level2 Level3 Options Descriptions Page — Sets the size of the paper 2.General Setup 3.Paper Size in the paper tray. (Continued) 10x15cm Letter Adjusts the ring volume. 4.Volume 1.Ring Med* High Adjusts the volume level 2.Beeper of the beeper.
- Page 104 Level1 Level2 Level3 Options Descriptions Page Choose the Receive 3.Fax 1.Setup Receive 1.Receive Mode Fax Auto* Mode that best suits your Fax/Tel needs. External TAD Manual 0 - 10 (4*) Sets the number of rings 2.Ring Delay before the machine answers in Fax Auto or Fax/Tel mode.
- Page 105 Settings and features tables Level1 Level2 Level3 Options Descriptions Page Sets the default resolution 3.Fax 2.Setup Send 1.Fax Resolution Standard* for outgoing faxes. (Continued) Fine S.Fine Photo Changes the lightness or 2.Contrast Auto* darkness of faxes you Light send. Dark Sends a fax without using 3.Real Time TX Next Fax Only...
- Page 106 Level1 Level2 Level3 Options Descriptions Page — Stops unauthorized users 3.Fax 0.Miscellaneous 1.TX Lock from changing the (Continued) machine’s current settings. You can switch the mode 2.Caller ID Type Auto* if Caller ID cannot be displayed normally. DTMF View or print a list of the 3.Caller ID Display# last 30 Caller IDs stored in...
-
Page 107: Network Menu
Automatically allocates 9.APIPA the IP address from the link-local address range. 2.WLAN Assistant — — You can configure your wireless network settings using the Brother CD-ROM. — — You can manually 3.Setup Wizard configure your print server for a wireless network. - Page 108 Level1 Level2 Level3 Options Descriptions Page — — You can easily configure 5.Network 4.WPS/AOSS your wireless network (Continued) settings using the one- button push method. 5.WPS w/PIN Code — — You can easily configure your wireless network settings using WPS with a PIN code.
- Page 109 Settings and features tables Level1 Level2 Level3 Options Descriptions Page — — Sets the date and time on 0.Initial Setup 1.Date&Time the screen and in the headings of the faxes you send. — Enter your name and fax 2.Station ID Fax: number to appear on Name:...
- Page 110 47% A4i10x15cm — — Choose the paper type Paper Type Plain Paper* that matches the paper in Inkjet Paper the tray. Brother BP71 Other Glossy Transparency — — Choose the paper size Paper Size that matches the paper in the tray.
- Page 111 Settings and features tables Level1 Level2 Level3 Options Descriptions Page — — Adjusts the density of Density -onnnn+ copies. -nonnn+ -nnonn+* -nnnon+ -nnnno+ — — You can choose to stack Stack/Sort Stack* or sort multiple copies. Sort — — You can make N in 1 or Page Layout Off(1in1)* Poster copies.
- Page 112 SCAN ( Level1 Level2 Level3 Options Descriptions Page — If you want to use the Scan to E-mail Set Options Off* control panel to change the machine’s settings, choose On. The settings below will appear when On is selected in Set Options. —...
- Page 113 Settings and features tables Level1 Level2 Level3 Options Descriptions Page — If you want to use the Scan to Image Set Options Off* control panel to change the machine’s settings, choose On. The settings below will appear when On is selected in Set Options. —...
- Page 114 Macintosh users. — You can choose the scan Scan Type Colour See Accessing type for your document. Black and White* Brother Support (Macintosh) — You can choose the scan Resolution 100dpi on page 5.) resolution for your 200dpi* document.
- Page 115 Settings and features tables Level1 Level2 Level3 Options Descriptions Page — If you want to use the Scan to File Set Options Off* control panel to change the machine’s settings, choose On. The settings below will appear when On is selected in Set Options. —...
-
Page 116: Address Book
(Address Book) Level1 Level2 Level3 Options Descriptions Page — — — You can set up dial by Search pressing only a few keys. — — — Stores Speed Dial Set Speed Dial numbers, so you can dial by pressing only a few keys (and Start). -
Page 117: Entering Text
Settings and features tables Entering Text When you are setting certain menu selections, such as the Station ID, you may need to enter text into the machine. Most dial pad keys have three or four letters printed on keys. The keys for # and l are used for special characters. -
Page 118: Special Characters And Symbols
Special characters and symbols Press l or # repeatedly until you see the special character or symbol you want. Press l (space) ! " # $ % & ' ( ) + , - . / Press # : ; < = > ? @ [ ] ^ _... -
Page 119: D Specifications
Specifications General NOTE This chapter provides a summary of the machine’s specifications. For additional specifications visit http://www.brother.com/. Printer Type Inkjet Piezo with 210 nozzles 1 Print Head Mono: Piezo with 70 nozzles 3 Color: Memory Capacity 64 MB 16 characters ... - Page 120 Dimension 180 mm 435 mm 374 mm 471 mm Weight 8.3kg Noise Level Sound Pressure Operating: 50 dB(A) (Maximum) 10 to 35 C Temperature Operating: 20 to 33 C Best Print Quality: Humidity Operating: 20 to 80% (without condensation) Best Print Quality: 20 to 80% (without condensation) ADF (automatic Up to 20 pages...
-
Page 121: Print Media
Specifications Print media Paper Tray Paper Input Paper type: Plain Paper, Inkjet Paper (coated paper), Glossy Paper and Transparency Paper size A4, Executive, Letter, JIS B5, A5, A6, Envelopes (Com-10, DL, C5, Monarch), Photo (10 15 cm), Photo 2L (13 18 cm) and Index Card (127 ... -
Page 122: Fax
Compatibility ITU-T Group 3 Modem Speed Automatic Fallback 14,400 bps Scanning Width ADF: 208 mm (A4) Scanner Glass: 204 mm (A4) Printing Width 204 mm (A4) Greyscale Monochrome: 8 bit (256 levels) Color: 24 bit (8 bit per color/ 256 levels) Resolution Standard 203 ... -
Page 123: Copy
Specifications Copy Color/Monochrome Yes/Yes Copy Width 204 mm Multiple Copies Stacks/Sorts up to 99 pages Enlarge/Reduce 25% to 400% (in increments of 1%) Prints up to 1200 2400 dpi Resolution When copying on A4 size paper. -
Page 124: Scanner
® Maximum 1200 1200 dpi scanning when using the WIA Driver for Windows XP, Windows Vista , Windows 7 and ® 8 (resolution up to 19200 19200 dpi can be selected by using the Brother scanner utility). Windows... -
Page 125: Printer
(127 203 mm), Photo 2L (13 18 cm) Print Speed When the Borderless feature is set to On. See Paper type and size for each operation on page 19. When printing on A4 size paper. For detailed specifications visit http://www.brother.com/. -
Page 126: Interfaces
Interfaces A USB 2.0 interface cable that is no longer than 2 m. Wireless LAN IEEE 802.11b/g/n (Infrastructure/Ad-hoc Mode) Your machine has a Hi-Speed USB 2.0 interface. The machine can also be connected to a computer that has a USB 1.1 interface. -
Page 127: Network
See Computer requirements on page 120. ® (Windows ) If you require more advanced printer management, use the latest Brother BRAdmin Professional utility version that is available as a download from http://solutions.brother.com/. (Macintosh) The latest Brother BRAdmin Light is available as a download from http://solutions.brother.com/. -
Page 128: Computer Requirements
OS X v10.8.x Scanning Conditions: For the latest driver updates, visit us at For WIA, 1200 1200 resolution. Brother Scanner http://solutions.brother.com/. Utility enables to enhance up to 19200 19200 dpi. All trademarks, brand and product names are the Third party USB ports are not supported. -
Page 129: Consumable Items
For more information about the replacement consumables, visit us at http://www.brother.com/pageyield/. What is Innobella™? Innobella™ is a range of genuine consumables offered by Brother. The name "Innobella™" derives from the words "Innovation" and "Bella" (meaning "Beautiful" in Italian) and is a representation of the "innovative"... -
Page 130: Index
Fax Detect ..........28 Cannot Print ......... 63 Clean Unable ........63 Comm. Error ......... 63 Cover is Open ........63 Brother Data Remaining ........63 CreativeCenter ........5 Document Jam ........64 Init Unable ..........63 Ink Box Full ........... 64 Ink Low .......... - Page 131 Fax, stand-alone receiving ..........26 difficulties ........84 Macintosh Fax Detect .........28 See Software and Network User’s Guide. from extension telephone ....38 Maintenance, routine Ring Delay, setting ......28 replacing ink cartridges ......53 telephone line interference / VoIP ..90 Manual sending ..........23 dialling ..........
- Page 132 if you are having difficulty copying ..........88 document jam ........70 Receive Mode incoming calls ........87 External TAD .........26 Network ..........89 Fax Auto ..........26 paper handling ........82 Fax/Tel ..........26 print quality ........81 Manual ..........26 printing ..........79 Redial/Pause ..........40 printing received faxes ......
- Page 133 Brother FAX-PRINTER ASCs Remark:The list was by the end of May,2012.Information in the list is subject to change without further notice.Please visit www.95105369.com to get the latest information. 省 城市 维修站名称 维修站地址 区号 电话 0451 82530790 哈尔滨 黑龙江光电世纪科 哈尔滨市南岗区南通大街 258 号船舶电子大世界中区...
- Page 134 省 城市 维修站名称 维修站地址 区号 电话 0991 4522839, 乌鲁木齐扬子江路 213 号红 乌鲁木齐 乌鲁木齐华昭通信 4522512 设备有限公司 十月花园东一区 6 号楼 4 单 元 101 室 新疆 0991 5866031 乌鲁木齐市黄河路 396 号七 乌鲁木齐 乌鲁木齐桑厦实业 有限公司 一酱园 A 座 2711 0951 6010943, 银川市文化东街 256 号 银川...
- Page 135 省 城市 维修站名称 维修站地址 区号 电话 65266126 北京 中国电子器材总公司 北京市东城区东皇城根南街 88 号 84473121, 北京市朝阳区东土城路 9 号 北京 北京泰智峰科技有 84473122 限公司 院内 15 号 62653486 北京市海淀区中关村大街 18 号中关 北京 北京万华京港技贸 北京 有限公司 村数字物流港一层 0002 号 62628292 北京 北京易禾鑫星科技 北京市海淀区中关村大街 22 号中科大厦 A806 室 服务有限公司...
- Page 136 省 城市 维修站名称 维修站地址 区号 电话 85426778 武汉市硚口区利济北路 80 号 武汉 武汉市大通电讯设 备有限公司 财源大厦主楼一层 5 号门面 0710 3233001 湖北省襄阳市春园路 17-11 襄阳 襄阳市三和现代办 公设备有限公司 号 (火炬大厦旁火炬路 1 号 对面 ) 51854915 湖北 武汉 武汉鑫宝丰盛科技 武汉市洪山区珞瑜路华中数 码城 9088B 有限公司 0716 4310075 荆州市沙市区红门路 23 号 荆州...
- Page 137 省 城市 维修站名称 维修站地址 区号 电话 64162760 上海市徐汇区零陵路 23 号 上海 上海发思达企业发 展有限公司 51005128 上海市共和新路 1207 号 7 上海 上海发思达办公通信 设备有限公司 号楼 3 楼 上海 4008803969, 上海 上海群盛办公设备 上海市浦东新区杨高南路 58730801 1677 弄 33 号 有限公司 52570565 上海市延安西路 1754 号 上海 上海中纺电子系统...
- Page 138 省 城市 维修站名称 维修站地址 区号 电话 0791 86204110 江西省南昌市八一大道 135 南昌 南昌鸿邮办公自动 化有限公司 号 8 楼 ( 长运商贸城 A 座 8 楼 ) 0791 88600759 南昌市洪都中大道 158 号鸿 南昌 江西怡瑞科技发展 有限公司 雁电子市场 N 栋 2 号 0792 8103338 江西 九江市滨江路 289 号滨江国 九江...
- Page 139 省 城市 维修站名称 维修站地址 区号 电话 0591 87326462 福州市东大路 150 号恒裕大 福州 福州正威数码科技 有限公司 厦西侧一楼 泉州市鲤城区九一路 108 号 0595 22176716, 泉州 泉州市新境界数码 22287718 科技有限公司 0592 5500712 福建省厦门市湖里区仙岳路 680 号 厦门 厦门市汉韦电子有 福建 限公司 龙门天下 10 号店 (后) 0596 2097110 漳州 漳州市瑞宝办公设...
- Page 140 设备经营部 区二楼 212 档 National service hotline: 95105369 (Or 021-62371303) Working Hours: 8:00~18:00 (Except Saturday, Sunday and holidays) To search ASCs/Drivers/Manuals,etc, please visit our service website: www.95105369.com To search consumables purchase shop, please visit Brother company website: www.brother.cn BROTHER(CHINA) LTD.
- Page 141 Visit us on the World Wide Web http://www.brother.com/ This machine is approved for use in the country of purchase only. Local Brother companies or their dealers will only support machines purchased in their own countries. www.brotherearth.com...