Table of Contents
Advertisement
Quick Links
Read Before Using Keyboard!
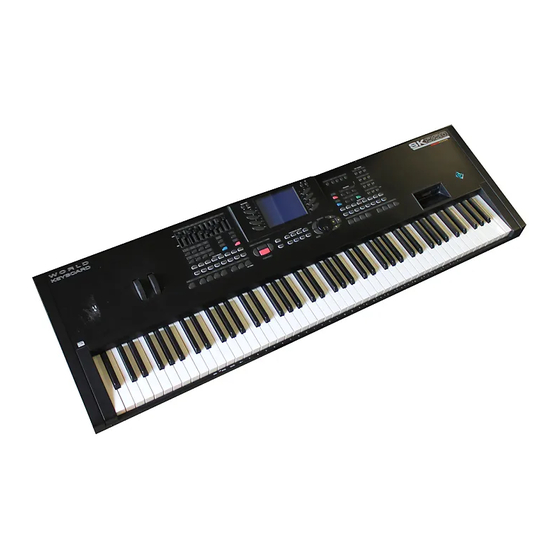
Congratulations on your purchase of the new GEM SK760/SK880 Special Edition World Key-
board by Generalmusic. This instrument is equipped with cutting edge Flash ROM memory, so
that your new keyboard can be permanently updated by disk with the latest operational advan-
tages and new features. It is important that you follow the procedure below before using your
instrument for the first time to ensure that the instrument functions properly. Check with your
authorised Generalmusic dealer for exciting new features to load in your Flash ROM in the fu-
ture.
STEP 1
STEP 2
iv
FINAL STEP
Dial
Note: There may be a Battery Warning message when you initially turn on the instrument.
This message will not appear after the instrument has been plugged in and turned ON for a
few hours. During this time, the internal battery that holds new information in memory will
recharge. For now, just press ENTER or ESCAPE to continue on if the message appears when
you power-up the instrument.
○
○
○
○
○
○
○
○
○
○
IMPORTANT
With the instrument turned OFF, insert the SK SE Operating System Disk
(OS-Disk) included in your materials packet into the disk drive. After
you have inserted the disk, turn the instrument ON.
You will see a message in the instrument display screen that says:
Loading OS-DISK clears ALL MEMORY!! <Enter to Load/Escape to
abort>
Press ENTER and wait about 3 minutes for the new Operating System
to load. When the new system has finished loading, you will see the
following
Loading Successful!! <Enter to continue>.
At this time, Press ENTER again and the instrument will proceed
through the normal operating display screens. You can now Turn OFF
the instrument in preparation for the final step listed below.
IMPORTANT: REMOVE THE OPERATING SYSTEM DISK BEFORE
PROCEEDING TO THE FINAL STEP!
As you turn the instrument ON, KEEP ROTATING THE DIAL until
the following message appears in your display screen:
!!WARNING!! Dial on Power-Up Requests Memory Clear!!
<Enter to clear/Escape to abort>
Press ENTER. You have now completed the update process, and your
SK760/880 SE World Keyboard has been permanently upgraded.
Location of Dial, Enter & Escape controls.
○
○
○
○
○
○
○
○
○
message
in
the
271329
instrument
display
screen:
Advertisement
Table of Contents

Related Manuals for GEM SK760


Summary of Contents for GEM SK760
- Page 1 Exclusive, Edit Preset 3. 7 stem Exclusive Impolmentation A. 28 Congratulations on your purchase of the new GEM SK760/SK880 Special Edition World Key- belle Styles A. 21 board by Generalmusic. This instrument is equipped with cutting edge Flash ROM memory, so p Tempo 1.
-
Page 3: Table Of Contents
rmat Hard Disk 4. 23 Load All, Disk 4. 9 rmat MS-DOS disk 4. 22 Load Group, Disk 4. 7 rmatting Floppy disks 4. 22 Load Group User Style, example 4. 8 rward >> button, Song 6. 2 Load Operations, Disk 4. 5 ont Panel 1. -
Page 4: Macintosh
The lightning flash with arrowhead symbol, within an equilateral triangle, is intended to alert the user to the CAUTION presence of uninsulated “dangerous voltage” within the product’s enclosure that may be of sufficient magnitude RISK OF ELECTRIC SHOCK to constitute a risk of electric shock to persons. DO NOT OPEN The exclamation mark within an equilateral triangle is CAUTION: TO REDUCE THE RISK OF ELECTRIC... - Page 5 FEDERAL COMMUNICATIONS COMMISSION Note: This equipment has been tested and found to comply with the limits for a Class B digital device, pursuant to Part 15 of FCC Rules. These limits are designed to provide reasonable protection against harmful interference in a residential installation.
- Page 6 Stock Code 271329 Specifications are subject to change without prior notice. PRINTED IN ITALY Sales Division: I -47848 S.Giovanni in Marignano (RN) - Italy – Via delle Rose, 12 Tel. +39 541 959511 – fax +39 541 957404 – tlx 550555 GMUSIC I Internet: http://www.generalmusic.com...
- Page 7 Contents ushort date; // total 2 bytes Introduction struct F_HEAD { unsigned char name[8],ext[3],flags; // 12 QUICK GUIDE TIME_INF time; // 2 DATE_INF date; // 2 Chapter 1 • Layout & Display 1. 1 long length; // 4 Front layout 1. 1 // total 20 bytes Rear panel connections 1.
- Page 8 REFERENCE GUIDE Sounds 2. 1 GMX Banks 1, 2 and 3 2. 1 Banks 4 - 16 2. 1 Drum Kits and Drum Sounds 2. 1 Selecting Sounds 2. 2 Moving Between Families 2. 2 The sound group families 2. 3 Edit Perf Sound/Sound Patch 2.
- Page 9 e procedure is as follows: from each bytes of the 7 in sequence, the least significan bit is extracted and saved in an eighth byte, therefore the same Send Sample / Sample Request (F7) 2. 54 e is shifted to the right; finally all is transmitted in the order. For example: Storing Samples 2.
- Page 10 JAZ 1G/2G FORMAT 4. 28 Additional Disk functions 4. 29 Disk handling information 4. 31 Styles 5. 1 About the SK760/880SE ROM Styles 5. 1 Flash Styles 5. 1 Selecting and playing the Styles 5. 1 The functions which control the Styles 5. 1 Arrange On/Off 5.
- Page 11 AMPLES of Resource Request message compositions Escape from Edit Style 5. 13 Undo 5. 13 xample 1 > : System Setup request: Style Name 5. 14 2F 50 Edit procedure 5. 14 (2) (3) Erase 5. 15 Move 5. 16 Exclusive Status Copy 5.
-
Page 12: Midi Implementation Chart
Vocal Processor 7. 1 The Vocal Processor features 7. 1 Connections 7. 1 Activate the Vocal Processor 7. 2 Working with the Vocal Processor 7. 2 Chord 7. 2 Vocoder 7. 3 Unison 7. 4 Edit 7. 4 Edit General 8. 1 Description of the Main Menu page 8. - Page 13 Model ID, 00 = WK4 c = checksum (0-1), f = Data Format (0-3) A guitar player can connect to the audio inputs of the SK760/880SE Series instruments and play the packet number (optional) chords which appear on a monitor connected to the instrument’s video outputs, and mix his sounds with those of the workstation (complete with effects processing!).
- Page 14 MIDI. paniment section. Sample-RAM (D-RAM) Sound generation SK760/880SE is fitted with 8 megabytes of RAM Based on sampled waveforms (Wave), modified to allow the loading of disk-based samples to cre- by programmable digital filters (DCF, Digitally ate RAM -Sounds.
- Page 15 Default as modifying sounds while a song is playing, load- 18 00 00 00 01 mode SK760/880SE is fitted with a 2.5” IDE or E-IDE ing a song during song play, formatting a disk 18 01 00 00 01 m_priority Poly.Mono...
- Page 16 < ENTER to CLEAR / ESCAPE to abort > IMPORTANT INFORMATION 1. The SK760/880SE should contain the following items from the factory: a) Instrument with power cord; b) 1 Floppy disk containing the Operating System (OS-Disk); c) Owner’s manual (shrink-wrap pack with 3-ring binder).
- Page 17 05 00 00 00 01 01ChordLanguage 0 = English, 1 = Italiano 0=English The SK760/880SE conserves the data in RAM after turning off, thanks to a rechargeable battery. The 05 01 00 00 01 01Help_Language 0 = English, 1 = Italiano 0=English battery is recharged while the instrument is turned on (not just plugged in!).
- Page 18 RAM RESET BATTERY DISCHARGED MESSAGE If the instrument has been left turned off for a If you want to recall the factory settings, you can long period of time, the battery will slowly dis- reset the backed RAM. charge. 1. Press GENERAL in the EDIT section to enter When the battery discharges completely, it caus- the “Edit General”...
-
Page 19: Quick Guide
Quick Guide AMPLES OF EXCLUSIVE MESSAGES AND CHECKSUM CALCULATIONS lating to the structure of the Address Data Interface) xample 1 > : The setting for the 1st Effect Type of Group A on Hall 3 using the common channel 7, the format 0 (7 bit data value) and without ecksum. -
Page 20: User Guide
GENERAL SAFETY INSTRUCTIONS Power source • Be sure that your local AC mains voltage matches the voltage specified on the name plate before connecting to the mains. • DC power cannot be used to power this instrument. • If the instrument is to remain unused for long periods of time, remove the power cord from its wall outlet. -
Page 21: Sound Groups
K760/880 Special Edition System Exclusive Implementation Chapter 1 • Layout & Display NIVERSAL NON-REAL TIME SYSTEM MESSAGES AMPLE DUMP STANDARD e transfer of data relating to the samples contained in the sounds of the instrument ias based on the standard protocol, called SDS (Sample Dump FRONT LAYOUT 10. -
Page 22: Rear Panel Connections
REAR PANEL (CONNECTIONS) 7. Output: (Left, Right, 1, 2). For Mono repro- 1. SCSI port. duction, use either the RIGHT or LEFT jack. 2. Pedals: Damper, 1, 2, Volume. The auxiliary outputs emit “dry” sounds (i.e. 3. Pedalboard port. with no effects). 4. -
Page 23: The Display
THE DISPLAY The SK760/880SE display is the principal user interface which communicates the status of the instru- ment at all times. TRACK SCROLL BUTTONS PAGE (MENU) SCROLL BUTTONS NEGATIVE HIGHLIGHT SOFT BUTTONS A … H SOFT BUTTONS F1 … F8... -
Page 24: Alphanumeric Entry
ALPHANUMERIC ENTRY In name writing situations (Performance name, Song name, etc.), the keyboard activates as a source of alphanumerical data where each note of the central zone of the keyboard corresponds to a letter, sym- bol or number. Use the / cursor buttons or the DIAL to navigate within the active name writing zone. ALPHANUMERIC CONFIGURATION IN NAME-WRITING MODE THE FOLLOWING EXAMPLE SHOWS HOW TO MODIFY A PER- FORMANCE NAME:... - Page 25 avetables THE DEFAULT DISPLAY: “SOUND VIEW” PAGE This type of page shows the Sounds assigned to the tracks. «Sound View» is the default viewing mode. FORM1 DIGI2 PRPSAWJM BD_KIK(1) SD_HEAVY4(2) PHONEWAVE(1) A typical Sound View page appears in Style/RealTime mode (other Sound View pages showing slight M_DIST ;...
- Page 26 8 engaged by the sequencer for the arrangements). A Song-Performance can contain up to 32 tracks. Sometimes, a track is not assigned to a SK760/880SE Sound, but it controls an expander connected to the MIDI OUT. In this case, “MIDI” is shown as well as ProgramChange and BankSelect numbers (MSB-LSB) on the main display when SK760/880SE is set to Multi mode.
- Page 27 erformances (Real) Effects Most of the operating modes display the tracks and their status icons are shown on the left part of the display. 00 PC Performances† CC00 PC Performances† CC16 DSP A/B select † CC16 DSP A/B select † The status of a track can be shown in four different ways: oup 1 Group 5...
- Page 28 DIALOG WINDOWS Several types of dialog window exist; generally an option requires selection or one or more parameters require modifications and confirmation with ENTER or a soft button. Some examples follow. Select one of the options with the cursor buttons. Press ENTER to confirm or press ESCAPE to cancel the modifications.
-
Page 29: Getting To Know Your Instrument
○ ○ ○ ○ ○ ○ 8Beat 8 SlowBlues 127 Praise N.B. Remember that the SK760/880SE does not have 4” jacks. Use RCA jacks to connect to do- BEAT Bank 2 FUNK Bank 1 POP Bank 2 WORLD Bank 1... -
Page 30: Play With Headphones
PLAY WITH HEADPHONES 6. Plug a set of headphones into the PHONES 1 jack. The headphones jack panel is located on the left side of the instrument, under the key- board. Inserting the headphones plug into the PHONES 1 jack excludes the internal speakers to allow you to play in total silence without disturbing others in the same room. -
Page 31: Play With The Wheels
rumkits PLAY WITH THE WHEELS The on-board controlling devices include two WHEEL 1 WHEEL 2 wheels on the left key block, both preset for Per- formance functions. The default configuration of the wheels is as fol- lows: • Wheel 1 (left) Pitch Bend •... -
Page 32: Select Sounds
Select sounds SK760/880SE has a vast selection of instrument Sounds, including orchestral, percussion and con- temporary musical instruments, organized in 16 Sound Groups, each consisting of 16 Banks of up to 16 Sounds in every bank. 1. Press a SOUND GROUPS button (PIANO GROUP button in the example). -
Page 33: Change Sound Bank
rumkits CHANGE SOUND BANK 4. Repeat step 2 to make additional selections. This time, after pressing a SOUND GROUPS button, select the Bank containing the desired sound using the +/– (Page/Bank) buttons in the top right hand corner of the display area. Each Sound Group button consists of up to 16 Sound Banks, each containing up to 8 Sounds. -
Page 34: Ll Keyboard Playing
6. Press Upper 2 (E/F) TWICE to select and activate the Upper 2 section and play a key above note F#3. You will hear two sounds for each single note played on the right hand. Activating Upper 2 introduces a second Sound (SlowString) layered with the first. -
Page 35: Play Up To 8 Sounds At The Same Time (Multi)
rumkits PLAY UP TO 8 SOUNDS AT THE SAME TIME (MULTI) 9. Press the soft buttons F5/F6 on the right of the display to select the MULTI keyboard mode. All references to the Upper and Lower key- board sections will no longer be displayed. The Multi situation will show 8 of the 16 Tracks of the current Performance. -
Page 36: Using The Keypad To Select Sounds
USING THE KEYPAD TO SELECT SOUNDS The SK760/880SE Sounds are identified by two numbers: the ProgramChange (PC) and the BankSelect MSB number (ControlChange 00 [CC00]). You can select a Sound by specifying the absolute values (PC and CC numbers) on the numeric keypad. -
Page 37: Adjust The Sound Volumes Separately (Balancing)
rumkits ADJUST THE SOUND VOLUMES SEPARATELY (BALANCING) The volume of each sound (in Full, Upp/Low or Multi setups) can be independently regulated with the corresponding sliders of the group to the left of the display. The Performances memorize the track volumes. After mixing, you can save the changes to the Full keyboard mode current Performance using the STORE PERF... -
Page 38: The Solo Button - Isolate A Single Sound From The Rest
THE SOLO BUTTON - ISOLATE A SINGLE SOUND FROM THE REST If you are playing in a situation where two or more sounds are displayed, before activating a muted sound you may want to listen to it alone to de- cide whether to activate it or not. -
Page 39: Listen To The Demo Songs
Listen to the Demo Songs You can listen to the automatic playback of your SK760/880SE to get an idea of what the instru- ment is capable of doing. 1. Press DEMO (in the Edit/Number section) to open the Demo window. - Page 40 5. Select the «ALL DEMO» option shown in the current selection window to chain all demos displayed (Song or Style). Playback starts automatically from the first demo. Demos not yet played are shown in negative highlight while those played return positive.
-
Page 41: Multimedia
OM-Sounds Multimedia Bank N SFX group SK760/880SE can display Lyrics when playing IceRain Noiseres BigRoom Submarin Impact Mech-Lp Yowww HitThePipe WK (or PS) Series Disks. There are a wide vari- Soundtrack MoonWind Slope Ekoendls SynRain Mech-Wv Stars StabSynth ety of disks that display lyrics when played. No... -
Page 42: Automatic Loading Of Songs At Power Up
7. Press the ENTER button to view the results. AUTOMATIC LOADING OF SONGS AT POWER UP If your SK760/880SE doesn’t have any Songs with lyrics in memory, it is possible to load a disk- based Block of data (including Song data) auto- matically at power up. -
Page 43: To Display Lyrics On An External Monitor
Clarinet ClarSolo ClarFilter LiscioClar UTE group The supplied RGB/Scart video cable is suit- Piccolo HardFlute1 HardFlute2 PanFilter able to connect your SK760/880SE to a do- Flute Dyn.Flute1 DynHiFlute ColorWind mestic TV or computer monitor. Recorder Recorder2 Bubbler PanFlute PanFlute2 Dyn.Pan... -
Page 44: Play With Auto Accompaniment Styles
Play with Auto Accompaniment Styles SK760/880SE has 192 auto accompaniment Styles with four Variations four Intros, four Fills and four Endings for each Style. You can also load up to 32 disk based User Styles of your choice into the 4 User Style banks available. - Page 45 OM-Sounds 4. Press the right Track Scroll button to check the sounds recalled for the accompaniment Bank tracks. SS group AcoustcBs1 AcoustcBs2 AcousticBs3 Dyn.AcoBs HarmAcBs FingerdBs2 DanceBass TheChopper Note that in this example, the tracks Acc 4/5/ FingeredBs Dyn.Fingrd Dyn.Bass1 Dyn.Baxx HarmAcBs2 Fretless3...
- Page 46 8. Press one of the VAR buttons shown off. Note how the accompaniment pattern changes to a different Variation. The VAR buttons control the Style Variations. Each button recalls a different version of the same accompaniment. Each Variation in- cludes different patterns for the Basic, Intro, Fill and Ending sections.
-
Page 47: Start A Style With Key Start
OM-Sounds START A STYLE WITH KEY START The Key Start function synchronizes the start of Bank the automatic accompaniment with a note ANO group pressed on the keyboard below the split point Piano1 PianoMk1 PickPiano PianoStage InharPiano Grand Piano without having to use START/STOP. KEY START Piano2 PianoW2 Pianoctave... -
Page 48: Start A Style With Tap Tempo
START A STYLE WITH TAP TEMPO 15. With the Style accompaniment off, beat time on the TAP TEMPO button. The tempo is set according to the timing of the last two taps, the relative Tempo value is displayed and the accompaniment starts au- tomatically. -
Page 49: Select And Play The Flash Memory User Styles
Display Hold IDI communications can sometimes “lock” the SK760/880SE leaves the factory with a selection of User Styles stored in the User Style flash memory strument due to the transmission of an exces- banks, reserved for factory use where the contents may vary from market to market. From time to time, This function is active (LED on) by default. -
Page 50: Select A Style Performance
SELECT A STYLE PERFORMANCE When Single Touch Play is on, each SK760/ 880SE Style is associated to 8 Style Perform- ances which you can assign at any time before or during play. The Style Performances are per- manent and cannot be destroyed. They are, how- ever, rewritable (keyboard and accompaniment sounds). -
Page 51: Select The Performances
Select the Performances SK760/880SE has 64 user programmable Performances, organized in eight different banks in the PER- FORMANCE GROUPS section. These Performances feature single and layered sounds, custom effect settings, split keyboard combinations and a special Drawbar Performance bank. You can create your own Performances or load new ones from disk. - Page 52 3. Play on the keyboard and listen to the Sound combination. Depending on the Performance recalled, you will be able to play with a combination of up to 16 Sounds, either layered together or split across the keyboard in any configuration. You can modify the Sound configuration to suit your needs then store the modified Perform- ance with the Store Perf button (explained...
-
Page 53: Saving To The Same Performance
Performances and restore the original factory turns to the modified Performance display. settings. Each time this Performance is recalled, it will configure the SK760/880SE with precisely the same settings are those memorized. WARNING: use the RESTORE commands with cau- tion because user-programmed data is irremediably If you press ESCAPE, you will to cancel Store lost. -
Page 54: Saving To A Different Performance
SAVING TO A DIFFERENT PERFORMANCE 3. If you want to save to a different Perform- ance, use the Cursor Left/Right ( / ) but- tons and the Dial to configure the Perform- ance Store display accordingly. The Cursor Left/Right arrows switch from the Performances (Performance) to the Style Performances (Style) and vice versa. -
Page 55: Transpose The Instrument Up Or Down
2. Press TRANSPOSE b to lower the pitch. (SK760/880SE sounds and signal of the MIC/ ackground (Positive) or white texts on a black LINE IN inputs). -
Page 56: Transposing Tracks By Octaves
TRANSPOSING TRACKS BY OCTAVES Any track, if selected, can be instantly transposed in octave steps, within the range ±5 octaves. 1. Select the track you wish to transpose. 2. Press the OCTAVE + to raise the octave set- ting. An insertion screen shows the current Oc- tave setting. -
Page 57: Bypass The Effects
Play with Effects or bypass them Pedalboard/Computer Note Function Note Function Start/Stop Tempo – Intro Tempo + he PEDALBOARD and COMPUTER connec- You can temporarily modify the way in which a rs cannot operate at the same time. Selecting Ending Var 1 Performance is processed by the on-board ef- ne renders the other inoperative. -
Page 58: Using The Midi File Player
Using the Midi File Player The MIDI FILE PLAYER plays MIDI files directly from floppy disk or Hard Disk without loading data into RAM memory. If a Floppy disk containing MIDI Files is already inserted in the drive, the MIDI File player engages the floppy, otherwise the Hard Disk (if present) is engaged automati- cally. -
Page 59: Melody Off
3. Press ENTER to access the SMF folder. General Controls Tuning/Scale A list of MIDI Files is shown. MASTER PITCH EYBOARD SENSITIVITY 4. Use the directional arrows to select a MIDI File that you want to listen to. Fine tunes the instrument as a whole in fractions etermines the response of the keyboard to ve- of 1/64 of a semitone. -
Page 60: Loading Data Into Ram Memory
If you have some disk-based Songs, or Styles or Performances that you wish to load into the instru- ment’s RAM memory, or you wish to load data from the SK760/880SE Hard Disk, here’s how to do it. The example shows how to load a Song from Floppy disk (or Hard Disk). All other data, such as User Styles, Programmable Performances, etc., are loaded using similar procedures adapted for the type of... - Page 61 4. If necessary, select a Block file and press ENTER to gain access to the files contained in the Block. Now the display shows a list of files of the same type selected in step 2 (in this case Songs). 5.
-
Page 62: Quick Rec Recording
Record a Song (Quick rec.) SK760/880SE allows you to record a simple multi-track Song using the QUICK REC recording method when using existing Styles. In practice, the Quick Rec method can record from 1 to 8 real time tracks accompanied by all the backing tracks of a Style to create a multitrack Song of up to 16 tracks. You can also play along with the song during playback. - Page 63 5. Press either PLAY or START/STOP to start the VOCAL ON/OFF AND EQUALIZER Additional changes recording and start to play. In «Edit General», the Mic/Line editor includes an Equalizer which prompts the following window PLAY starts the recording for the real time addition to the above, the following additional when activated: tracks only.
-
Page 64: Play Along With Your Recorded Song
PLAY ALONG WITH YOUR RECORDED SONG In Song playback mode, you can play along with your recorded Song by activating one or more tracks not used for the recording. It is also possible to disengage a recorded track from the sequencer and use it to play in real time. -
Page 65: Save Your Programmed Data To Disk Or Hard Disk
Have a new or used disk ready to save data to. These can be SK760/880SE format disks (or standard llowing scale. MS-DOS disks for the storage of MIDI files). You can also save MIDI Files to SK760/880SE format Voice 1 = +12 cents disks. - Page 66 3. Press ENTER to confirm the command and open the File Selector. The display shows the directories of the RAM memory and the floppy disk, or Hard Disk. In the example, the instrument’s RAM direc- tory is shown with 2 songs (with generic names).
- Page 67 CTIVATE THE VOCAL PROCESSOR 7. If necessary, select a destination and press WORKING WITH THE VOCAL PROCESSOR ENTER twice to execute the Save Single Song he Vocal Processor operates only if both the Select the Vocal Processor editor from the main command.
- Page 68 ○ ○ ○ ○ ○ ○ ○ ○ ○ ○ ○ ○ ○ ○ ○ ○ ○ ○ ○ ○ ○ ○ 1•48 Quick Guide...
- Page 69 < 1/16 (H) Reference Guide or by playing a different chord. ee above. Takes the cursor to the previous six- Play the chords below the Split Point. enth • Sounds, Edit Perf Sound/Sound Patch END PHRASE (F) T SCORE... (F4) Edit Sound This command inserts an ‘End phrase’...
- Page 70 ○ ○ ○ ○ ○ ○ ○ ○ ○ ○ ○ ○ ○ ○ ○ ○ ○ ○ ○ ○ ○ ○ Reference Guide...
-
Page 71: Sounds
Because the SK760/880SE has well over 1000 bass extension will appear in the following factory sounds as standard, these sounds have These are the “core” sounds of the SK760/880SE, form: CMaj/D, Dmin/G... been divided into 16 families, making it easier to where you will find a wide selection of typical syn- Press the soft buttons D («Next event»... -
Page 72: Selecting Sounds
Selecting Sounds Individual Sounds are recalled using the buttons If the Display Hold (D.HOLD) function is on of the SOUND GROUPS section. The sounds (LED on), the SOUND GROUPS selection recalled are assigned to the selected track of the window will remain active, allowing you to current Performance. -
Page 73: The Sound Group Families
At times, the music score will show special sym- Any sound on the SK760/880SE can be edited ily by pressing the SOUND GROUP buttons ac- bols. -
Page 74: Edit Perf Sound/Sound Patch
Edit Perf Sound/Sound Patch The term “Sound” refers to all the SK760/880SE Sounds that are not Drumkits, nor contain a dy- namic switch. “Sound Patch” is a generic term used to describe a Drumkit or a Sound contain- ing a dynamic switch. -
Page 75: Edit Performance Sound
Recalls a dialog window from which you can se- In «Edit Performance Sound», you can program ture of the SK760/880SE Rom Sounds and how lect the type of event to insert manually with the a set of principal Performance parameters that they are affected by the modifications you make «Ins(x)»... - Page 76 ues, subtracting them from or adding them to the Band-pass - Allows the entire band to pass. normal decay of the Sound. Modifies the phase of the Sound and is use- ful when two oscillators that read the same Assignable values: -63 (maximum rate) ... 0 (un- Wave are used.
- Page 77 Initial parameters Event List THE PERFORMANCE SOUND OPTIONS eter to either increase, decrease or completely Master Track remove the effect. Assignable values: -63 (minimum rate) ... 0 (un- COPY TO... (F6) he Master Track editor allows you to modify the changed) ...
-
Page 78: Edit Sound Patch
EDIT SOUND PATCH SELECTING/MUTING THE DYNAMIC LAYER Drumkits and Sound Patches have two dynamic In «Edit Performance S Patch», you can program Layers. Normally, Sound Patches exploit both a set of Performance parameters exclusive to Layers (1 & 2) while Drumkits limit themselves to these type of sounds. - Page 79 THE EDIT SOUND PATCH PARAMETERS VENTS TABLE AND RELATED PARAMETERS EXCLUDE: A linking number between two notes that exclude each other. Playing a note will in- terrupt another note with the same exclude EDIT NOTE: Determines the note to edit. TATUS VALUE 1 VALUE 2...
- Page 80 THE SOUND PATCH OPTIONS EXPAND... (F3) Extends the programmed parameters of the note CATCH NOTE... (F1) in edit to a specified keyboard zone. Selects the note to place in edit by playing it on 1. Select the note whose parameters require the keyboard.
- Page 81 COMPARE... (F4) SAVE THE MODIFICATIONS AS A NEW DRUMKIT/ Transpose SOUND PATCH FILE ON/OFF switch. When active, the original pa- rameter values of the Drumkit/Sound Patch in edit 1. Press F8 («Store...»). ansposition of a recorded track by semitones. are temporarily recalled in order to compare them so available are options to transpose the The «Store»...
-
Page 82: Save The Modifications To A Performance
6. Press ENTER to save the new file to the se- SAVE THE MODIFICATIONS TO A PERFORMANCE lected location. 1. Press F8 («Store...»). The «Store» dialog The new Drumkit/SoundPatch is now availa- window appears: ble as a RAM-Sound. As any new RAM-Sound, the new Drumkit/ SoundPatch will remain in memory after pow- er down. -
Page 83: Entering Edit Sound
Hint: To cancel measures without shifting those af- 2. Press the SYNTH button in the EDIT ter the deletion point, use the Erase events function. SK760/880SE. The results of your Sound edit- NUMBER section ing tasks is a RAM-Sound that you can store to... -
Page 84: Temporary Escape From Edit Sound
TEMPORARY ESCAPE FROM EDIT SOUND THE EDIT SOUND MAIN MENU Thanks to multitasking, you can temporarily es- The configuration of the Editors changes accord- cape Edit Sound by pressing the SYNTH button ing to the Algorithm selected, but the basic func- or ESCAPE. -
Page 85: Layers
So what actually is a layer ? In simple terms, a Compare Available in all Edit pages, Compare layer is a sound. In fact, many of the SK760/ temporarily assigns the original pa- 880SE sounds are created using only one layer. -
Page 86: The Algorithms
THE ALGORITHMS SINGLE Layers can also be of different types - single waveform or dual waveform. Each layer is elabo- rated by an associated “Algorithm” of synthesis. A Volume, Amplitude envelope, Filter and Pitch envelope for one waveform only. An Algorithm is the “signal path” of a sample to the audio outputs, through a series of process- DUAL 1 ing functions that you select during the course of... -
Page 87: Waveform
OPY PARAMETERS FROM LOCATOR... TO LOCATOR... Waveform Determines the start measure and end measure of the part to copy. Bars and Resolution cannot OPY MODE be specified. Valid for all Algorithms. Single activates a single WAVE VECTOR: Allows you to choose a wave etermines the copy mode. - Page 88 Depending on the waveform, values above the SCALE MODE: Selects a scale (temperament). default starting point may cause the sample to Assignable values: 0, 1, 2. start at a later point, removing some or all of its Value 0 corresponds to Equal temperament; attack.
-
Page 89: Volume E Balance
Volume e Balance Move hifts events from one point of the selected track VOLUME DYNAMIC SENSITIVITY: Links the Volume re- another. sponse to velocity variations. Valid for all Algorithms. Dual 1 and Dual 2 acti- Assignable values: –7 ... +7. vate Volume 1 and Volume 2, Dual 3 and Dual 4 share a single Volume editor with a Balance con- Positive values increase the Volume with in-... -
Page 90: Volume Tracking (F2)
VOLUME TRACKING (F2) POINT, KEY, LEVEL Valid for all Algorithms. Tracking allows you to The Tracking curve can be defined using the 3 determine how the volume varies across the key- display parameters, Point, Key and Level. board. Here you can enhance the presence of a sound more or less across the keyboard in order Point: Corresponds to one of the extreme ends to simulate to a greater degree that which occurs... -
Page 91: Balance
BALANCE BALANCE TRACKING (F2) Erase Balance Tracking allows you to program a Bal- Valid for Dual 3 and Dual 4 Algorithms onl ance offset, or the variation of the Balance (pro- ancels the events from a single track or from all grammed in the Balance page) across the key- acks. -
Page 92: Programming A Tracking Envelope
PROGRAMMING A TRACKING ENVELOPE 1. Press F6 to open the SEGMENT selection win- 3. Select the KEY parameter with the down ( ) dow, select 3 or 6 segments with the down cursor arrow and rotate the DIAL to set the ( ) cursor arrow and press ENTER to con- required value. -
Page 93: Amplitude Envelope & Balance Envelope
THE EDIT SONG OPTIONS Edit Song Amplitude Envelope & Balance Envelope UNDO (F2) Valid for all Algorithms. Dual 1 and Dual 2 acti- When this parameter is not set to “Off”, the last When this parameter is selected (shown in nega- ter recording a Song using either the RECORD vate the Amp. -
Page 94: Amplitude Key On And Key Off Envelopes
AMPLITUDE KEY ON AND KEY OFF ENVELOPES Add Segm: Inserts a new segment immediately after the currently selected segment. A maximum The Key On Envelope is a 10 segment curve of up to 10 segments is permitted. (maximum) that represents the variation of the sound’s volume for the entire duration that the Del Segm: Cancels the current segment. -
Page 95: Programming Key On And Key Off Envelopes
PLAY/REC MODE fect - To record the changes of the effects as- The maximum segment time is approximately 21 IMPORTANT gned to the Performance and respective effect seconds. Assignable values: 0 ... 127. Recording and playback options for the Song. The initial level of the first Key On segment olume levels. -
Page 96: Amplitude Envelope Tracking
AMPLITUDE ENVELOPE TRACKING BALANCE ENVELOPE The tracking “curve” represents the change in the Valid for Dual 3 and Dual 4 Algorithms only. completion velocity of the Amplitude Envelope The Balance Envelope corresponds to a mixer across the keyboar for the two oscillators which share a single Am- plitude Envelope. -
Page 97: Balance Envelope Key On & Key Off
BALANCE ENVELOPE KEY ON & KEY OFF Balance envelope response to key velocity vari- The Record method ations. The Balance Key On and Key Off Envelopes are Positive values increase the response of the Bal- 10 segment curves (maximum), allowing you to Press the SONG button to open the Song Banks ance envelope with increased key velocity while enhance the presence of one Waveform with re-... -
Page 98: Balance Envelope Tracking
BALANCE ENVELOPE TRACKING The Balance Tracking allows you to vary the Bal- ance setting across the keyboard. The option and parameters used to shape the Balance Envelope Tracking curve, (Segment, Point, Key and Level), are identical to those used for the Volume Tracking curve explained on page 2. -
Page 99: Filter
Sound, unless you of the Waveforms. The sound changes accord- programme Filter Tracking. ing to the type of filter selected. The SK760/ ELODY ON/OFF (F3) Assignable values: 0 ... 191. 880SE filters are 2 pole filters with roll off curves elect this option to deactivate the melody line at 12 dB per octave. -
Page 100: Filter Cutoff Tracking
FILTER CUTOFF TRACKING RESONANCE TOUCH SENSITIVITY: Links the Resonance to Aftertouch. Valid for All Algorithms. Positive values increases the amount of Reso- The Filter Cutoff Tracking curve allows you to vary nance applied with increased Aftertouch pres- the Cutoff Frequency across the keyboard, in sure, negative values have the inverse effect. -
Page 101: Filter Envelope Key On & Key Off
FILTER ENVELOPE KEY ON & KEY OFF THE PRELOAD FUNCTIONS FILTER ENVELOPE TRACKING You can fill the list in a single step using the «Select All” function (F7). Valid for all Algorithms. Starting with the Time/Tempo display, press Valid for all Algorithms. To replace a file inserted into the list by mis- PRELOAD to gain access to all the options avail- The Filter Envelope Tracking curve, valid both... -
Page 102: Pitch Envelope
Pitch Envelope Valid for all Algorithms. DYNAMIC RATE: Sensitivity of the Pitch Enve- The Dual options activate separate Pitch Enve- lope to key velocity variations. lopes for the two waveforms of each layer (Pitch Envelope Os. 1 and Pitch Envelope Os. 2). With positive values, increasing the key velocity (playing harder) speeds up the Envelope devel- The tuning (pitch) of the waveforms can vary over... - Page 103 PITCH ENVELOPE KEY ON & KEY OFF JUKEBOX PITCH ENVELOPE TRACKING his parameter sets the start measure and can The Pitch Key On and Key Off Envelopes are 10 The Jukebox function chains the songs of your The Pitch Envelope Tracking “curve”, valid both nly be modified when the Play mode is set to segment maximum) curves.
-
Page 104: Lfo (Low Frequency Oscillator)
LFO (Low Frequency Oscillator) A single Low Frequency Oscillator generator for You can choose from the following waves: Sinus, all Algorithms. Triangle; Saw, Square, Random, Sample/Hold. The LFO’s depth of action on the Pitch, Ampli- tude and Filter is independently programmable for each oscillator. - Page 105 JUKEBOX... (F1) Start the playback with the PLAY button in AMPLITUDE S.O.1 & S.O.2: Applies Lfo to the TOUCH FILT S.O.1 & S.O.2: Links the depth of the SEQUENCER. Amplitude to produce Tremolo effects. This pa- the Filter modulation to Aftertouch pressure. By Recalls the Jukebox function (explained after- rameter determines the modulation depth of the applying aftertouch pressure to the keys, the “De-...
-
Page 106: Pan
Valid for all Algorithms. In Dual situations, re- ENV AMOUNT DYN SENSITIVITY: Links the en- gardless of whether the Filters are connected in velope amount to key velocity variations. series or in parallel, there is only one pan enve- Positive values increase the envelope amount by lope for both waveforms (oscillators). -
Page 107: Pan Envelope Key On & Key Off
PAN ENVELOPE KEY ON & KEY OFF PAN ENVELOPE TRACKING A1...A6 of Variation 2 and you want to mask A4, Mask A5 and A6 for Variation 1, A2 and A3 for Variation The Pan Key On and Key Off Envelopes are 10 The Pan Envelope Tracking curve, valid both for 2, program the first two lines as follows: segment maximum) curves. - Page 108 The Main Menu options SAMPLE TRANSLATOR (F1) Import: opens a second level dialog window where you can select the source and destination This gains access to the Sample Translator, ex- layer. plained separately in detail from page 2.40 on- wards. ALGORITHM (F2) This option allows you to choose the Algorithms.
- Page 109 SAVE (F8) Press this soft button to save your programmed atus Gate sound to the SK760/880SE Sound Library and ote: escape from Edit Sound permanently. Refer to the section entitled “Storing Sounds” measure Value 1 ontr.
-
Page 110: Storing Sounds
Edit Sound menu. The «Bank Prog. Change» window opens where you can select the destination of the new Sound in the SK760/880SE Sound li- Use the standard name entry procedure (see brary. “Alphanumeric Entry” on page 1.4 of the Quick Guide). - Page 111 IMPORTANT REMINDERS WHEN STORING NEW SOUNDS From locator... To locator...: Determines the Velocity start and end point of the part to be affected. It is possible to specify measure, beat and resolution. 1. You cannot overwrite a Rom-Sound. odifies the key Velocity value. This parameter Assignable values: within the actual limits of the A modified ROM-Sound generates a RAM- presents the key-strike velocity, or its intensity.
- Page 112 Not all Waveforms cover the entire extension of Thanks to the articulated Key Off Envelopes (Re- the keyboard. This becomes particularly evident lease phase) of the SK760/880SE Series, you when you use an 88 note keyboard. can create some very interesting effects. In prac- tice, you can render a Sound “live”...
- Page 113 The slope of these curves is determined by the alue Quantization attraction capacity of the “poles”. The SK760/ PARAMETERS: 880SE Series can have two 2-pole filters con- Note Off Quantize: Specifies the Note Off nected in parallel (Dual 1, Dual 3 Algorithms), or quantize values.
-
Page 114: Sample Translator
Samples and the Sample Translator SAMPLE LOADING METHODS The SK760/880SE can load new sound samples into memory which can then be edited and saved Samples can be loaded from disk, via MIDI from as new SK760/880SE sounds. computers, samplers, etc., from external SCSI... -
Page 115: Selecting Samples From The Waveform Display
(for example, another From locator... To locator...: Sets the start and signed, the original sample pitch, and the upper SK760/880SE keyboard). end point of the part to be copied. Only the meas- keyboard limit: Exit: Escapes the Sample Translator, ure (bar) can be specified. -
Page 116: Loading Samples
The time taken depends on the size of the Loading samples sample. When loading has finished, the dis- play shows a situation similar to the example LOAD (F1) below, with one or more samples which con- stitute the Waveform. The Load option allows you to load Samples into the Sample Translator directly from a RAM Sound, or from disk or SCSI device (optional). -
Page 117: Loading Samples And Programs
«empty When the sample has been loaded, the dis- and Programs (similar to the SK760/880SE Se- ack» message is displayed at the bottom of the play will show something similar to the ex- ries Waveforms). -
Page 118: Receiving Samples Via A Dump
Sample Translator can load single Samples, or it can convert, in a single operation, an entire “level” ASSIGN (F4) of the Program into a SK760/880SE Series Wave- form. If a Program contains more than one “level”, Once you’ve loaded in the samples that you need,... - Page 119 At this point, unless you want to start editing your sample, you can press SAVE, (F2) to store your sample to the SK760/880SE wave library. Fol- low the section entitled, “Storing the sample” on page 2.55 at the end of this chapter.
-
Page 120: Cancelling Assignments
Cancelling assignments Cancelling samples DEASSIGN (F5) DELETE (F3) The Deassign command cancels a sample as- The Delete option allows you to cancel the se- signment. lected Sample from the Sample Translator. 1. Select the Sample to deassign. After listening to your Samples and assigning them, you may want to eliminate the no longer required. -
Page 121: Sample Editing
LOOP END: This parameter represents the end If the SK760/880SE does not recognize the Sam- of the current sample and the point where the sample, once played, loops back to the Loop Start ple Pitch of a sample you’ve loaded from disk,... -
Page 122: General Notes On Sample Editing
Loop Start and Loop End, you’ll hear the effect ing on a stereo sample (Left and Right parts). with the next note you play. However, the Sam- ple is not actually changed in the SK760/880SE memory until you save it. THE SAMPLE EDIT OPTIONS... - Page 123 REC RIFF... (F2) EXPORT (F7) 1. Press F3 to select GAIN. The Record View page The display will show the current GAIN sta- Opens the SELECT RIFF dialog window where Use the Export option to save the Sample cur- tus (in the example, we are working on the you can select a riff to record.
-
Page 124: Sample Midi Dump
If you’re requesting a sample from an exter- ther the external device or the SK760/880SE. It nal computer or sampler, you can specify a is not necessary to set MIDI channels. If the ex-... -
Page 125: Storing Samples
The SAVE operation is used to save assigned Style. Pressing EXIT activates a prompt to confirm the Samples to the SK760/880SE Wave Library. A abort process with ENTER and cancel all sam- Waveform can contain one or more assigned ples. - Page 126 SK760/880SE Wave Library. The new -Sound is simultaneously saved to the SK760/880SE Sound Library at the selected lo- cation. Pressing Enter also escapes the Sample Translator and returns to Edit Sound where you can start to edit the new Ram -Sound using all the methods already described.
-
Page 127: Performances
The Per- attern instantly without “breaks” in the pattern. the SK760/880SE in Performance play mode. formance will still be the same one recalled, but hen off, a change of chord does not update You would use the Performances to play in real modified so that more tracks are active to play. -
Page 128: Style Lock
ARRANGE ON/OFF STYLE LOCK When you turn the instrument on for the first time, Thanks to the STYLE LOCK function, you can or every time you select the GRAND PIANO Per- decide to select Performances and change Style formance from Group 1, the panel will default to every time, or simply recall keyboard sounds with- the power up situation with several buttons on, out changing the Style accompaniment. -
Page 129: Multi Track List
ARMONY function of the «Edit Tracks» envi- The buttons which gain access to the Perform- nment. When Single Touch Play is on, each SK760/ ance Edit Menus are 880SE Style is associated to 8 Style Perform- armony can orchestrate your Style playing,... - Page 130 TRACKS/SPLIT: Here you can program the pa- rameters exclusive to the tracks, such as Sec- tion Transpose, Detune, Polyphony priority, Ve- locity. These parameters would affect any sound you decide to assign to the tracks being pro- grammed. SOUND/S.PATCH: Here you can program a set An Edit Menu contains several parameters and of sound edit parameters that would affect any options to choose from, most of which affect the...
-
Page 131: Midi
Block can- figuration parameter is divided into four parts and ead may need cleaning. This can be done us- not exceed the limit imposed by the SK760/ MIDI CHANNELS (F1) the selected one is shown highlighted. Rotate g a good-quality fluid-type head cleaning kit for 880SE RAM. -
Page 132: Midi Filters
MIDI OUT ICON: The events generated by the eral Setup. track are sent to an external MIDI device via the SK760/880SE MIDI OUT port. When OFF, the MIDI CLOCK: This allows you to select whether track does not transmit MIDI via MIDI OUT. - Page 133 SYSTEM EXCLUSIVE: Setting this function to Changes according to the status of the param- ON allows the reception and transmission of eter. SK760/880SE system exclusive data via MIDI. he name can be of the particular file you are Options: On, Off. Options: On, Off.
-
Page 134: Common Channel/Arrangement
(1...16) port (A or B) For example, if you selected a multi-track Per- formance on the SK760/880SE and then tried to play this Performance from an external control- ler keyboard connected to either of the SK760/ 880SE’s MIDI IN ports, you would normally only... -
Page 135: Midi Dump
P 100/250 FORMAT record System Exclusive data. his operation formats a 100 or 250 Megabyte 1. Connect the MIDI OUT of the SK760/880SE p™ disk using a slower but optimised method, to the MIDI IN of the sequencer. Use the hecking the medium for possible bad blocks. -
Page 136: Reception Of Dump Data From A Sequencer
Performance. WARNING - Sending system exclusive data to SK760/880SE cancels all data of the same type cur- THE MIXER MENU rently residing in memory. Save the data you wish to conserve before receiving the system exclusive data from an external unit. -
Page 137: Random Pan
4. Press EXECUTE to start the copy process. connected to the internal sound generation. Normally the SK760/880SE sends sounds to both LEFT and RIGHT outputs, but it is possible to send some tracks to the auxiliary 1 and 2 out- puts, for an external mixing operation and a wider sound ‘opening’. -
Page 138: Effect
EFFECTS TYPE (F1) Effects When you select the EFFECTS Edit button, the display will show a sub-menu with two editors: EFFECT and VOCAL PROCESSOR. Here you can set up the actual effects that you would like your Performance to use from each DSP. -
Page 139: Send Level
Hard Disk Protection active. Assignable values: 0 ... 127. the SK760/880SE to the natural reverb of the sur- Selecting this function opens a second level order to use the Save, Erase or Move opera- EFFECT 2 TO EFFECT 1: Sets the quantity of roundings. - Page 140 The tables i the Appendix list the available effect SPEED (ROTARY EFFECTS): Time required to types. pass from slow to fast or vice versa. The parameters shown in the display will depend ROTARY: Slow/fast velocity. on the type of effects selected from the Eff.1 and SEMITONE: Transposition in semitone steps.
-
Page 141: Controllers/Pads
See “Pedals Programming You can also use a formatted disk, provided troller (CC02), Volume (CC07), Pan (CC10), Ex- SK760/880SE assigns a generic code name to (F2)” . that you are not interested in conserving its pression (CC11), Vocal Volume. -
Page 142: Pedals Assignment
PEDALS ASSIGNMENT THE CONTINUOUS PEDAL FUNCTIONS No effect Pitch Bend Applies Pitch Bend to the notes. The Pitch Bend sweeps from the maxi- mum negative to maximum positive setting of the Pitch setting in the Per- formance Controls menu. The cen- tral position of the continuous pedal corresponds to 0 pitch. -
Page 143: The Switch Pedal Functions
THE SWITCH PEDAL FUNCTIONS Move operations Fade In/Out Activates/deactivates the Fade In/ Out function. No effect Tempo > Increases the Tempo setting by one unit at a time. se the Move command to shift a file from one Damper Applies the sustain effect to released 3. -
Page 144: Pads
To enable the recall of the Pedal/Pads param- Select LSB). This parameter does not re- eters, make sure the Padlock is open (unlocked). quire a setting to play an internal SK760/ The Pedals/Pads Lock remains in memory after 880SE sound. Range 1…128. -
Page 145: Transpose
DETUNE (F3) Copy operations Tracks/Split Here you can program the parameters exclusive se the Copy command to copy a file from one In this case, pass to the source directory and, to the tracks, such as Section Transpose, Mas- cation to another within the same device, or from if necessary, select Floppy Disk (F1). -
Page 146: Mode/Priority
VELOCITY CURVE (F7) the current Performance for the action of the touch sensitive keyboard. Tracks set to “Off” will not react to velocity changes. Assignable values: 0n, Off. MODE/PRIORITY (F6) Provides a selection of Velocity response curves. As well as modifying the velocity data, velocity curves allow the creation of crossfade effects between two tracks. -
Page 147: Harmony Type
he Save All procedure offers the following pos- Then assign the VELOCITY range as follows; Duet: similar to Smart, but limited to two bilities: notes. Track 1 : 0 to 40 ave All Song: saves up to 16 Songs; Block: based on the harmonizing tables. Track 2 : 40 - 80 ave All Sound: saves an unspecified number Octave 1: doubles the note of the right hand... -
Page 148: Delay
DELAY (F2) Track 2: C3 to B3 Track 3: C4 to B4 Track 4: C5 to B5 Track 5: C6 to A8 This will give you a five part split where you have a different sound in each octave. Assignable values: A0) … C8 . Selecting a value here will cause the sound to be delayed for a brief period of time after a key is CREATE TRACK (F6) -
Page 149: Erase Track
SAVE GROUP STYLE PERFORMANCE (EXAMPLE) your error with the following message: Press ENTER to confirm or ESCAPE to cancel Store Performance the operation. 1. Select GROUP STYLE PERFORMANCE from the Note: This operation does not copy the notes cap- main Save page. Whenever you edit a Performance, you will, at tured by the sequence. -
Page 150: To Save To A Different Performance
3. Press ENTER again to save the Performance 5. Move down to the “Perf” option with the cur- with the new name. sor button [ ] and select the destination Per- formance or Style Performance with the DIAL. TO SAVE TO A DIFFERENT PERFORMANCE 1. -
Page 151: Disk - Hard Disk - Scsi
.MID extension. The .MID exten- yle Groups (1-4) present on disk or Hard disk. sion is attached to the original SK760/880SE The DISK section of the SK760/880SE allows you SCSI: With the option, it is possible to connect Song name automatically. -
Page 152: The File Selector
File Selector will show the RAM directory listing all the Songs present in the SK760/880SE RAM memory. Empty locations are represented by a broken line. If you select a destination already occupied by a file, the existing file is replaced by the incoming one. -
Page 153: The General Disk Procedure
“UNTITLED” or other will be shown. he loading procedures are identical to those 2. Use the +/– Page/Bank button to choose sed for SK760/880SE Songs and Styles. 6. Select a Block and press ENTER to gain ac- which type of operation you want to per- he Blocks however show the «.WXS»... - Page 154 8. Press ENTER to confirm your choice. You will be prompted with “Are you sure?”. 9. Press ENTER again to execute the command, or ESCAPE to cancel the operation. With ENTER, the command is executed and a dialog window opens showing a message relating to the current operation.
-
Page 155: Load Operations
1. Insert the disk in the drive, press DISK and disk, Hard disk or SCSI. Loading MIDI Files into RAM automatically con- select GROUP USER STYLE from the main verts the files into SK760/880SE format Songs. Load page. The «Load MIDI File» procedure is almost iden- LOAD SINGLE tical to «Load Single Song». -
Page 156: Load Single Sound, Example
LOAD SINGLE REAL PERFORMANCE LOAD SINGLE SOUND (EXAMPLE) Loads a single Performance to any of the 64 lo- Use a disk known to contain a Sample to load to cations of the Performance Groups (1-8). The memory, or load from Hard Disk. For this proce- incoming Performances overwrite those in RAM. - Page 157 OAD SINGLE REAL PERFORMANCE LOAD SINGLE SOUND (EXAMPLE) LOAD GROUP In the display example of the previous page, the disk directory shows the presence of one oads a single Performance to any of the 64 lo- Use a disk known to contain a Sample to load to The Load Group command offers a quick way of Percussive Sample (GRV.bpm 106) with Pr.
- Page 158 LOAD GROUP USER STYLE PROCEDURE (EXAM- For example, Group 8 cannot be loaded to any other location in RAM other than Group 8. PLE) If you attempt to load to a destination other than Use a disk known to contain User Style Groups the correct one, a user message will inform you to load to memory, or load from the Hard Disk.
- Page 159 Press ENTER to confirm your choice. 4. Select the User Group that you wish to load LOAD ALL and its corresponding destination in RAM (1, Use «Load All» to load an entire set of file types You will be prompted with “Are you sure?”. 2, 3 or 4).
-
Page 160: Load Wx/Sx Songs And Styles
Load All User Style: loads up to 4 Groups of User Styles (including all associated User Style Performances). LOAD WX/SX SONGS AND STYLES SK760/880SE can load Songs and Styles from the following previous format disks: WX2, WX400, WX Expander, SX2, SX3 The loading procedures are identical to those used for SK760/880SE Songs and Styles. -
Page 161: Save Operations
Single and All operations only. Naturally, only one Block with the name “AUTOLOAD” The SK760/880SE RAM is backed by a recharge- can exist in a disk. he table below shows the valid commands for... - Page 162 ProgramChange number of the chosen destina- tion, therefore, if you save 19-2 SwOrgan to, say, Saves a SK760/880SE Song to disk (MS-Dos for- destination 25-16, the Sound will be shown with mat) as a MIDI File in order to exchange the song the new ProgramChange number on a future load with other instruments or computers.
- Page 163 SAVE MIDI FILE PROCEDURE (EXAMPLE) SAVE GROUP Press ENTER again to save the Performance 5. Move down to the “Perf” option with the cur- with the new name. sor button [ ] and select the destination Per- The Save Group command offers a quick way of 1.
- Page 164 SAVE GROUP STYLE PERFORMANCE (EXAMPLE) of your error with the following message: 1. Select GROUP STYLE PERFORMANCE from the main Save page. Press ESCAPE to close the user message and try again, this time selecting the correct destina- tion. 2. Press ENTER to enter the FILE SELECTOR and select the destination device (Floppy, Hard disk o SCSI).
- Page 165 ELAY (F2) 4. Select the Group file from the RAM directo- SAVE ALL Track 2: C3 to B3 ry and its destination. Track 3: C4 to B4 Use «Save All» to save an entire set of file types contained in RAM in a single step. Track 4: C5 to B5 Track 5: C6 to A8 This will give you a five part split where you have...
- Page 166 The Save All procedure offers the following pos- sibilities: Save All Song: saves up to 16 Songs; Save All Sound: saves an unspecified number of Ram-Sounds and RAM -Sounds (16 Groups); Save All Real Perf: saves up to 8 Groups of Performances;...
-
Page 167: Erase Operations
VELOCITY CURVE (F7) e current Performance for the action of the touch Erase operations ensitive keyboard. Tracks set to “Off” will not act to velocity changes. ssignable values: 0n, Off. Use the Erase command to cancel files no longer needed from a data storing device; Disk, Hard ODE/PRIORITY (F6) Disk or SCSI, or from RAM, to make room for other files. -
Page 168: Copy Operations
Copy operations Use the Copy command to copy a file from one In this case, pass to the source directory and, location to another within the same device, or from if necessary, select Floppy Disk (F1). the Hard Disk to floppy (bypassing the RAM) and vice versa, or from a SCSI device to Hard Disk or floppy and vice versa. - Page 169 To enable the recall of the Pedal/Pads param- Select LSB). This parameter does not re- eters, make sure the Padlock is open (unlocked). quire a setting to play an internal SK760/ The Pedals/Pads Lock remains in memory after 880SE sound. Range 1…128.
-
Page 170: Move Operations
Move operations Use the Move command to shift a file from one 3. Select the source and destination devices with location to another within the same device, or from soft buttons F1, F2, F3 or F4. the Hard Disk to floppy (bypassing the RAM) and In this case, select RAM as the device to work vice versa, or from a SCSI device to Hard Disk or floppy and vice versa. - Page 171 DALS ASSIGNMENT 6. Pass into the destination directory and se- THE CONTINUOUS PEDAL FUNCTIONS lect the destination. No effect Pitch Bend Applies Pitch Bend to the notes. The Pitch Bend sweeps from the maxi- mum negative to maximum positive setting of the Pitch setting in the Per- formance Controls menu.
-
Page 172: Utility
1. Insert a new floppy disk into the drive. search times even further. You can also use a formatted disk, provided SK760/880SE assigns a generic code name to that you are not interested in conserving its disks formatted with the Utility formatting proce- contents. -
Page 173: Hard Disk Utility
HARD DISK UTILITY HARD DISK CHECK/RECOVERY he tables i the Appendix list the available effect SPEED (ROTARY EFFECTS): Time required to pes. pass from slow to fast or vice versa. This procedure can restore a damaged Hard Disk he parameters shown in the display will depend to its original status. - Page 174 2. Select the Hard Disk Backup option and press Note: All SK760/880SE instruments leave the fac- ENTER to activate the function. tory with the Hard Disk Protection active. Selecting this function opens a second level...
- Page 175 EFFECTS TYPE (F1) HARD DISK RESTORE Effects Use the HARD DISK RESTORE function to load backup data from floppy disk back into the Hard hen you select the EFFECTS Edit button, the Disk. splay will show a sub-menu with two editors: •...
-
Page 176: Multicopy H.disk To Scsi
MULTICOPY H.DISK TO SCSI 5. Press EXECUTE to start the hard disk re- store process. This option allows you to copy more than one When the Hard Disk Restore has finished, a Block file at a time (a batch) from Hard Disk to a message is displayed saying: “Operation SCSI device of your choice. -
Page 177: Multicopy Options
ENTER to open the SCSI WARNING - Sending system exclusive data to dimension of the current list and shows the free SK760/880SE cancels all data of the same type cur- Drive selection window. space available at the destination. -
Page 178: Scsi Utility
This page offers a configuration of formatting options for periferal SCSI devices, depending on the current operating system running on your SK760/880SE. The following example shows one of the possible configurations. FAST ZIP 100/250 FORMAT This operation formats a 100 or 250 Megabyte Zip™... -
Page 179: Additional Disk Functions
Per- according to your needs. The dimensions of the same Block residing in rmance on the SK760/880SE and then tried to RAM and in disk can differ by a few kilobytes, Selecting the option opens the window where you... - Page 180 SEARCH RESOURCE (F4) SOUND SEARCH... (F7) This option appears on all second level pages of The Sound Search function appears in the third all Single File operations. The second level pages level directory displays for the following opera- are those that appear after confirming a File Se- tions: lector selection.
-
Page 181: Disk Handling Information
Before ejecting a disk, make sure that the disk Options: On, Off. potential sources of magnetic fields. Doing drive operating led is off and that the SK760/ 880SE display is not currently showing a “Load- so may render the disk unusable. - Page 182 • the maximum number of files in a Block can- head may need cleaning. This can be done us- not exceed the limit imposed by the SK760/ ing a good-quality fluid-type head cleaning kit for 880SE RAM. 3.5 inch (double-sided) disk drives. Do not use a •...
-
Page 183: Styles
Performance in edit are shown page 2.4. the left track column at all times, therefore you The SK760/880SE has 192 auto accompaniment an select your tracks without returning to the ROM Styles arranged in 12 Style Groups, each ulti Track list. -
Page 184: Tempo Lock
Style. HARMONY function of the «Edit Tracks» envi- ronment. When Single Touch Play is on, each SK760/ 880SE Style is associated to 8 Style Perform- Harmony can orchestrate your Style playing, ances which you can assign at any time before making simple one-note melodies sound as if they or during play. -
Page 185: Auto Chord And Fixed Chord Modes
RRANGE ON/OFF STYLE LOCK CHORD RECOGNITION MODES A Style Performance be programmed to change the keyboard sounds as well as the accompani- The Chord Recognition modes generate the au- hen you turn the instrument on for the first time, Thanks to the STYLE LOCK function, you can ment sounds, but the accompaniment patterns tomatic accompaniments of the Styles in various every time you select the GRAND PIANO Per-... -
Page 186: Dynamic Arrange
CHANGING THE SPLIT POINT chord is not recognized, the chord symbol is shown as the lowest note played followed by sev- The Split Point is: eral asterisks. For example: «C***** ». (a) the point that separates the Upper and Low- Note: In order for the chord to be recognized (and er keyboard sections in the Upper&Lower and the relative symbol to be shown on the display) -
Page 187: User Styles
WHAT IS A RIFF? e SK760/880SE Wave Library. The new User Styles -Sound is simultaneously saved to the A Riff is a musical motif capable of repetition (loop- K760/880SE Sound Library at the selected lo- ing). It can also be expressed as a “phrase” or ation. -
Page 188: Recording
RECORDING Recording a User Style is easy. 1. Press on of the USER Style buttons and se- lect a free location (User) to create a new Style. 5. Select the track, usually the Drum track first, that you want to record. Press the corresponding Soft button to place the track in Record mode (Record icon show- ing). -
Page 189: Restoring The User Styles Memory
If you’re requesting a sample from an exter- 11. When you have finished, press the RECORD er the external device or the SK760/880SE. It nal computer or sampler, you can specify a button to escape Record mode. -
Page 190: The Record View Page
REC RIFF... (F2) The Record View page Opens the SELECT RIFF dialog window where you can select a riff to record. The Record View page shows several parameters which you can set for your User Style before start- ing your recording or playback. Select the Variation, section and chord with the cursor buttons and press ENTER to confirm. -
Page 191: Time Signature
However, the Sam- as well as for the Minor and 7th chords. Several Determines the length of a riff expressed in meas- e is not actually changed in the SK760/880SE different solutions for each chord are provided ures (max 16). - Page 192 FREE MEMORY (CANNOT BE MODIFIED) The amount of memory remaining to record the riff. Each riff can occupy up to 30.000 bytes (30 kilobytes). If the RAM contains a large amount of data, a dialog window may appear showing the message «Memory full!»...
- Page 193 SCALE CONVERSION TABLES Cancelling assignments Cancelling samples These Scale Conversion tables refer to chord and bass patterns played in the key of C and show which notes are converted. The changes are expressed in semitones, therefore, if the note C shows a conver- EASSIGN (F5) DELETE (F3) sion of –2, the note is converted 2 semitones down (Bb).
- Page 194 Scale Converter active: C Major riff –> C minor riff min 1 accomp. –1 min 1 bass –1 min 2 accomp. –1 –1 min 2 bass –1 –1 min 3 accomp. –1 min 3 bass –1 min 4 accomp. –1 –1 min 4 bass –1...
-
Page 195: Edit Style
When this parameter is selected (shown in nega- signed samples become a part of a Waveform will be available. which you can then save to the SK760/880SE tive highlight), the UNDO function is enabled. NVERSION LIMITATIONS Undo cancels the last operation or series of op- Wave Library. -
Page 196: Edit Procedure 5. 14 F7
STYLE NAME (F8) EDIT PROCEDURE Changes the name of a Style. This function only 1. Press ST./SONG to enter «Edit Style». The applies to USER Styles; the names of the ROM main menu appears. Styles are permanent and cannot be modified. 2. - Page 197 the end of the riff. The time taken depends on the size of the Erase Loading samples sample. When loading has finished, the dis- play shows a situation similar to the example ERASE RIFF (F6) This editor cancels events. OAD (F1) below, with one or more samples which con- Here you can erase all the tracks of a Riff.
-
Page 198: Move
Copy Move Shifts events from one point to another within the Copies events from a track or from all the tracks. selected track. COPY TRACK (F5) PARAMETERS: Variation: Selects one of the 4 Style Variations. PARAMETERS: Only Variations that contain at least one recorded Copy to Style...: Selects the destination Style riff can be selected. - Page 199 Assignable values: depends of the length of the COPY STYLE (F8) SAMPLE LOADING METHODS he SK760/880SE can load new sound samples riff. The copy must not exceed the riff length. to memory which can then be edited and saved Samples can be loaded from disk, via MIDI from s new SK760/880SE sounds.
-
Page 200: Quantize
Note range from... to... : Sets the highest and Quantize lowest note range to quantize. To quantize a sin- gle percussive instrument of the Drum track, as- An auto-corrector of timing errors. sign the same note to the highest and lowest limit. For example, to quantize the snare (D2), set the NOTE ON QUANTIZE (F1) parameter to «Note range from D2 to D2». -
Page 201: Delete Measures
Riff and join with e keyboard. This becomes particularly evident lease phase) of the SK760/880SE Series, you inserted. The length of the Riff changes. the measures preceding the cancellation point. -
Page 202: Velocity
From locator... To locator...: Determines the Velocity start and end point of the part to be affected. It is possible to specify measure, beat and resolution. Modifies the key Velocity value. This parameter Assignable values: within the actual limits of the represents the key-strike velocity, or its intensity. -
Page 203: Transpose
Selects the Riff and Variation to edit. where you can select the destination of the pose a single percussive instrument of the Drum new Sound in the SK760/880SE Sound li- track, assign the same note to the highest and Use the standard name entry procedure (see brary. - Page 204 INS: (X) (F3) Event List track in edit Inserts the event specified in the “INS. TYPE” function at the current cursor position. To posi- tion the inserted event precisely, modify its locator (the parameters to the left of the «Status» col- umn).
- Page 205 EVENTS TABLE AND RELATVE PARAMETERS The Main Menu options STATUS VALUE 1 VALUE 2 VALUE 3 GATE AMPLE TRANSLATOR (F1) Import: opens a second level dialog window Note Note name Key On Velocity Key Off Velocity Note Length expressed as the where you can select the source and destination his gains access to the Sample Translator, ex- Sequencer resolution...
- Page 206 A1...A6 of Variation 2 and you want to mask A4, Mask A5 and A6 for Variation 1, A2 and A3 for Variation 2, program the first two lines as follows: The Mask function allows you to program the Ba- V1 = Off/Off/Off/A4/A5/A6 sic elements of two Variations (Var 2 and 4) in order to automatically obtain the Basic elements V2 = Off/A2/A3/Off/Off/Off...
-
Page 207: Song
Song alid for all Algorithms. In Dual situations, re- ENV AMOUNT DYN SENSITIVITY: Links the en- ardless of whether the Filters are connected in velope amount to key velocity variations. SONG PLAYBACK The SONG button allows you to select any eries or in parallel, there is only one pan enve- SONGS that you may already have loaded to Positive values increase the envelope amount by... - Page 208 JUKEBOX... (F1) 3. Start the playback with the PLAY button in the SEQUENCER. Recalls the Jukebox function (explained after- During the playback, the LED on the PLAY wards). button will be on and the song location point- er (LOC) in the top right hand corner of the OPTION...
-
Page 209: Play/Rec Mode
“Delay” parameter is ignored and the oscillation indicate the current status of the synchronizing starts immediately. MIDI clock: [i] = internal (SK760/880SE or [e] = external (external sequencer controlling the Positive and negative values indicate an opposed sequencer). The MIDI Clock can be programmed sense of vibration at the starting phase (upwards under EDIT MIDI/GENERAL SETTINGS. -
Page 210: Jukebox
START JUKEBOX This parameter sets the start measure and can The Jukebox function chains the songs of your only be modified when the Play mode is set to choice and plays them back as a ‘medley’ with a LOOP. With LOOP selected, the START param- single command. -
Page 211: Preload
PRELOAD ECUTE, (F8) to start the playback of the Juke- Pitch Envelope box list. The Preload function is a background loading facility which allows you to playback, by means alid for all Algorithms. of a single command, a list of Songs (or MIDI DYNAMIC RATE: Sensitivity of the Pitch Enve- he Dual options activate separate Pitch Enve- Files) contained in a disk or Hard disk, without... - Page 212 THE PRELOAD FUNCTIONS 5. You can fill the list in a single step using the «Select All” function (F7). Starting with the Time/Tempo display, press To replace a file inserted into the list by mis- PRELOAD to gain access to all the options avail- take, select the name to replace, then select able which you can select with the soft buttons the file that you want to insert and press EN-...
-
Page 213: Midi File Player
Reso- The Filter Cutoff Tracking curve allows you to vary ance applied with increased Aftertouch pres- SK760/880SE features a MIDI File player which the Cutoff Frequency across the keyboard, in SELECT ALL (F7) ure, negative values have the inverse effect. - Page 214 SEARCH S.M.F. (F7) The MIDI file starts to play directly from the source disk. Press STOP to stop the MIDI File playback This button open a Search window where you at any point. can specify the name or the first few letters of a The MIDI FILE PLAYER display offers several specific MIDI File, useful for searching on the options.
-
Page 215: Recording Songs
Balance Tracking allows you to vary the Bal- nce setting across the keyboard. THE QUICK REC METHOD SK760/880SE offers two principal Song record- ing methods: Quick Rec and Record. (N.B. See also page 1.42 of the Quick Guide). 1. Press SONG to open the «Songs» dialog QUICK REC RECORDING window and select a free location (User). -
Page 216: The Record Method
The Record method 1. Press the SONG button to open the Song Banks window. Here you can program a number of record- ing parameters before starting. Refer to the section entitled Time/Tempo on page 6.12. 2. Select an empty location (User). 5. - Page 217 MPLITUDE ENVELOPE TRACKING 10. When you have finished, stop the recording with BALANCE ENVELOPE TIME/TEMPO PAGE STOP. he tracking “curve” represents the change in the Valid for Dual 3 and Dual 4 Algorithms only. MODE... (F1) ompletion velocity of the Amplitude Envelope Note: Pressing STOP twice rewinds the Song back The Balance Envelope corresponds to a mixer Opens the «Record Mode»...
-
Page 218: Time Signature
PLAY/REC MODE Effect - To record the changes of the effects as- signed to the Performance and respective effect Recording and playback options for the Song. volume levels. These events are captured as Linear causes the Song to play or be recorded CC16, CC17, CC48, CC49 (see Appendix). -
Page 219: Quantize
MPLITUDE KEY ON AND KEY OFF ENVELOPES recording by using the DIAL. The events are Add Segm: Inserts a new segment immediately If the RAM already contains a large amount of captured in the Master Track, provided that the after the currently selected segment. A maximum data, a dialog window may appear showing the he Key On Envelope is a 10 segment curve appropriate option is active («Controls rec», dia-... -
Page 220: Edit Song
THE EDIT SONG OPTIONS Edit Song UNDO (F2) When this parameter is selected (shown in nega- After recording a Song using either the RECORD tive highlight), the UNDO function is enabled. method or the QUICK REC method, it can be Undo cancels the last operation or series of op- modified using the functions of the EDIT SONG erations carried out. -
Page 221: Edit Procedure
Sound - Volume Tracking: add 3 segments 4. Select the LEVEL parameter with the down SK760/880SE file selector. This name does not 6. Confirm the operation with ENTER. Rotate the DIAL to select the Point that you ( ) cursor arrow and rotate the DIAL to set appear when the disk is read by a computer. -
Page 222: Erase
Erase Cancels the events from a single track or from all tracks. SOFT BUTTONS F3 ... F8 Use the Soft buttons F1...F8 to select the track from which events will be cancelled. Depending on the type of track selected, the following pa- rameters may or may not appear. - Page 223 OLUME TRACKING (F2) NOTE RANGE FROM... TO... POINT, KEY, LEVEL The highest and lowest limits of the note range alid for all Algorithms. Tracking allows you to The Tracking curve can be defined using the 3 to cancel. To cancel a single percussive instru- etermine how the volume varies across the key- display parameters, Point, Key and Level.
-
Page 224: Move
Move Shifts events from one point of the selected track to another. PARAMETERS FROM LOCATOR... TO LOCATOR... Determines the start and end point of the part to move. It is possible to specify the measure, beat and resolution (tick). Assignable values: within the limits of the Song. It is not possible to specify a point before the start or after the end of the Song. -
Page 225: Copy
epending on the waveform, values above the SCALE MODE: Selects a scale (temperament). Copy efault starting point may cause the sample to Assignable values: 0, 1, 2. art at a later point, removing some or all of its Value 0 corresponds to Equal temperament; Copies events from a single track or from all tack. - Page 226 COPY PARAMETERS FROM LOCATOR... TO LOCATOR... Determines the start measure and end measure of the part to copy. Bars and Resolution cannot COPY MODE be specified. Determines the copy mode. «Merge» unites the Assignable values: within the limits of the Song. copied events to those already present at the des- It is not possible to specify a measure after the tination.
-
Page 227: Quantize
HE ALGORITHMS SINGLE Quantize ayers can also be of different types - single aveform or dual waveform. Each layer is elabo- An auto-corrector of timing errors. Includes tri- ted by an associated “Algorithm” of synthesis. A Volume, Amplitude envelope, Filter and Pitch envelope for plet and swing quantize values. - Page 228 QUANTIZE PARAMETERS NOTE OFF QUANTIZATION Determines the Note Off quantize value. Same as Note On. NOTE ON QUANTIZATION Determines the Note On quantize values. NOTE RANGE FROM... TO... Determines the highest and lowest note range to Value Quantization quantize. To quantize a single percussive instru- ment of the Drum track, assign the same note to the highest and lowest limit.
-
Page 229: Insert Measures
MPORARY ESCAPE FROM EDIT SOUND THE EDIT SOUND MAIN MENU Insert measures hanks to multitasking, you can temporarily es- The configuration of the Editors changes accord- ape Edit Sound by pressing the SYNTH button ing to the Algorithm selected, but the basic func- Inserts a specified number of measures. -
Page 230: Delete Measures
Delete measures Cancels a specified number of measures. The measures directly after the point of cancellation shift towards the beginning of the Song and join with the measures preceding the cancellation point. Hint: To cancel measures without shifting those af- ter the deletion point, use the Erase events function. -
Page 231: Velocity
Press ENTER to save the new file to the se- SAVE THE MODIFICATIONS TO A PERFORMANCE Velocity lected location. 1. Press F8 («Store...»). The «Store» dialog The new Drumkit/SoundPatch is now availa- window appears: Modifies the key Velocity. This parameter repre- ble as a RAM-Sound. -
Page 232: Transpose
Transpose Transposition of a recorded track by semitones. Also available are options to transpose the Chords and Music tracks of the Score of a song. This allows you to see the score in the correctly transposed status after a transpose operation. TRACK (F6) Transposition of a Song track by semitones. -
Page 233: Microscope
Event List track in edit HE SOUND PATCH OPTIONS EXPAND... (F3) Microscope Extends the programmed parameters of the note ATCH NOTE... (F1) in edit to a specified keyboard zone. The Microscope allows you to modify every sin- elects the note to place in edit by playing it on 1. - Page 234 EVENTS TABLE AND RELATED PARAMETERS STATUS VALUE 1 VALUE 2 VALUE 3 GATE Note Note name Key On Velocity Key Off Velocity Note Length [C–1 … G9] [1 … 127] [1 … 127] expressed as the Sequencer resolution (q=192) [0 … 63323] Program Program change Bank Select MSB...
- Page 235 DIT SOUND PATCH INS: (X) (F3) SELECTING/MUTING THE DYNAMIC LAYER DELETE (F6) Drumkits and Sound Patches have two dynamic Inserts the event specified in the “INS. TYPE” Cancels the selected event. «Edit Performance S Patch», you can program Layers. Normally, Sound Patches exploit both function at the current cursor position.
-
Page 236: Master Track
Initial parameters Event List Master Track The Master Track editor allows you to modify the events recorded in the Master track which con- tains events pertaining to the general controls of the Song. This Track records changes in Perform- ance, general Volume (Pedal Volume), Effect Changes, Effect Volume, Scale, Tempo changes, initial Time Signature and the Score Key. - Page 237 PROGRAMMABLE EVENTS AND PARAMETERS es, subtracting them from or adding them to the Band-pass - Allows the entire band to pass. STATUS VALUE ormal decay of the Sound. Modifies the phase of the Sound and is use- TEMPO Metronomic Tempo. If the The «Status»...
- Page 238 INS TYPE... (F4) The events are inserted with the following de- fault parameter values: Recalls a dialog window from which you can se- lect the type of event to insert manually with the «Ins(x)» function. Status Value Tempo Performance Volume Eff.
-
Page 239: The Score Track
Edit Perf Sound/Sound Patch Score & Edit Score Score Controls THE SCORE TRACK he term “Sound” refers to all the SK760/880SE In the «Score» page, press F8 to open the «Score ounds that are not Drumkits, nor contain a dy- Control» dialog window. -
Page 240: Video Controls
The «octave lower» symbol. The displayed note or notes ON: the external monitor displays exactly what is are in reality one octave shown on the SK760/880SE display. lower. OFF: the monitor displays only the Score parts The «note too high» symbol. -
Page 241: How To Enter Edit Score
INSERTING CHORD SYMBOLS Selecting Sounds Edit Score Chord symbols correspond to the MIDI ‘Text’ event. These are loaded and saved with MIDI HOW TO ENTER EDIT SCORE dividual Sounds are recalled using the buttons If the Display Hold (D.HOLD) function is on files. -
Page 242: Inserting Lyrics
INSERTING LYRICS and F8 («>>1/16»). To escape and return to the note, press the Lyrics corresponds to the MIDI Lyrics event. This soft button E («Previous event»). To escape type of event is loaded and saved with MIDI files. and pass to the next note press the soft but- Lyrics can be inserted into a new Song in the ton D («Next event»). - Page 243 THE «EDIT SCORE» PAGE To escape and return to the note, press the soft button E («Previous event»). To escape and pass to the next note press the soft but- CHORDS (F5) ton D («Next event»). Takes the cursor to the Chords line (above the At this point, «Next event»...
- Page 244 << 1/16 (H) or by playing a different chord. See above. Takes the cursor to the previous six- Play the chords below the Split Point. teenth END PHRASE (F) GET SCORE... (F4) This command inserts an ‘End phrase’ symbol Creates a score from the selected track from (‘I’) at the end of a verse.
-
Page 245: Vocal Processor
(voice, guitar, synth, etc.). A low impedance microphone with a stand- Your SK760/880SE is fitted with the Audio Vocal ard jack connector on the output end of the Processor card which provides effect processing cable. -
Page 246: Activate The Vocal Processor
ACTIVATE THE VOCAL PROCESSOR WORKING WITH THE VOCAL PROCESSOR The Vocal Processor operates only if both the Select the Vocal Processor editor from the main Mic/Line On/Off and Vocal Processor On/Off op- Edit Effects menu and press ENTER to gain ac- tions in Edit General are enabled. - Page 247 Press ENTER to confirm the command and VOCODER (F6) The four voices can be selected from the six avail- open the File Selector. able: VOCODER mode operates both in Style mode Voice 1 : Extreme Lower octave as well as Song mode. The display shows the directories of the RAM Voice 2 : Close Lower octave memory and the floppy disk, or Hard Disk.
- Page 248 UNISON (F7) UNISON mode operates both in Style mode as well as Song mode. In this mode, the Vocal Proc- essor automatically produces the same note as the input note, doubling up to 4 Voices. Each voice is doubled with a slight detune effect above and below the input note according to the following scale.
- Page 249 LAY ALONG WITH YOUR RECORDED SONG THE EDIT PAGE PARAMETERS VOICE SET (F4) LFO WAVE In this page, it is possible to recall up to 16 Cus- Song playback mode, you can play along with your recorded Song by activating one or more tracks tom configurations.
- Page 250 VOCAL ON/OFF AND EQUALIZER Additional changes In «Edit General», the Mic/Line editor includes an Equalizer which prompts the following window In addition to the above, the following additional when activated: modifications are implemented by the Vocal Proc- essor: • High gain •...
-
Page 251: Unison
SPECIAL MIDI CONTROLLERS ASSOCIATED TO THE LOADING MIDI FILES CONTAINING A VOCODER Record a Song (Quick rec.) VOCAL PROCESSOR TRACK To control the Vocal Processor via MIDI, the fol- When a MIDI File containing a Vocoder track is K760/880SE allows you to record a simple multi-track Song using the QUICK REC recording method lowing special MIDI controllers (Common Chan- hen using existing Styles. - Page 252 ○ ○ ○ ○ ○ ○ ○ ○ ○ ○ ○ ○ ○ ○ ○ ○ ○ ○ ○ ○ ○ ○ 7•8 Vocal Processor...
-
Page 253: Edit General
Songs, or Styles or Performances that you wish to load into the instru- ent’s RAM memory, or you wish to load data from the SK760/880SE Hard Disk, here’s how to do it. DESCRIPTION OF THE MAIN MENU PAGE... -
Page 254: Keyboard Sensitivity
General Controls Tuning/Scale MASTER PITCH KEYBOARD SENSITIVITY Fine tunes the instrument as a whole in fractions Determines the response of the keyboard to ve- of 1/64 of a semitone. locity changes. Assignable values: -63...+63. Assignable values: Soft, Medium soft, Medium, Medium hard, Hard. - Page 255 OCTAVE UP (F5) The final configuration can then be copied to se- Using the Midi File Player lected octaves of the keyboard, or to all octaves. Selects the next highest octave to edit. EXAMPLE - TO PROGRAM A SCALE BY FINE TUNING ONE he MIDI FILE PLAYER plays MIDI files directly OCTAVE DOWN (F6) OR MORE NOTES:...
-
Page 256: Pedalboard/Computer
Pedalboard/Computer Note Function Note Function Start/Stop Tempo – Intro Tempo + The PEDALBOARD and COMPUTER connec- tors cannot operate at the same time. Selecting Ending Var 1 one renders the other inoperative. Fill < Var 2 To activate one of the two connectors, select the Fill = Var 3 corresponding option («Pedalboard»... -
Page 257: Date & Time
ANSPOSING TRACKS BY OCTAVES COMPUTER MODE (F8) OPTIONS Date & Time Options to communicate with a computer ny track, if selected, can be instantly transposed octave steps, within the range ±5 octaves. Sets the internal calendar and clock. Select the track you wish to transpose. SET DATE (F1) Sets the date in edit. -
Page 258: Display Controls
The M. VOL slider regulates the sum DISPLAY MODE of the internal sound generator output level Offers the choice of viewing black text on a white (SK760/880SE sounds and signal of the MIC/ background (Positive) or white texts on a black LINE IN inputs). background (Negative). - Page 259 Determines the position of the input signal within If you are saving to the Style Perform- nal SK760/880SE sounds. the stereo panorama. ances, select a Style Group in the “Store to”...
-
Page 260: System Info
The Edit General Main Menu Options BATTERY & RE..(F1) SYSTEM INFO (F2) This option shows the date and time of the latest This option displays information regarding the release of the operating system and the charge presence or absence of the various accessories level of the rechargeable backing battery. -
Page 261: Restore All
This operation is particularly useful to operation with ENTER or cancel with ESCAPE. Select one of the 8 Drawbar Performances restore the original SK760/880SE sound set (over and play on the keyboard. 1,000 sounds) after loading a sound configura-... - Page 262 ○ ○ ○ ○ ○ ○ ○ ○ ○ ○ ○ ○ ○ ○ ○ ○ ○ ○ ○ ○ ○ ○ 8•10 Reference Guide...
-
Page 263: Help
ELECT A STYLE PERFORMANCE Help hen Single Touch Play is on, each SK760/ 80SE Style is associated to 8 Style Perform- nces which you can assign at any time before during play. The Style Performances are per- HOW TO USE HELP SK760/880SE incorporates an on-line-help sys- anent and cannot be destroyed. -
Page 264: Panic
Use ESCAPE to close the current selection win- dow without deactivating D. HOLD. Use Display Hold when selecting Sounds, Styles, Performances and Songs SK760/880SE sends the “all notes off” and “reset all controllers” messages to all connect- ed MIDI devices. ○... -
Page 265: Appendix
ART A STYLE WITH TAP TEMPO Appendix 5. With the Style accompaniment off, beat time on the TAP TEMPO button. • Sound tables The tempo is set according to the timing of the last two taps, the relative Tempo value is •... - Page 266 ROM-Sounds Bank PIANO group Piano1 PianoMk1 PickPiano PianoStage InharPiano Grand Piano Piano2 PianoW2 Pianoctave PianoTine TonePiano Piano3 E.G.Piano1 E.G.Piano2 AtkPiano1 ArcoPiano E. Grand 1 HonkyTonk DetPiano Western AtkPiano2 E.Piano1 ThinRhodx E.Piano4 RhodxFilt E.PianoMk E.PianoX FM Pro Rhodex 1 E.Piano2 E.Piano3 E.Piano5 E.PianoSft DetuneE.P.
- Page 267 Press one of the VAR buttons shown off. ROM-Sounds Note how the accompaniment pattern Bank changes to a different Variation. PIANO group The VAR buttons control the Style Variations. Each button recalls a different version of the same accompaniment. Each Variation in- cludes different patterns for the Basic, Intro, Fill and Ending sections.
- Page 268 ROM-Sounds Bank BASS group AcoustcBs1 AcoustcBs2 AcousticBs3 Dyn.AcoBs HarmAcBs FingerdBs2 DanceBass TheChopper FingeredBs Dyn.Fingrd Dyn.Bass1 Dyn.Baxx HarmAcBs2 Fretless3 FingerdBs3 LowPassed PickBass Dyn.Bass2 PckBass2 PkBsMute HarmElBs WedgeBass SubBass SerialBass Fretless AcidBass1 Flanged Fretless2 RezoBass SynBass5 WowBass ContraSynB SlapBass1 Dyn.Bass3 SlapSynBs PckBass3 ClickBass ToneBass FingAndSlp...
- Page 269 ROM-Sounds Play with Auto Accompaniment Styles Bank BASS group K760/880SE has 192 auto accompaniment Vang.Bass ST_AcousBs yles with four Variations four Intros, four Fills DanceFing Vang.Bass2 ST_FngrdBs nd four Endings for each Style. You can also SoftBass ST_PickBs2 ad up to 32 disk based User Styles of your ST_Fretls1 hoice into the 4 User Style banks available.
- Page 270 ROM-Sounds Bank REED group Soprano Soprano2 SoprFilter AltoSax Safe Sax SoftSax SaxNoise SoftFilt LiscioSax TenorSax OctaveSax TenFilter TouchSax BaritonSax BaritDet BariFilter BaritnSax2 Oboe OboeChiff OboeFilter SaxQuartet EnglisHorn EngHorn2 HornFilter TenSaxSolo Bassoon Bassoon2 BassoonFlt BreathSopr Clarinet ClarSolo ClarFilter LiscioClar FLUTE group Piccolo HardFlute1 HardFlute2...
- Page 271 UTOMATIC LOADING OF SONGS AT POWER UP CrossWires ToneZone4 Maj7Stack FatAttak2 Alf's Lead your SK760/880SE doesn’t have any Songs SYNTH PAD group th lyrics in memory, it is possible to load a disk- IcePad1 IcePad2 Alf's Pad ased Block of data (including Song data) auto-...
- Page 272 ROM-Sounds Bank SYN SFX group IceRain Noiseres BigRoom Submarin Impact Mech-Lp Yowww HitThePipe Soundtrack MoonWind Slope Ekoendls SynRain Mech-Wv Stars StabSynth Crystal Wind SynLead2 Jets SeqSnap SeqCook Babbling MetalWork Atmosphere Arp26000 GlockAthm Smak ColorBlast BounSync Synkro DigiDrops Brightness WithGas PopUp OnOff Spect1 Atomic...
- Page 273 Select the «ALL DEMO» option shown in the ROM-Sounds current selection window to chain all demos Bank displayed (Song or Style). SYN SFX group BDHOUSE1 BDHOUSE2 BDELECT1 BDJAZZ BDROOM1 BDSTD1 BDSTD2 BDSTD3 Playback starts automatically from the first BDTEKNO BDORCH BDPOWER ACOUST_KIK BD_KIK...
- Page 274 Drumkits ○ ○ ○ ○ ○ ○ ○ ○ ○ ○ ○ ○ ○ ○ ○ ○ ○ ○ ○ ○ ○ ○ A•10 Appendix...
- Page 275 HE SOLO BUTTON - ISOLATE A SINGLE SOUND FROM THE REST Drumkits you are playing in a situation where two or more ounds are displayed, before activating a muted ound you may want to listen to it alone to de- de whether to activate it or not.
- Page 276 Drumkits ○ ○ ○ ○ ○ ○ ○ ○ ○ ○ ○ ○ ○ ○ ○ ○ ○ ○ ○ ○ ○ ○ A•12 Appendix...
- Page 277 SING THE KEYPAD TO SELECT SOUNDS Drumkits he SK760/880SE Sounds are identified by two numbers: the ProgramChange (PC) and the BankSelect SB number (ControlChange 00 [CC00]). You can select a Sound by specifying the absolute values C and CC numbers) on the numeric keypad.
- Page 278 Drumkits ○ ○ ○ ○ ○ ○ ○ ○ ○ ○ ○ ○ ○ ○ ○ ○ ○ ○ ○ ○ ○ ○ A•14 Appendix...
- Page 279 Press Upper 2 (E/F) TWICE to select and Drumkits activate the Upper 2 section and play a key above note F#3. You will hear two sounds for each single note played on the right hand. Activating Upper 2 introduces a second Sound (SlowString) layered with the first.
- Page 280 Drumkits ○ ○ ○ ○ ○ ○ ○ ○ ○ ○ ○ ○ ○ ○ ○ ○ ○ ○ ○ ○ ○ ○ A•16 Appendix...
- Page 281 Drumkits Select sounds K760/880SE has a vast selection of instrument ounds, including orchestral, percussion and con- mporary musical instruments, organized in 16 ound Groups, each consisting of 16 Banks of p to 16 Sounds in every bank. Press a SOUND GROUPS button (PIANO GROUP button in the example).
- Page 282 Drumkits ○ ○ ○ ○ ○ ○ ○ ○ ○ ○ ○ ○ ○ ○ ○ ○ ○ ○ ○ ○ ○ ○ A•18 Appendix...
- Page 283 LAY WITH HEADPHONES Drumkits Plug a set of headphones into the PHONES 1 jack. The headphones jack panel is located on the left side of the instrument, under the key- board. Inserting the headphones plug into the PHONES 1 jack excludes the internal speakers to allow you to play in total silence without disturbing others in the same room.
- Page 284 ROM-Styles CC00 PC Style CC00 PC Style CC00 PC Style CC00 PC Style ROCK Bank 2 POP Bank 1 COUNTRY Bank 2 8 BEAT Bank 1 8Beat 1 Rock 3 70' Disco 120 TheatreOrg 8Beat 2 Rock 4 Disco 01 121 Org.March 8Beat 3 Shuffle...
- Page 285 IALOG WINDOWS Styles/Style Performances User Styles/Songs everal types of dialog window exist; generally an option requires selection or one or more parameters CC00 PC Style CC00 PC Style-Perf. † CC00 PC User Style CC00 PC Song † quire modifications and confirmation with ENTER or a soft button. Some examples follow. LATIN 1 Bank 1 USER 1...
- Page 286 Performances (Real) Effects CC00 PC Performances† CC00 PC Performances† CC16 DSP A/B select † CC16 DSP A/B select † Group 1 Group 5 Eff1 (Reverbs GrpA) Eff2 (Mod. GrpA) Eff1 (Reverbs GrpB) Eff2 (Mod. GrpB) GrandPiano Mantovani CC48 Rev Eff type select † CC48 Mod.
- Page 287 32 tracks. MARI_GM HH_OPEN1 TRIAN_LO BARCHIME THUMBASS FINGBELL VOICESA ometimes, a track is not assigned to a SK760/880SE Sound, but it controls an expander connected to MARIM HH_PEDAL TRIAN_SH BOTTLE HARMELBS CELLO ACOUSGTR e MIDI OUT. In this case, “MIDI” is shown as well as ProgramChange and BankSelect numbers...
- Page 288 Wavetables KALI FORM1 DIGI2 PRPSAWJM BD_KIK(1) SD_HEAVY4(2) PHONEWAVE(1) GM_DIST ; FORM3 FARFIS PULSE_JM BD_ROCK(2) SD_P70(1) REVERSEBD1(1) CRUNCH FORM4 FINGBMS RDPHAS BD_Z1_HHC(2) SD_ROCK(2) REVERSEBD2(1) STRATO FORM5 FISA REZOBASS BD_Z1_LAYH(2) SD_SH1(1) REVERSEBD3(1) CRUNCH FORM7 FMISH SEQ_TONE BD_Z1_LAYL(2) SD_SH2(1) REVERSHRT1(1) MUTEDCGT FORM1 SEQSNP BD_Z2(1) SD_SH3(1) REVERSHRT2(1)
- Page 289 LPHANUMERIC ENTRY RECOGNIZED CONTROL CHANGE MES- CONTROL CHANGE ON TRACKS SAGES (MIDI CONTROLLERS) name writing situations (Performance name, Song name, etc.), the keyboard activates as a source of CC00,32 Bank change. phanumerical data where each note of the central zone of the keyboard corresponds to a letter, sym- A ControlChange message activates a Controlller, CC01 Modulation.
- Page 290 ○ ○ ○ ○ ○ ○ ○ ○ ○ ○ ○ ○ ○ ○ ○ ○ ○ ○ ○ ○ ○ ○ A•26 Appendix...
- Page 291 EAR PANEL (CONNECTIONS) 7. Output: (Left, Right, 1, 2). For Mono repro- SCSI port. duction, use either the RIGHT or LEFT jack. Pedals: Damper, 1, 2, Volume. The auxiliary outputs emit “dry” sounds (i.e. Pedalboard port. with no effects). Computer port (serial connector for direct 8.
- Page 292 SK760/880 Special Edition System Exclusive Implementation UNIVERSAL NON-REAL TIME SYSTEM MESSAGES SAMPLE DUMP STANDARD The transfer of data relating to the samples contained in the sounds of the instrument ias based on the standard protocol, called SDS (Sample Dump Standard). The formats of the various commands available are as follows:...
-
Page 293: Master Volume
DEVICE INQUIRY GENERAL SAFETY INSTRUCTIONS To be able to identify a MIDI device, the following two messages are utilized; the first used for the inquiry: ower source INQUIRY MESSAGE: • Be sure that your local AC mains voltage matches the voltage specified on the name plate before System Exclusive Message status Non-Real Time extension connecting to the mains. - Page 294 EXAMPLES OF EXCLUSIVE MESSAGES AND CHECKSUM CALCULATIONS (relating to the structure of the Address Data Interface) < Example 1 > : The setting for the 1st Effect Type of Group A on Hall 3 using the common channel 7, the format 0 (7 bit data value) and without checksum.
- Page 295 AM RESET BATTERY DISCHARGED MESSAGE (2)manufacturer ID=GENERAL MUSIC (3)Command ID(3=RealTime) + device ID (1=2° device ID) If the instrument has been left turned off for a (4)Set Subfunction you want to recall the factory settings, you can (5)Model ID (0=WK4) long period of time, the battery will slowly dis- set the backed RAM.
- Page 296 00 04 01 00 00 01 Footswitch[2] 0=Normally closed, 1=open 0=NormClosd 00 04 02 00 00 01 Footswitch[3] 0=Normally closed, 1=open 0=NormClosd (GENERAL) DISPLAY CONTROLS Address(H) Size (H) Range(H) Parameter Description Default 00 05 00 00 00 01 01ChordLanguage 0 = English, 1 = Italiano 0=English 00 05 01 00 00 01...
-
Page 297: Preset Parameters
00 00 01 ped_ftsw[2] xx 12 02 00 00 01 ped_ftsw[3] PRESET PARAMETERS PORTANT INFORMATION EFFECTS A The SK760/880SE should contain the following items from the factory: Address(H) Size (H) Range(H) Parameter Description Default a) Instrument with power cord; 00 13 00... - Page 298 00 13 09 00 00 01 par#3_2 00 13 0A 00 00 01 Eff2ToEff1 0 -> 127 EFFECTS B Address(H) Size (H) Range(H) Parameter Description Default 00 14 00 00 00 01 Eff_Type1 0 -> 23 2= Hall3 00 14 01 00 00 01 eff_vol1 0 ->...
- Page 299 Sample-RAM (D-RAM) LOCAL ( xx = CHANNEL = 0 - 1F ) ound generation Address(H) Size (H) Range(H) SK760/880SE is fitted with 8 megabytes of RAM Parameter Description Default ased on sampled waveforms (Wave), modified xx 1B 00 00 00 01...
- Page 300 TRACK SELECT Address(H) Size (H) Range(H) Parameter Description Default 00 20 00 00 00 01 Selected 00 31 SYSTEM OBJECT ACCESS MESSAGES SYSTEM RESOURCE ACCESS Messages relating to the RESOURCE ACCESS allow the transfer via MIDI of the same basic resources of the instrument that can be exported to disk, and which are: ∑...
- Page 301 Vocal Processor 7. 1 Subfunction ID = FILE DATA Model ID, 00 = WK4 The Vocal Processor features 7. 1 checksum, format 3 (octect) Connections 7. 1 packet number (00:7fH) Activate the Vocal Processor 7. 2 <data> 15 octects Working with the Vocal Processor 7. 2 checksum Chord 7.
- Page 302 EXAMPLES of Resource Request message compositions < Example 1 > : System Setup request: 2F 50 (2) (3) (1)Exclusive Status (2)manufacturer ID=GENERAL MUSIC (3)Command ID(5=RESOURCE ACCESS) + device ID (0=1° device ID) (4)Subfunction ID (3=RESOURCE REQUEST) (5)Model ID (0=WK4) (6)c=0(No checksum),f=0(7 bit data value) (7)Resource ID (0=Setup) (8)not used for Setup Req (7)EOX...
- Page 303 4 - Pianos WS400 RPro1 RPro2 RPprox Ps2500 PS1500 About the SK760/880SE ROM Styles 5. 1 5 - Home Organs Flash Styles 5. 1 6 - Classic Organs Selecting and playing the Styles 5. 1 7 - Accessories AS-1 The functions which control the Styles 5. 1 (TAB.1)
- Page 304 The procedure is as follows: from each bytes of the 7 in sequence, the least significan bit is extracted and saved in an eighth byte, therefore the same byte is shifted to the right; finally all is transmitted in the order. For example: 7 real bytes = 0x11 0x22 0x33 0x44 0x55 0x66 0x77 then shifting to the right and memorizing in a byte the “extracted”...
- Page 305 EFERENCE GUIDE Types of Resources The resources can be classified as follows: Sounds 2. 1 GMX Banks 1, 2 and 3 2. 1 Resource ID: system SETUP SOUNDS Banks 4 - 16 2. 1 GLOBAL PRESETS Drum Kits and Drum Sounds 2. 1 STYLE PRESETS Selecting Sounds 2.
- Page 306 ushort date; // total 2 bytes struct F_HEAD { unsigned char name[8],ext[3],flags; // 12 TIME_INF time; // 2 DATE_INF date; // 2 long length; // 4 // total 20 bytes For completion, the description of the file inside the HEADER.hdr refers instead to a more complex stucture: struct F_HEADER { F_HEAD char...
- Page 307 APPENDIX C MIDI FILTERS conversion table Description Description Filter off 77 S.C. (Undef.) Prg. change 78 S.C. (Undef.) Pitch 79 S.C. (Undef.) Mono touch 80 Gen. purp. c.5 Poly touch 81 Gen. purp. c.6 0 Bank sel 82 Gen. purp. c.7 1 Modulation 83 Gen.
- Page 308 ○ ○ ○ ○ ○ ○ ○ ○ ○ ○ ○ ○ ○ ○ ○ ○ ○ ○ ○ ○ ○ ○ A•44 Appendix...
-
Page 309: Mask, Edit Style
Index Delete measures, Edit Song 6. 24 The lightning flash with arrowhead symbol, within an equilateral triangle, is intended to alert the user to the Delete measures, Edit Style 5. 19 CAUTION presence of uninsulated “dangerous voltage” within the Detune, Edit Preset 3. 19 product’s enclosure that may be of sufficient magnitude RISK OF ELECTRIC SHOCK Dialog windows 1. -
Page 310: Lyrics On Display
Format Hard Disk 4. 23 Load All, Disk 4. 9 Format MS-DOS disk 4. 22 Load Group, Disk 4. 7 Formatting Floppy disks 4. 22 Load Group User Style, example 4. 8 Forward >> button, Song 6. 2 Load Operations, Disk 4. 5 Front Panel 1. - Page 311 PC1 (Computer) 8. 5 PC2 (Computer) 8. 5 Sample Editing, Sample Translator 2. 51 Ped./Pad 3. 18 Sample loading methods 2. 44 Pedalbass 8. 4 Sample MIDI Dump 2. 54 Pedalboard 8. 4 Sample Translator 2. 44 Pedalchord 8. 4 Sample Translator, entering 2.
- Page 312 Styles 5. 1 Styles, selection and play 1. 24 Switch action pedals 3. 15 Switch sounds 2. 8 System Exclusive, Edit Preset 3. 7 System Exclusive Impolmentation A. 28 Tabelle Styles A. 21 Tap Tempo 1. 28 Tempo Lock 5. 2 Time Signature, Song 6.