Meade ETX-70AT Instruction Manual
Astro telescope with autostar hand controller
Hide thumbs
Also See for ETX-70AT:
- Brochure (20 pages) ,
- Repair manual (14 pages) ,
- Instruction manual (313 pages)

Related Manuals for Meade ETX-70AT


Summary of Contents for Meade ETX-70AT
- Page 1 Instruction Manual ETX-60AT Astro Telescope with Autostar Hand Controller ETX-70AT Astro Telescope with Autostar Hand Controller Meade Instruments Corporation...
-
Page 2: Table Of Contents
If you are anxious to use your telescope for the first time, read the QUICK-START GUIDE on page 3. ® The name “Meade,” the Meade logo, and “ETX” are trade- marks registered with the U.S. Patent Office and in principal countries throughout the world. All rights reserved. -
Page 3: Quick-Start Guide
(6, 9, Fig. 1). See page 5 for more information. Remove the dust cover from the end of the telescope tube. Place the MA 25mm eyepiece (A) into the eyepiece holder on the telescope and tighten the attachment thumb- screw (B) to a "firm feel"... -
Page 4: Telescope Features
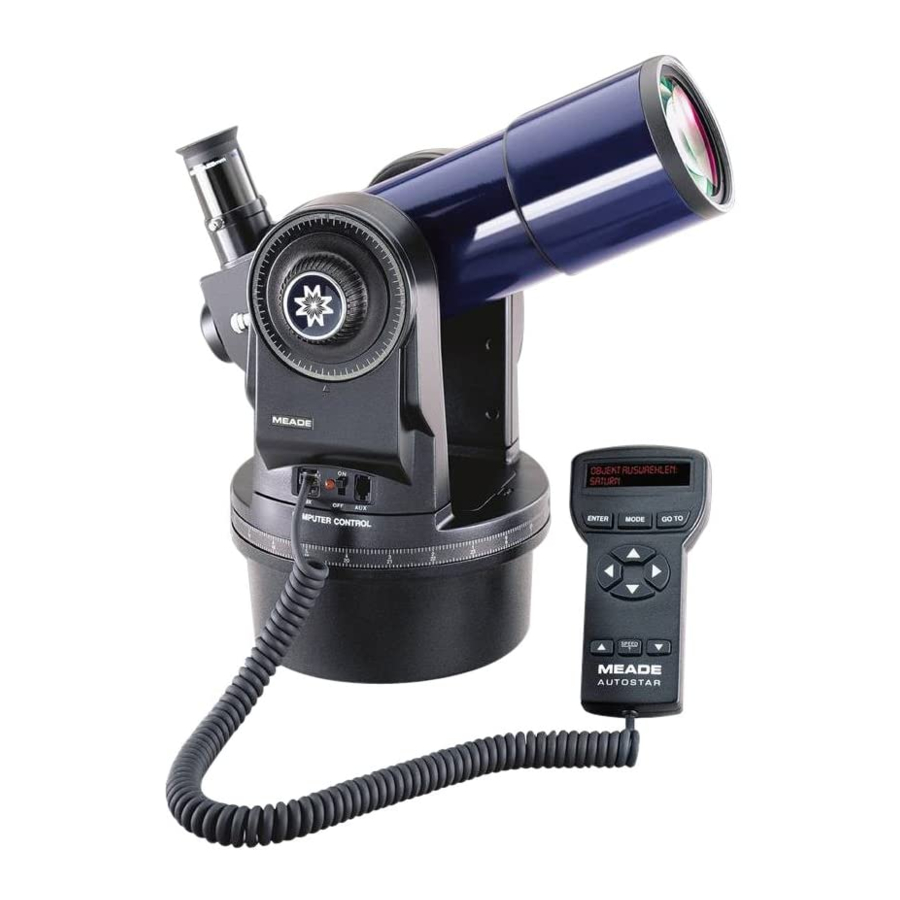
TELESCOPE FEATURES (on top of base, (opposite side) not shown) (not shown) Fig. 1: The ETX-60AT and ETX-70AT Telescope. 4 Telescope Features... - Page 5 800 million miles. Focus beyond the Solar System and observe majestic nebulae, ancient star clusters, remote galaxies, and even stars recently discovered to have planets orbiting about them. Meade ETX telescopes are instruments fully capable of growing with your interest and are ideal for both the casual observer and serious astronomer alike.
- Page 6 Autostar handbox and to the telescope’s motor drive. C. ON/OFF Switch - Turns the Computer Control Panel and Autostar ON or OFF. D. Auxiliary (AUX) Port - Provides connection for current and future Meade acces- sories, such as the Meade “AstroFinder Software with Cable Connector Kit,” which allows you to control your ETX from a PC.
-
Page 7: Autostar Features
Tour the Cosmos with Just the Push of a Button Control of the ETX-60AT and the ETX-70AT is through the operation of the standard-equipment #494 Autostar. Nearly all functions of the telescope are accomplished with just a few pushes of Autostar’s buttons. - Page 8 GO TO. Pressing GO TO again resumes the slew to the object. the term "Alt/Az." Arrow Keys - Slew the telescope in a specific direction (up, down, left, and right), at any Alt/Az is frequently one of nine different speeds. Speed selection is explained in “SLEW SPEEDS,” page 22.
- Page 9 Speed/? Key - Pressing the Speed/? key cycles through the nine slew speeds that move the telescope. Each time the Speed/? key is pressed briefly, the current slew speed is shown for about two seconds on the display. See “SLEW SPEEDS,” page 22.
-
Page 10: Getting Started
Do not mix battery types. If these precautions are not followed, batteries may explode, catch fire, or leak. Improperly installed batteries void your Meade warranty. Always remove the batteries if they are not to be used for a long period of time. -
Page 11: Manual Operation Without Using Autostar
Set the telescope on a table top or tripod, loosen the horizontal and vertical locks (6 and 9, Fig. 1), and turn the telescope towards the object you wish to observe. Sight along the top of the tube until you find the object. -
Page 12: Moving Through Autostar's Menus
Scroll keys to cycle through the database of cities. Press ENTER when the correct city appears on screen. 11. The next screen asks for the telescope model. Use the Scroll keys to locate ETX-60 or ETX-70. Press ENTER to select the appropriate model. -
Page 13: Autostar Operation
“INITIALIZING AUTOSTAR,” page 12, before proceeding with this exercise. OBJECT Select from over 1400 database objects and press GO TO to move the telescope automatically to the object and place it in the telescopic field of view. SETUP Select Item:... -
Page 14: Easy Two-Star Alignment
During the Easy Alignment procedure, Autostar slews the telescope to a first alignment North star. The user is asked to verify that the telescope is pointed at the chosen star and then to cen- ter the star in the eyepiece. The process is repeated with a second star to complete the align- ment. -
Page 15: Observing Exercises
After performing the Easy Two-Star Alignment procedure, the motor drive begins operating and NOTE: the telescope is aligned for a night of viewing. Objects in the eyepiece should maintain their Keep in mind that position even though the Earth is rotating beneath the stars. -
Page 16: Autostar Menus
GO TO once to change the second line to the name of the brightest star in the constel- lation. Press GO TO a second time to slew the telescope to that star. Use the Scroll keys to cycle through the list of stars in the constellation, from brightest to dimmest. -
Page 17: Event Menu
Identify is an exciting feature for an observer who wants to scan the night sky and start explor- ing. After the telescope has been properly aligned, use the Autostar Arrow keys to move about in the sky. Then follow this procedure: IMPORTANT NOTE: Only use the Arrow keys to move the telescope during the Identify procedure. -
Page 18: Glossary Menu
OFF. When ON is displayed, press ENTER to activate the alarm. When the alarm time arrives, Autostar beeps. Press ENTER to deactivate the alarm. Eyepiece Calc calculates information about an eyepiece for the specific telescope to which Autostar is connected. -
Page 19: Setup Menu
Park Scope is designed for a telescope that is not moved between observing sessions. Align the telescope one time, then use this function to park the telescope. Next time it is powered up, enter the correct date and time - no alignment is required. Pressing ENTER causes the tele- scope to move to its pre-determined Park position. - Page 20 Autostar first slews to a nearby bright star and displays "ENTER to Sync." Center the star in the eyepiece, then press ENTER. At that point the telescope has a high precision alignment to that part of the sky and it then slews to the object that was originally requested.
-
Page 21: Advanced Features
The term "Alt/Az." is frequently used to refer to the Altitude or horizontal and Azimuth or verti- cal movements of the ETX-60AT and ETX-70AT telescopes. Other terms to describe a tele- scope's movement may be used with telescopes that have mounts different from the ETX-60AT and ETX-70AT. -
Page 22: Two-Star Alt/Az Alignment
Fig. 14: Alt/Az Two-Star Press ENTER. The telescope slews to the star for alignment. Use the Arrow keys to move Alignment. the telescope until the star is visible and centered in the eyepiece. -
Page 23: Observing A Satellite
Software and Cable Connector Kit. See “OPTIONAL ACCESSORIES,” page 25. Photography with the ETX Photography through the ETX-60AT or ETX-70AT requires the addition of the optional #64ST T–Adapter. See “OPTIONAL ACCESSORIES,” page 25. With the #64ST T-Adapter attached to the telescope (Fig. 17), through-the-telescope photography is possible with any 35mm camera body with a removable lens. - Page 24 Photography of the Moon and planets through the ETX-60AT or ETX-70AT can be espe- cially gratifying, but points 1 through 4 should be particularly noted in this case. Lunar or planetary photography requires that the telescope be Polar aligned.
-
Page 25: Optional Accessories
Example: By itself the PL 5mm eyepiece yields a power of 70X with the ETX-70AT; used with the #128 3x Barlow Lens, this eyepiece yields a power of 210X. Insert either Barlow Lens into the telescope's eyepiece holder, followed by an eyepiece. - Page 26 Moon and planets. The #3200 Set includes light yellow, very light red, very light blue, and neutral density filters. Each filter threads into the barrels of all Meade MA, PL, and WA eyepieces and is packed in a separate plastic case for secure storage.
-
Page 27: Maintenance And Servicing
MAINTENANCE AND SERVICING General Maintenance The ETX-60AT and ETX-70AT telescopes are precision optical instruments designed to yield a lifetime of rewarding applications. Given the care and respect due any precision instrument, your telescope will rarely require factory servicing or maintenance. Maintenance guidelines include: Avoid cleaning the telescope’s optics. -
Page 28: Troubleshooting
Troubleshooting The following suggestions may be helpful with operation of the ETX-60AT or ETX-70AT. The power indicator light on the telescope does not come on or there is no response when pressing Autostar Arrow keys: Verify that the Computer Control Panel power switch (10C, Fig. 1) is in the ON position. -
Page 29: Meade Customer Service
Customer Service hours are 8:30 AM to 4:30 PM, Pacific Time, Monday through Friday. In the unlike- ly event that the ETX requires factory servicing or repairs, write or call the Meade Customer Service Department first, before returning the telescope to the factory, giving full particulars as to the nature of the problem, as well as your name, address, and daytime telephone number. - Page 30 Slow-Motion Controls ...Electric, 9 speed, both axes Hemispheres of operation ...North and South, switchable Bearings: Materials Telescope dimensions ...40.4cm x 18cm x 22cm (15.9” x 7” x 9”) Telescope net weight: (telescope only, without batteries, eyepieces) ETX-60AT ...2.6 kg (5.8 lbs.) ETX-70AT ...2.7 kg (5.9 lbs.)
-
Page 31: Appendix A: Equatorial (Polar) Alignment
#883 Deluxe Field Tripod (Fig. 26). In order to Polar align your telescope, it is essential to have an understanding of how and where to locate celestial objects as they move across the sky. This section provides a basic introduc- tion to the terminology of Polar-aligned astronomy, and includes instructions for finding the celestial pole and for finding objects in the night sky using Declination and Right Ascension. - Page 32 IMPORTANT NOTE: For almost all astronomical observing requirements, approximate set- tings of the telescope’s latitude and Polar axis are acceptable. Do not allow undue attention to precise Polar Alignment of the telescope to interfere with your basic enjoyment of the instru- ment.
-
Page 33: Appendix B: Using Autostar To Enter Coordinates
Check out your local library, computer store or bookstore for astronomy books, CD Roms, or magazines (such as Sky & Telescope or Astronomy), to find coordinates of celestial objects. A list of the coordinates of 14 common stars are printed at the end of this manual;... -
Page 34: Appendix C: Helpful Charts
APPENDIX C: HELPFUL CHARTS Latitude Chart for Major Cities of the World To aid in the Polar Alignment procedure (see page 30), latitudes of major cities around the world are listed below. To determine the latitude of an observing site not listed on the chart, locate the city closest to your site. Then follow the procedure below: Northern Hemisphere observers (N): If the site is over 70 miles (110 km) North of the listed city, add one degree for every 70 miles. -
Page 35: Appendix D: Training The Drive
APPENDIX D: TRAINING THE DRIVE Train the telescope motors using Autostar. Perform this procedure after RESET or if you are experiencing any point- ing accuracy problems. Figure 30 depicts the complete Drive Training procedure. NOTE: Use a terrestrial object, such as a telephone pole or lamp post, to train the drive. Complete this exercise once every 3 to 6 months to maintain the highest level of telescope pointing accuracy. -
Page 36: Appendix E: Initialization Example
During the procedure, information, such as the current time and date, observation location, and telescope model, is entered into Autostar. Autostar uses this information to precisely calculate the location of celestial objects (such as stars and planets) and how to move your telescope correctly for various operations. -
Page 37: Basic Astronomy
In the early 17th century, Italian Scientist Galileo, using a crude telescope considerably small- er than the ETX-60AT or ETX-70AT, turned it to look towards the sky instead of distant trees and mountains. What he saw, and what he realized about what he saw, forever changed the way mankind thought of the universe. - Page 38 The major division in Saturn's rings, Fig. 34: Saturn has called the Cassini Division, is occasionally visible through the ETX-60AT or ETX-70AT. Titan, the most extensive ring structure in our the largest of Saturn’s 18 moons can also be seen as a bright, star-like object near the planet.
-
Page 39: Roadmap To The Stars
A Roadmap to the Stars The night sky is filled with wonder and intrigue. You too, can enjoy exploring the universe simply by following a few pointers on a roadmap to the stars. First, find the Big Dipper which is part of the constellation Ursa Major. - Page 40 ONE YEAR from the date of original purchase in the U.S.A. and Canada. Meade will repair or replace a product, or part thereof, found by Meade to be defective, provided the defective part is returned to Meade, freight-prepaid, with proof of purchase.