Sign In
Upload
Manuals
Brands
Kenwood Manuals
Transceiver
TS-890S
Kenwood TS-890S Manuals
Manuals and User Guides for Kenwood TS-890S. We have
7
Kenwood TS-890S manuals available for free PDF download: Instruction Manual, In-Depth Manual, Command Reference Manual, Setting Manual, Manual, Service Bulletin
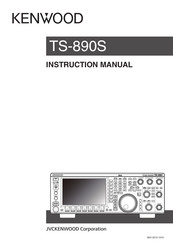
Kenwood TS-890S Instruction Manual (196 pages)
Brand:
Kenwood
| Category:
Transceiver
| Size: 20.43 MB
Table of Contents
Before Using
3
Table of Contents
7
Installation and Connection
13
Installation
13
Antenna Installation and Connection
13
Ground Connection
13
Installation of Lightning Arrestors
13
Connection of Regulated DC Power Supply
13
Using the Auxiliary Support
13
Torque Adjustment with Tuning Control
14
Connection of Accessories (Front Panel)
14
Connection of Accessories (Rear Panel)
15
PC Connection for Data Communication
16
Virtual COM Port
17
Terminal Descriptions
18
Names and Functions of Parts
21
Front Panel
21
Panel Key Behavior
21
List of Function Key Behaviors (Standard Mode Screen)
24
Rear Panel
27
Microphone (Optional)
28
Screen
29
Menu
33
Menu Operation
33
Calling up a Menu
33
Calling up a Sub-Menu
33
Advanced Menu
33
Common Menu Screen Operations
34
Exiting the Menu
34
Switching between the CONFIG a and CONFIG B Operating Environments
34
Menu Items
35
Basic Operations
45
Turning ON/OFF the Power
45
Screen Display Settings
45
Changing the Background Color
45
Changing the Type of Function Key Display
45
Changing the Frequency Display Font Type
45
Dimmer
46
Switching the Brightness Level
46
Adjusting the Dimmer Level
46
Adjusting AF Gain
46
Adjusting RF Gain
46
Adjusting the Squelch Level
46
Selecting VFO A/ B
47
Selecting an Operating Band
47
Changing the Number of Band Memories
47
Selecting an Operating Mode
48
SSB (LSB-USB) Mode
48
CW/ CW-R Mode
48
FSK/ FSK-R/ PSK/ PSK-R Mode
48
FM/ am Mode
48
DATA Mode
48
Auto Mode
48
Turning ON/OFF Auto Mode
48
Configuring Auto Mode Frequency Points
49
Adjustment of Frequencies
49
Adjustment Using the Tuning Control
49
Adjustment Using the Microphone Key
49
FINE Tuning
49
Configuring the Number of Steps Per Revolution of the Tuning Control
49
Configuring the Fast Forward Rate of the Tuning Control
49
Configuring the Sensitivity for Starting the Fast Forward Operation
49
Frequency Adjustment Using the [MULTI/CH] Control
50
Rounding the Frequency
50
Configuring the Frequency Step Size of the [MULTI/CH] Control
50
Switching the am Broadcast Frequency in 9 Khz Steps
50
Adjusting Frequency in Mhz Steps
50
Configuring the Frequency Step Size in Mhz
50
Direct Input of Frequency Value
50
Frequency Input History
51
Frequency Lock
51
Selecting the Frequency Lock Function Behavior
51
Transmission
52
Audio Transmission
52
CW Transmission
52
Adjusting Microphone Gain
52
Adjusting TX Output Power
52
Fine Adjustment of TX Output Power
52
TX Output Power Limiter
53
Turning ON/OFF TX Output Power Limiter
53
Configuring the TX Output Power Limiter
53
Meter
53
Changing the Meter Type
53
Changing the Meter Type from the Menu
53
Changing the Meter Type Via Touchscreen Operation
53
Switching between TX Meters
53
FM Mode S-Meter Sensitivity
54
Analog Meter Response
54
Meter with Peak Hold
54
S Meter Scale
54
TX Meter (Digital)
54
Switching the Antenna
54
RX Antenna
54
Drive Output (DRV)
55
Turning ON/OFF Drive Output
55
Adjusting the Drive Output Level
55
Built-In Antenna Tuner
55
Impedance Matching with the Antenna
55
Preset
56
Holding Transmission at the End of Antenna Tuning
56
Switching Antenna Tuner Behavior During Reception
56
Configuring the Built-In Antenna Tuner Behavior for each Band
56
Connecting the External Antenna Tuner AT-300
56
Communicating Aids
57
Split Operation
57
Direct Input of Frequency Difference Specified by DX Station
57
Turning the Tuning Control to Search for a TX Frequency
57
F Display
57
Changing the Split Frequency Using the [RIT/XIT] Control
57
Configuring the Band Direct Key During Split Operation
58
TF-SET (Setting the TX Frequency)
58
Agc
58
Switching the AGC Time Constant
59
Adjusting the AGC Time Constant Preset Value
59
Agc off
59
AGC Quick Recovery
59
RX Equalizer
60
Turning ON/OFF RX Equalizer
60
Selecting an RX Equalizer Characteristic
60
Adjusting the Equalizer Characteristics
60
Copying Equalizer Data
61
Saving Equalizer Data
61
Reading Equalizer Data
61
Preamplifier
62
RX Monitor
62
SWL (BCL) Mode
62
Band Switching in the SWL Mode (VFO Mode)
62
Transmission in Data Mode
63
Transmission Via PTT Switch, SS Terminal and SEND
63
Transmission Via DATA PTT or DATA SEND
63
Rit/Xit
63
RIT (Receiver Incremental Tuning)
63
RIT Shift
63
XIT (Transmitter Incremental Tuning)
63
XIT Shift
63
Adjusting the Carrier Level
64
Operation in CW Mode
64
CW Break-In
64
Turning ON/OFF Break-In
64
Adjusting the Break-In Mode and Break-In Delay Time
64
Adjusting the Sidetone and Pitch Frequency
65
Adjusting the Sidetone Volume
65
CW Rise Time
65
Auto Zero-In (CW Auto Tune)
65
CW BFO Sideband
65
CW Automatic Transmission from SSB Mode
65
Frequency Offset When Shifting from SSB to CW Mode
65
Encoding/Decoding Morse Code
66
Displaying the CW Communication Screen
66
Operating the CW Communication Screen
66
Indicator Displays
66
Adjusting the Decode Threshold Level
67
Decode Filter
67
Transmitting Character Strings Via USB Keyboard Operation
67
Encoding Character Strings Using the CW Message Memory
68
Paddle Operation on CW Communication Screen
68
Paddle Operation When the Character String Buffer Is Empty
68
Paddle Operation During Encoding of Character Strings in the Character String Buffer
68
Saving CW Communication Logs
68
Electronic Keyer
69
Selecting the PADDLE Jack Behavior
69
Selecting the KEY Jack Behavior
69
Operation Mode of the Electronic Keyer
69
Reversing Dot and Dash
69
MIC Paddle Mode
69
Adjusting the Keying Speed
69
Changing the Weighting
70
Weight Ratio Reverse
70
CW Message Memory
70
Switching the Method of Registering CW Messages
70
Registering CW Messages Via Text Input
70
Registering CW Messages Via Paddle Operation
71
Contest Number
71
Configuring the Starting Contest Number (Text Input Only)
71
Selecting a Method for Sending out Contest Number (Text Input Only)
72
Selecting a Channel for Counting up the Contest Numbers (Text Input Only)
72
Decrementing the Contest Number (Text Input Only)
72
Playing/Transmitting CW Messages
72
Repeat Playback of CW Messages
72
Configuring the Repeat Playback Interval
73
Interrupt Keying
73
Deleting a CW Message
73
RTTY Operation
73
Displaying the RTTY Communication Screen
73
Switching between the FFT Scope and X-Y Scope Display
73
Operating the RTTY Encode/Decode Screen
74
Indicator Displays
74
Saving RTTY Communication Logs
74
Adjusting the RTTY Decode Threshold Level
74
FFT Scope/X-Y Scope Display Setting
74
FFT Scope Waveform Averaging
74
Selecting a Waterfall Display Type
75
Tracking Speed/Density Level of X-Y Scope
75
Transmitting Character Strings Using USB Keyboard
75
Transmitting the Input Character String Immediately
75
Temporarily Placing Character Strings in the Character String Buffer before Transmission
75
RTTY Message Memory
76
Registering RTTY Messages
76
Configuring Auto TX/RX for the RTTY Message Memory
76
Transmitting Character Strings from the RTTY Message Memory
77
Settings Related to RTTY Encode/Decode
77
Enabling Decode UOS (Unshift on Space)
77
Newline Code Setting
77
Diddle Operation
77
Encode UOS
77
Sending a Newline Code at the Start or End of a Transmission
77
RTTY Parameters
77
Configuring the Mark Frequency
77
Configuring the RTTY Shift Width
77
Frequency Reverse in RTTY Mode
78
Operating RTTY (FSK) Using an External Device
78
When Connecting to a PC (Using the USB Port)
78
When Connecting to Other External Devices (Using the ACC 2 Connector)
78
RTTY (FSK) Keying Polarity Setting
78
Audio Peak Filter
78
PSK Operation
78
Displaying the PSK Communication Screen
78
Switching between the FFT Scope and Vectorscope Display
78
Operating the PSK Communication Screen
79
Indicator Displays
79
Saving PSK Communication Logs
79
Adjusting the PSK Decode Threshold Level
79
FFT Scope/Vectorscope Display Setting
80
FFT Scope Waveform Averaging
80
Selecting a Waterfall Display Type
80
Vectorscope
80
AFC (Automatic Frequency Control)
80
Configuring the AFC Tuning Range
80
Net
80
Switching between BPSK and QPSK
80
Switching between PSK31 and PSK63
81
Transmitting Character Strings from USB Keyboard
81
Transmitting the Input Character String Immediately
81
Temporarily Placing Character Strings in the Character String Buffer before Transmission
81
PSK Message Memory
82
Registering Messages
82
Configuring Auto TX/RX for the PSK Message Memory
82
Transmitting Character Strings from the PSK Message Memory
83
Settings Related to PSK
83
Configuring the PSK Tone Frequency
83
Reversing the Direction of Phase Change in the QPSK Mode
83
PSK Operation Using a PC
83
Communication Log
83
Selecting a Log File Format
83
Displaying a Time Stamp
84
Selecting a Time Stamp Type
84
Selecting a Clock Type
84
Editing the Communication Log File
84
Operation in FM Mode
84
Adjusting Microphone Gain During Operation in FM Mode
84
Operation in Narrow FM Mode
85
Operating the FM Repeater
85
Configuring the Tone Signal
85
Selecting a Tone
85
Configuring the Tone Frequency
85
Tone Frequency Scan
85
CTCSS Operation
86
Selecting CTCSS
86
Configuring the CTCSS Frequency
86
CTCSS Frequency Scan
86
Cross Tone
86
Selecting Cross Tone
86
Configuring the TX/RX Tones
86
Rejecting Interference
87
Attenuator
87
Switching the RX Filter Band Characteristics
87
Switching the RX Filter (A, B, C)
87
Configuring the Selectable Types of RX Filters
87
Filter Scope
87
Configuring the RX Filter
88
Selecting a Roofing Filter
88
Switching the if Filter Shape
88
Switching the AF Filter Type
88
Configuring the Behavior of the HI/SHIFT and LO/WIDTH Controls (SSB/SSB-DATA Only)
89
Changing the Cutoff Frequency
89
Changing the Passband Width and Shift Amount
90
Preset Passband Characteristics
91
Audio Peak Filter in the CW Mode
91
Turning ON/OFF Audio Peak Filter
91
Switching the Passband Characteristics
91
Shifting the Passband Width
91
Configuring the Peak Gain
92
Audio Peak Filter in the FSK Mode
92
Noise Blanker
92
Turning ON/OFF Noise Blanker 1/2
92
Adjusting the NB1 Level
92
Nb2
93
Configuring the NB2 Effect Level (Type A)/ NB2 Pulse Sensitivity Level (Type B)
93
Configuring the Blanking Duration (Type B Only)
93
Configuring the NB2 Attenuation Level (Type B Only)
93
Notch Filter
94
Turning ON/OFF Notch Filter
94
Switching the Notch Filter Bandwidth
94
Noise Reduction
94
Turning ON/OFF Noise Reduction
94
Configuring the NR1 Effect Level
95
Configuring the NR2 Correlation Time
95
Beat Canceler
95
Turning ON/OFF Beat Canceler
95
DSP Monitor
95
Assigning DSP Monitor to PF Key
95
Expanding the Passband Width Using DSP Monitor
95
Scope Functions
97
Bandscope
97
Displaying the Bandscope
97
Switching the Bandscope Display Type
97
Adjusting the Reference Level
98
Switching the Bandscope Attenuator
98
Configuring the Speed of Waterfall Drop
98
Waterfall Display During Tuning (Center Mode)
98
Reduced Bandscope Display
98
Switching the Scope Display Mode
99
Switching the Display Frequency Span
99
Marker Shift
99
Shifting the Marker
99
Changing the Shift Position of Marker Shift
99
Expand
100
Scope Range of each Band (Fixed Mode)
100
Switching the Scope Range
100
Configuring the Scope Range
100
Marker Centering (Fixed Mode)
101
Notification on Exceeding the Lower or Upper Limit (Fixed Mode)
101
Selecting Relative or Absolute Frequency Display for the Grid (Center Mode)
101
Displaying Tuning Assist Line (SSB Only)
101
Configuring the Gradation of the Waterfall
101
Touchscreen Tuning
102
Turning ON/OFF Touchscreen Tuning
102
Correction Steps for Touchscreen Tuning
102
Turning ON/OFF Step Correction
102
TX/RX Frequency Marker Display
102
Registering Frequency Marker
102
Deleting a Registered Frequency
103
Turning ON/OFF Marker Function
103
Displaying the Maximum Value in the Waveform
103
Turning ON/OFF Maximum Value Display
103
Configuring the Hold Type
103
Pausing the Waveform Display
103
Averaging of Spectrum Scope Waveform
103
Displaying the TX Signal Waveform
103
Audio Scope
104
Displaying the Audio Scope
104
Switching the Audio Scope Display Type
104
Switching the Spectrum Scope Attenuator
104
Switching the Display Frequency Span of the Spectrum Scope
104
Switching the Oscilloscope Level
104
Switching the Sweep Time
104
Pausing the Audio Scope
104
Transmit Functions
105
Configuration of the Input Path of TX Audio
105
Switching the Audio Source Input
105
VOX (Voice-Operated Transmit)
105
Turing ON/OFF VOX Function
105
Selecting Audio Source Input for Data VOX
106
Adjusting VOX Gain
106
Adjusting the Anti VOX Gain Level
106
Adjusting VOX Delay Time
107
VOX Voice Delay
107
TX Monitor
107
Adjusting the TX Monitor Level
107
Speech Processor
108
Turning ON/OFF Speech Processor
108
Configuring the Speech Processor Input Level
108
Configuring the Speech Processor Output Level
108
Configuring the Speech Processor Effect
108
TX Filter
109
Changing the TX Filter Bandwidth
109
Configuring the Low Cutoff Frequency in the SSB/AM Mode
109
Configuring the High Cutoff Frequency in the SSB/AM Mode
109
Configuring the Low Cutoff Frequency in the SSB-DATA/AM-DATA Mode
109
Configuring the High Cutoff Frequency in the SSB-DATA/AM-DATA Mode
109
Displaying the Filter Scope During Transmission
109
TX Equalizer
109
Turning ON/OFF TX Equalizer
109
Selecting a Frequency Characteristic for the TX Equalizer
110
Adjusting the TX Equalizer
110
Copying the TX Equalizer Settings
110
Saving the TX Equalizer Settings
111
Reading the TX Equalizer Settings
111
TX Tuning
112
Adjusting TX Output Power During TX Tuning
112
Timeout Timer (TOT)
112
ID Beep
112
Memory Channels
113
Displaying the Memory Channel List
113
Registering Operating Frequency Data to a Memory Channel
114
Configuring the Operating Data through Direct Frequency Entry
114
Memory Channel Mode
114
Operating in the Memory Channel Mode
114
Direct Entry of a Memory Channel Number
114
Changing the Memory Channel Temporarily
115
Changing the Frequency Temporarily
115
Copying the Operating Data of a Memory Channel
115
Memory Shift (Memory → VFO)
115
Selecting a Memory Channel and Copying to VFO
115
Copying Data from the Memory Channel List Screen to VFO
115
Channel-To-Channel Copying
115
Configuring the Program Scan Frequency Range
116
Erasing Memory Channels
116
Registering a Memory Channel Name
116
Quick Memory Channels
117
Registering a Quick Memory Channel
117
Calling up a Quick Memory Channel
117
Configuring the Number of Quick Memory Channels
117
Erasing a Quick Memory Channel
117
Memory Shift (Quick Memory → VFO)
118
10 Scan
119
Program Scan
119
Starting the Program Scan (VFO Scan)
119
Configuring the Program Scan (VFO Scan) Frequency Range
119
Switching the Scan Speed
120
Program Slow Scan
120
Turning ON/OFF Program Slow Scan
120
Configuring the Frequency Points for Program Slow Scan
120
Configuring the Segment for Program Slow Scan
121
Scan Hold
121
Memory Scan
121
Performing Memory Scan
121
Configuring All-Channel Scan and Group Scan
121
Memory Channel Lockout
122
Quick Memory Scan
122
Configuring the Conditions for Resuming Scan
122
11 Usb/File Management
123
Managing Different File Types
123
Usb/File Management Menu
124
Configuring the Destination for Saving Files
124
Saving Settings Data
124
Reading Settings Data
125
Changing the Name of Files Stored in the Built-In Memory
126
Copying Files to a PC
126
Deleting Files (Built-In Memory)
127
Formatting a USB Flash Drive
127
Copying Files to a USB Flash Drive
127
Safely Removing the USB Flash Drive
128
12 Voice Message/Audio File
129
Recording/Playing a Voice Message
129
Recording a Voice Message
129
Registering a Name for a Voice Message
130
Playing Back a Voice Message
130
Adjusting the Playback Volume
130
Sending a Voice Message
131
Deleting a Voice Message
131
Configuring the Time Interval for Repeated Transmission
131
Recording/Playing Voice Communication
131
Manual Recording
131
Full-Time Recording
132
Configuring the Maximum Duration for Full-Time Recording
132
Saving Full-Time Recording Audio
132
Audio Recording in Tandem with Squelch
132
Quick Playback
132
Adjusting the Playback Volume
132
Audio Recording File Screen
132
Playing Back an Audio File
133
Renaming an Audio File
134
Deleting an Audio File
134
Voice Guidance 13
135
Adjusting the Voice Guidance Volume
135
Adjusting the Voice Guidance Speed
135
Configuring the Voice Guidance Language
135
Auto Voice Guidance
135
Voice 1
136
"Voice2
146
"Voice3
146
14 Clock Display/Timer
147
Configuring Date and Time
147
Displaying the Clock Menu Screen
147
Configuring the Local Clock Date
147
Configuring the Local Clock Time
147
Configuring the Local Clock Time Zone
147
Configuring the Auxiliary Clock Time Zone
148
Registering an Auxiliary Clock Identifier
148
Configuring the Date Display Format
148
Configuring the Clock Display
148
Clock Correction Using NTP (Network Time Protocol)
148
Displaying the Auto Correction Configuration Screen
148
Configuring the NTP Server Address
149
Turning ON/OFF Auto Clock Correction
149
Correcting the Date and Time Manually
149
Timer
150
Configuring the Program Timer
150
Pausing Program Timer Operation
152
Sleep Timer
152
Configuring the Sleep Timer
152
Pausing the Sleep Timer
152
APO (Automatic Power Off)
152
15 Network/Kns Operation
153
Lan
153
Configuring the IP Address
153
Viewing the MAC Address
154
KNS Operation
154
Configuring for KNS Operation
155
LAN Connection Settings
155
Administrator Settings
155
Built-In Voip Function
156
Audio Input/Output Level of Built-In Voip
156
Built-In Voip Jitter Absorption Buffer
156
Prohibition of Remote Volume Control
156
KNS Communication Log
157
KNS User Registration
157
KNS Users List
157
Registering User Information
157
Editing User Information
158
Deleting a User
158
Remote Operation by Registered User
158
Session Time
158
KNS Welcome Message
158
16 Other Functions
159
Configuring the Power-On Message
159
Configuring the Screen Saver
159
Configuring the Screen Saver Type
159
Saving Images for Use by Type 3 Screen Saver
159
Configuring the Time for Launching the Screen Saver
159
Configuring the Displayed Screen Saver Text
160
Configuring the Long-Press Behavior of Keys
160
Configuring the Beep Volume
160
PF Keys (Programmable Function Keys)
160
Assigning Functions to PF Keys (Front Panel)
160
Assigning Functions to PF Keys (Microphone)
160
Assigning Functions to the PF Keys (KEYPAD Jack)
161
List of Assignable Functions
161
PC Control
163
Configuring the COM/USB (Rear Panel) Baud Rate
163
Configuring the USB Keyboard
163
Sending Message from the USB Keyboard
163
Selecting a USB Keyboard Language
163
Configuring the Time for Activating Key Repeat
163
Configuring the Key Repeat Speed
163
Saving a Screen Shot
164
Configuring Output to an External Meter
164
Configuring the Output Signal Format of the External Meter
164
Configuring the External Meter Output Level
164
External Monitor Output
165
Configuring the External Monitor Resolution
165
Configuring Audio Input/Output
165
Configuring the USB Connector Input/Output Signal
165
Configuring the Audio Signal Input Level
165
Configuring the Audio Signal Output Level
165
Configuring the ACC 2 Connector Input/Output Signal
165
Configuring the TX Monitor Level for External Audio Output
165
Configuring Audio Mixing for the External Audio Output Connector
165
Switching the Reference Signal
166
Switching the CTCSS Mute Operation
166
Configuring the SQL Control Signal
166
Configuring the Logic of PSQ
166
Configuring the PSQ Output Conditions
166
Switching the COM Connector Signal
166
Split Transfer
167
Connection
167
Split Transfer a
167
Configuration
167
Operation
168
Muting the Sub-Receiver
168
Split Transfer B
168
TX Inhibit
169
Packet Cluster Tuning
169
Connection
169
Receiving Packet Cluster Data
169
Control of External Devices
170
TX Inhibit in Busy State (When Squelch Is Open)
170
Reversing the PKS Signal Polarity
170
USB Keying
170
Decoded Character Output
170
Turning ON/OFF Decoded Character Output
170
Configuring the Baud Rate of the Virtual COM (Enhanced) Connector
170
Controlling the Linear Amplifier
171
TL-922 Connection
171
General Linear Amplifier Connection
171
Linear Amplifier Menu Screen
172
Turning ON/OFF Linear Amplifier
172
Linear Amplifier TX Control
172
Turning ON/OFF Linear Amplifier TX Delay
172
Linear Amplifier TX Delay Time
172
Linear Amplifier Relay Control
172
External ALC Voltage of Linear Amplifier
172
Operating the Transverter/Exciter
173
Connecting to a Transverter
173
Turning off Power down During Transverter Operation
173
Displaying the Operating Frequency Configured for the Transverter
173
Configuring the Operating Frequency of the Transverter
173
Antenna Output for External Receivers
174
Emergency Call (K Type Only)
174
Crossband Repeater
174
Connection
174
Operation
175
Sky Command System II
175
Sky Command System II Diagram
175
Preparation
175
Starting Sky Command System II Operation
176
TS-890S + TH-D7A/ TH-D72(A/E)/ TM-D700A/ TM-D710/G(A/E)/ TM-V71A + RC-D710 (Transporter) Setup
176
17 Maintenance and Adjustment
177
Reset
177
Firmware Update
177
Firmware Version Check
177
Calibration of Internal Reference Frequency
178
Adjusting the Touchscreen
179
Adjusting the Display Color
179
Replacing the Fuse
180
Replacing the Fuse of the External Antenna Tuner
180
Replacing the Fuse of the DC Power Cable
180
18 Troubleshooting
181
General Information
181
Service
181
Service Note
181
Cleaning
181
18 Troubleshooting
182
Problems Related to Reception and Transmission
182
Problems Related to Data Communication, PC and Network
185
Troubles Related to Recording and Playback
188
Error Messages
189
Warning Messages
191
Internal Beats
192
Spurious Signals on the Bandscope
192
19 Others
193
Optional Accessories
193
Installing the YG-82CN-1 Roofing Filter
193
Specifications
194
Advertisement
Kenwood TS-890S In-Depth Manual (96 pages)
HF/50MHz TRANSCEIVER
Brand:
Kenwood
| Category:
Transceiver
| Size: 10.66 MB
Table of Contents
Table of Contents
3
1 Prologue
5
About The Release Of The Ts-890S
5
Features Of The Ts-890S
6
2 Reception Circuit
7
Receiver Configuration
7
First Mixer
9
Roofing Filters
9
What Is A Roofing Filter
9
Roofing Filters
10
Agc Circuits
11
Analog Agc Circuits
11
Optimization Of Gain Distribution
12
Deflection Of The S Meter Needle
12
Noise Level
13
Rf Gain Adjustment
13
Agc Off
13
Noise Blankers
14
Features Of The Nb1 And Nb2
14
Auxiliary Circuits
15
Medium Wave Band Sensitivity Risers
15
3 Transmission Circuit
16
Fet Final Amplifier Circuit
16
If Circuit For Clean And Stable 100 W Output Power
16
High-Speed Relay-Controlled Antenna Tuner
17
Linear Amplifier Control
18
Remote Connector
18
Linear Amplifier Menu Settings
19
Alc
21
Transmit Power Limiter
22
Alc Operation When An External Device Is Connected
23
Drv Terminal
24
Protections
25
Swr Protection
25
Overcurrent Protection
25
Thermal Protection And Fan Control
25
4 Local Oscillator Circuit
26
Local Oscillator
26
First Local Oscillator Signal
26
5 Antenna Control Circuit
28
Signaling Paths
28
Rx Antenna Feature (Rx In / Rx Out Connectors)
28
Antenna Output Feature (Ant Out Connector)
28
TS-890S User Report
29
6 Mpu Peripheral Circuit
32
Mpu Peripherals For Application Control
32
Mpu Peripherals For Operation Panel Control
32
7 Dsp
33
Mpu Peripherals For Transceiver Control
32
Dsps And Peripheral Hardware
33
Features Of Ts-890S Dsp Technologies
33
Signal Processing In The If Stage
34
If-Agc
34
Agc Quick Recovery
35
If Filter
36
Interference Rejection
38
Reception
40
Demodulation
40
Af Filter
41
Audio Peak Filter
42
Noise Reduction
43
Beat Canceler
46
Signal Processing By Morse Code Decoder
47
Transmission
48
Modulation
48
Microphone Gain Control
50
Speech Processors
50
Other Functions
52
Tx/Rx Equalizers
52
Voice Guidance
52
8 Bandscope
53
More User-Friendly Bandscope
53
Differences With The Ts-990S As An Fft Bandscope
53
3 Types of Scope Display Modes
53
Reference Level
54
Touchscreen Tuning
54
Gradation Settings
55
Tuning Assist Line, Filter Passband Display and Frequency Marker
55
9 Software
56
Display Function For Actual Operation
56
Meter
56
Transmission Digital Meter
57
Filter Scope
57
Operability Improvements For Split Operation
58
Split Frequency Configuration by Using the Numeric Keypad
58
Band Direct Key Configuration For Split
58
Split Frequency Change By Using The Rit/Xit Knob
58
Split Frequency Reception by Using an External Sub Receiver
59
CW/RTTY/PSK Decoding/Encoding Available Only for the Main Unit
59
Decoding/Encoding Of Cw Morse Code
59
Decoding/Encoding Of Rtty/Psk
60
Data Mode Convenient for Operation Using an External Device
61
Switching The Input Sound Source
61
Usb Keying
62
Functions Related to the Internal Memory/Usb Flash Drive/File Management
62
Selection Of Data Storage Location
63
Storage And Reading Of Configuration Data
63
Copying From The Internal Memory To The Usb Flash Drive
63
Copying From The Internal Memory To A Pc
64
Configuring The Images To Be Used In The Screen Saver
64
Other Useful Functions
65
Audio Scope
65
Recording Function
65
Clock Setting Function That Uses An Ntp Server
65
Transverse Dial Display In Swl Mode
66
Firmware Updating
66
PC-Control
67
Kns Operation Without Using The Host Pc
69
Windows Software
70
System Configurations
71
New Option ARCP-890 (Radio Control Program for TS-890S) (Free Software Application)
74
Basic Specifications Inherited From The Arcp-990
74
User Interface
74
New Option ARHP-890 (Radio Host Program) (Free Software Application)
75
Basic Specifications Inherited From The Arhp-990
75
User Interface
75
ARUA-10 (USB Audio Controller) (Free Software Application)
76
Basic Functions
76
Behavior
76
ARVP-10H/ARVP-10R (Radio Voip Program) (Free Software Application)
77
Basic Functions
77
Virtual Com Port Driver
78
10 Terminal Functions
80
Acc 2 Connector
80
DISPLAY (DVI-I) Connector
81
Ext Sp 8 Ω (External Speaker Jack)
81
Key Pad
81
Lan Connector
82
Meter Jack
83
Paddle, Key Jack
83
Phones Jack
83
Usb Connector (Usb-A)
84
Usb Connector (Usb-B)
85
11 Mechanical Structure
86
Internal Structure
86
Cooling
87
Lift-Up Mechanism Of The Front Bases
89
Operability
90
Tft Display And Touch Panel
92
Main Control Knob Mechanism
93
12 Sp-890
94
Appearance And Features
94
Speaker
94
Built-In Passband Filter
95
Speaker Input Select Switch
95
Kenwood TS-890S Setting Manual (73 pages)
NETWORK COMMAND SYSTEM
Brand:
Kenwood
| Category:
Transceiver
| Size: 1.72 MB
Table of Contents
Table of Contents
2
1 Introduction
5
2 About Operation Style
6
3 Remote Operation by LAN Connection
7
System Configuration / Feature of Remote Control by LAN Connection
7
TS-890S Settings for Remote Operation by LAN Connection
8
Administrator Settings
8
Registering KNS Users
8
Setting the Built-In Voip
8
Setting Voip Input/Output Level
9
Setting Voip Jitter Absorption Buffer
9
Setting Speaker Mute
10
Configuration for KNS Operation
10
Timeout Timer Settings
10
Configuration of the Input Path of TX Audio
10
Setting and Confirming the IP Address
11
Confirming MAC Address
11
Setting and Operation of ARCP-890 for Remote Control by LAN Connection
12
PC Operating Environment
12
Installing ARCP-890
12
Settings for Connecting to TS-890S
12
Sound Device Selection and Voip Setting
16
Connection and Disconnection to TS-890S
17
Setting TX Operation for Use in ARCP-890 and Checking Modulation Line
17
Setting the Delay by TX to RX Transition
18
PC Settings for Remote Operation by LAN Connection
19
Windows Firewall Settings
19
Settings for Integrated Security Software
20
4 Remote Operation by Internet Connection
21
System Configuration / Feature of Remote Control by Internet Connection
21
TS-890S Settings for Remote Operation by Internet Connection
22
Administrator Settings
22
Registering KNS Users
22
Setting the Built-In Voip
22
Setting Voip Input/Output Level
23
Setting Voip Jitter Absorption Buffer
23
Setting Speaker Mute
24
Configuration for KNS Operation
24
Timeout Timer Settings
24
Configuration of the Input Path of TX Audio
25
Setting and Confirming the IP Address
25
Confirming the Global IP Address
25
ARCP-890 Setting and Operation for Remote Control by Internet Connection
26
PC Operating Environment
26
Installing ARCP-890
26
Settings for Connecting to TS-890S
27
Sound Device Selection and Voip Setting
30
Connection and Disconnection to TS-890S
31
Setting TX Operation for Use in ARCP-890 and Checking Modulation Line
31
Setting the Delay by TX to RX Transition
32
Network Settings for Remote Control by Internet Connection
33
Required Network Environment
33
Broadband Router Settings
34
PC Settings for Remote Operation by Internet Connection
35
Windows Firewall Settings
35
Settings for Integrated Security Software
36
5 Remote Operation Via the Internet by Conventional System
37
Conventional System Configuration
37
TS-890S Settings in Conventional System
38
Administrator Settings
38
Settings the Built-In Voip(to Turn OFF)
38
Setting Speaker Mute
39
Configuration for KNS Operation
39
Timeout Timer Settings
39
Configuration the Input Path of TX Audio
39
Setting the ACC 2 Audio Input / Output Level
40
Setting Beep Mixed Output
40
Setting the TX Monitor Level
41
Setting and Confirming the IP Address
41
ARHP-890 Settings in Conventional System
41
PC Operating Environment
41
Installing ARHP-890
42
Settings for Connecting to TS-890S
42
Setting KNS
45
Connection and Disconnection to TS-890S
48
Confirming the IP Address
49
Confirming the Global IP Address
49
ARCP-890 Settings in Conventional System
49
PC Operating Environment
49
Installing ARCP-890
50
Settings for Connecting to TS-890S
50
Connection and Disconnection to TS-890S
54
Checking Modulation Line
54
Setting the Delay by TX to RX Transition
55
Settings of ARVP-10 in Conventional System
56
Installing ARVP-10
56
Setting ARVP-10
57
Network Settings in Conventional System
57
Required Network Environment
57
Broadband Router Settings
57
PC Settings in Conventional System
59
Windows Firewall Settings
59
Settings for Integrated Security Software
60
6 Limitations
61
7 Cautions
62
8 Frequently Asked Questions
63
(Supplement): FAQ: Explaining the Internet "Cannot Operate Transceiver
71
Advertisement
Kenwood TS-890S Command Reference Manual (77 pages)
PC CONTROL COMMAND
Brand:
Kenwood
| Category:
Transceiver
| Size: 1 MB
Kenwood TS-890S Instruction Manual (44 pages)
Brand:
Kenwood
| Category:
Transceiver
| Size: 2.87 MB
Table of Contents
Connection
3
Configuration
4
Timer
5
Operation
6
Table of Contents
7
Installation
13
Torque Adjustment with Tuning Control
14
Connection of Accessories (Rear Panel)
15
Connection with Data Communication Equipment
16
Terminal Descriptions
17
Front Panel
18
Panel Key Behavior
21
Manual Recording
22
Program Scan
24
Quick Memory Channels
25
Screen
26
Rear Panel
27
Microphone (Optional)
28
Preamplifier
29
Noise Blanker
30
Usb/File Management Menu Screen
33
Decoded Character Output
34
Menu Items
35
Voice Guidance
36
Program Slow Scan
37
Audio Recording in Tandem with Squelch
38
Waterfall Display During Tuning (Center Mode)
39
Meter
40
Built-In Voip Function
43
Kenwood TS-890S Manual (2 pages)
Brand:
Kenwood
| Category:
Gateway
| Size: 0.28 MB
Kenwood TS-890S Service Bulletin (2 pages)
Circuit update for antenna tuner failure.
Brand:
Kenwood
| Category:
Tuner
| Size: 0.35 MB
Advertisement
Related Products
Kenwood TS-870S
Kenwood TS-811A
Kenwood TS-820S
Kenwood TS-830S
Kenwood TS-820
Kenwood TS-830
Kenwood TS-811B
Kenwood TS-811E
Kenwood TS-870
Kenwood TS-830M
Kenwood Categories
Car Receiver
Transceiver
CD Player
Amplifier
Receiver
More Kenwood Manuals
Login
Sign In
OR
Sign in with Facebook
Sign in with Google
Upload manual
Upload from disk
Upload from URL