Miele KM 6357 Operating And Installation Instructions
Ceramic cooktops with induction
Hide thumbs
Also See for KM 6357:
- Operating and installation instruction (84 pages) ,
- Operating and installation instructions (72 pages) ,
- Operating and installation instructions (17 pages)
Table of Contents
Advertisement
Advertisement
Table of Contents

Related Manuals for Miele KM 6357


Summary of Contents for Miele KM 6357
- Page 1 Operating and installation instructions Ceramic cooktops with induction To avoid the risk of accidents or damage to the appliance, it is essential to read these instructions before it is installed and used for the first time. en - AU, NZ M.-Nr.
-
Page 2: Table Of Contents
KM 6357 / KM 6358 ........ - Page 3 Con|ctivity and Miele|home ........
- Page 4 Contents Flush-fitted cooktops ..........74 Building-in dimensions .
-
Page 5: Warning And Safety Instructions
They contain important notes on installation, safety, use and maintenance. Miele cannot be held liable for damage caused by non-compliance with these Warning and Safety instructions. - Page 6 Warning and Safety instructions Correct application This cooktop is designed for domestic use and for use in similar environments by guests in hotel or motel rooms, bed & breakfasts and other typical living quarters. This does not include common/shared facilities or commercial facilities within hotels, motels or bed &...
- Page 7 Warning and Safety instructions Safety with children Small children must be kept away from the appliance unless they are constantly supervised. Older children may only use the appliance if they have been shown how to use it in a safe way and understand the hazards involved.
- Page 8 Installation, maintenance and repairs by unqualified persons could be dangerous. Miele cannot be held liable for unauthorised work. A damaged appliance can be dangerous. Check the appliance for visible signs of damage.
- Page 9 The manufacturer can only guarantee the safety of the appliance when original Miele replacement parts are used. Faulty components must only be replaced by genuine Miele original spare parts. The cooktop is not intended for use with an external timer switch or a remote control system.
- Page 10 Warning and Safety instructions Danger of electric shock. Do not use the cooktop if it is faulty, or if the ceramic surface is cracked, chipped or damaged in any way. Switch it off immediately, and disconnect it from the mains electricity supply. In areas which may be subject to infestation by cockroaches or other vermin, pay particular attention to keeping the appliance and its surroundings clean at all times.
- Page 11 Warning and Safety instructions Correct use Oil and fat can overheat and catch fire. Do not leave the appliance unattended when cooking with oil or fat. If oil or fat does catch fire, do not attempt to put out the flames with water. Disconnect the appliance from the mains and use a suitable fire blanket, saucepan lid, damp towel or similar to smother the flames.
- Page 12 Warning and Safety instructions If the appliance is installed behind a kitchen furniture door, it may only be used with the furniture door open. Do not close the door whilst the cooktop in use or whilst there is any residual heat present. The appliance gets hot when in use and remains hot for a while after being switched off.
- Page 13 Warning and Safety instructions Do not use pots or pans on the cooktop with bases with pronounced edges or ridges. These could scratch or scour the ceramic glass surface permanently. Only use pots and pans with smooth bases. Grains of salt, sugar and sand (e.g. from cleaning vegetables) can cause scratches if they get under pan bases.
- Page 14 Warning and Safety instructions Metal utensils stored in a drawer under the cooktop can become hot if the induction cooktop is used intensively for a long time. Do not store any metal items or utensils in a drawer under the cooktop This cooktop is fitted with a cooling fan.
-
Page 15: Guide To The Appliance
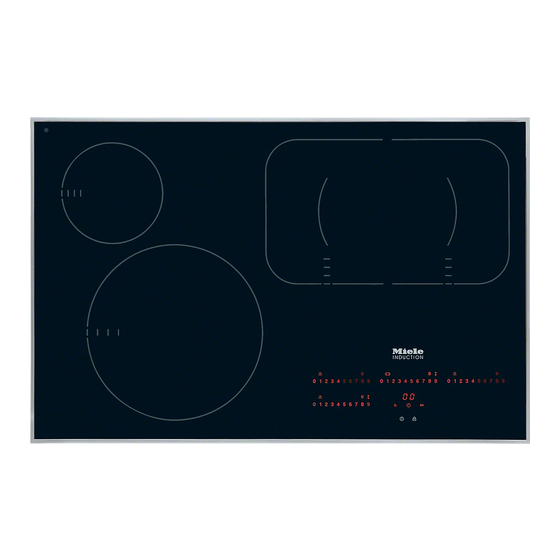
Guide to the appliance Models KM 6357 / KM 6358 a Cooking zone with TwinBooster b Cooking zone with Booster cd PowerFlex cooking zones with TwinBooster c + d can be combined to form a PowerFlex cooking area e Control panel... - Page 16 Guide to the appliance KM 6379 ad Cooking zones with Booster bc PowerFlex cooking zones with TwinBooster b + c can be combined to form a PowerFlex cooking area e Control panel...
- Page 17 Guide to the appliance KM 6386 / KM 6387 ab Cooking zones with Booster c Cooking zone with TwinBooster de PowerFlex cooking zones with TwinBooster d + e can be combined to form a PowerFlex cooking area f Control panel...
-
Page 18: Control Panel
Guide to the appliance Control panel (Example) 0 1 2 3 4 5 6 7 8 9 0 1 2 3 4 5 6 7 8 9 0 1 2 3 4 5 6 7 8 9 0 1 2 3 4 5 6 7 8 9 0 1 2 3 4 5 6 7 8 9... - Page 19 Guide to the appliance Sensor controls a On/Off b Safety lock c Hours d - For selecting the timer - For switching between the timer functions - For selecting the switch-off time (see "Switching off a cooking zone automatically") e Stop and Go f For setting the power level g Booster/TwinBooster h For switching on the PowerFlex cooking area...
-
Page 20: Cooking Zones
Guide to the appliance Cooking zones Cooking KM 6357 / KM 6358 zone Minimum to maximum Rating in watts for 230 V** C in cm* 18–28 Normal 2600 TwinBooster level 1 3000 TwinBooster level 2 3700 10–16 Normal 1400 Booster 2200 15–23... - Page 21 Guide to the appliance Cooking KM 6379 zone Minimum to maximum Rating in watts for 230 V** C in cm* 14–20 Normal 1850 Booster 3000 15–23 Normal 2100 TwinBooster level 1 3000 TwinBooster level 2 3700 15–23 Normal 2100 TwinBooster level 1 3000 TwinBooster level 2 3700...
- Page 22 Guide to the appliance Cooking KM 6386 / KM 6387 zone Minimum to maximum Rating in watts for 230 V** C in cm* 14–20 Normal 1850 Booster 3000 10–16 Normal 1400 Booster 2200 18–28 Normal 2600 TwinBooster level 1 3000 TwinBooster level 2 3700 15–23...
-
Page 23: Caring For The Environment
Caring for the environment Disposal of the packing Disposing of your old material appliance The transport and protective packing Electrical and electronic appliances has been selected from materials often contain materials which, if which are environmentally friendly for handled or disposed of incorrectly, disposal and should be recycled. -
Page 24: Before Using For The First Time
Before using for the first time Please stick the extra data plate for the appliance supplied with this documentation in the space provided in the "After sales service, data plate, warranty" section of this booklet. Cleaning for the first time ^ Remove any protective wrapping and adhesive labels. -
Page 25: Induction
Induction The induction principle An induction coil is located under each cooking zone. When a cooking zone is switched on, this coil creates a magnetic field which impacts directly on the base of the pan and heats it up. The cooking zone itself is heated up indirectly by the heat given off by the pan. -
Page 26: Noises
Induction Noises When using an induction cooking zone, the following noises can occur in the pan, depending on what it is made of and how it has been constructed. – On the higher power levels, it might buzz. This will decrease or cease altogether when the power level is reduced. -
Page 27: Pans
Induction Pans Suitable pans include: – stainless steel pans with a magnetic base – enamelled steel pans – cast iron pans Unsuitable pans: – stainless steel pans without a magnetic base – aluminium and copper pans – glass, ceramic or earthenware pots and pans To test whether a pot or pan is suitable for use on an induction cooktop, hold a magnet to the base of the pan. -
Page 28: Power Level Range
Power level range The appliance is delivered with 9 power levels programmed as standard. If you wish to fine-tune a setting, you can extend the power level range (see "Programming"). Settings Standard Extended factory settings settings (9 power levels) (17 power levels) Melting butter 1 to 2 1 to 2+... -
Page 29: Operation
Operation How the cooktop is operated The cooktop is equipped with electronic sensor controls which react to finger contact. When the cooktop is switched off only the symbols for the sensors for switching the cooktop on and off and the safety lock are visible. -
Page 30: To Switch The Cooktop On
Operation Fire hazard! Do not leave the appliance unattended whilst it is being used. To switch the cooktop on ^ Touch the s sensor. All the sensors will light up. If no further entry is made, the cooktop will switch itself off after a few seconds for safety reasons. -
Page 31: Powerflex Cooking Area
Operation PowerFlex cooking area The PowerFlex cooking zones can be combined to form a PowerFlex cooking area. The settings for the cooking area are controlled by the rear or left Powerflex cooking zone and the other numerical keypad goes out, except for the symbol y which remains lit. -
Page 32: Auto Heat-Up
Operation Auto heat-up When Auto heat-up has been activated, the cooking zone switches on automatically at the highest power setting and then switches to the continued cooking setting selected. The heat-up time depends on which continued cooking setting has been chosen (see chart). Activating ^ Touch the number of the continued cooking setting you require until a tone sounds and the continued cooking... - Page 33 Operation Continued Heat-up time cooking setting* in minutes and seconds (approx.) 0 : 15 0 : 15 0 : 15 0 : 15 0 : 25 0 : 25 0 : 50 0 : 50 2 : 00 5 : 50 5 : 50 2 : 50 2 : 50...
-
Page 34: Booster Function
Operation Booster function The cooking zones are equipped with a Booster or TwinBooster (see "Guide to the appliance"). When activated, the power is boosted for a maximum of 15 minutes so that large quantities can be heated up quickly, e.g. when boiling water for cooking pasta. The booster function can only be used on two cooking zones at the same time. - Page 35 Operation Whilst the booster is switched on, the B sensor and all of the numbers in the relevant numerical keypad are lit up at brightness level 2. To switch on the Booster ^ Touch the "0" on the numerical keypad of the cooking zone you wish to use.
-
Page 36: Keeping Warm Function
Operation Keeping warm function Some cooking zones have a keeping warm function. This function is for keeping food that has just been cooked warm, i.e. food that is still hot. It is not for reheating food that has gone cold. If the keeping warm function has been activated, the cooking zone will switch off automatically after a maximum of 2 hours. -
Page 37: Switching Off And Residual Heat Indicators
Operation Switching off and residual heat indicators Switching off a cooking zone ^ Touch the "0" on the numerical keypad of the cooking zone you wish to use. The numbers 1 to 9 will go out after a few seconds. If the cooking zone is still hot, residual heat will then be indicated in the display. -
Page 38: Tips On Saving Energy
Tips on saving energy – Use a pan lid whenever possible to minimise heat loss. uncovered covered – Select a smaller pan when cooking small quantities. A smaller pan uses less energy than a larger pan with very little in it. –... -
Page 39: Timer
Timer The cooktop must be switched on to use the timer. The timer can be used for two different functions: – to set the minute minder – to set a cooking zone to switch off automatically. You can select a time from 1 minute (01) to 9 hours (9^). A time of up to 99 minutes is set and displayed in minutes. -
Page 40: Minute Minder
Timer Minute minder To set the minute minder time Minutes Example: You want to set 15 minutes. ^ Switch the cooktop on. ^ Touch the m sensor. The m indicator light will flash. 00 will appear in the timer display. The 0 on the right will flash. Enter the tens first and then the units. - Page 41 Timer Hours Whole hours are set by touching the relevant number on the numerical keypad. Half hours are set by touching the area between the relevant two numbers. Example: You want to set 2 hours 30 minutes. ^ Switch the cooktop on. ^ Touch the m sensor.
- Page 42 Timer To change the minute minder time ^ Touch the m sensor. ^ Set the time you want, as described above. To delete the minute minder time ^ Touch the m sensor. ^ Touch 0 on the numerical keypad.
-
Page 43: To Switch A Cooking Zone Off Automatically
Timer To switch a cooking zone off automatically You can set a time at the end of which a cooking zone will switch off automatically. All the cooking zones can be programmed at the same time. If the time programmed is longer than the maximum operational time allowed, the cooking zone will switch off after the maximum time allowed (see "Safety switch-off"). -
Page 44: To Use Both Timer Functions At The Same Time
Timer To use both timer functions at the same time The minute minder and automatic switch-off functions can be used at the same time. If you have programmed in one or more switch-off times, and would like to use the minute minder as well: Touch the m sensor repeatedly until the indicator lights for the cooking zones you have programmed light up constantly and 00 appears in the timer display. -
Page 45: Safety Features
Safety features Safety lock / System lock Keep children away from the cooktop for their own safety. Your appliance is equipped with a safety lock to prevent the cooktop and the cooking zones being switched on or any settings being altered. The safety lock is set with the cooktop switched on. - Page 46 Safety features Activating Three-finger operation (standard default setting) ^ Touch the $ sensor and the "0" setting of both right-hand cooking zones at the same time until the safety lock indicator lights up and LC appears in the timer display. The safety lock indicator and LC will go out after a short while.
-
Page 47: Stop And Go
Safety features Stop and Go Your appliance has a Stop and Go feature which, when activated, reduces the power of all cooking zones in use to power level 1. When Stop and Go is activated, the cooking zone power levels and the setting of the timer cannot be altered and the cooktop can only be switched off. -
Page 48: Safety Switch-Off
Safety features Safety switch-off Safety switch-off with an over-long cooking time If one of the cooking zones is heated for an unusually long period of time (see chart) and the power level is not altered, the cooktop will switch itself off automatically and the relevant residual heat indicator will light up. -
Page 49: Overheating Protection
Safety features Overheating protection All the induction coils and the cooling elements for the electronics are fitted with an overheating protection mechanism. Before the induction coils or cooling elements get too hot, the overheating protection mechanism cuts in in one of the following ways: Induction coils –... -
Page 50: Cleaning And Care
Cleaning and care Danger of injury. Do not use a steam cleaning appliance to clean this appliance. The steam could reach electrical components and cause a short circuit. The appliance should be cleaned after each use. Let it cool down to room temperature before cleaning. To avoid water marks and limescale deposits, use a soft cloth to dry the appliance after cleaning. - Page 51 Wipe off all coarse soiling using a damp cloth. Stubborn soiling may need to be removed with a shielded scraper blade. Then clean the cooktop with the Original Miele ceramic and stainless steel cooktop cleaner (see "Optional accessories") applied with kitchen paper or a clean cloth. Do not apply cleaner whilst the appliance is still hot, as this could result in marking.
-
Page 52: Programming
Programming You can change the default settings of the programme options (see chart). Several settings can be altered in succession. After selecting programming mode, P (Programme) and S (Status) will appear in the timer display. On cooktops with 3 cooking zones, an additional indicator will appear at the rear left. - Page 53 Programming Programme* Status** Setting Demonstration mode and Demonstration mode on factory default settings Demonstration mode off Factory default settings reinstated Stop and Go Power level range 9 power levels (1, 2, 3 ... to 9) 17 power levels/settings (1, 1+, 2, 2+, 3 ... to 9) Induction warning tone when there is no pan or Quiet...
- Page 54 Programme* Status** Setting System lock Manual activation of the system lock only Manual and automatic activation of the System lock Auto heat-up Miele|home Feature not fitted - only on Signed off communication-enabled Signed on appliances fitted with a communication module.
-
Page 55: Problem Solving Guide
With the help of the following notes, minor faults in the performance of the appliance, some of which may result from incorrect operation can be put right without contacting Miele. Please note that a call-out fee will be applied to unnecessary service visits where the problem could have been rectified as described in these operating instructions. - Page 56 Problem solving guide Problem Possible cause Remedy A smell and vapours The smell and vapours will are given off when a be less noticeable with new appliance is each subsequent use being used. before dissipating completely. The power levels 1 to There is no pan on the Use a suitable pan (see 9 flash.
- Page 57 Problem solving guide Problem Possible cause Remedy Power level 9 is Operating both zones automatically reduced at power level 9 would if you select power exceed the permitted level 9 on two linked maximum power level cooking zones or for the two zones. extended zones at the same time.
- Page 58 Make sure it has not been or faulty. blocked by something like a FE 48 fork. Remove the cause of the blockage. If the fault message appears again, call Miele. Other fault messages There is an electronic Interrupt the power supply to FE.. fault.
-
Page 59: Optional Accessories
These can be ordered online at: or from Miele (see back of manual for contact details). Pans Miele offers a wide range of pans which are perfect for Miele cooktops. Please refer to the Miele website for more details on individual products. - Page 60 The cooktop sends information on its operating status via the household electrical supply. To enjoy the benefits of this feature, your appliance needs to be fitted with a communication module. Detailed information about the Miele|home system can be found at www.miele.de. XKM 2100 KM Communication module including installation accessories...
- Page 61 Miele|home a Communication enabled appliances (examples) b Communication module c SuperVision appliance d Electrical supply (Powerline) e Miele|home Gateway f WLAN) Router Possible connections (optional) g PC, Notebook h iPod* or iPhone* i Connection with a domestic bus system display j Possible internet connection * iPod und iPhone are registered trade marks of Apple Inc.
- Page 62 Optional accessories Con|ctivity a Communication module XKM 2000 DA b Communication module XKM 2100 KM c Electrical supply (Powerline)
-
Page 63: Con|Ctivity And Miele|Home
Con|ctivity and Miele|home Signing on the cooktop If you want to sign the cooktop – on to the Miele{home system, first prepare the signing on procedure on the master appliance (see the "Miele|home" fitting and installation instructions) – on to the Con|ctivity system, first sign on the rangehood (see the "Con|ctivity"... -
Page 64: Signing Off The Cooktop
Con|ctivity and Miele|home Signing off the cooktop If you want to sign off from the Miele{home system, first prepare the signing-off procedure on the master appliance (see the "Miele|home" fitting and installation instructions). ^ With the cooktop switched off, touch the s and $ sensors at the same time until the safety lock indicator light flashes. -
Page 65: Safety Instructions For Installation
Safety instructions for installation After installation, ensure that the The appliance must only be installed connection cable is without hindrance and connected to the electricity and that there is no mechanical supply by a suitably qualified and obstruction which could damage it. competent person in strict accordance with current national All dimensions in this instruction booklet... -
Page 66: Safety Distances
Safety distances Safety distance above the appliance When two or more appliances are installed together below a rangehood, e.g. a gas appliance and an electric cooktop, which have different safety distances given in the installation instructions, you should select the greater distance of the two. - Page 67 Safety distances Safety distances to the sides and back of the cooktop Ideally the cooktop should be installed with plenty of space on either side. There may be a wall at the rear or a tall unit or wall on one side (right or left). On the other side, however, no unit or divider should stand higher than the cooktop (see illustrations).
- Page 68 Safety distances Safety distances underneath the Interim shelf cooktop It is not necessary to fit an interim shelf underneath the cooktop, but one may To ensure sufficient ventilation to the cooktop, a certain gap must be left be fitted if you wish. between the underside of the cooktop Leave a gap of 10 mm at the back of and any oven, interim shelf or drawer.
-
Page 69: Cooktop With Frame Or Bevelled Edge
Cooktop with frame or bevelled edge Installation notes Tiled worktop Seal between the cooktop and the worktop Grout lines a and the hatched area underneath the cooktop frame must be smooth and even. If they are not the cooktop will not sit flush with the worktop and the sealing strip The sealing strip under the edge of the underneath the cooktop will not provide... -
Page 70: Building-In Dimensions
Cooktop with frame or bevelled edge Building-in dimensions KM 6357 a Front b Casing depth c Connection for Miele|home d Mains connection box The mains connection cable (1440 mm long) is supplied separately. - Page 71 Cooktop with frame or bevelled edge KM 6379 a Front b Casing depth c Connection for Miele|home d Mains connection box The mains connection cable (1440 mm long) is supplied separately.
- Page 72 Cooktop with frame or bevelled edge KM 6386 a Front b Casing depth c Connection for Miele|home d Mains connection box The mains connection cable (1440 mm long) is supplied separately.
-
Page 73: Installing The Cooktop
Cooktop with frame or bevelled edge Installing the cooktop Installing the cooktop ^ Feed the mains connection cable Preparing the worktop down through the cut-out. ^ Make the worktop cut-out according ^ Place the cooktop centrally in the to the dimensions given in the cut-out. -
Page 74: Flush-Fitted Cooktops
Flush-fitted cooktops Building-in dimensions KM 6358 a Front b Casing depth c Connection for Miele|home Please take careful note of the d Stepped cut-out for granite or marble detailed diagrams for the cut-out worktops dimensions in granite and marble e Mains connection box worktops. - Page 75 Flush-fitted cooktops KM 6387 a Front b Casing depth Please take careful note of the c Connection for Miele|home detailed diagrams for the cut-out d Stepped cut-out for granite or marble dimensions in granite and marble worktops. worktops e Mains connection box The mains connection cable (1440 mm long) is supplied separately.
-
Page 76: Installing The Cooktop
Flush-fitted cooktops Installing the cooktop The cooktop can be installed – in a suitable cut-out in a granite or Flush fit cooktops are only suitable marble worktop. for installation in granite, marble, tiled or solid wood worktops. – in a suitable cut-out in a tiled or solid wood worktop or a glass worktop When using a worktop made from with a wooden support frame. - Page 77 Flush-fitted cooktops Granite and marble worktops Connecting the mains cable to the appliance Preparing the worktop The mains cable must only be connected to the appliance by a qualified and competent electrician in strict accordance with current local and national safety regulations. ^ Follow the instructions in the wiring diagram (see "Electrical connection - Wiring diagram").
- Page 78 Flush-fitted cooktops Solid wood, tiled and glass Connecting the mains cable to the appliance worktops The mains cable must only be Preparing the worktop connected to the appliance by a qualified and competent electrician in strict accordance with current local and national safety regulations. ^ Follow the instructions in the wiring diagram (see "Electrical connection - Wiring diagram").
-
Page 79: Electrical Connection
When switched off there must be an type H 05 VV-F, available from all-pole contact gap of at least 3 mm in Miele. the isolator switch (including switch, fuses and relays). Ensure power is not supplied to the appliance until after installation or repair work has been carried out. -
Page 80: Wiring Diagram
Electrical connection Wiring diagram The electrical safety of this appliance can only be guaranteed when continuity is complete between it and a b c d e an effective earthing system, which complies with current local and national safety regulations. It is most important 200-240 V~ that this basic safety requirement is 200-240 V~... -
Page 81: After Sales Service, Data Plate, Warranty
In the event of any faults which you cannot remedy yourself, please contact: – Miele (see back of manual for contact details). When contacting Miele, please quote the model and serial number of your appliance. These are given on the data plate. - Page 84 KM 6357 / KM 6358 KM 6379 KM 6386 / KM 6387 en - AU, NZ M.-Nr. 09 542 740 / 02...