Table of Contents
Advertisement
Available languages
Available languages
Quick Links
Advertisement
Chapters
Table of Contents

Related Manuals for Electrolux COHHH00BK


Summary of Contents for Electrolux COHHH00BK
- Page 1 Benutzerinformation Backofen User Manual EN 20 COHHH00BK Oven COHHH00BX Manual de instrucciones ES 36 KOHHH00BK3 Horno KOHHH00BX3 Notice d'utilisation FR 54 Four Istruzioni per l’uso Forno electrolux.com/register...
-
Page 2: Table Of Contents
WIR DENKEN AN SIE Vielen Dank für Ihren Kauf eines Electrolux-Geräts. Sie haben ein Produkt gewählt, das jahrzehntelange professionelle Erfahrung und Innovation mit sich bringt. Das ausgeklügelte und stilvolle Produkt wurde für Sie entwickelt. So können Sie jedes Mal, wenn Sie das Produkt verwenden, sicher sein, dass Sie großartige Ergebnisse erzielen werden. -
Page 3: Sicherheitshinweise
SICHERHEITSHINWEISE Lesen Sie vor der Montage und dem Gebrauch des Geräts zuerst die Bedienungsanleitung. Bei Verletzungen oder Schäden infolge nicht ordnungsgemäßer Montage oder Verwendung übernimmt der Hersteller keine Haftung. Bewahren Sie die Anleitung zum Nachschlagen an einem sicheren und zugänglichen Ort auf. 1.1 Sicherheit von Kindern und schutzbedürftigen Personen Das Gerät kann von Kindern ab 8 Jahren und Personen mit... - Page 4 Dieses Gerät ist für den Hausgebrauch in einem • Einfamilienhaus in Innenräumen bestimmt. Dieses Gerät darf in Büros, Hotelzimmern, Gästezimmern • in Pensionen, Bauernhöfen und anderen ähnlichen Unterkünften verwendet werden, wenn diese Nutzung das (durchschnittliche) Nutzungsniveau im Haushalt nicht überschreitet. Die Montage des Geräts und der Austausch des Kabels •...
-
Page 5: Sicherheitsanweisungen
2. SICHERHEITSANWEISUNGEN 2.1 Montage Mindestgröße der Belüf‐ 560x20 mm tungsöffnung. Öffnung auf WARNUNG! der Rückseite unten Die Montage des Geräts darf nur von einer qualifizierten Fachkraft Länge des Netzanschluss‐ 1100 mm durchgeführt werden. kabels. Das Kabel befindet sich in der rechten Ecke •... - Page 6 • Ziehen Sie nicht am Netzkabel, wenn Sie • Lassen Sie das Gerät während des das Gerät von der Stromversorgung Betriebs nicht unbeaufsichtigt. trennen möchten. Ziehen Sie stets am • Schalten Sie das Gerät nach jedem Netzstecker. Gebrauch aus. • Verwenden Sie nur geeignete •...
- Page 7 Gerätebetriebs nicht geschlossen wird. • Bezüglich der Lampe(n) in diesem Gerät Hinter einer geschlossenen Möbelfront und separat verkaufter Ersatzlampen: können sich Hitze und Feuchtigkeit Diese Lampen müssen extremen ansammeln und das Gerät, das Gehäuse physikalischen Bedingungen in oder den Boden beschädigen. Schließen Haushaltsgeräten standhalten, wie z.B.
-
Page 8: Montage
3. MONTAGE 3.1 Montage WARNUNG! Siehe Kapitel Sicherheitshinweise. min. 550 min. 560 min. 550 min. 560 DEUTSCH... -
Page 9: Gerätebeschreibung
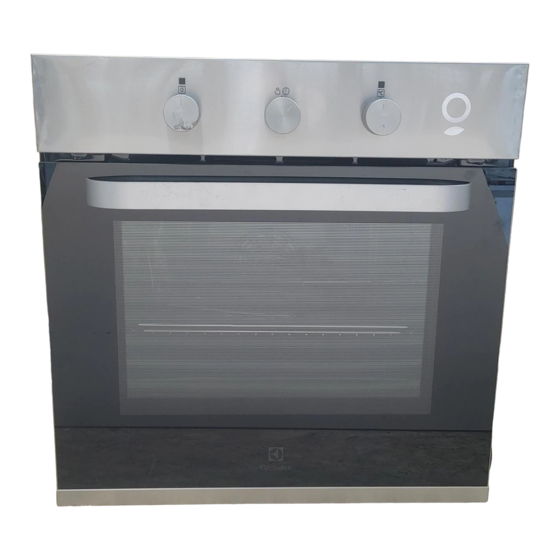
3.2 Befestigung des Ofens am Möbel 4. GERÄTEBESCHREIBUNG 4.1 Gesamtansicht Bedienfeld Betriebskontrolllampe/-symbol Einstellknopf für die Ofenfunktionen Timer-Einstellknopf Einstellknopf (für die Temperatur) Temperaturanzeige / -symbol Lüftungsöffnungen für den Kühlventilator Heizelement Lampe Ventilator Garraumvertiefung Einschubebenen 4.2 Zubehör Zum Backen und Braten oder als Pfanne zum Aufsammeln von Fett. -
Page 10: Täglicher Gebrauch
Schritt 1 Schritt 2 Reinigen Sie den Backofen Heizen Sie den leeren Backofen vor Entfernen Sie die Innenausstattung aus dem Back‐ Stellen Sie die Höchsttemperatur für folgende ofen. Funktion ein: Feuchten Sie ein weiches Tuch mit warmem Was‐ Zeit: 1 Std. ser und etwas mildem Reinigungsmittel an, und Stellen Sie die Höchsttemperatur für folgende reinigen Sie damit den Backofen und das Zubehör. -
Page 11: Uhrfunktionen
Näheres zum Garen finden Sie im Kapitel Energiesparen finden Sie im Kapitel „Tipps und Hinweise“, Feuchte Umluft. „Energieeffizienz“, Energiesparen. Allgemeine Empfehlungen zum 7. UHRFUNKTIONEN 7.1 Einstellen von: Garzeitende Zum Einstellen der Abschaltzeit für Ofenfunktionen. Schritt 1 Stellen Sie die Ofenfunktion und Temperatur ein. Schritt 2 Drehen Sie den Kurzzeitwecker auf den höchsten Wert. -
Page 12: Zusatzfunktionen
9. ZUSATZFUNKTIONEN 9.1 Kühlgebläse gefährlichen Überhitzung führen. Um dies zu verhindern, ist der Backofen mit einem Wenn der Backofen in Betrieb ist, wird das Sicherheitsthermostat ausgestattet, der die Kühlgebläse automatisch eingeschaltet, um Stromzufuhr unterbrechen kann. Die die Ofenoberflächen zu kühlen. Wenn Sie Wiedereinschaltung des Backofens erfolgt den Backofen ausschalten wird das automatisch bei Temperaturabfall. - Page 13 Förmchen Pizzapfanne Backform Tortenbodenform Keramikform Dunkel, nicht reflektierend Dunkel, nicht reflektierend Dunkel, nicht reflektierend 8 cm Durchmes‐ 28 cm Durchmesser 26 cm Durchmesser 28 cm Durchmesser ser, 5 cm Höhe 10.3 Feuchte Umluft Beachten Sie für beste Ergebnisse die unten in der Tabelle aufgeführten Empfehlungen.
- Page 14 (°C) (Min.) Mürbeteigplätzchen, Backblech oder tiefes Blech 40 - 50 20 Stück Törtchen, 8 Stück Backblech oder tiefes Blech 20 - 30 Gemüse, pochiert, 0,4 Backblech oder tiefes Blech 35 - 40 Vegetarisches Omelett Pizzapfanne auf Kombirost 30 - 45 Mediterranes Gemüse, Backblech oder tiefes Blech 35 - 40...
-
Page 15: Reinigung Und Pflege
11. REINIGUNG UND PFLEGE WARNUNG! Siehe Kapitel Sicherheitshinweise. 11.1 Hinweise zur Reinigung Feuchten Sie ein weiches Tuch mit warmem Wasser und etwas mildem Reinigungsmittel an, und reinigen Sie damit die Vorderseite des Backofens. Reinigen und überprüfen Sie die Tür‐ dichtung um den Garraumrahmen. Reinigen Sie die Metalloberflächen mit einer Reinigungslösung. - Page 16 Schritt 3 Schließen Sie die Backofentür halb Schritt 4 Legen Sie die Backofentür auf eine bis zur ersten Öffnungsstellung. An‐ stabile Fläche und lösen Sie das Ver‐ schließend heben und ziehen Sie die riegelungssystem, um die innere Glas‐ Tür nach vorn aus der Aufnahme he‐ scheibe zu entfernen.
-
Page 17: Fehlersuche
11.3 Austausch: Lampe WARNUNG! Stromschlaggefahr. Die Lampe kann heiß sein. Bevor Sie die Lampe austauschen: Schritt 1 Schritt 2 Schritt 3 Schalten Sie den Backofen aus. Trennen Sie den Ofen von der Netz‐ Breiten Sie ein Tuch auf dem Gar‐ Warten Sie, bis der Ofen kalt ist. -
Page 18: Energieeffizienz
Modell (MOD.): ......... Produktnummer (PNC) ......... Seriennummer (S.N.) ......... 13. ENERGIEEFFIZIENZ 13.1 Produktinformationen und Produktinformationsblatt* Name des Lieferanten Electrolux COHHH00BK 944068297 COHHH00BX 944068296 Modellbezeichnung KOHHH00BK3 944068301 KOHHH00BX3 944068300 Energieeffizienzindex 94.9 Energieeffizienzklasse Energieverbrauch mit einer Standardbeladung, konventioneller Mo‐ 0.89 kWh/Programm Energieverbrauch mit einer Standardbeladung, Umluft-Modus 0.75 kWh/Programm... -
Page 19: Umwelttipps
Verwenden Sie Kochgeschirr aus Metall, um Min. vor Ablauf des Garvorgangs. Die mehr Energie zu sparen. Restwärme im Backofen wird weiterhin garen. Heizen Sie, wenn möglich, den Backofen nicht vor. Nutzen Sie die Restwärme, um andere Speisen aufzuwärmen. Wenn Sie mehrere Speisen gleichzeitig zubereiten, halten Sie die Unterbrechungen Warmhalten von Speisen beim Backen so kurz wie möglich. - Page 20 WE’RE THINKING OF YOU Thank you for purchasing an Electrolux appliance. You’ve chosen a product that brings with it decades of professional experience and innovation. Ingenious and stylish, it has been designed with you in mind. So whenever you use it, you can be safe in the knowledge that you’ll get great results every time.
-
Page 21: Safety Information
SAFETY INFORMATION Before the installation and use of the appliance, carefully read the supplied instructions. The manufacturer is not responsible for any injuries or damage that are the result of incorrect installation or usage. Always keep the instructions in a safe and accessible location for future reference. -
Page 22: Safety Instructions
similar accommodation where such use does not exceed (average) domestic usage levels. Only a qualified person must install this appliance and • replace the cable. Do not use the appliance before installing it in the built-in • structure. Disconnect the appliance from the power supply before •... - Page 23 Make sure that there is access to the mains plug after the installation. Height of the back of the 570 mm • If the mains socket is loose, do not appliance connect the mains plug. Width of the front of the ap‐ 594 mm •...
- Page 24 2.4 Care and cleaning • Be careful when you open the appliance door while the appliance is in operation. Hot air can release. WARNING! • Do not operate the appliance with wet Risk of injury, fire, or damage to hands or when it has contact with water. the appliance.
-
Page 25: Installation
2.7 Disposal • Disconnect the appliance from the mains supply. • Cut off the mains electrical cable close to WARNING! the appliance and dispose of it. Risk of injury or suffocation. • Remove the door catch to prevent children or pets from becoming trapped in •... -
Page 26: Product Description
3.2 Securing the oven to the cabinet 4. PRODUCT DESCRIPTION 4.1 General overview Control panel Power lamp / symbol Knob for the heating functions Knob for the timer Control knob (for the temperature) Temperature indicator / symbol Air vents for the cooling fan Heating element Lamp Cavity embossment... -
Page 27: Daily Use
Step 1 Step 2 Clean the oven Preheat the empty oven Remove all accessories from the oven. Set the maximum temperature for the function: Clean the oven and the accessories with a soft Time: 1 h. cloth, warm water and a mild detergent. Set the maximum temperature for the function: Time: 15 min. -
Page 28: Clock Functions
7. CLOCK FUNCTIONS 7.1 How to set: End of Cooking To set the switch-off time for oven functions. Step 1 Set the oven function and the temperature. Step 2 Turn the knob for the timer to its full range. Step 3 Turn the knob for the timer to set the switch-off time. -
Page 29: Hints And Tips
9.2 Safety thermostat safety thermostat which interrupts the power supply. The oven turns on again Incorrect operation of the oven or defective automatically when the temperature drops. components can cause dangerous overheating. To prevent this, the oven has a 10. HINTS AND TIPS Leave the meat for approximately 15 minutes Refer to Safety chapters. - Page 30 (°C) (min) Sweet rolls, 12 pieces baking tray or dripping pan 35 - 40 Rolls, 9 pieces baking tray or dripping pan 35 - 40 Pizza, frozen, 0.35 kg wire shelf 35 - 40 Swiss roll baking tray or dripping pan 30 - 40 Brownie baking tray or dripping pan...
-
Page 31: Care And Cleaning
(°C) (min) Small cakes, Conventional Baking tray 20 - 30 20 per tray Cooking Apple pie, 2 Conventional Wire shelf 80 - 120 tins Ø20 cm Cooking Sponge Conventional Wire shelf 35 - 45 cake, cake Cooking mould Ø26 Short bread Conventional Baking tray 20 - 35... - Page 32 Clean all accessories after each use and let them dry. Use a soft cloth with warm water and a mild detergent. Do not clean the accessories in a dishwasher. Do not clean the non-stick accessories using abrasive cleaner or sharp-edged objects. Accessories 11.2 How to remove and install: Door The oven door has two glass panels.
-
Page 33: Troubleshooting
90° Step 7 Clean the glass panels with water and soap. Dry the glass panels carefully. Do not clean the glass panels in the dishwasher. Step 8 After cleaning, install the glass panel and the oven door. When installed correctly the door trim clicks. Make sure that you install the internal glass panel in the seats correctly. -
Page 34: Energy Efficiency
Product number (PNC) ......... Serial number (S.N.) ......... 13. ENERGY EFFICIENCY 13.1 Product Information and Product Information Sheet* Supplier's name Electrolux COHHH00BK 944068297 COHHH00BX 944068296 Model identification KOHHH00BK3 944068301 KOHHH00BX3 944068300 Energy Efficiency Index 94.9 Energy efficiency class Energy consumption with a standard load, conventional mode 0.89 kWh/cycle... -
Page 35: Environmental Concerns
* For European Union according to EU Regulations 65/2014 and 66/2014. For Republic of Belarus according to STB 2478-2017, Appendix G; STB 2477-2017, Annexes A and B. For Ukraine according to 568/32020. Energy efficiency class is not applicable for Russia. EN 60350-1 - Household electric cooking appliances - Part 1: Ranges, ovens, steam ovens and grills - Methods for measuring performance. - Page 36 PENSAMOS EN USTED Gracias por adquirir un electrodoméstico Electrolux. Ha elegido un producto que lleva décadas de experiencia e innovación profesionales. Ingenioso y elegante, ha sido diseñado pensando en usted. Así pues, cada vez que lo utilice, puede tener la seguridad de que obtendrá...
-
Page 37: Información Sobre Seguridad
INFORMACIÓN SOBRE SEGURIDAD Antes de instalar y utilizar el aparato, lea atentamente las instrucciones facilitadas. El fabricante no se hace responsable de lesiones o daños producidos como resultado de una instalación o un uso incorrectos. Conserve siempre estas instrucciones en lugar seguro y accesible para futuras consultas. -
Page 38: Instrucciones De Seguridad
Este aparato está diseñado para uso doméstico en • interiores. Este aparato se puede utilizar en oficinas, habitaciones de • hotel, habitaciones de Bed&Breakfast, casas de campo y otros alojamientos similares donde dicho uso no exceda (en promedio) los niveles de uso doméstico. Solo un electricista cualificado puede instalar este aparato y •... - Page 39 • No tire nunca del aparato sujetando el • Todas las conexiones eléctricas deben asa. realizarlas electricistas cualificados. • Instale el aparato en un lugar seguro y • El aparato debe conectarse a tierra. adecuado que cumpla los requisitos de •...
- Page 40 inflamables dentro, cerca o sobre el aparato. Tipos de cables aplicables para su instalación o cambio para Europa: ADVERTENCIA! Podría dañar el aparato. H07 RN-F, H05 RN-F, H05 RRF, H05 VV-F, H05 V2V2-F (T90), H05 BB-F • Para evitar daños o decoloraciones en el esmalte: Para la sección del cable, consulte la –...
- Page 41 • Limpie periódicamente el aparato para • Este producto contiene una fuente evitar el deterioro del material de la luminosa de la clase de eficiencia superficie. energética G. • Limpie el aparato con un paño suave • Utilice solo bombillas de las mismas humedecido.
-
Page 42: Instalación
3. INSTALACIÓN 3.1 Empotrado ADVERTENCIA! Consulte los capítulos sobre seguridad. min. 550 min. 560 min. 550 min. 560 3.2 Fijación del horno al mueble ESPAÑOL... -
Page 43: Descripción Del Producto
4. DESCRIPCIÓN DEL PRODUCTO 4.1 Resumen general Panel de mandos Piloto/símbolo de alimentación Mando de las funciones de cocción Mando del temporizador Mando de control (para la temperatura) Indicador/símbolo de temperatura Respiraderos del ventilador de refrigeración Resistencia Bombilla Ventilador Relieve de la cavidad Posiciones de las parrillas 4.2 Accesorios •... -
Page 44: Uso Diario
Retire todos los accesorios del horno. Seleccione la temperatura máxima para la función: Limpie el horno y los accesorios con un paño sua‐ ve humedecido en agua templada y jabón neutro. Tiempo: 1 h. Seleccione la temperatura máxima para la función: Tiempo: 15 min. -
Page 45: Funciones Del Reloj
7. FUNCIONES DEL RELOJ 7.1 Cómo ajustar: Fin de cocción Para ajustar la hora de desconexión de las funciones del horno. Paso 1 Programa la función y la temperatura del horno. Paso 2 Gira el mando del temporizador hasta el máximo. Paso 3 Gira el mando del temporizador para ajustar la hora de apagado. -
Page 46: Funciones Adicionales
9. FUNCIONES ADICIONALES 9.1 Ventilador de enfriamiento sobrecalentamientos peligrosos. Para evitarlo, el horno dispone de un termostato Cuando el horno funciona, el ventilador de de seguridad que interrumpe la alimentación. enfriamiento se pone en marcha El horno se vuelve a encender automáticamente para mantener frías las automáticamente cuando desciende la superficies del horno. - Page 47 Ramequines Bandeja para pizza Bandeja para hornear Molde para base Cerámica Oscuro, mate Oscuro, mate Oscuro, mate 8 cm de diámetro, 28 cm de diámetro 26 cm de diámetro 28 cm de diámetro 5 cm de altura 10.3 Horneado húmedo + ventil. Para obtener el mejor resultado, siga las recomendaciones de la tabla siguiente.
- Page 48 (°C) (min) Muffins, 12 piezas bandeja o bandeja honda 30 - 40 Tarta salada, 16 pie‐ bandeja o bandeja honda 35 - 45 Galletas crujientes de bandeja o bandeja honda 40 - 50 masa quebrada, 20 piezas Tartaletas, 8 piezas bandeja o bandeja honda 20 - 30 Verduras pochadas,...
-
Page 49: Mantenimiento Y Limpieza
(°C) (min) Hamburgue‐ Grill Parrilla y máx. 20 - 30 Coloque la parrilla en sa de vacu‐ grasera el tercer nivel y la gra‐ no, 6 trozos, sera en el segundo ni‐ 0,6 kg vel del horno. De la vuelta a la comida a la mitad del tiempo de cocción. - Page 50 PRECAUCIÓN! No utilices el horno sin los paneles de cristal. Paso 1 Abra completamente la puerta y suje‐ Paso 2 Levante y gire completamente las pa‐ te las dos bisagras. lancas de ambas bisagras. Paso 3 Cierre la puerta del horno hasta la pri‐ Paso 4 Pon la puerta sobre un paño suave en mera posición de apertura (a mitad de...
-
Page 51: Solución De Problemas
11.3 Cómo cambiar: Bombilla ADVERTENCIA! Riesgo de descarga eléctrica. La lámpara puede estar caliente. Antes de reemplazar la bombilla: Paso 1 Paso 2 Paso 3 Apague el horno. Espere hasta que Desconecte el horno de la red. Coloque un paño en el fondo de la el horno esté... -
Page 52: Eficacia Energética
......... Número de serie (S.N.) ......... 13. EFICACIA ENERGÉTICA 13.1 Información del producto y hoja de información del producto* Nombre del proveedor Electrolux COHHH00BK 944068297 COHHH00BX 944068296 Identificación del modelo KOHHH00BK3 944068301 KOHHH00BX3 944068300 Índice de eficiencia energética 94.9 Clase de eficiencia energética Consumo de energía con una carga estándar, modo convencional... -
Page 53: Aspectos Medioambientales
En la medida de lo posible, no precaliente el que transcurra el tiempo de cocción. El calor horno antes de cocinar. residual dentro del horno seguirá cocinando. Reduzca al máximo el tiempo entre Utilice el calor residual para calentar otros horneados cuando prepare varios platos de platos. - Page 54 NOUS PENSONS À VOUS Merci d’avoir choisi un appareil Electrolux. Vous avez choisi un produit qui bénéficie de décennies d'expérience professionnelle et d'innovation. Ingénieux et élégant, il a été pensé pour vous. C'est la raison pour laquelle vous pouvez avoir la certitude d'obtenir d'excellents résultats à...
-
Page 55: Information Sur La Sécurité
INFORMATION SUR LA SÉCURITÉ Avant d'installer et d'utiliser cet appareil, lisez soigneusement les instructions fournies. Le fabricant ne pourra être tenu pour responsable des blessures et dégâts résultant d'une mauvaise installation ou utilisation. Conservez toujours les instructions dans un lieu sûr et accessible pour vous y référer ultérieurement. -
Page 56: Consignes De Sécurité
Cet appareil est conçu pour un usage domestique unique, • dans un environnement intérieur. Cet appareil peut être utilisé dans les bureaux, les • chambres d’hôtel, les chambres d’hôtes, les maisons d’hôtes de ferme et d’autres hébergements similaires lorsque cette utilisation ne dépasse pas le niveau (moyen) de l’utilisation domestique. - Page 57 2.2 Branchement électrique toujours des gants de sécurité et des chaussures fermées. • Ne tirez jamais l'appareil par la poignée. AVERTISSEMENT! • Installez l'appareil dans un lieu sûr et Risque d'incendie ou adapté répondant aux exigences d'électrocution. d'installation. • Respectez l'espacement minimal requis •...
- Page 58 • Cet appareil est fourni avec une fiche de l'alcool peut provoquer un mélange électrique et un câble d’alimentation. d'alcool et d'air. • Ne laissez pas des étincelles ou des flammes nues entrer en contact avec Types de câbles compatibles pour l'installation l'appareil lorsque vous ouvrez la porte.
- Page 59 • Avant toute opération d'entretien, éteignez informations sur le statut opérationnel de l'appareil et débranchez la fiche de la l’appareil. Elles ne sont pas destinées à prise secteur. être utilisées dans d'autres applications et • Vérifiez que l'appareil est froid. Les ne conviennent pas à...
-
Page 60: Installation
3. INSTALLATION 3.1 Encastrement AVERTISSEMENT! Reportez-vous aux chapitres concernant la sécurité. min. 550 min. 560 min. 550 min. 560 3.2 Fixation du four au meuble FRANÇAIS... -
Page 61: Description De L'appareil
4. DESCRIPTION DE L'APPAREIL 4.1 Vue d’ensemble Bandeau de commande Voyant / symbole de mise sous tension Manette de sélection des modes de cuisson Manette du minuteur Manette de commande (de la température) Indicateur / symbole de température Fentes d’aération du ventilateur de refroidissement Résistance Éclairage... -
Page 62: Utilisation Quotidienne
Retirez tous les accessoires du four. Réglez la température maximale pour la fonction : Nettoyez le four et les accessoires avec un chiffon doux, de l’eau tiède et un détergent doux. Durée : 1 h. Réglez la température maximale pour la fonction : Durée : 15 min. -
Page 63: Fonctions De L'horloge
Chaleur tournante humide. Pour obtenir des « Efficacité énergétique », « Économie recommandations générales sur l'économie d'énergie ». d'énergie, reportez-vous au chapitre 7. FONCTIONS DE L'HORLOGE 7.1 Comment régler : Heure de fin de cuisson Pour régler l'heure d'arrêt des fonctions du four. Étape 1 Réglez la fonction du four et la température. -
Page 64: Fonctions Supplémentaires
Lèchefrite: Poussez la plaque entre les rails du support de grille. 9. FONCTIONS SUPPLÉMENTAIRES 9.1 Ventilateur de refroidissement surchauffe dangereuse. Pour éviter cela, le four dispose d'un thermostat de sécurité Lorsque le four fonctionne, le ventilateur de interrompant l'alimentation électrique. Le four refroidissement se met automatiquement en se remet automatiquement en marche pour refroidir les surfaces du four. - Page 65 10.2 Chaleur tournante humide - accessoires recommandés Utilisez les moules et récipients foncés et non réfléchissants. Ils offrent une meilleure absorption de la chaleur que les plats réfléchissants de couleur claire. Ramequins Plaque à pizza Plat de cuisson Moule pour fond de tarte Céramique Sombre, non réfléchissant Sombre, non réfléchissant...
- Page 66 (°C) (min) Viande pochée, 0,25 Plateau de cuisson ou plat à 40 - 50 rôtir Chachlyk, 0,5 kg Plateau de cuisson ou plat à 25 - 35 rôtir Cookies, (16 pièces) Plateau de cuisson ou plat à 20 - 30 rôtir Macarons, (20 pièces) Plateau de cuisson ou plat à...
-
Page 67: Entretien Et Nettoyage
(°C) (min) Génoise, Chauffage Grille métal‐ 35 - 45 moule à gâ‐ Haut/ Bas lique teau de 26 cm Sablé Chauffage Plateau de 20 - 35 Préchauffez le four Haut/ Bas cuisson pendant 10 minutes. Toasts, 4 à Gril Grille métal‐ max. - Page 68 Après chaque utilisation, lavez tous les accessoires et séchez-les. Utilisez un chiffon doux avec de l’eau tiède et un détergent doux. Ne lavez pas les accessoires au lave-vaisselle. Ne nettoyez pas les accessoires antiadhésifs avec un produit nettoyant abrasif ou des objets tranchants.
- Page 69 90° Étape 7 Nettoyez les vitres à l'eau savonneuse. Essuyez soigneusement les panneaux de verre. Ne passez pas les panneaux en verre au lave-vaisselle. Étape 8 Après le nettoyage, installez le panneau de verre et la porte du four. Lorsque le cadre de la porte est installé correctement, il émet un clic.
-
Page 70: Dépannage
Référence produit (PNC) ......... Numéro de série (S.N.) ......... 13. RENDEMENT ÉNERGÉTIQUE 13.1 Informations produit et fiche d’informations produit* Nom du fournisseur Electrolux COHHH00BK 944068297 COHHH00BX 944068296 Identification du modèle KOHHH00BK3 944068301 KOHHH00BX3 944068300 Indice d’efficacité énergétique 94.9 Classe d’efficacité énergétique Consommation d’énergie avec charge standard, en mode conven‐... -
Page 71: Matière De Protection De L'environnement
Source de chaleur Électricité Volume 58 l Type de four Four encastrable COHHH00BK 26.5 kg COHHH00BX 27.3 kg Masse KOHHH00BK3 26.5 kg KOHHH00BX3 26.5 kg * Pour l’Union européenne conformément aux Règlements UE 65/2014 et 66/2014. Pour la République de Biélorussie conformément à STB 2478-2017, Annexe G ; STB 2477-2017, Annexes A et Pour l’Ukraine conformément à... - Page 72 sécurité, recyclez vos produits électriques et ménagères. Emmenez un tel produit dans électroniques. Ne jetez pas les appareils votre centre local de recyclage ou contactez vos services municipaux. portant le symbole avec les ordures FRANÇAIS...
- Page 73 PENSIAMO A TE Grazie per aver acquistato un elettrodomestico Electrolux. Hai scelto un prodotto che ha alle spalle decenni di esperienza professionale e innovazione. Ingegnoso ed elegante, è stato progettato pensando a te. Quindi, in qualsiasi momento lo utilizzi, avrai la certezza di ottenere sempre i migliori risultati.
-
Page 74: Informazioni Di Sicurezza
INFORMAZIONI DI SICUREZZA Leggere attentamente le istruzioni fornite prima di installare e utilizzare l'apparecchiatura. I produttori non sono responsabili di eventuali lesioni o danni derivanti da un'installazione o un uso scorretti. Conservare sempre le istruzioni in un luogo sicuro e accessibile per poterle consultare in futuro. 1.1 Sicurezza di bambini e persone vulnerabili Quest’apparecchiatura può... - Page 75 Quest’apparecchiatura è progettata per un uso domestico • singolo in un ambiente interno. Quest’apparecchiatura può essere utilizzata in uffici, • camere d'albergo, camere di bed & breakfast, alloggi in agriturismi e altre sistemazioni simili in cui tale utilizzo non superi i livelli di utilizzo domestico (medi). L'installazione dell'apparecchiatura e la sostituzione dei •...
-
Page 76: Istruzioni Di Sicurezza
2. ISTRUZIONI DI SICUREZZA 2.1 Installazione Profondità di incasso del‐ 540 mm l'apparecchiatura AVVERTENZA! L’installazione Profondità con porta aperta 1007 mm dell'apparecchiatura deve essere Dimensioni minime dell'a‐ 560x20 mm eseguita da personale pertura di ventilazione. qualificato. Apertura collocata sul lato posteriore inferiore •... - Page 77 Verificare che la spina di alimentazione • Non modificare le specifiche tecniche rimanga accessibile dopo l'installazione. dell'apparecchiatura. • Nel caso in cui la spina di corrente sia • Assicurarsi che le aperture di ventilazione allentata, non collegarla alla presa. non siano bloccate. •...
- Page 78 2.5 Illuminazione interna • Lo scolorimento dello smalto o dell'acciaio inox non influisce sulle prestazioni dell'elettrodomestico. AVVERTENZA! • Eseguire sempre la cottura con lo Pericolo di scosse elettriche. sportello dell’apparecchiatura chiuso. • Se l'apparecchiatura si trova dietro a un • Per quanto riguarda la lampada o le pannello anteriore (ad es.
-
Page 79: Installazione
3. INSTALLAZIONE 3.1 Incasso AVVERTENZA! Fare riferimento ai capitoli sulla sicurezza. min. 550 min. 560 min. 550 min. 560 3.2 Fissaggio nel mobile ITALIANO... -
Page 80: Descrizione Del Prodotto
4. DESCRIZIONE DEL PRODOTTO 4.1 Panoramica generale Pannello dei comandi Spia/simbolo alimentazione Manopola di regolazione delle funzioni cottura Manopola del timer Manopola di regolazione (per la temperatura) Indicatore/simbolo della temperatura Aperture di ventilazione per la ventola di raffreddamento Resistenza Lampadina Ventola Goffratura della cavità... -
Page 81: Utilizzo Quotidiano
Rimuovere tutti gli accessori dal forno. Impostare la temperatura massima per la funzione: Pulire il forno e gli accessori con un panno morbi‐ do imbevuto di acqua tiepida e detergente delicato. Tempo: 1 ora Impostare la temperatura massima per la funzione: Tempo: 15 min. -
Page 82: Funzioni Del Timer
risparmio energetico rimandiamo al capitolo "Efficienza energetica", Risparmio energetico. 7. FUNZIONI DEL TIMER 7.1 Come impostare: Fine della cottura Per impostare l’ora di spegnimento delle funzioni del forno. Passaggio Selezionare la funzione di cottura e regolare la temperatura. Passaggio Ruotare la manopola del timer al massimo. Passaggio Ruotare la manopola del timer all'ora di fine. -
Page 83: Funzioni Aggiuntive
Leccarda: Spingere la lamiera tra le guide del supporto ripia‐ 9. FUNZIONI AGGIUNTIVE 9.1 Ventola di raffreddamento surriscaldamento pericoloso. Per evitare che questo accada, il forno è dotato di un Quando il forno è in funzione, la ventola di termostato di sicurezza che interrompe raffreddamento si accende in modo l'alimentazione della corrente elettrica. - Page 84 10.2 Cottura ventilata umida - accessori consigliati Usare scatole e contenitori scuri e non riflettenti. Assorbono meglio il calore rispetto al colore chiaro e ai piatti riflettenti. Pirofile monopor‐ zione Teglia da pizza Pirofila Tortiera per flan Ceramica Scura, non riflettente Scura, non riflettente Scura, non riflettente diametro 8 cm, al‐...
- Page 85 (°C) (min.) Muffin, 12 pezzi vassoio di cottura o leccarda 30 - 40 Pasta saporita, 16 vassoio di cottura o leccarda 35 - 45 pezzi Biscotti di pasta frolla, vassoio di cottura o leccarda 40 - 50 20 pezzi Tortine, 8 pezzi vassoio di cottura o leccarda 20 - 30 Verdure, al vapore, 0,4...
-
Page 86: Pulizia E Cura
(°C) (min.) Burger di Grill Su ripiano a 20 - 30 Sistemare il ripiano a manzo, 6 filo e leccar‐ filo sul terzo livello e la pezzi, 0,6 kg leccarda sul secondo livello del forno. A me‐ tà cottura girare gli ali‐ menti. - Page 87 Passaggio Aprire completamente la porta e tene‐ Passaggio 2 Alzare e ruotare le levette completa‐ re le due cerniere. mente sulle due cerniere. Passaggio Chiudere la porta del forno fino alla Passaggio 4 Appoggiare la porta su una superficie prima posizione di apertura. Quindi stabile e coperta da un panno morbido sollevare e tirare in avanti la porta sfi‐...
-
Page 88: Risoluzione Dei Problemi
11.3 Come sostituire: Lampadina AVVERTENZA! Pericolo di scosse elettriche. La lampada potrebbe essere calda. Prima di sostituire la lampadina: Passagio 1 Passagio 2 Passagio 3 Spegnere il forno. Attendere che il Estrarre la spina dalla presa di cor‐ Appoggiare un panno sul fondo del‐ forno sia freddo. -
Page 89: Efficienza Energetica
......... Numero di serie (S.N.) ......... 13. EFFICIENZA ENERGETICA 13.1 Informazioni sul prodotto e scheda informativa sul prodotto* Nome del fornitore Electrolux COHHH00BK 944068297 COHHH00BX 944068296 Identificazione modello KOHHH00BK3 944068301 KOHHH00BX3 944068300 Indice di efficienza energetica 94.9 Classe di efficienza energetica Consumo energetico con carico standard, modalità... -
Page 90: Considerazioni Sull'ambiente
Servirsi di pentole in metallo per migliorare il minimo 3-10 minuti prima della fine del risparmio energetico . processo di cottura. La cottura proseguirà grazie al calore residuo all'interno del forno. Ove possibile, non pre-riscaldare il forno prima della cottura. Utilizzare il calore residuo per scaldare altri piatti. - Page 92 electrolux.com...