Sanyo PDG-DWL100 Owner's Manual
Hide thumbs
Also See for PDG-DWL100:
- Service manual (78 pages) ,
- Owner's manual (63 pages) ,
- Command manual (47 pages)

Related Manuals for Sanyo PDG-DWL100


Summary of Contents for Sanyo PDG-DWL100
- Page 1 All manuals and user guides at all-guides.com Multimedia Projector PDG-DWL100 MODEL Owner's Manual...
-
Page 2: Table Of Contents
All manuals and user guides at all-guides.com Table of Contents Table of Contents Table of Contents Network Setting Page ........37 Security Setting Page ........38 Alert Setting Page ..........39 Usage Notice Logout Page ............. 40 Precautions ............2 Appendices Introduction Troubleshooting ........... -
Page 3: Usage Notice
All manuals and user guides at all-guides.com Usage Notice Precautions Follow all warnings, precautions and maintenance as recom- mended in this user’s guide to maximize the life of your unit. ■ This apparatus must be earthed. Warning- ■ Do not look into the projector’s lens when the Warning- lamp is on. - Page 4 All manuals and user guides at all-guides.com Usage Notice ■ Allowing the proper amount of space on the Warning- top, sides, and rear of the projector cabinet is critical for proper air circulation and cooling of the unit. The dimensions shown here indicate the minimum space required.
- Page 5 All manuals and user guides at all-guides.com Usage Notice ■ Turn off the product before cleaning. ■ Use a soft cloth moistened with mild detergent to clean the display housing. ■ Disconnect the power plug from AC outlet if the product is not being used for a long period of time.
-
Page 6: Introduction
All manuals and user guides at all-guides.com Introduction Introduction Product Features This product is a WXGA single chip 0.65” DLP projector. ® Outstanding features include: True WXGA, 1280 x 800 addressable pixels ■ Single chip DLP technology ■ ® NTSC3.58/NTSC4.43/PAL(B/D/G/H/I/M/N)/ ■... -
Page 7: Package Overview
All manuals and user guides at all-guides.com Introduction Package Overview This projector comes with all the items shown below. Check to make sure your unit is complete. Contact your dealer immedi- ately if anything is missing. Due to the differ- Projector with lens cap Wireless Remote Control 2 x AAA Batteries... -
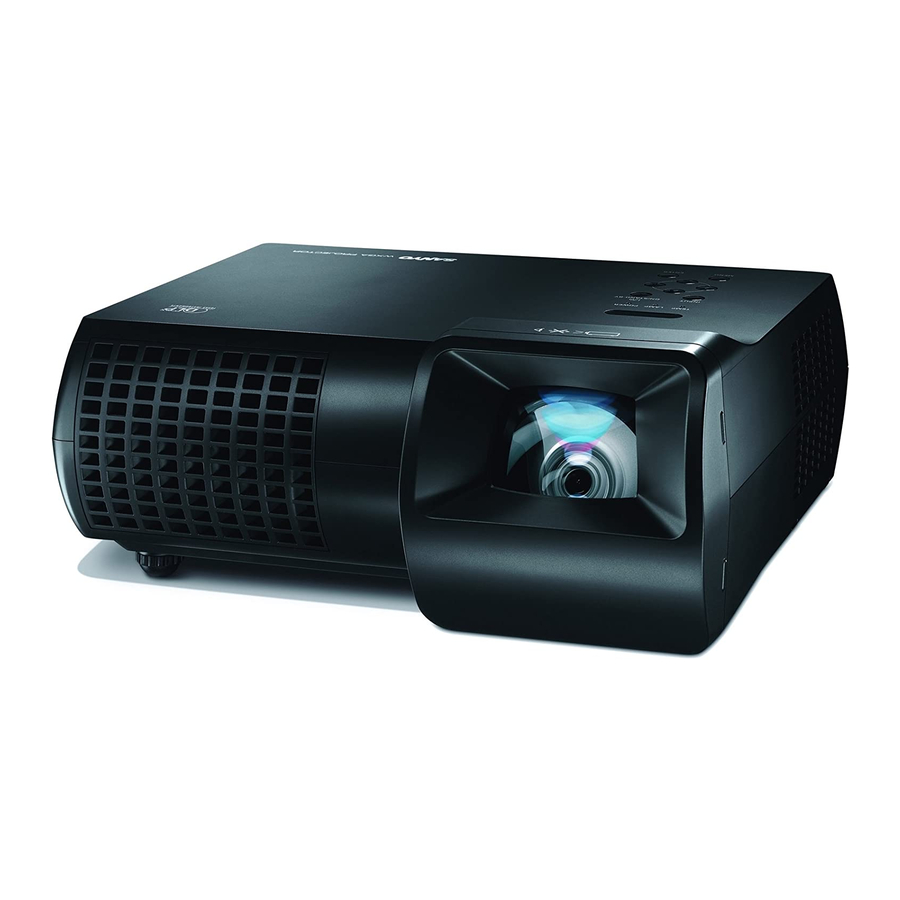
Page 8: Product Overview
All manuals and user guides at all-guides.com Introduction Product Overview Projector Air Flow 1. Control Panel 2. Remote Sensor 3. Focus Ring 4. Ventilation (outlet) 5. Lens 6. Lens Cap (with String) 7. Ventilation (inlet) 8. Speaker English English... -
Page 9: Connection Ports
All manuals and user guides at all-guides.com Introduction Connection Ports AUDIO IN COMPUTER IN 1 SERVICE MONITOR OUT VIDEO IN COMPONENT IN 1 PORT S-VIDEO IN ( VARIABLE ) AUDIO OUT COMPUTER IN 2 COMPONENT IN 2 11 12 1. SERVICE Port 7. -
Page 10: Remote Control
All manuals and user guides at all-guides.com Introduction Remote Control Infrared trans- Sends signals to the projector. mitter Infrared indica- Signals indicator for sending. ON/STAND- Refer to the “Power On/Off the Pro- jector” section. (See pages 15~16) ENTER Confirm your section of items in sub menu operation. - Page 11 All manuals and user guides at all-guides.com Introduction MENU Press “MENU” to launch the On- screen display (OSD), back to the top level of OSD for the OSD main menu operation To quick change IMAGE Select the Image mode from Presenta- remote control code, tion, Movie, sRGB, Bright and User.
- Page 12 All manuals and user guides at all-guides.com Introduction VOLUME +/- Increase/decrease speaker volume. Keypad 1~9 For input a password in the “Security settings”. AUTO. ADJ Automatically synchronize the projec- tor to the input source. HDMI Press “HDMI” to choose HDMI con- nector.
-
Page 13: Remote Control Battery Installation
All manuals and user guides at all-guides.com Introduction Remote Control Battery Installation Install new batteries into the Open the battery com- Replace the com- compartment. partment lid. partment lid Two AAA size batteries For correct polarity (+ and –), be sure battery terminals are in contact with pins in the com- partment. -
Page 14: Installation
All manuals and user guides at all-guides.com Installation Connecting the Projector Connect to Computer/Notebook VGA, DVI Make sure that the Audio Output power plug is fully inserted into both the projector AC inlet and the wall outlet. The AC outlet must be near this equipment and must be easily ac- AUDIO IN... -
Page 15: Connect To Video
All manuals and user guides at all-guides.com Installation Connect to Video DVD player, Set-top Box HDTV receiver Make sure that the power plug is fully inserted into both the projector AC inlet and the wall outlet. The AC outlet must Video Output be near this equipment and must be easily ac-... -
Page 16: Powering On/Off The Projector
All manuals and user guides at all-guides.com Installation Powering On/Off the Projector Powering On the Projector 1. Ensure that the power cable and signal cable are securely connected. The POWER LED will turn orange. 2. Remove the lens cap. 3. -
Page 17: Powering Off The Projector
All manuals and user guides at all-guides.com Installation Powering Off the Projector 1. Press the “ON/STAND-BY” to turn off the projector lamp, you will see a message as below on the on-screen display. Press the “ON/STAND-BY” again to confirm. 3. The cooling fan continues to operate for about 60 seconds for cooling cycle and the POWER LED will flash green. -
Page 18: Warning Indicator
All manuals and user guides at all-guides.com Installation Warning Indicator When the “TEMP” LED indicator turns red, it indicates the projector has overheated. The projector will automatically shut itself down. When you see the message below displays on-screen, the ... -
Page 19: Adjusting The Projected Image
All manuals and user guides at all-guides.com Installation Adjusting the Projected Image Adjusting the Height of Projector Image The projector is equipped with adjustable feet to raise and lower the image to fill the screen. To raise/lower the image: 1. Use to fine-tune the display angle You can raise the projector front up to 3 degrees by rotating the... -
Page 20: Adjusting The Projector Focus
All manuals and user guides at all-guides.com Installation Adjusting the Projector Focus To focus the image, rotate the focus ring until the image is clear. The projector will focus at distances from 1.65 to 12.13 feet (0.5 to 3.7 meters) with mechanical travel. Focus Ring Adjusting Projection Image Size H : A = 6.78... -
Page 21: User Controls
All manuals and user guides at all-guides.com User Controls On Screen Display The Projector has a multilingual On Screen Display that allows you to make image adjustments and change a variety of set- tings. The projector will automatically detect the source. How to operate To open the OSD, press “MENU”... -
Page 22: Image(Pc Mode)
All manuals and user guides at all-guides.com User Controls Image (PC Mode) Image Mode There are many factory presets optimized for various types of im- ages. Use the to select the item. Presentation: For computer or notebook. Movie: For home theater. ... - Page 23 All manuals and user guides at all-guides.com User Controls Fine Sync Eliminate flicker from the image displayed. Use the to adjust the value. White Peaking Use the white peaking control to set the white peaking level of DMD chip. 0 stands for minimal peaking, and 10 stands for maxi- mum peaking.
-
Page 24: Image(Video Mode)
All manuals and user guides at all-guides.com User Controls Image (Video Mode) Image Mode There are many factory presets optimized for various types of im- ages. Use the to select the item. Presentation: For computer or notebook. Movie: For home theater. ... - Page 25 All manuals and user guides at all-guides.com User Controls Tint Adjust the color balance of red and green. Press the to increase the amount of green in the image. Press the to increase the amount of red in the image. ...
-
Page 26: Screen
All manuals and user guides at all-guides.com User Controls Screen Keystone Adjust image distortion caused by tilting projector. H-position (Horizontal Position) The bottom side of OSD Press the to move the image left. menu might be out Press the to move the image right. - Page 27 All manuals and user guides at all-guides.com User Controls Mounting Front-Desktop The factory default setting. Rear-Desktop When you select this function, the projector reverses the image so you can project behind a translucent screen. Front-Ceiling When you select this function, the projector turns the image upside down for ceiling-mounted projection.
-
Page 28: Setting
All manuals and user guides at all-guides.com User Controls Setting Input Search When this function is turned “On”, the projector will search for other signals if the current input signal is lost. When this function is turned “Off”, it will only search a specified connection port. Fan Control Choose “On”... - Page 29 All manuals and user guides at all-guides.com User Controls Eco Standby Power (<1W) This function is available when the projector is turned off and in Please turn this func- Stand-by. It is recommended to use Eco under normal condition. tion “Off ”, if you want On: lower power consumption than Normal mode in Stand-by ...
- Page 30 All manuals and user guides at all-guides.com User Controls Volume: ■ Press the to decrease the volume. ■ Press the to increase the volume. Lamp Counter Reset Reset the lamp life hour after replacing a new lamp. Security Settings Security Settings: ...
-
Page 31: Setting/Network
All manuals and user guides at all-guides.com User Controls Setting/Network Network Status Display the network connection status. DHCP Display the network connection status. On: Assign an IP address to the projector from the DHCP server automatically. Off: Assign an IP address manually. ... -
Page 32: Language
All manuals and user guides at all-guides.com User Controls Language Language Choose the multilingual OSD. Press into the sub menu and then use the key to select your preferred In the first instance language. Press “ENTER” to finalize the selection. of powering on the projector, the language menu is displayed to... -
Page 33: Controlling The Projector From Web
All manuals and user guides at all-guides.com User Controls Controlling the Projector From Web Configuring the Network Setting If the Netscape user 1. Fill in a new IP, a subnet mask, a gateway and a DNS in the wants to control the dialogue box. - Page 34 All manuals and user guides at all-guides.com User Controls For example: Use Microsoft Internet Step 6: To open Internet Options, click Explorer (IE) web browser IE web browser, click Internet Options, click the Connections tab to control the projector, and click “LAN Settings...” the IP address is http: // 192.168.0.100.
- Page 35 All manuals and user guides at all-guides.com User Controls Step 9: The web page will display as below: Step 10: Open “Control Panel” to control your projector. English...
-
Page 36: Home Page
All manuals and user guides at all-guides.com User Controls Home Page Access the Projector Web Server by entering the projector’s IP address at the web browser. The Home Page displays basic information about the projector. When Home page display error status, it indicates the lamp failed. -
Page 37: Control Panel Page
All manuals and user guides at all-guides.com User Controls Control Panel Page This page allows you to manage the projector status using a Web browser. How to operate Control Panel page Button setting: Action. The value in the text box indicates current Text box setting: Enter a number or text and then click “Set”... -
Page 38: Network Setting Page
All manuals and user guides at all-guides.com User Controls Network Setting Page This page allow you to enable or disable DHCP and set network re- lated addresses and names. Projector Setting Allows you to define the group name and projector name of the projector. -
Page 39: Security Setting Page
All manuals and user guides at all-guides.com User Controls Security Setting Page This page allow you control the projector by using the telnet or PJLink application installed on your computer. New Password: Enter new password. Confirm Password: Enter password again and submit. ... -
Page 40: Alert Setting Page
All manuals and user guides at all-guides.com User Controls Alert Setting Page Email Setting E-mail Alert: You can set whether to be notified by email (Enable) or not (Disable). To/CC/From: You can enter email address of sender (From) and ... -
Page 41: Logout Page
All manuals and user guides at all-guides.com User Controls Logout Page When you use this page, the projector system will go back Login mode. English... -
Page 42: Appendices
All manuals and user guides at all-guides.com Appendices Troubleshooting If you experience trouble with the projector, refer to the fol- lowing information. If the problem persists, please contact your local dealer or service center. Problem: No image appears on screen Ensure all the cables and power connections are correctly and ... - Page 43 All manuals and user guides at all-guides.com Appendices 4. Verify the resolution setting is less than or equal to 1600 x 1200 resolution. 5. Select the “Change” under the “Monitor” tab . 6. Click on “Show all devices”. Next, select “Standard monitor types”...
- Page 44 All manuals and user guides at all-guides.com Appendices Check and reconfigure the display mode of your graphic card to make it compatible with the product. Problem: Image is out of focus Adjust the Focus Ring on the projector lens. ...
- Page 45 All manuals and user guides at all-guides.com Appendices Problem: LED lighting message TEMP- LAMP- POWER-LED Message (Red) (Green) (Orange) (Red) (Red) Standby (Input power cable) Normal (Power on) Powering up (Warming up) Flashing Power off (Cooling-I: It can’t accept any Flashing key at this status) Power off (Cooling-II: It can accept...
- Page 46 All manuals and user guides at all-guides.com Appendices Problem: Message Reminders Over temperature - the projector has exceeded its recommended operating temperature and must be allowed to cool down before it may be used. Replacing the lamp - the lamp is about to reach its maximum life- ...
-
Page 47: Replacing The Lamp
All manuals and user guides at all-guides.com Appendices Replacing the lamp The projector will detect the lamp life itself. It will show you a warning message Warning: To avoid When you see this message, change the lamp as soon as pos- burns, allow the sible. - Page 48 Appendices ORDER REPLACEMENT LAMP Replacement lamp can be ordered through your dealer. When ordering a projection lamp, give the following information to the dealer. Model No. of your projector : PDG-DWL100 ■ Replacement Lamp Type No. : POA-LMP138 ■ (Service Parts No. CHSP8EM01GC01 or 610 346 4633)
-
Page 49: Cleaning The Air Filters
All manuals and user guides at all-guides.com Appendices Cleaning the Air Filters Air filters prevent dust from accumulating on the optical elements inside the projector. Should the air filters become clogged with dust particles, it will reduce cooling fans’ effec- tiveness and may result in internal heat build up and adverse- ly affect the life of the projector. -
Page 50: Specifications
All manuals and user guides at all-guides.com Appendices Specifications Projection System Single Chip DLP Technology by Texas Instruments ® Number of Pixels WXGA: 1280 pixels(H) X 800 lines(V), up to UXGA (1600 X 1200) with scaling technology Lamp 225W (170W on ECO mode) Projection Lens F#2.6 f=7.198mm with manual focus Projection Screen Size... -
Page 51: Computer Compatibility (Analog)
All manuals and user guides at all-guides.com Appendices Computer Compatibility (Analog) (1) Signals from D-sub 15 V.Frequency H.Frequency Modes Resolution (Hz) (kHz) 640 x 480 31.50 640 x 480 37.90 640 x 480 37.50 720 x 400 31.50 SVGA 800 x 600 35.20 800 x 600 37.90... -
Page 52: Computer Compatibility (Digital-Hdmi)
All manuals and user guides at all-guides.com Appendices Computer Compatibility (Digital- HDMI) (1) PC digital signals with HDMI-DVI cable V.Frequency H.Frequency Modes Resolution (Hz) (kHz) 640 x 480 31.50 640 x 480 37.90 640 x 480 37.50 720 x 400 31.50 SVGA 800 x 600... - Page 53 All manuals and user guides at all-guides.com Appendices (2) AV digital signals with HDMI cable V.Frequency Modes Resolution (Hz) 480i 1440 x 480 480p (NTSC) 640 x 480 480p (NTSC) 720 x 480 576i (PAL) 1440 x 576 576p (PAL) 720 x 576 720p (NTSC) 1280 x 720...
-
Page 54: Configurations Of Terminals
All manuals and user guides at all-guides.com Appendices Configurations of Terminals Terminal : Analog RGB (Mini D-sub 15 pin) Red (R/Cr) Input/R Output 5V / *** Green (G/Y) Input/G Output Ground (Ver. sync.) Blue (B/Cb) Input/B Output ICP download DDC data / *** Ground (Horiz.sync.) Horiz. -
Page 55: Regulation & Safety Notices
All manuals and user guides at all-guides.com Appendices Regulation & Safety Notices This appendix lists the general notices of your Projector. FCC notice This device has been tested and found to comply with the limits for a Class B digital device pursuant to Part 15 of the FCC rules. These limits are designed to provide reasonable protection against harmful interference in a residential installation. - Page 56 All manuals and user guides at all-guides.com Appendices Operation conditions This device complies with Part 15 of the FCC Rules. Operation is subject to the following two conditions: 1. This device may not cause harmful interference and 2. This device must accept any interference received, in- cluding interference that may cause undesired operation.
-
Page 57: Serial Control Interface
All manuals and user guides at all-guides.com Appendices Serial Control Interface This projector provides a function to control and monitor the projector’s operations by using the RS-232C serial port. Operation 1. Connect a RS-232C serial cross cable to SERVICE PORT on the projector and serial port on the PC. -
Page 58: Functional Execution Command
All manuals and user guides at all-guides.com Appendices Functional Execution Command Format The command is sent from PC to the projector with the format below; ‘C’ [Command] ‘CR’ Command: two characters (refer to the command table below. ■ The projector decodes the command and returns the ‘ACK’ with the format below;... -
Page 59: Status Read Command
All manuals and user guides at all-guides.com Appendices Status Read Command Format The command is sent from PC to the projector with the format below; ‘CR’ [Command] ‘CR’ Command: one character (refer to the command table below. ■ The projector decodes the command and returns the ‘Character string’... -
Page 60: Use Of Telnet
All manuals and user guides at all-guides.com Appendices Use of Telnet You can control the projector by using the telnet application installed on your computer. Normally, the telnet application The telnet 10000 port is used to control the is available on your computer. projector. -
Page 61: Pjlink Notice
All manuals and user guides at all-guides.com Appendices 4. Type the commands, refer to right Command list table table, to control the projector and Command Function then press “Enter” key for termina- POWER ON tion. For example, type “C00” which POWER OFF is a command to turn on the projec- (Immediate POWER OFF) -
Page 62: Dimensions
All manuals and user guides at all-guides.com Appendices Dimensions 12.06"/306.53mm 2.55"/64.67mm Lens Center 5.07"/128.92mm 4.74"/120.54mm 3° Max. 0.47"/11.89mm 4.13"/105.00mm 4.70"/119.50mm 0.74"/18.80mm Screw Holes for Ceiling Mount Screw: M4 4.06"/103.10mm 4.06"/103.10mm Depth: 0.47”/12.0mm English English... - Page 63 All manuals and user guides at all-guides.com KY5A...