Advertisement
m DANGER
If you smell gas:
1.
Shut off gas to the appliance.
2.
Extinguish any open flame.
3.
If odor continues, keep away from the
appliance and immediately call your gas
supplier or fire department.
m WARNING
Do not store or use gasoline or other
flammable vapors and liquids in the vicinity
of this or any other appliance.
An LP-cylinder not connected for use shall
not be stored in the vicinity of this or any
other appliance.
m WARNING
Improper installation, adjustment, alteration,
service or maintenance can cause property
damage, injury or death. Read the
installation, operating and maintenance
instructions thoroughly before installing or
servicing this equipment.
m WARNING
For outdoor use only.
Customer Service Hotline
1-866-994-6390
DO NOT RETURN YOUR PATIO
HEATER TO THE STORE
Before visiting your local retailer, call our customer service
department at 1-866-994-6390 from 9:00 am
to 5:00 pm Eastern time, Monday through Friday.
CALIFORNIA PROPOSITION 65 WARNING:
•
WARNING: This product can expose you to
lead, which is known to the State of California
to cause cancer and birth defects or other
reproductive harm. For more information go
to www.P65Warnings.ca.gov
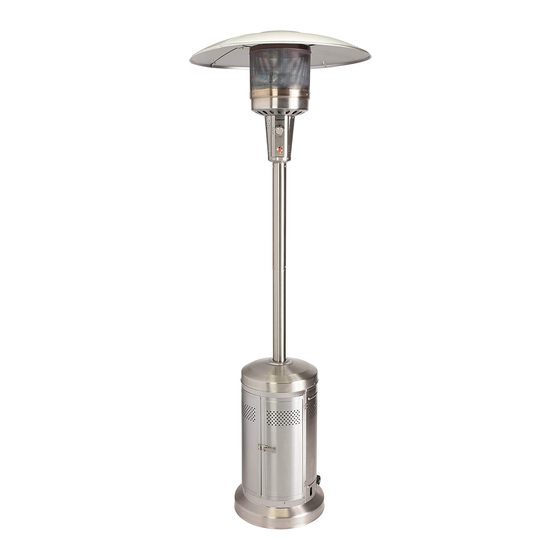
STAINLESS STEEL
PROPANE PATIO HEATER
Model NO: COH-300
Advertisement
Table of Contents

Related Manuals for Cuisinart COH-300

Summary of Contents for Cuisinart COH-300
- Page 1 STAINLESS STEEL PROPANE PATIO HEATER Model NO: COH-300 m DANGER If you smell gas: Shut off gas to the appliance. Extinguish any open flame. If odor continues, keep away from the appliance and immediately call your gas supplier or fire department.
-
Page 2: Table Of Contents
TABLE OF CONTENTS Product Specification - - - - - - - - - - - - - - - - - - - - - - - - - - - - - - - - - - - - - - - - - - - - - - - - - - - - - - - - - - - - - - - - - - - - - - - - - - - - - - - - - - - Safety Information - - - - - - - - - - - - - - - - - - - - - - - - - - - - - - - - - - - - - - - - - - - - - - - - - - - - - - - - - - - - - - - - - - - - - - - - - - - - - - - - - - - Package Contents... -
Page 3: Safety Information
SAFETY INFORMATION Please read and understand this entire manual before attempting to assemble, operate or install the product. 1. The installation must conform with local codes or, in the absence of local codes, with the National Fuel Gas Code, ANSI Z223.1 /NFPA 54, Natural Gas and Propane Installation Code, CSA B149.1, or Propane Storage and Handling Code, B149.2. - Page 4 SAFETY INFORMATION 15. Keep the ventilation opening(s) of the cylinder enclosure free and clear from debris. Use this appliance in a well-ventilated space only. Do not use it in a building, garage, or any other enclosed area. Use this appliance in outdoor areas described below: (a) With walls on all sides, but at least one permanent opening at ground level and no overhead cover.
-
Page 5: Package Contents
PACKAGE CONTENTS Part Description Quantity Top Dome 1 pc KD Dome 1 pcs Burner Assembly 1 pc Upper Pole 1 pc Beauty Ring 1 pc Lower Pole Assembly 1 pc Cylinder Housing Assembly 1 pc Base 1 pc Wheel Assembly 1 pc... -
Page 6: Hardware Contents
HARDWARE CONTENTS HARDWARE DESCRIPTION (x2) M8 x 15 mm Bolt Reflector Spacer (x3) M8 Nut (x2) M5 x 8 mm Bolt (x16) M6 x 10 mm Bolt (x4) M5 x 8 mm Silver Bolt (x12) M5 Nut (x12) AAA Battery (x1) Wing Nut (x3) -
Page 7: Assembly Preparation
ASSEMBLY PREPARATION Before beginning assembly of product, make sure all parts are present. Compare parts with package contents list and diagram above. If any part is missing or damaged, do not attempt to assemble the product. Contact customer service for replacement parts. Estimated Assembly Time: 30 minutes Tools required: Wrench, Magnetic Head Phillips Screwdriver (Not included) Not Included... - Page 8 ASSEMBLY INSTRUCTIONS STEP 4 Back - - - - - - - - - - - - - - - - - - - - - - - - - - - - - - - - - - - - - - - - - - - Attach Lower Pole assembly (F) to Cylinder Housing Assembly (G) using M6 x 10 mm bolts (EE),and then put Beauty Ring (E) through the Lower Pole assembly on top...
- Page 9 ASSEMBLY INSTRUCTIONS STEP 7 - - - - - - - - - - - - - - - - - - - - - - - - - - - - - - - - - - - - - - - - - - - Feed the valve and gas hose and connect Upper Pole (D) to the Lower Pole Assembly (F).
- Page 10 ASSEMBLY INSTRUCTIONS STEP 10 - - - - - - - - - - - - - - - - - - - - - - - - - - - - - - - - - - - - - - - - - - - Connect Hose &...
-
Page 11: Safety Check
SAFETY CHECK Checking for Leaks Your patio heater has been checked at all factory connections for leakage. To check the connection at the gas hose/regulator/cylinder: a. Make leakage solution by mixing 1part liquid dish soap and 3 part water. b. Spoon or brush several drops (or use squirt bottle) of the solution onto the gas hose/regulator and regulator/ cylinder and hose connection. -
Page 12: Care And Maintenance
OPERATION INSTRUCTIONS In any case of failure of normal ignition, please use a Lighter gun (Sold Separately) to reach the burner for ignition through the hole on the bottom of burner diffuser. WARNING FOR YOUR SAFETY: If at any time you are unable to light burner and smell gas, wait 5 minutes to allow gas to dissipate before attempting to light heater. - Page 13 CARE AND MAINTENANCE Cleaning • Wipe surfaces clean with mild dish detergent or baking soda. • For stubborn surfaces use a citrus-based degreaser and a nylon scrubbing brush. • Rinse clean with water. Note: While cleaning the unit, be sure to keep the area around the burner and pilot assembly dry at all times.
-
Page 14: Troubleshooting
TROUBLESHOOTING Problem Possible Cause Corrective Action Burner won’t light. • Gas pressure is low. • Turn tank valve “OFF” and replace the tank. • Clear blockage. • The orifice is blocked. • Turn control knob to “High”. • Control knob is not in “High” position. -
Page 15: Replacement Part List
REPLACEMENT PARTS LIST Part Description Top Dome KD Dome Burner Assembly Burner Chamber Assembly Insulation Plate Control Panel Knob Igniter Thermocouple Ignition Pin Tilt Switch Upper Pole Beauty Ring Lower Pole Assembly Cylinder Housing Assembly Shroud Fix Bracket Base Wheel Assembly Weight Plate Hardware Pack... -
Page 16: Warranty
This warranty gives you specific legal rights, and you may also have the other rights that vary from state to state. For troubleshooting, FAQs or customer service, visit us at www.cuisinart.com/outdoorgrilling or contact us at 1-866-994-6390 Model # COH-300 North American Distributor:...