LG LSRG309ST Installation Manual
Hide thumbs
Also See for LSRG309ST:
- Owner's manual (92 pages) ,
- Service manual (77 pages) ,
- Manual del propietario (53 pages)

Related Manuals for LG LSRG309ST


Summary of Contents for LG LSRG309ST
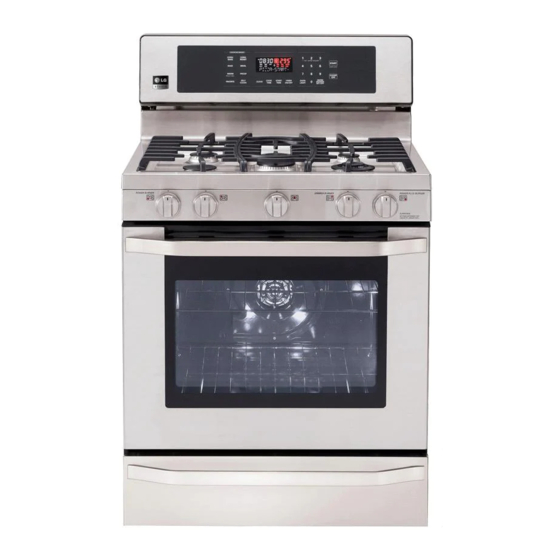
- Page 1 INSTALLATION MANUAL GAS RANGE Please read this guide thoroughly before installation. LSRG309ST www.lg.com MFL62177702...
-
Page 3: Installation Safety Instructions
INSTALLATION INSTRUCTIONS READ ALL INSTRUCTIONS BEFORE INSTALLATION INSTALLATION SAFETY INSTRUCTIONS BEFORE YOU BEGIN Remove all tape and packing materials before using the range. Dispose all plastic bags after unpacking the range. Never allow children to play with packing materials. IMPORTANT SAFETY INSTRUCTIONS Read these instructions completely and carefully. - Page 4 INSTALLATION INSTRUCTIONS READ ALL INSTRUCTIONS BEFORE INSTALLATION INSTALLATION SAFETY INSTRUCTIONS (continued) WARNING! - If the range is pulled away from the wall for cleaning, service, or any other reason, ensure that the Anti-Tip Device is properly reengaged when ALL RANGES CAN TIP the range is pushed back against the wall.
-
Page 5: In The Commonwealth Of Massachusetts
INSTALLATION INSTRUCTIONS READ ALL INSTRUCTIONS BEFORE INSTALLATION INSTALLATION SAFETY INSTRUCTIONS (continued) WARNING • If a 30” clearance between cooking surface and • The vertical distance from the plane of the cooking overhead combustible material or metal cabinets surface to the bottom of adjacent overhead cannot be maintained, protect the underside of the cabinets extending closer than 1”... -
Page 6: Dimensions And Clearances
INSTALLATION INSTRUCTIONS DIMENSIONS AND CLEARANCES Provide proper clearances between the range and The range may be placed with 0” clearance (flush) at adjacent combustible surfaces. These dimensions the back wall. must be met for safe use of your range. The location of the electrical outlet and pipe opening (see “GAS PIPE AND ELECTRICAL OUTLET LOCATIONS”) may be adjusted to meet specific requirements. - Page 7 INSTALLATION INSTRUCTIONS LOCATION Do not locate your range where it may be subject When the floor covering ends at the front of the range to strong drafts. Any openings in the floor or wall the area that the range will be installed on should be behind the range should be sealed.
-
Page 8: Provide Adequate Gas Supply
INSTALLATION INSTRUCTIONS GAS PIPE AND ELECTRICAL OUTLET LOCATIONS 1. PROVIDE ADEQUATE GAS SUPPLY Your range is designed to operate at a pressure of For LP gas, the pressure supplied to the regulator 5” of water column on natural gas or 10” of water must be between 10”... -
Page 9: Connect The Range To Gas
INSTALLATION INSTRUCTIONS 2. CONNECT THE RANGE TO GAS Shut off the range gas supply valve before Connect flexible metal appliance connector to the removing the old range and leave it off until the adapter on the range. Position range to permit new hook-up has been completed. -
Page 10: Electrical Connections
INSTALLATION INSTRUCTIONS 3. ELECTRICAL CONNECTIONS ELECTRICAL REQUIREMENTS 120 Volt, 60 Hertz, properly grounded dedicated circuit protected by a 15 or 20 Amp circuit breaker, or slow blow fuse. GROUNDING IMPORTANT: FOR PERSONAL SAFETY, THIS APPLIANCE MUST BE PROPERLY GROUNDED. The power cord of this appliance is equipped with a CAUTION: 3-prong (grounding) plug which mates with a standard 3-prong grounding wall receptacle to minimize the... -
Page 11: Assemble The Surface Burners
INSTALLATION INSTRUCTIONS 5. ASSEMBLE THE SURFACE BURNERS CAUTION DO NOT operate the burners without all parts in Hole place. Place the burner caps and heads on the cooktop. Electrode Make sure that the caps and heads are placed in the correct locations. - Page 12 INSTALLATION INSTRUCTIONS 7. ADJUST THE SURFACE BURNER LOW FLAME(SIMMER) SETTING. 1) Light all surface burners. 2) Turn the knob on the burner being adjusted to “LO”. 3) Remove knob. 4) Insert a small, flat bladed screwdriver into the valve shaft as shown in Fig. 1. Center adjustment screw Adjustment screw next to the valve shaft...
- Page 13 INSTALLATION INSTRUCTIONS 8. CHECK OPERATION OF BAKE/BROIL BURNERS To check ignition of the Bake burner follow the steps To check ignition of the Broil burner follow the steps below: below: 1) Remove all packing from inside the oven cavity. 1) Press "Broil" ("Hi" will be shown in the display). 2) Press "Bake"...
-
Page 14: Installing The Anti-Tip Device
INSTALLATION INSTRUCTIONS 10. INSTALLING THE ANTI-TIP DEVICE LOCATING THE BRACKET USING THE WARNING TEMPLATE. • Range must be secured with an approved Anti- Tip device. • Unless properly installed, the range could be tipped by you or a child standing, sitting or leaning on an open door. -
Page 15: When All Hookups Are Complete
INSTALLATION INSTRUCTIONS WHEN ALL HOOKUPS ARE COMPLETE Make sure all controls are left in the off position. Make sure the flow of combustion and ventilation air to the range is unblocked. CONVERTING TO LP GAS (OR CONVERTING BACK TO NATURAL GAS FROM LP) This range leaves the factory set for use with The conversion instructions and LP orifices can be natural gas. - Page 16 M e m o...
-
Page 17: Estufa De Gas
I N S T R U C C I O N E S P A R A L A I N S T A L A C I Ó N ESTUFA DE GAS Lea detenidamente estas instrucciones antes de instalar LSRG309ST www.lg.com P/No.: MFL62177702... - Page 19 INSTRUCCIONES DE INSTALACIÓN LEA TODAS LAS INSTRUCCIONES ANTES DE REALIZAR LA INSTALACIÓN INSTRUCCIONES DE SEGURIDAD DURANTE LA INSTALACIÓN ANTES DE COMENZAR Retire todas las cintas y materiales de embalaje antes de usar el horno. Deseche todas las bolsas de plástico tras desembalar la cocina de gas.
- Page 20 INSTRUCCIONES DE INSTALACIÓN LEA TODAS LAS INSTRUCCIONES ANTES DE REALIZAR LA INSTALACIÓN INSTRUCCIONES DE SEGURIDAD DURANTE LA INSTALACIÓN (continuación) - Si se retira la cocina de gas de la pared para llevar a ADVERTENCIA! cabo labores de limpieza, servicio o por cualquier otra razón, asegúrese de volver a colocar correctamente el TODAS LAS COCINAS DE GAS soporte antivuelco al devolver el electrodoméstico a su...
-
Page 21: En El Estado De Massachusetts
INSTRUCCIONES DE INSTALACIÓN LEA TODAS LAS INSTRUCCIONES ANTES DE REALIZAR LA INSTALACIÓN INSTRUCCIONES DE SEGURIDAD DURANTE LA INSTALACIÓN (continuación) ADVERTENCIA • Si resulta imposible obtener 30” de espacio libre entre la • La distancia vertical desde el plano de la superficie de superficie de la cocina y el material combustible o el cocción hasta la base de los armarios superiores armario metálico superior, proteja la parte inferior del... -
Page 22: Dimensiones Y Espacios Libres
INSTRUCCIONES DE INSTALACIÓN DIMENSIONES Y ESPACIOS LIBRES Permita los espacios libres adecuados entre la cocina Localización de la tubería de gas y toma eléctrica) de gas y las superficies combustibles adyacentes. pueden ajustarse para cumplir exigencias específicas. Deben respetarse estas dimensiones para usar su La cocina de gas puede colocarse con 0”... - Page 23 INSTRUCCIONES DE INSTALACIÓN COLOCACION No coloque la cocina de gas en lugares expuestos a La estufa de gas debe instalarse sobre una lámina de fuertes corrientes. Cualquier apertura en el piso o en madera contrachapada (o material similar). Cuando el la pared posterior de la cocina de gas debe sellarse.
- Page 24 INSTRUCCIONES DE INSTALACIÓN INSTALACION DE LA TUBERÍA DE GAS Y LA TOMA ELÉCTRICA 1. PROPORCIONE EL SUMINISTRO DE GAS ADECUADO Su estufa de gas está diseñada para funcionar a una Para gas LP, la presión de suministro al regulador debe presión de 5”...
- Page 25 INSTRUCCIONES DE INSTALACIÓN 2. CONECTE LA ESTUFA AL GAS Corte antes la válvula general de suministro de gas Coloque el conector para electrodomésticos de Desconecte la estufa de gas antigua y déjela metal flexible al adaptador de la estufa de gas. desconectada hasta completar la nueva instalación.
-
Page 26: Conexiones Eléctricas
INSTRUCCIONES DE INSTALACIÓN 3. CONEXIONES ELÉCTRICAS REQUISITOS ELÉCTRICOS 120 voltios, 60 hercios, conexión a tierra adecuada, circuito propio protegido mediante disyuntor de 15 ó 20 amperios o fusible retardador. CONEXIÓN A TIERRA IMPORTANTE: POR MOTIVOS DE SEGURIDAD PERSONAL, ESTE ELECTRODOMÉSTICO DEBE CONECTARSE CORRECTAMENTE A TIERRA. - Page 27 INSTRUCCIONES DE INSTALACIÓN 5. INSTALE LOS QUEMADORES PRECAUCIÓN NO use los quemadores sin haber instalado todas Hueco sus piezas. Coloque las tapas y cabezas de los quemadores en la Electrodo cocina. Asegúrese de que las tapas y cabezas estén colocados en posición correcta. Existe un quemador pequeño, uno mediano, uno grande y otro extra-grande compuestos por cabeza y tapa.
- Page 28 INSTRUCCIONES DE INSTALACIÓN 7. REDUCIR LA LLAMA DEL QUEMADOR A LA POSICIÓN BAJA (COCER A FUEGO LENTO) 1) Encienda todos los quemadores. 2) Gire el mando del quemador que desea ajustar hasta la posición “LO” (BAJA). 3) Extraiga el mando. 4) Introduzca un destornillador pequeño de cabeza plana en el eje de la válvula como se muestra en la Tornillo de ajuste central...
- Page 29 INSTRUCCIONES DE INSTALACIÓN 8. VERIFIQUE EL ENCENDIDO DE LOS QUEMADORES (HORNO Y PARRILLA) Para verificar el encendido del quemador del horno siga los Para verificar el encendido del quemador de la parrilla siga pasos descritos a continuacion: los pasos descritos a continuacion: 1) Retire los accesorios de empaque del interior del horno.
-
Page 30: Instalación Del Dispositivo Antivuelco
INSTRUCCIONES DE INSTALACIÓN 10. INSTALACIÓN DEL DISPOSITIVO ANTIVUELCO SITÚE EL SOPORTE USANDO LA PLANTILLA ADVERTENCIA • La cocina de gas debe asegurarse mediante un Soporte dispositivo antivuelco aprobado. Placa de pared antivuelco • A menos que la instalación se haya realizado El perno debe correctamente, la cocina podría volcar sobre anclarse en madera... - Page 31 INSTRUCCIONES DE INSTALACIÓN AL TERMINAR TODAS LAS CONEXIONES Asegúrese de dejar todos los controles en la posición de apagado. Asegúrese de que el flujo de combustión y el aire de ventilación al horno no estén obstruidos. ADAPTACIÓN A GAS LP (O READAPTACIÓN A GAS NATURAL DE UNA INSTALACIÓN DE LP) Esta cocina de gas viene ajustada de fábrica para su Las instrucciones de instalación y los orificios para gas...
- Page 32 LG Customer Information Center 1-800 - 243-0000 USA, Consumer User 1-888- 865-30 26 USA, Comme rcial User 1-888 -542-2 623 CANADA Register your product Online! www.lg.com Printed in Mexico...